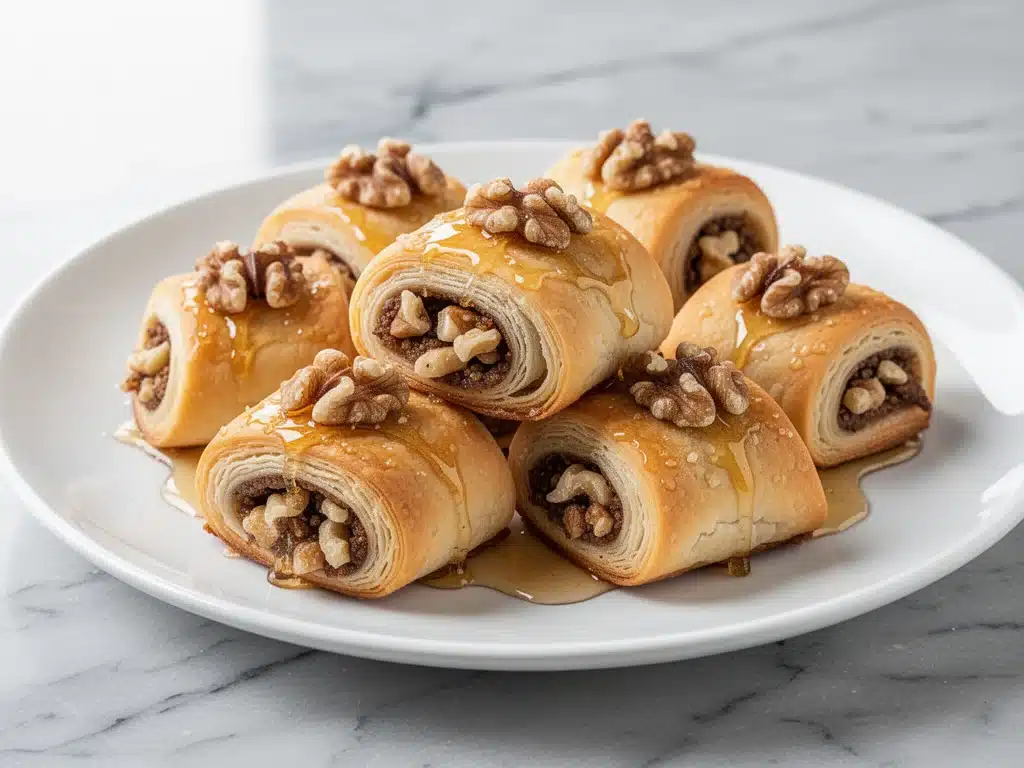
It’s 11:30 PM on the night before Rosh Hashanah. The house is quiet, the decorations are up, and I am staring at a stack of parchment paper like it’s the enemy. I’ve made these rugelach twelve times before. Twelve. I’ve had flour in my hair, cream cheese that was too warm, and dough that cracked every which way. But this year, I finally cracked the code. Not just for my family, but for my neighbor Mrs. Gable, who sends me texts every year asking if I’m making the “good ones” again.
These Rosh Hashanah honey walnut rugelach are not just cookies. They are a promise. A promise that the new year will be sweet, that the hard work of the past year melts away in every flaky bite, and that you don’t need to be a professional pastry chef to make something that looks like it came from a fancy deli in New York. I’ve spent years tweaking this recipe, moving from the traditional cream cheese base to a version that’s richer, nuttier, and infinitely easier to roll. The secret? It’s all in the honey and the walnuts, and knowing exactly when to stop rolling.
If you’ve ever been intimidated by rugelach, let me save you the panic. This is the version I make when I’m tired, when the kids are running around, and when I need a win. It’s the best easy holiday dessert I’ve ever developed, and I’m sharing every little trick I’ve learned so you can succeed on your first try. These cookies are buttery, sweet, crunchy, and absolutely perfect for the High Holidays.
Why You’ll Love This Rugelach Recipe
Look, I get it. The holiday season is stressful enough without adding a finicky pastry to your plate. But this rugelach recipe has completely changed how I approach holiday baking. It’s not about perfection; it’s about flavor and texture that just works. Here’s why this batch is going to become a staple in your Rosh Hashanah rotation:
Actually Flaky, Not Tough — Most rugelach recipes turn out dense or chewy. This one is all about those shattering, flaky layers. I use a mix of butter and cream cheese to get that tender crumb that melts in your mouth. It’s the kind of texture that makes people ask for the recipe before they’ve even finished the first cookie.
The Honey-Walnut Filling is Addictive — Skip the jam. Jam can get soggy and messy. This filling is a dry, crunchy mixture of toasted walnuts, brown sugar, cinnamon, and a touch of honey. It stays crisp for days, and the honey adds a floral sweetness that pairs perfectly with the toasted nuts. It’s sophisticated but tastes like home.
Make-Ahead Friendly — This is the real game-changer. The dough needs to chill, which means you can make it days in advance. I usually make the dough on Tuesday, roll and bake on Thursday, and have fresh cookies ready for the holiday dinner on Friday night. It takes the stress out of the holiday prep entirely.
Gluten-Free Option Built-In — Not everyone eats gluten, and I refuse to leave anyone out of the cookie jar. This recipe works beautifully with a 1:1 gluten-free flour blend. I’ve tested it with several brands, and the texture holds up just as well as the wheat version. It’s a huge relief for my gluten-free friends who usually have to settle for store-bought options.
Impressive but Simple — These look like they took hours to make. They don’t. The rolling technique is simple once you see it, and the filling is just mixing things in a bowl. You’ll feel like a pro, and your guests will be blown away. It’s the kind of cookie that says, “I put thought into this,” without actually taking all day.
This is my go-to when I need a dessert that feels traditional but tastes modern. No complicated techniques, no weird ingredients, just reliable, delicious food that makes everyone happy. Whether you’re serving them with coffee after a heavy holiday meal or packing them in a gift box for friends, these rugelach are a winner.
Ingredients You’ll Need
Here’s the best part: you probably have most of this already in your pantry. I’m particular about three ingredients here—the butter, the honey, and the walnuts—and I’ll tell you exactly why they matter. Don’t skimp on quality here; these rugelach are only as good as their components.
For the Dough
Unsalted Butter (1 cup / 226g) — This is non-negotiable. Use high-quality, European-style butter if you can find it. It has a higher fat content, which means more flavor and better flakiness. I like to cut it into cubes while it’s still cold so it incorporates evenly. If the butter gets too warm while you’re mixing, the dough will be greasy and hard to roll.
Full-Fat Cream Cheese (8 ounces / 225g) — Block cream cheese, not the spreadable kind in a tub. Let it sit out for 15 minutes so it’s slightly softened but still cool. This adds tang and tenderness to the dough. It’s what gives rugelach its signature soft interior.
All-Purpose Flour (2 ½ cups / 315g) — I use regular all-purpose flour for the traditional version. If you’re making the gluten-free shortbread-style version, use a high-quality 1:1 blend like King Arthur Measure for Measure. Don’t swap in cake flour; you need that structure.
Sugar (¼ cup / 50g) — Granulated white sugar. It helps the dough brown nicely and adds a little crunch. You don’t need brown sugar in the dough itself; keep that for the filling.
Salt (½ teaspoon) — Just a pinch to balance the sweetness. It wakes up the butter flavor.
Vanilla Extract (1 teaspoon) — Pure vanilla, not imitation. It adds a warm, comforting aroma that ties everything together.
For the Honey Walnut Filling
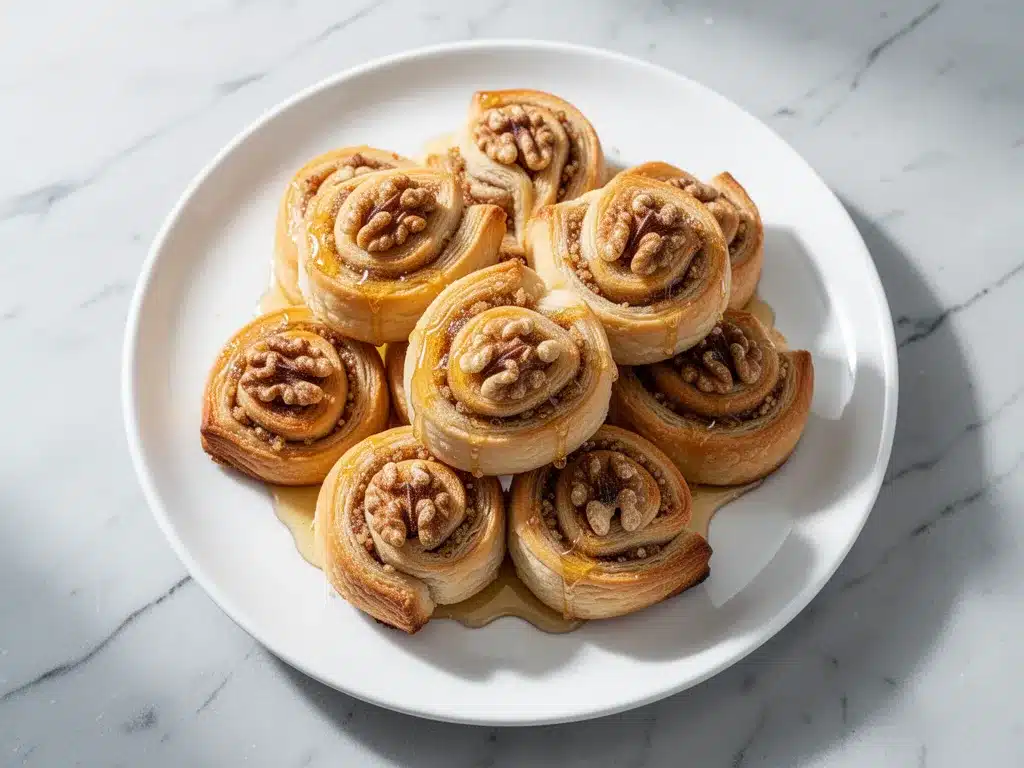
Walnuts (1 ½ cups / 170g) — Raw walnuts, chopped. I like them chunky, not powdered. Toasting them first (see tips below) is crucial for flavor. If you buy pre-chopped, check that they aren’t rancid; walnuts go bad faster than most nuts.
Brown Sugar (½ cup / 100g) — Light or dark, doesn’t matter much, but dark gives a deeper molasses note. It provides the chew and the caramel-like texture when baked.
Honey (2 tablespoons / 30g) — This is the star of the show. Use a mild honey like clover or orange blossom. Avoid strong buckwheat honey unless you want a very robust flavor. The honey acts as a binder and adds that signature “sweet new year” taste.
Cinnamon (1 teaspoon) — Ground cinnamon. Fresh is best; if yours is old and dusty, replace it. It adds warmth and pairs perfectly with the walnuts.
Nutmeg (¼ teaspoon) — Freshly grated if you have a microplane. It’s subtle but adds depth. Don’t skip it; it’s what makes it taste like “holiday.”
Pinch of Salt — To balance the sweetness of the brown sugar and honey.
Equipment Needed
You don’t need fancy equipment for this. Here’s what I actually use in my home kitchen:
Food Processor — I love using my food processor to make the dough. It keeps the butter cold and mixes it quickly. If you don’t have one, you can do this by hand with a pastry cutter, but it takes longer and warms the butter more.
Rolling Pin — A standard wooden rolling pin works fine. I prefer a French-style rolling pin because it has no handle, giving you more control, but any pin will do.
Parchment Paper — You’ll need two large sheets. One for rolling the dough and one for lining the baking sheets. Parchment is your best friend here; it prevents sticking and makes cleanup a breeze.
Large Sheet Pan — I use half-sheet pans (18×13 inches). Make sure they are light-colored aluminum; dark pans can over-brown the bottoms. If you only have dark pans, lower the oven temperature by 25 degrees.
Sharp Knife or Pizza Cutter — To slice the dough into wedges. A pizza cutter is actually easier because it doesn’t drag the dough. Just roll it through the wedge cleanly.
Mixing Bowls — One medium bowl for the filling, one large for the dough.
Cooling Rack — Essential for letting the cookies cool completely so the filling sets. If you move them while they’re warm, they’ll break.
How to Make It: Step-by-Step
Alright, let’s make this! I’m walking you through exactly how I do it, including the little tricks I’ve picked up over the years. The process is simple, but patience is key.
Step 1: Make the Dough (10 minutes)
In your food processor, pulse the flour and salt together. Add the cold, cubed butter and the cream cheese. Pulse in short bursts until the mixture looks like coarse crumbs with some pea-sized pieces of butter remaining. Do not over-process; you want those butter pieces to stay distinct for flakiness. Add the sugar and vanilla, and pulse just until the dough comes together. It will look shaggy at first, but keep pulsing until it forms a ball.
Pro Tip: If the dough is too dry and won’t hold together, add a teaspoon of ice water. If it’s too sticky, add a sprinkle more flour.
Step 2: Chill the Dough (At least 4 hours, preferably overnight)
Turn the dough out onto a sheet of plastic wrap. Divide it in half. Flatten each half into a 6-inch disc. Wrap tightly in plastic wrap. Place the discs in the refrigerator for at least 4 hours, or up to 3 days. This chilling step is critical. It relaxes the gluten and firms up the butter, making the dough easy to roll without cracking.
Why this matters: If you try to roll warm dough, it will stick to everything and tear. Cold dough is happy dough.
Step 3: Prepare the Filling (5 minutes)
While the dough chills, toast the walnuts. Spread them on a baking sheet and bake at 350°F (175°C) for 5-7 minutes until fragrant. Let them cool completely, then chop them into small chunks. In a small bowl, mix the toasted walnuts, brown sugar, cinnamon, nutmeg, salt, and honey. Stir until the mixture looks like wet sand. It should hold together when you squeeze it in your hand.
Step 4: Roll Out the Dough (15 minutes)
Take one disc of dough out of the fridge. Let it sit for 5 minutes to soften slightly so it doesn’t crack. Place it on a lightly floured surface or between two sheets of parchment paper. Roll it out into a 12-inch circle. It doesn’t have to be perfect, but try to keep the edges even. If it cracks, just press it back together; it will hold during rolling.
Step 5: Fill and Roll (10 minutes)
Sprinkle the honey walnut filling evenly over the dough, leaving a 1-inch border at the edge. Starting from the long edge, tightly roll the dough into a log. Use the parchment paper to help you lift and roll it tightly. Once rolled, wrap the log in plastic wrap and chill in the refrigerator for at least 30 minutes (or up to 2 days). This second chill makes slicing much easier.
Repeat: Do the same with the second disc of dough. You should have two logs of rugelach.
Step 6: Slice and Bake (20-25 minutes)
Preheat your oven to 350°F (175°C). Line two baking sheets with parchment paper. Take a chilled log of dough and slice it into 1-inch thick rounds. Place them on the baking sheets, spacing them about 2 inches apart. They will spread slightly.
Bake for 20-25 minutes, or until the edges are golden brown and the centers look set. Rotate the pans halfway through for even baking. The cookies should be golden, not pale.
Step 7: Cool and Serve (30 minutes)
Let the cookies cool on the baking sheet for 5 minutes, then transfer them to a wire rack to cool completely. This is hard, but necessary. If you try to eat them warm, the filling will be too soft and the cookie will be delicate. Once cool, they are firm, crunchy, and perfect.
Expert Tips & Tricks
Here’s everything I’ve learned from making this dozens of times. These tips will save you from my mistakes.
Keep Everything Cold
This is the #1 rule for flaky pastry. If your butter gets soft, put the dough back in the fridge. If your kitchen is hot, work in batches. Cold butter creates steam in the oven, which lifts the layers. Warm butter just makes a dense cookie.
Toast Your Nuts
Never skip toasting the walnuts. Raw walnuts taste bland and can be slightly bitter. Toasting releases their oils and brings out a deep, nutty flavor that pairs beautifully with the honey. It’s a small step that makes a huge difference.
Don’t Overwork the Dough
When mixing the dough, stop as soon as it comes together. Overmixing develops gluten, which makes the rugelach tough instead of tender. You want a soft, pliable dough, not a chewy bread dough.
Use a Pizza Cutter
Slicing with a knife can drag the dough and mess up the shape. A pizza cutter rolls through cleanly, giving you perfect wedges. If you don’t have one, use a sharp chef’s knife and use a sawing motion.
Chill Before Baking
If your slices look soft or misshapen after cutting, put the baking sheet in the fridge for 10 minutes before baking. This helps them hold their shape in the oven.
Storage is Key
These cookies keep best in an airtight container at room temperature for up to 5 days. They actually get better on day 2 as the flavors meld. If you need to freeze them, freeze the unbaked logs for up to 3 months. Slice and bake straight from frozen, adding 2-3 minutes to the bake time.
Variations & Substitutions
Once you’ve nailed the basic version, here’s how you can mix it up. I’ve tried all of these, and they are all delicious.
Chocolate Chip Walnut
Swap the honey walnut filling for a mixture of dark chocolate chips and chopped walnuts. Add a splash of orange zest to the dough for a sophisticated twist. This is a crowd-pleaser for kids.
Apricot Jam Rugelach
For a traditional twist, spread a thin layer of apricot jam over the dough before sprinkling with a mixture of crushed walnuts and cinnamon. The jam adds moisture and a tart contrast to the sweet dough.
Pumpkin Spice Rugelach
Add 1 teaspoon of pumpkin pie spice to the filling instead of cinnamon. Use pecans instead of walnuts for a fall-themed variation. This pairs wonderfully with a hot cup of coffee.
Gluten-Free Version
As mentioned, use a 1:1 gluten-free flour blend. The dough may be slightly more fragile, so handle it gently. I’ve found that adding an extra tablespoon of cream cheese helps bind the gluten-free dough. The texture is slightly more crumbly but still delicious.
Vegan Option
Use vegan butter and vegan cream cheese. The filling is already vegan. Note that vegan butter can have a higher water content, so you may need to add a little more flour to get the right consistency.
Almond Variation
Swap walnuts for almonds. Almond rugelach is a classic variation. Use sliced almonds for a pretty topping after baking. The flavor is milder and slightly sweeter.
Serving & Storage
How to Serve:
I usually serve these rugelach on a platter with a mix of other holiday cookies, but they are also perfect on their own. They pair beautifully with black tea, coffee, or a glass of milk. For a Rosh Hashanah table, I arrange them on a tiered stand with some apple slices and honey for dipping. It’s a nice visual contrast.
Side Dishes:
These are a dessert, so they don’t need sides. But if you’re hosting a brunch, they go well with sourdough French toast or fresh fruit. They are also great as a snack with afternoon tea.
Storage Instructions:
Refrigerator: Store in an airtight container at room temperature for up to 5 days. If your kitchen is very humid, store them in the fridge to prevent sogginess.
Freezer: You can freeze the unbaked dough logs for up to 3 months. Wrap tightly in plastic wrap and then in foil. Slice and bake as directed. You can also freeze baked cookies for up to 2 months. Thaw at room temperature before serving.
Reheating: These are best at room temperature. If you want them warm, heat them in the oven at 300°F for 5 minutes. Do not microwave them; they will become chewy and lose their flakiness.
Nutrition Information
I’m not a nutritionist, but here’s the breakdown if you’re tracking. These are rich cookies, so portion control is key!
Per Cookie (makes about 24 cookies):
- Calories: 140
- Protein: 2g
- Carbs: 14g
- Fiber: 1g
- Sugar: 7g
- Fat: 9g
- Saturated Fat: 5g
- Cholesterol: 20mg
- Sodium: 60mg
What’s Good:
- Walnuts provide healthy omega-3 fatty acids.
- Relatively low in sugar compared to other holiday cookies.
- Gluten-free option available for dietary needs.
What to Know:
- High in fat due to butter and cream cheese.
- Contains dairy and gluten (unless modified).
- Calorie-dense, so a little goes a long way.
My Take:
Look, these are holiday cookies. They are meant to be enjoyed. They are not a diet food, but they are not overly sweet either. The walnuts and honey give them a more balanced profile than a sugar cookie. When I make these, I enjoy one or two with a cup of tea and feel satisfied. It’s about balance and enjoyment.
Final Thoughts
So that’s my Rosh Hashanah Honey Walnut Rugelach! I’ve probably talked your ear off at this point, but when you make a recipe this often, you have a lot to say about it. These cookies have saved my holiday baking more times than I can count. They are my answer to “what do I bring to the party” when I want to impress but don’t have hours to spare. My family loves them, my friends request them, and I love making them because they are so forgiving.
Make them yours! Try different nuts, add different spices, or adjust the honey to your taste. The best recipes are the ones you adapt to your family’s tastes. If you make these, drop a comment and let me know what you think! I love hearing how recipes turn out in your kitchen. And if something doesn’t work, tell me that too—I’m here to help troubleshoot.
Happy baking! And I hope your kitchen smells half as good as mine does right now.
Frequently Asked Questions
Can I make the dough ahead of time?
Yes! In fact, I recommend it. The dough can be made up to 3 days in advance and kept in the fridge. You can also freeze the dough logs for up to 3 months. Just let them thaw in the fridge overnight before rolling and baking.
Why did my rugelach spread too much in the oven?
This usually means the dough was too warm when it went into the oven. Make sure your butter is cold when you mix the dough, and chill the rolled logs for at least 30 minutes before slicing and baking. If your kitchen is hot, work in smaller batches.
Can I use honey substitute?
You can use maple syrup, but the flavor will be different and the filling may be slightly wetter. I recommend reducing the maple syrup by a tablespoon and adding a teaspoon of flour to the filling to help absorb the moisture. Honey is best for its binding properties and mild flavor.
How do I store leftover rugelach?
Store them in an airtight container at room temperature for up to 5 days. If your kitchen is humid, store them in the fridge. They will stay fresh and crunchy for several days.
Can I freeze the baked cookies?
Yes, but they are best fresh. If you need to freeze them, let them cool completely, then store them in an airtight container with parchment paper between layers. They will keep for up to 2 months. Thaw at room temperature before serving.
Why did my dough crack when I rolled it?
This happens if the dough is too cold or too dry. Let the dough sit at room temperature for 5-10 minutes before rolling. If it’s still cracking, add a teaspoon of water to the dough next time you make it. Also, rolling between two sheets of parchment paper can help prevent sticking and cracking.
Can I use pecans instead of walnuts?
Absolutely! Pecan rugelach is a classic variation. Toast the pecans and chop them similarly to the walnuts. The flavor will be slightly sweeter and richer. You can also mix walnuts and pecans for a combo.
Pin This Recipe!
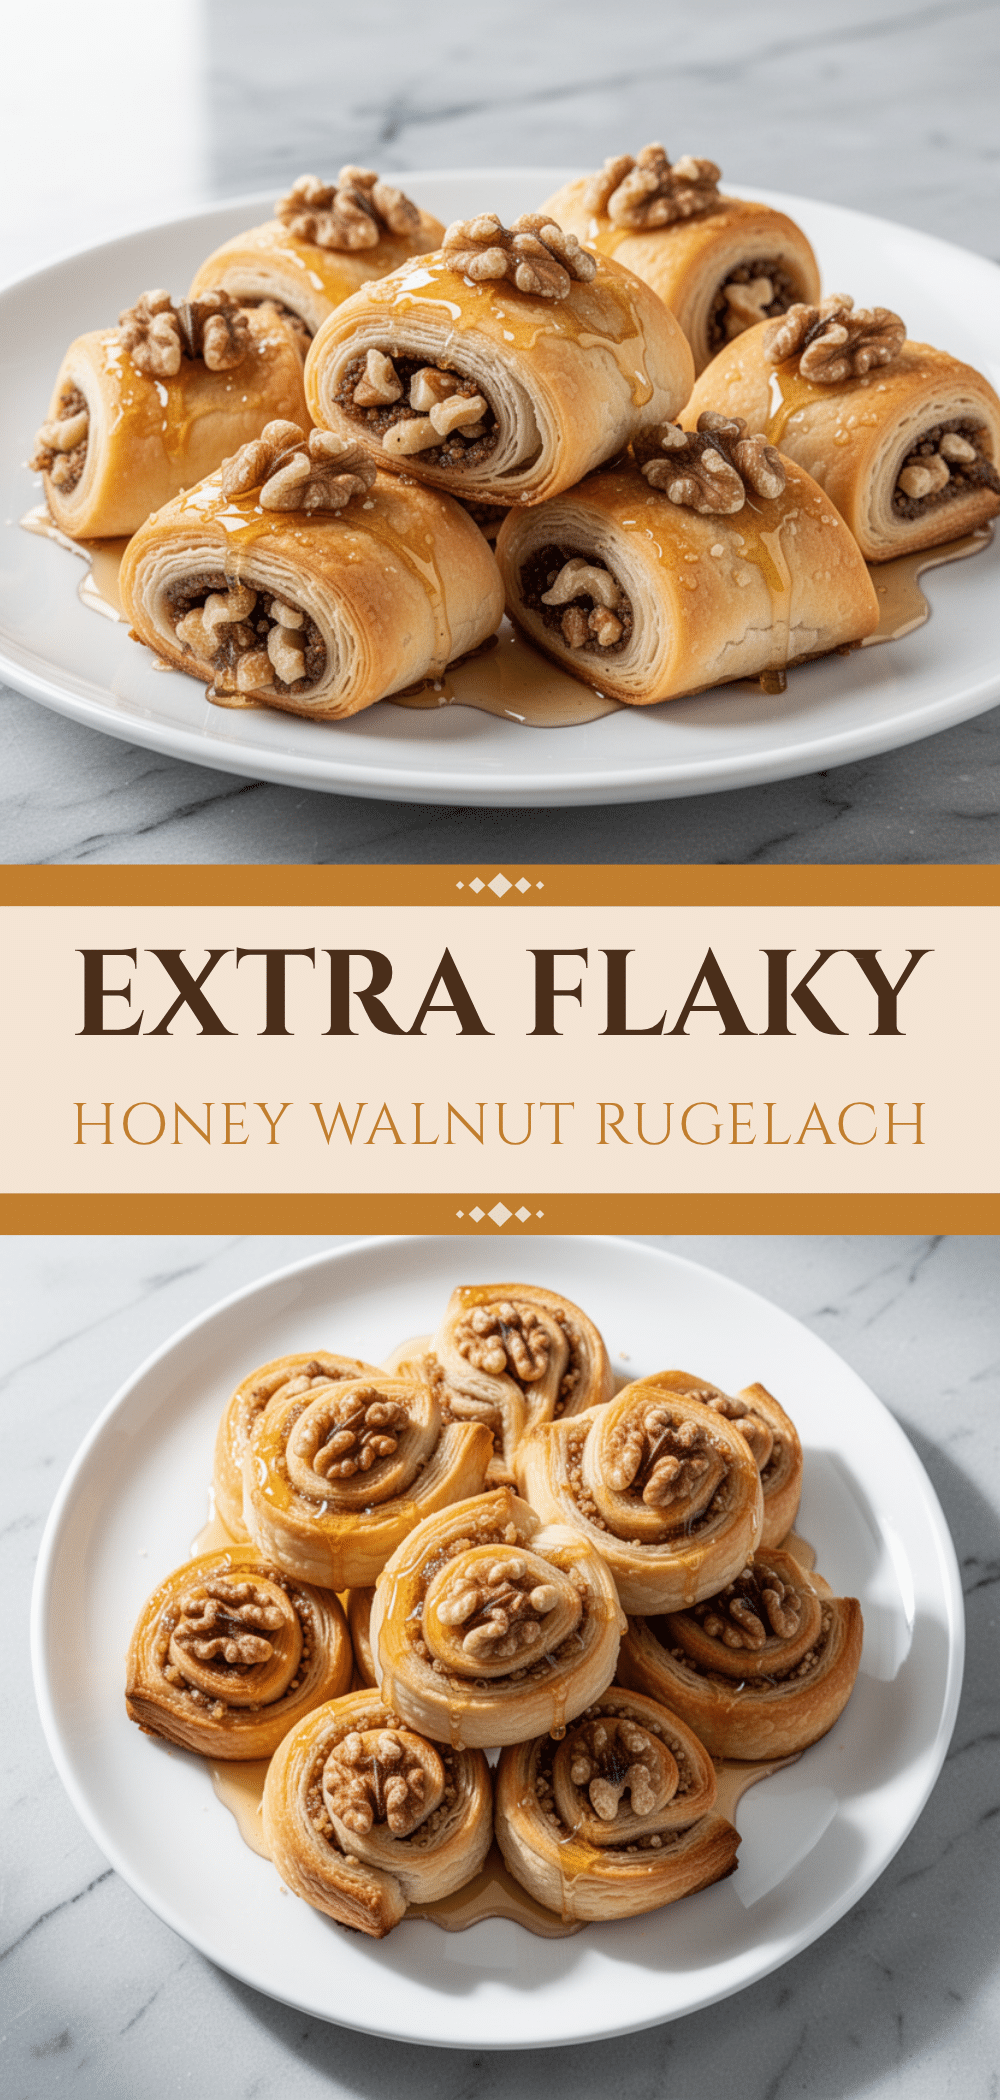

Rosh Hashanah Honey Walnut Rugelach
- Total Time: 5 hours 10 minutes
- Yield: 24 cookies 1x
Description
These flaky, buttery rugelach cookies feature a rich honey-walnut filling and are designed to be easy to make, make-ahead friendly, and perfect for the High Holidays.
Ingredients
- 1 cup (226g) unsalted butter, cold and cubed
- 8 ounces (225g) full-fat block cream cheese, slightly softened
- 2 ½ cups (315g) all-purpose flour
- ¼ cup (50g) granulated white sugar
- ½ teaspoon salt
- 1 teaspoon pure vanilla extract
- 1 ½ cups (170g) raw walnuts, toasted and chopped
- ½ cup (100g) brown sugar
- 2 tablespoons (30g) mild honey (e.g., clover or orange blossom)
- 1 teaspoon ground cinnamon
- ¼ teaspoon freshly grated nutmeg
- Pinch of salt
Instructions
- In a food processor, pulse flour and salt. Add cold cubed butter and cream cheese; pulse until mixture resembles coarse crumbs with pea-sized butter pieces.
- Add sugar and vanilla; pulse until dough forms a ball. If too dry, add ice water; if too sticky, add flour.
- Divide dough in half, flatten into 6-inch discs, wrap in plastic, and refrigerate for at least 4 hours or overnight.
- While dough chills, toast walnuts at 350°F (175°C) for 5-7 minutes. Cool and chop into chunks.
- Mix toasted walnuts, brown sugar, honey, cinnamon, nutmeg, and salt until the mixture resembles wet sand.
- Roll one dough disc into a 12-inch circle on a floured surface or between parchment paper.
- Sprinkle filling evenly over dough, leaving a 1-inch border. Roll tightly into a log, wrap in plastic, and chill for at least 30 minutes.
- Repeat with second dough disc to create two logs.
- Preheat oven to 350°F (175°C). Slice chilled logs into 1-inch thick rounds and place on parchment-lined baking sheets.
- Bake for 20-25 minutes until edges are golden brown. Rotate pans halfway through.
- Cool on baking sheet for 5 minutes, then transfer to a wire rack to cool completely before serving.
Notes
Keep all ingredients cold for flaky layers. Toast walnuts for better flavor. Dough can be made 3 days in advance or frozen for 3 months. Baked cookies keep for 5 days at room temperature.
- Prep Time: 45 minutes
- Cook Time: 25 minutes
- Category: Dessert
- Cuisine: Jewish
Nutrition
- Serving Size: 1 cookie
- Calories: 140
- Sugar: 7
- Sodium: 60
- Fat: 9
- Saturated Fat: 5
- Carbohydrates: 14
- Fiber: 1
- Protein: 2
Keywords: Rosh Hashanah, rugelach, honey walnut cookies, holiday baking, flaky pastry, make-ahead dessert, gluten-free option