Last Saturday, I was staring at a dying embers in our fire pit, trying to figure out how to salvage the evening. We’d spent four hours smoking brisket, the kind of low-and-slow session that requires constant attention and makes your kitchen smell like hickory for days. But the real magic? That happened right at the end, when the heat dropped to a gentle glow and the kids started asking, “Is it dessert time yet?”
Usually, this is where I panic. I’d rush inside to preheat the oven, fighting against the cold air and the lingering smoke on my clothes, only to end up with burnt edges or uneven baking. But this time, I decided to try something different. I pulled out a cast-iron skillet, some marshmallows, and a bag of crispy rice cereal. I didn’t need an oven. I didn’t even need to go inside.
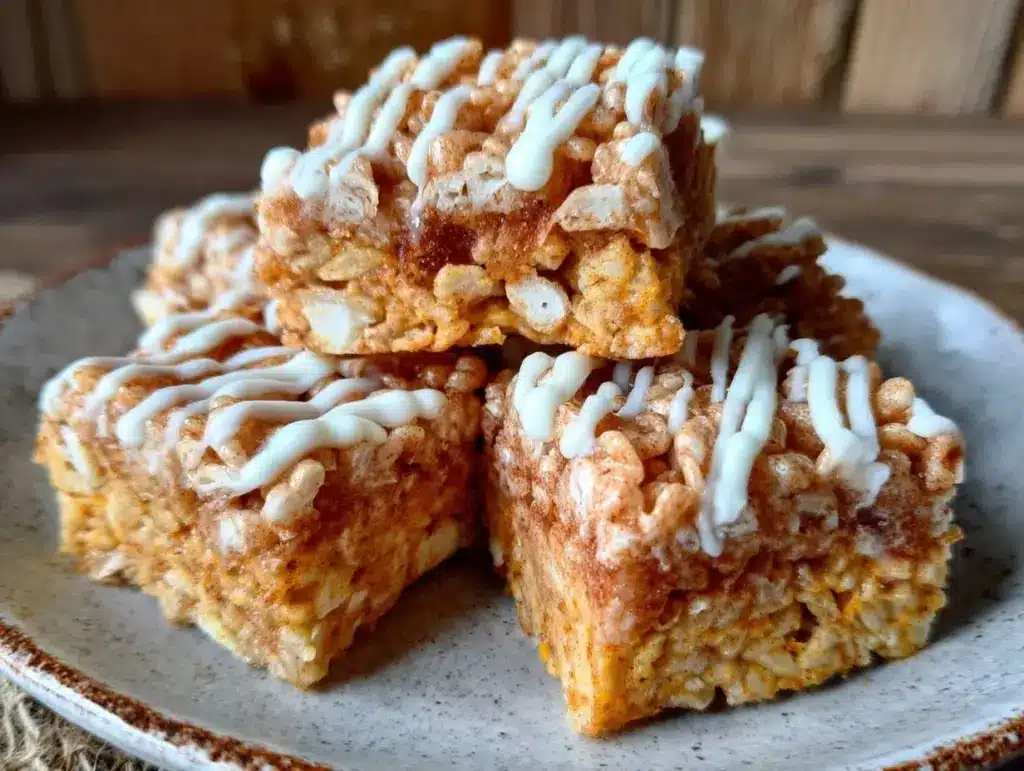
I made pumpkin spice Rice Krispie treats right over the coals. They were gooey, fragrant with cinnamon and nutmeg, and drizzled with white chocolate that had been melted slowly by the residual heat of the pan. It was the perfect balance of campfire nostalgia and cozy autumn flavor. And honestly? They were better than anything I’ve ever baked indoors. The slight char on the bottom, the smoky aroma infused into the marshmallows—it just hits different.
If you’ve ever felt like your outdoor cooking is limited to just burgers and steaks, you’re missing out. This pumpkin spice Rice Krispie treats recipe is my new secret weapon for any gathering where the fire is burning. It’s stupid simple, requires zero oven space, and tastes like a hug from the inside out. I’ve made these over a propane grill, a wood-burning fire pit, and even a charcoal chimney. They work every time.
Why You’ll Love This Recipe
I’ve been grilling and smoking for years, but there’s something special about making a dessert that doesn’t fight your main cook. Here’s why this version has taken over our outdoor game:
- No Oven Wars — Seriously. When you’re smoking meat or grilling burgers, your oven is already busy. This pumpkin spice Rice Krispie treats recipe uses your stovetop, grill grates, or fire pit. I keep my oven free for the brisket or ribs. It’s a game-changer for meal flow.
- Campfire Ready — You don’t need a fancy setup. I’ve made these in a cast-iron skillet over a campfire, on a propane grill, and even in a Dutch oven buried in coals. The versatility is insane. If you can melt butter, you can make this.
- Smoky Flavor Boost — Cooking marshmallows over an open flame or hot coals adds a subtle smokiness that you just can’t replicate indoors. It pairs perfectly with the warm spices. It tastes like autumn, but better.
- Super Fast — From start to finish, it takes about 15 minutes. That’s less time than it takes to smoke a chicken breast. I make these while the main course rests. It’s the perfect “I need to do something productive” task.
- Kid-Friendly Chaos — My kids love helping with this. They get to stir the gooey marshmallows and drizzle the chocolate. It’s a safe, non-heat task for them (mostly) and keeps them entertained while we prep the rest of the meal. It’s way better than handing them a tablet.
- Make-Ahead Friendly — These hold up surprisingly well for outdoor snacks. I cut them into bars the night before, keep them in a tin, and pack them for the hike or the campsite. They don’t get soggy, and they don’t melt in the car (unless it’s 100 degrees, then pray).
This is my go-to when I want a dessert that feels special but requires zero stress. It’s reliable, delicious, and makes everyone happy without turning your outdoor kitchen into a disaster zone.
Ingredients You’ll Need
Here’s the best part: you probably have most of this already. I’m particular about two things here—the marshmallows and the spices—but everything else is pantry staples.
For the Treats
Unsalted butter (6 tablespoons / 85g) — I use real butter. Margarine doesn’t melt the same way and can make the treats greasy. If you’re using a grill, I keep the butter in a small ramekin so it melts evenly.
Marshmallows (10 oz / 280g, about 4 cups) — Do not buy the cheap bag. Get the good stuff. The kind that puffs up nicely. I prefer the jumbo marshmallows because they melt slower and more evenly over indirect heat. If you’re making this over a fire, bigger marshmallows give you more control.
Rice Krispies cereal (6 cups / 170g) — Yes, that’s a lot. But you need the ratio right. If you use less, it’ll be a marshmallow brick. I keep a box in my outdoor pantry just for this. Regular crispy rice cereal works too, but the brand name has that perfect snap.
Pumpkin pie spice (2 teaspoons) — This is the star. Cinnamon, ginger, nutmeg, cloves. If you don’t have a blend, mix 1 tsp cinnamon, ½ tsp ginger, ¼ tsp nutmeg, and a pinch of cloves. Don’t skip the spices—this is what makes it “pumpkin spice” and not just regular goo.
Salt (½ teaspoon) — A pinch of salt cuts the sweetness and balances the pumpkin flavor. I use flaky sea salt if I have it, but table salt works fine.
For the White Chocolate Drizzle
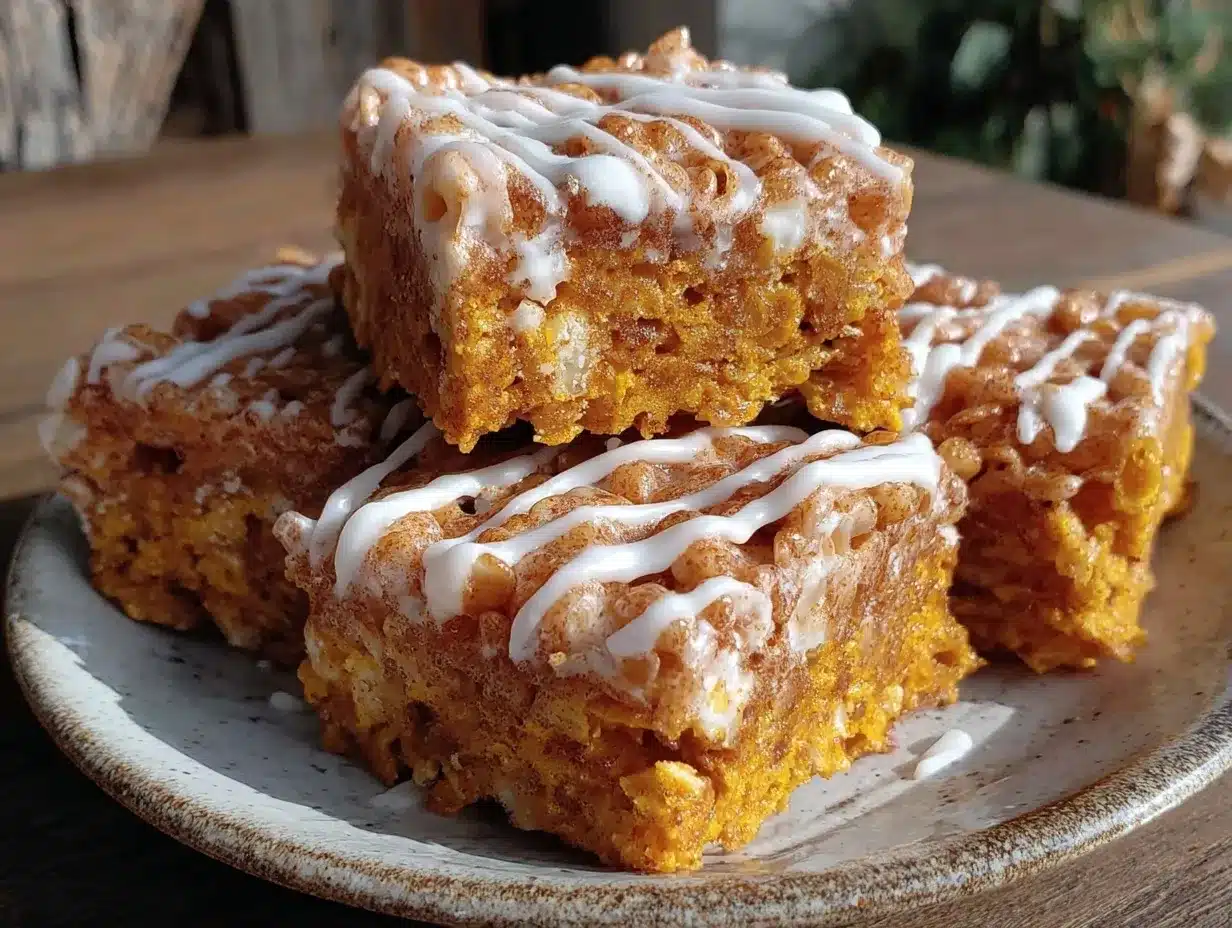
White chocolate chips (½ cup / 85g) — I use high-quality chips, like Ghirardelli or Callebaut. They melt smoother and taste richer. Cheap chips can seize up and turn grainy, which is a bummer after all that work.
Heavy cream (1 tablespoon / 15ml) — Just a splash to help the chocolate melt smoothly. If you’re out, a teaspoon of milk works, but heavy cream keeps it glossy.
Vanilla extract (½ teaspoon) — Enhances the white chocolate flavor. Optional, but I always add it.
Optional Add-ins
Mini chocolate chips (¼ cup) — For a bit of contrast. I like the visual of white chocolate with dark specks.
Crushed graham crackers (2 tablespoons) — For extra texture. It makes it feel more like a s’mores hybrid.
Edible gold dust (a pinch) — Okay, maybe not for everyday, but if you’re making these for a holiday party, it looks fancy. My husband pretends he doesn’t care, but he always steals the gold-dusted ones.
Equipment Needed
You don’t need fancy equipment for this. Here’s what I actually use when I’m cooking outdoors:
Cast-iron skillet (10-inch) — This is my weapon of choice. Cast iron holds heat beautifully and distributes it evenly. I love the slight char it gives the bottom of the treats. If you don’t have cast iron, a heavy-bottomed saucepan works, but it’s harder to control on a fire.
Heat-resistant spatula — Silicone or wood. I use a silicone spatula because it scrapes the bowl clean, which is crucial for getting every last bit of marshmallow goo.
Large mixing bowl — Grease it lightly with butter first. Trust me. Marshmallow sticks to everything. I keep a dedicated “outdoor mixing bowl” that I don’t use for anything else, so I don’t have to scrub it later.
Small saucepan or microwave-safe bowl — For melting the white chocolate. If you’re using a grill, I put the chocolate in a small metal bowl and set it on the warm side of the grill. No direct heat, or it’ll burn.
8×8 inch baking pan — Line it with parchment paper. Do not skip the parchment. You will thank me when you’re trying to lift the treats out without smashing them. I use a square pan because it cuts into perfect bars. Rectangular is fine, but the bars will be thinner.
Tongs — For handling the skillet over the fire. Don’t use your hands. I’ve learned this the hard way. Burnt fingers are not fun.
Pastry brush — For greasing the pan. Or just use your fingers if you’re feeling lazy. I’m usually feeling lazy.
Ziplock bags — For storing leftovers. I keep these in my outdoor cooler box so they stay fresh during long camping trips.
How to Make It: Step-by-Step
Alright, let’s make this! I’m walking you through exactly how I do it, including the little tricks I’ve picked up from burning marshmallows and breaking chocolate.
Step 1: Prep Your Station (5 minutes)
Before you even light the fire, get everything ready. Grease your baking pan with butter and line it with parchment paper. Set out your mixing bowl, spatula, and measured ingredients. Once you start melting marshmallows, things move fast. I keep the pumpkin spice and salt measured in small bowls nearby so I don’t have to rummage through bags while the marshmallows are melting.
Step 2: Melt the Butter (3 minutes)
Place your cast-iron skillet over medium-low heat. If you’re using a grill, set it to indirect heat. If you’re using a fire pit, wait for the embers to settle. Add the butter and let it melt completely. Don’t let it brown. You want clear, golden butter. If it starts to smoke, take it off the heat for a minute. I’ve burned butter too many times—it tastes bitter and ruins the whole batch.
Step 3: Melt the Marshmallows (5 minutes)
Add the marshmallows to the melted butter. Stir constantly. This is the meditative part. The marshmallows will start to clump, then slowly melt into a gooey mass. Keep stirring until there are no more dry patches. This takes about 5 minutes. If you’re cooking over a fire, move the skillet around a bit to ensure even heating. The goal is smooth, glossy marshmallow. If it looks lumpy, keep stirring. Patience pays off.
Step 4: Add the Spices (1 minute)
Once the marshmallows are fully melted, remove the skillet from the heat. Stir in the pumpkin pie spice and salt. The residual heat will bloom the spices, releasing their aroma. You’ll smell like a pumpkin patch immediately. It’s intoxicating. Mix it in until it’s evenly distributed. The mixture will turn a pale orange-brown color.
Step 5: Fold in the Cereal (2 minutes)
Add the Rice Krispies cereal all at once. Use your spatula to fold it in. Don’t stir aggressively—you’ll break the cereal. Just lift and fold until every piece is coated in marshmallow. It’s like a heavy, sticky salad. If some cereal isn’t coated, add a tiny splash of milk to help bind it, but usually, it’s fine. I’ve made this without milk and it works perfectly.
Step 6: Press and Cool (10 minutes)
Transfer the mixture to your prepared baking pan. Use a buttered spatula or your buttered hands to press it down evenly. Don’t pack it too tight, or it’ll be dense. Just level it out. Let it cool at room temperature for 10-15 minutes. If you’re outdoors and it’s cold, it’ll set faster. If it’s hot, give it 20 minutes. Don’t cut it while it’s hot, or it’ll be a mess. I’ve tried. I know.
Step 7: Melt the Chocolate (5 minutes)
While the treats cool, melt the white chocolate chips with the heavy cream. If you’re using a grill, put a small metal bowl with the chocolate on the warm side. Stir occasionally until smooth. If you’re indoors, microwave in 30-second bursts. Add the vanilla extract once melted. The chocolate should be thin enough to drizzle but thick enough to hold its shape.
Step 8: Drizzle and Serve
Once the treats are firm, drizzle the white chocolate over the top. Use a fork or a piping bag for control. Let the chocolate set for 5 minutes. Then, cut into bars. I cut them into 12 squares. They’re rich, so you don’t need much. Serve immediately, or store in an airtight container.
Total Time: About 30 minutes (10 minutes active, 20 minutes mostly hands-off)
Expert Tips & Tricks
Here’s everything I’ve learned from making this dozens of times over campfires and grills. These tips will save you from my mistakes.
The Heat is Everything
The biggest mistake people make is using too high heat. Marshmallows burn fast. If you’re using a fire pit, wait for the flames to die down to coals. If you’re using a grill, use indirect heat. Direct flame will char the bottom before the top melts. I keep a spray bottle of water nearby to control flare-ups. It’s not glamorous, but it works.
Don’t Over-Stir the Cereal
When you fold in the cereal, be gentle. Breaking the pieces makes the treats gritty. You want whole pieces for that satisfying crunch. If you break them, the texture suffers. I use a light touch and let the marshmallow do the work.
White Chocolate Can Seize
White chocolate is sensitive to heat and moisture. If you add water or steam to the chocolate, it’ll seize up and become grainy. Keep your utensils dry. If you’re melting it over a fire, keep the bowl far from direct flames. I prefer melting it in a bowl set over a pot of simmering water (double boiler method) for control. It’s safer and more even.
Butter Your Hands
Marshmallow is sticky. Like, really sticky. I keep a small dish of butter nearby and dip my hands in it before pressing the mixture into the pan. It saves so much frustration. You don’t want marshmallow on your fingers for hours.
Cut With a Sharp Knife
For clean cuts, use a sharp knife. I wipe the knife with a damp cloth between cuts to remove any sticky residue. This keeps the edges clean and professional-looking. If you’re serving these at a party, presentation matters.
Variations & Substitutions
Once you’ve nailed the basic version, here’s how you can mix it up. I’ve tried all of these.
S’mores Style
Add ½ cup of crushed graham crackers to the cereal mixture. It adds a nice crunch and makes it feel more like a s’mores bar. I love the combination of crispy rice and graham cracker textures.
Chocolate Chip Chunk
Fold in ½ cup of semi-sweet chocolate chips along with the cereal. The contrast of white chocolate drizzle and dark chocolate chips is amazing. It’s like a dessert pizza.
Peanut Butter Swirl
Swirl 2 tablespoons of peanut butter into the melted marshmallow mixture before adding the cereal. It adds a salty-sweet kick that pairs well with the pumpkin spice. My husband’s favorite variation.
Gluten-Free
Use gluten-free crispy rice cereal. Everything else is naturally gluten-free. I’ve used Nature’s Path and it works great. Just check the label to ensure no cross-contamination if you’re sensitive.
Dairy-Free
Replace butter with coconut oil and white chocolate chips with dairy-free white chocolate. The flavor is slightly different, but still tasty. My lactose-intolerant friend requests this version when we’re camping.
Vegan
Use vegan marshmallows (like Dandies), coconut oil, and vegan white chocolate. It’s not exactly the same, but it’s close enough that no one will complain. I’ve made this for vegan friends and they’ve loved it.
Serving & Storage
I usually serve these straight from the pan at the campsite—they look rustic and stay warm. But here are other ways I’ve enjoyed them:
How to Serve
Pair these with a cold glass of milk or a hot cup of coffee. They’re rich, so they go well with bitter drinks. I also like serving them with a side of fresh fruit, like apple slices or pears, to cut the sweetness.
Side Dishes
– Apple cider (hot or cold)
– Roasted nuts (pecans or walnuts)
– Fresh berries
– Vanilla ice cream (if you’re feeling fancy)
Storage Instructions
Room Temperature: Store in an airtight container for up to 3 days. They’ll stay soft and chewy. If it’s hot, keep them in the cooler.
Refrigerator: Not recommended. The cold makes the marshmallow hard and the chocolate dull. I only refrigerate if I’m meal-prepping for a week.
Freezing: These freeze well! Cut them into bars, wrap them individually in plastic wrap, and store in a freezer bag. They’ll last for 2 months. Thaw at room temperature before eating. I make a double batch and freeze half for later.
Pro Tip: If leftovers are drying out, add a slice of bread to the container. The marshmallow will absorb the moisture from the bread and stay soft. It’s a classic trick.
Nutrition Information
I’m not a nutritionist, but here’s the breakdown if you’re tracking.
| Per Serving (1 bar) | Amount |
|---|---|
| Calories | 220 |
| Protein | 3g |
| Carbs | 32g |
| Fiber | 1g |
| Sugar | 22g |
| Fat | 9g |
| Saturated Fat | 5g |
| Cholesterol | 20mg |
| Sodium | 120mg |
What’s Good: Quick energy source, good for hiking or camping trips. Contains some calcium from the milk products.
What to Know: High in sugar and calories. It’s a treat, not a health food. Enjoy in moderation. If you’re watching carbs, skip the cereal and use almond flour (though it won’t be the same).
Final Thoughts
So that’s my go-to pumpkin spice Rice Krispie treats recipe! I’ve probably talked your ear off at this point, but when you make a recipe this often, you have a lot to say about it.
This has saved outdoor dinners more times than I can count. It’s my answer to “what’s for dessert” when I’m tired, don’t want to cook, and still want something that tastes really good. My kids are happy, my husband’s happy, and I’m happy because I’m not stressed about cooking.
Make it yours! Try different add-ins, swap in your favorite spices, adjust the chocolate. The best recipes are the ones you adapt to your family’s tastes. And if you’re looking for more outdoor dessert ideas, check out my fall brown butter pumpkin cookies or my cinnamon apple dump cake. They’re perfect for the same campfire setting.
If you make this, drop a comment and let me know what you think! I love hearing how recipes turn out in your kitchen. And if something doesn’t work, tell me that too—I’m here to help troubleshoot.
Happy cooking! And I hope your kitchen smells half as good as mine does right now.
Frequently Asked Questions
Can I use mini marshmallows?
Yes, but they melt faster. Keep a close eye on them so they don’t burn. I prefer jumbo marshmallows because they give you more control, especially over a fire. If you use mini, reduce the melting time by a minute or two.
Why did my treats turn out hard?
This usually happens if you press them too tightly into the pan or if you overcook the marshmallows. Marshmallows continue to set as they cool. If you pack them down, they’ll be dense. Also, don’t let the marshmallows get too hot before adding the cereal. Heat breaks down the structure.
Can I make this ahead for a camping trip?
Absolutely. I make these the night before and store them in a tin. They travel well and don’t melt easily (unless it’s extremely hot). Just keep them in a cooler or shaded area. I’ve made these for day hikes and they’ve been a hit.
Why did my white chocolate seize?
White chocolate is sensitive to moisture and high heat. If you added water or steam, it seized. Or if the heat was too high. Always melt white chocolate gently, over low heat or in a double boiler. Stir constantly. If it seizes, add a tiny bit of warm cream and whisk it back together. It might not be perfect, but it’s still usable.
Can I use a different spice blend?
Yes! You can use cinnamon alone, or mix in some cardamom or allspice. I’ve tried pumpkin spice with a hint of cardamom, and it was amazing. Feel free to experiment. The base recipe is very forgiving.
How do I reheat leftovers?
These are best eaten at room temperature. If you want them warm, microwave a bar for 10-15 seconds. Don’t overheat, or the marshmallow will melt into a puddle. I usually just eat them cold or room temp—they’re still delicious.
Can I double this recipe?
Yes, but you’ll need a larger skillet and mixing bowl. Double the ingredients and follow the same steps. Just be careful not to overcrowd the pan when melting the marshmallows. I usually make a double batch when I have guests, and it works fine.
Pin This Recipe!
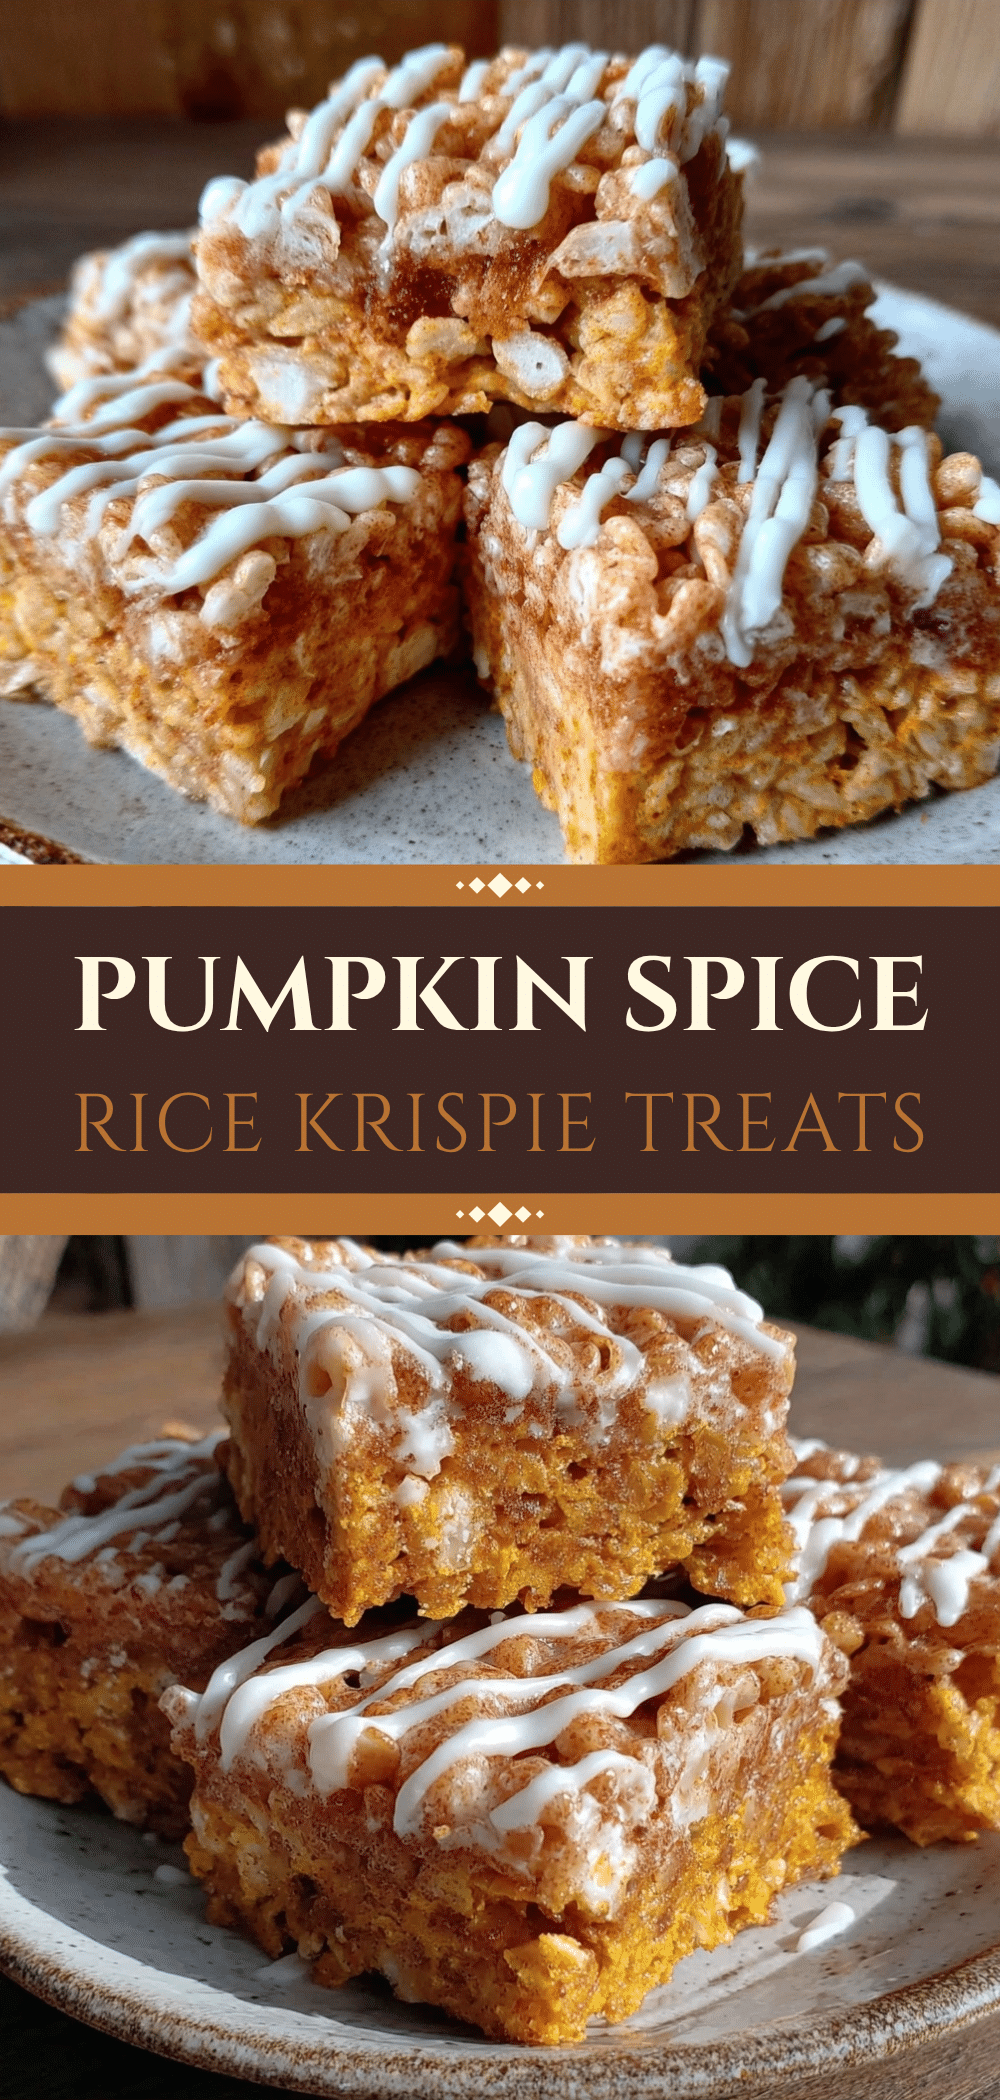
Pumpkin Spice Rice Krispie Treats: Best Outdoor Campfire Dessert
- Total Time: 30 minutes
- Yield: 12 servings 1x
Description
A quick, no-oven dessert perfect for campfires and grills. These gooey treats combine melted marshmallows with pumpkin pie spice and are finished with a white chocolate drizzle for a cozy autumn flavor.
Ingredients
- 6 tablespoons (85g) unsalted butter
- 10 oz (280g, about 4 cups) jumbo marshmallows
- 6 cups (170g) Rice Krispies cereal
- 2 teaspoons pumpkin pie spice
- 1/2 teaspoon salt
- 1/2 cup (85g) white chocolate chips
- 1 tablespoon heavy cream
- 1/2 teaspoon vanilla extract
- Optional: 1/4 cup mini chocolate chips, 2 tablespoons crushed graham crackers, pinch of edible gold dust
Instructions
- Grease an 8×8 inch baking pan with butter and line with parchment paper. Set out mixing bowl, spatula, and measured ingredients.
- Place a 10-inch cast-iron skillet over medium-low heat (or indirect heat on a grill). Add butter and melt completely without browning.
- Add marshmallows to the melted butter. Stir constantly for about 5 minutes until smooth and glossy with no dry patches.
- Remove skillet from heat. Stir in pumpkin pie spice and salt until evenly distributed.
- Add Rice Krispies cereal all at once. Gently fold with a spatula until every piece is coated. Do not stir aggressively to avoid breaking the cereal.
- Transfer mixture to the prepared pan. Use a buttered spatula or hands to press down evenly (do not pack tight). Let cool at room temperature for 10-15 minutes.
- While treats cool, melt white chocolate chips with heavy cream over low heat or in a double boiler until smooth. Stir in vanilla extract.
- Drizzle white chocolate over the cooled treats. Let set for 5 minutes, then cut into 12 bars.
Notes
Use indirect heat when cooking over a fire or grill to prevent burning. Marshmallows burn quickly, so monitor heat closely. For clean cuts, use a sharp knife and wipe it with a damp cloth between cuts. Store in an airtight container at room temperature for up to 3 days. Do not refrigerate as it hardens the marshmallow.
- Prep Time: 10 minutes
- Cook Time: 20 minutes
- Category: Dessert
- Cuisine: American
Nutrition
- Serving Size: 1 bar
- Calories: 220
- Sugar: 22
- Sodium: 120
- Fat: 9
- Saturated Fat: 5
- Carbohydrates: 32
- Fiber: 1
- Protein: 3
Keywords: pumpkin spice, rice krispie treats, campfire dessert, outdoor cooking, no oven dessert, fall recipes, marshmallow treats, white chocolate drizzle



