There is a specific kind of magic that happens in my kitchen when the first real chill hits the air. You know the feeling. The windows fog up just from boiling water, the light changes to that golden, late-afternoon hue, and suddenly, the house smells like cinnamon and baked apples. For years, I tried to replicate that cozy fall vibe with complicated recipes that required four cups of flour, a stand mixer, and about three hours of my life I didn’t have back. I’d end up exhausted, with a sink full of dishes and a dessert that was good, sure, but lacked that soul-warming comfort I was chasing.
Then I discovered the cinnamon apple dump cake. It’s not just a recipe; it’s a lifeline for busy weeknights and lazy weekend afternoons alike. I remember the first time I made it. I had just come from the grocery store, loaded with cans of apple pie filling and a box of yellow cake mix, feeling slightly guilty about how “easy” it was. But five minutes later, the smell wafting from the oven stopped my guilt in its tracks. It smelled like my grandmother’s kitchen. It smelled like safety. It smelled like fall.
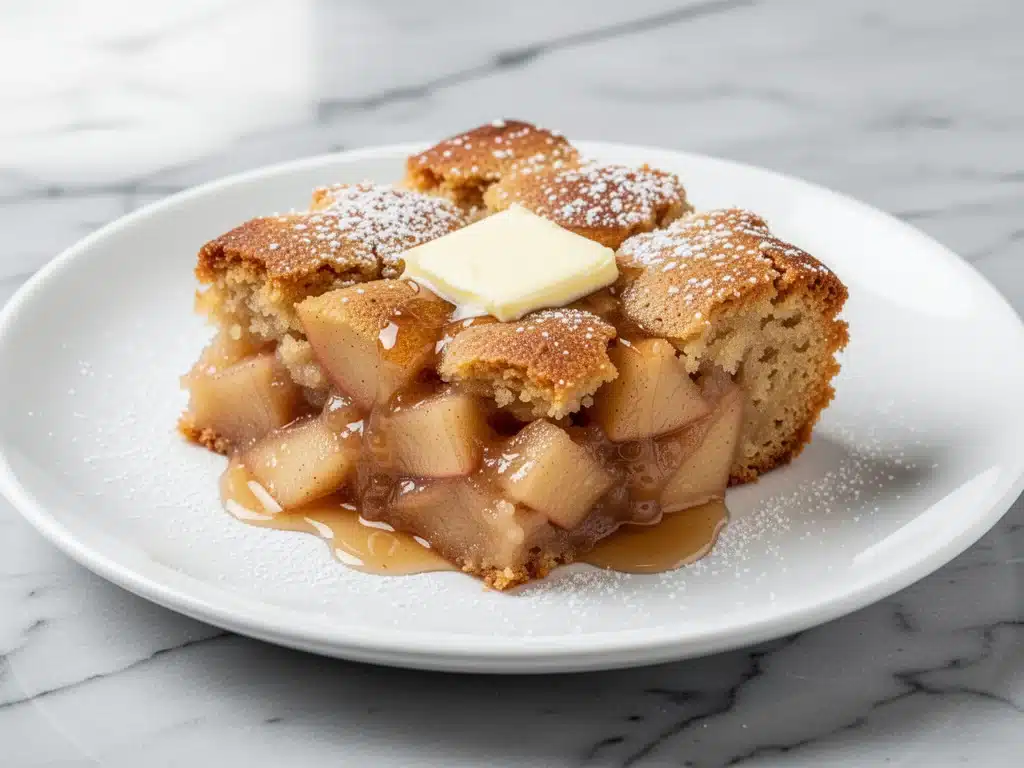
This dessert is the ultimate proof that you don’t need to be a professional baker to make something spectacular. It’s essentially three ingredients (plus butter, obviously), tossed into a baking dish, and put in the oven. No mixing bowls to clean, no measuring cups to wash, no waiting for dough to rise. Just pure, unadulterated apple pie flavor with a crunchy, buttery crumble topping. I’ve made this cinnamon apple dump cake so many times that I can do it with my eyes closed, usually while helping my kids with homework or answering work emails. It’s become my go-to when I want to impress guests without actually doing any work, or when I just need a warm hug in dessert form.
What I love most is how versatile it is. You can serve it warm with vanilla ice cream for a proper dinner party dessert, or scoop it into a bowl for a quick snack with a cup of tea. It’s the kind of recipe that makes people ask, “Wait, you made that yourself? It doesn’t taste store-bought at all.” And the best part? It pairs perfectly with other cozy fall treats, much like my cinnamon roll apple cobbler or those fall baked pumpkin spice donuts. If you’re looking for more easy, seasonal wins, you’re in the right place. Let’s get baking.
Why You’ll Love This Recipe
There are about a dozen reasons I keep coming back to this cinnamon apple dump cake, but let’s be honest: you’re here because you want dessert that works as hard as you do. Here’s why this specific recipe has earned a permanent spot in my weekly rotation:
- Three Ingredients, Zero Stress — Seriously. I’m not exaggerating. You need canned apple pie filling, yellow cake mix, and butter. That’s it. If you can open a can and sprinkle powder, you can make this. I’ve made it for dinner parties where I was running around hosting, and it never fails. It’s the culinary equivalent of hitting “autopilot” but tasting like you spent hours in the kitchen.
- Lightning Fast Prep — The actual hands-on time is about 5 minutes. Five. I’ve timed it. You dump the apples, sprinkle the mix, dot with butter, and pop it in the oven. You have the rest of the evening back. This is crucial for those nights when you’ve cooked a big meal like creamy cajun sausage pasta and just don’t have the energy to bake a pie from scratch.
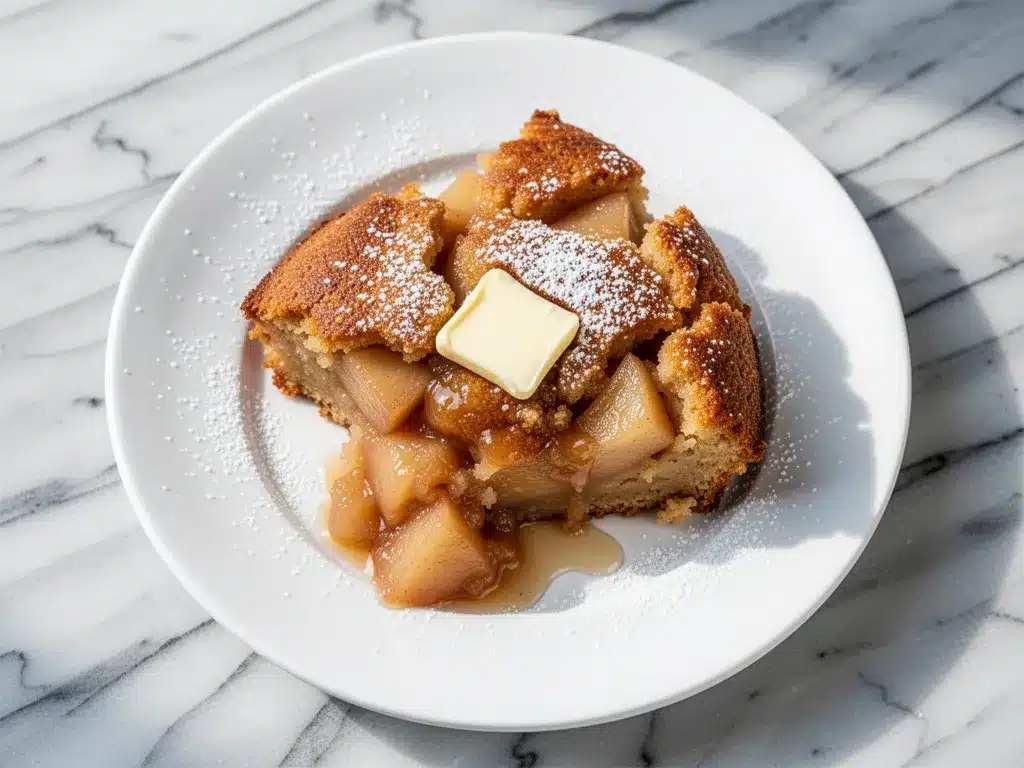
- Perfect Texture Every Time — The magic of the dump cake method is the bottom layer. It bakes up soft, saucy, and tender, while the top gets this incredible, golden-brown, crumbly crust. It’s the best of both worlds. No soggy bottoms, no burnt tops. Just consistent, reliable deliciousness.
- Smells Like Autumn — This isn’t just a taste thing. The aroma that fills your house when this is baking is overwhelming in the best way possible. It makes your home feel inviting and warm. Guests will walk in and immediately relax. It sets the mood for a cozy evening instantly.
- Leftovers Are Better — I know, I know, leftovers usually mean sad, mushy food. Not here. This tastes even better the next day as the flavors meld. I often make a second one on Sunday just so I have dessert ready for Monday night. It reheats beautifully in the microwave or toaster oven.
This is my answer to “what’s for dessert?” when I’m tired, broke, or just lazy. It’s reliable, it’s cheap, and it makes everyone happy. No complicated techniques, no weird ingredients you have to hunt for. Just simple, delicious food that feels like a hug.
Ingredients You’ll Need
Here’s the best part: you probably have most of this already in your pantry. I’m not asking you to go out and buy specialty items. This recipe relies on pantry staples and convenience foods to keep things simple. Let’s break down what you need and why each one matters.
The Core Three
Yellow Cake Mix (1 box / 15.25 oz) — This is your dry base. I always use the standard yellow cake mix (Duncan Hines or Betty Crocker work fine). Do not use white cake mix unless you want a milder flavor. The yellow mix has vanilla and egg solids that give it that rich, bakery-style taste. Some people argue for spice cake mix, but yellow is the classic choice for this specific texture.
Canned Apple Pie Filling (2 cans / 21 oz each) — Look for the kind with cinnamon already added. This saves you from having to peel and slice apples (which, let’s be real, is the hard part). I prefer the chunky style because you get actual bites of apple. If you can only find the sauce-style, it still works, but the texture will be more like an apple crisp than a cake. Avoid fresh apples unless you want to commit to peeling and slicing them—this recipe is about convenience.
Unsalted Butter (½ cup / 1 stick, melted) — This is what creates the crumble topping. I use unsalted so I can control the saltiness, but if you only have salted, just reduce any added salt in other parts of your meal. Melted butter is crucial here. You need it liquid to drizzle over the dry mix. If you try to use cold butter cubes, you’ll get uneven clumps instead of that beautiful golden crust.
The “Nice-to-Haves” (Optional but Recommended)
Ground Cinnamon (1 teaspoon) — Even though the filling is pre-spiced, a little extra cinnamon on top boosts that autumnal aroma. I sprinkle it right before I put it in the oven.
Vanilla Ice Cream — For serving. Non-negotiable. The hot cake and cold ice cream combo is the whole point.
Walnuts or Pecans (½ cup, chopped) — If you want a little crunch and nuttiness, mix these into the cake mix before sprinkling. It adds a texture I love, but it’s not traditional. My kids prefer it plain, so I sometimes make two versions.
Maple Syrup (2 tablespoons) — Drizzle this over the melted butter before pouring it over the cake mix. It adds a deep, woodsy sweetness that complements the apples perfectly. This is my secret weapon for making it taste fancier.
Shopping Tips
I always keep a box of yellow cake mix in my pantry specifically for dump cakes. They last forever and are great for emergencies. For the apples, I buy the 21-oz cans when they’re on sale. If you see a deal, grab two. Also, don’t skimp on the butter. Using margarine or a light butter substitute will ruin the texture of that crust. It needs real fat to get crispy.
Equipment Needed
You don’t need fancy equipment for this. In fact, the whole point is simplicity. Here’s what I actually use in my kitchen:
9×13 Inch Baking Dish — I use a glass Pyrex dish because I like to see the browning on the sides. A metal pan works too, but it might brown faster, so watch it closely. Do not use a smaller dish (like an 8×8) unless you want a super thick, dense cake that might not cook through.
Microwave-Safe Bowl — To melt the butter. I just throw the stick in there and zap it for 30-45 seconds. No need to dirty a saucepan.
Whisk or Fork — To stir the melted butter if it hasn’t fully combined. A fork is fine.
Measuring Cups — You’ll need a ½ cup measure for the butter and maybe a teaspoon for cinnamon. Standard stuff.
Spatula — To spread the apple filling evenly. A rubber spatula works best to get into the corners.
Cooling Rack — To let it rest before serving. This helps the filling set up slightly so it’s not just liquid soup.
Optional: Ice Cream Scoop — Because nothing says “cozy fall evening” like a perfect scoop of vanilla on top.
How to Make It: Step-by-Step
Alright, let’s make this! I’m walking you through exactly how I do it, including the little tricks I’ve picked up over the years. It’s so simple you might think you’re missing a step, but trust me, that’s the beauty of it.
Step 1: Prep Your Oven and Dish (2 minutes)
Preheat your oven to 350°F (175°C). This is a standard baking temperature that cooks the apples through without burning the top. Grease your 9×13 baking dish lightly with butter or cooking spray. I usually just rub a little butter around with my fingers—it adds flavor and prevents sticking.
Step 2: Dump the Apples (1 minute)
Open your two cans of apple pie filling. Pour them evenly into the prepared baking dish. Use your spatula to spread it out so it’s level. If there are big chunks, try to distribute them so you get a bit of apple in every bite. Don’t worry about it looking pretty; it’s a dump cake, after all.
Step 3: Sprinkle the Cake Mix (1 minute)
Take your box of yellow cake mix. Do not add water, eggs, or oil. Just pour the dry mix directly over the apples. Sprinkle it evenly. You want to cover the entire surface of the apples. If there are small gaps where you can see the apples, that’s okay, but try to get full coverage. This layer will absorb the apple juices and turn into the cake part.
Step 4: Add the Butter (2 minutes)
Melt your ½ cup of butter. I use the microwave. Once melted, drizzle it evenly over the dry cake mix. You want to get butter to every part of the top. If you miss spots, you’ll have dry, powdery patches. I use a fork to spread the melted butter around a bit to ensure full coverage. This step creates the crumble topping.
Step 5: Bake (45-50 minutes)
Place the dish in the preheated oven. Bake for 45 to 50 minutes. You’ll know it’s done when the top is golden brown and bubbly. The bubbles are key—they mean the apple filling is hot and cooking through. If the top is browning too fast but the center isn’t bubbly yet, cover it loosely with aluminum foil for the last 10 minutes.
Step 6: Cool and Serve (10-15 minutes)
Remove from the oven and let it cool for at least 10 minutes. This is the hardest part, I know. But if you cut into it immediately, it’ll be a soupy mess. Letting it rest allows the filling to thicken slightly. Serve warm, topped with a scoop of vanilla ice cream or a dollop of whipped cream.
Total Time: About 1 hour (5 minutes prep, 50 minutes bake).
Troubleshooting During Baking
- Top isn’t browning? Your oven might be underheating. Check with an oven thermometer. Or, switch to broil for the last 1-2 minutes (watch it like a hawk!).
- Too dry? You might have used too much cake mix or not enough butter. Next time, add a splash more melted butter.
- Undercooked center? If the apples are still cold in the middle, bake for another 5-10 minutes. The time can vary based on your oven and the brand of filling.
Expert Tips & Tricks
Here’s everything I’ve learned from making this dozens of times. These tips will save you from my mistakes and take your dump cake from “okay” to “amazing.”
Use Room Temperature Butter — Cold butter takes longer to melt and can clump. Let it sit on the counter for 15 minutes before you start, or just microwave it briefly. You want it liquid and easy to drizzle.
Don’t Skip the Resting Time — I know the urge to dig in is strong. But if you cut it immediately, you get a runny mess. Letting it cool for 10-15 minutes lets the pectin in the apples set, giving you those perfect, distinct layers.
Add a Pinch of Nutmeg — If you’re feeling fancy, add a pinch of nutmeg to the cake mix before sprinkling. It adds a subtle warmth that pairs beautifully with the cinnamon in the apples.
Use a Different Fruit — This method works with cherry pie filling, peach pie filling, or even mixed fruit. The ratio stays the same. Cherry dump cake is a close second in my house.
Make It Crispier — If you like a really crunchy topping, add ½ cup of crushed graham crackers or crushed cookies (like Oreos) to the cake mix. It adds a different texture that’s fantastic.
Avoid Soggy Bottoms — Make sure your apples are evenly distributed. If you have a huge pile in one corner, that spot might stay watery. Spread it out!
Variations & Substitutions
Once you’ve nailed the basic version, here’s how you can mix it up. I’ve tried all of these, and they all work.
Spice Cake Version — Swap the yellow cake mix for a spice cake mix. This intensifies the cinnamon flavor and makes it taste more like a spiced apple pie. My favorite for winter.
Strudel Style — Add ½ cup of raisins and ½ cup of chopped walnuts to the cake mix before sprinkling. It adds chewiness and crunch.
Lemon Glaze — After baking, mix 1 cup of powdered sugar with 2 tablespoons of lemon juice and drizzle it over the warm cake. The tartness cuts through the sweetness perfectly.
Gluten-Free — Use a gluten-free yellow cake mix. Just check that your apple filling is also certified gluten-free (most are, but some thickeners can contain wheat). Everything else is naturally GF.
Vegan — Use a vegan cake mix and substitute the butter with vegan butter sticks or coconut oil. It works surprisingly well, though the texture might be slightly denser.
Fresh Apple Version — If you want to avoid canned fruit, peel and slice 6-7 large apples (Granny Smith or Honeycrisp work best). Toss them with 1 tablespoon of flour and 1 tablespoon of sugar, then dump them in the dish. You’ll need to bake it for 55-60 minutes. This is closer to a traditional apple crisp.
Serving & Storage
How to serve it for maximum cozy vibes:
Classic Style — Warm slice with a big scoop of vanilla ice cream. The melting ice cream creates a sauce that’s incredible.
Adults Only — Add a splash of bourbon or apple brandy to the warm cake before serving. It elevates it to a dinner party level.
Breakfast Dessert — Serve it with a cup of strong coffee or hot cocoa. It’s hearty enough for a weekend brunch treat.
Side Dishes — This pairs well with savory fall meals like high-protein turkey chili or roasted chicken. The sweetness balances out spicy or savory mains.
Storage — Store leftovers in an airtight container in the fridge for up to 3 days. It actually tastes better on day two as the flavors meld.
Reheating — Microwave individual slices for 30-60 seconds. Or warm the whole dish in a 350°F oven for 10-15 minutes. Avoid the microwave for the whole dish, as it heats unevenly.
Freezing — You can freeze this! Wrap the baked (and cooled) cake tightly in plastic wrap and foil. Freeze for up to 2 months. Thaw in the fridge overnight and reheat in the oven. It’s great for meal prepping dessert.
Nutrition Information
I’m not a nutritionist, but here’s the breakdown if you’re tracking. Keep in mind this is a sweet, buttery dessert, so portion control is key.
Per Serving (based on 9 servings):
- Calories: 380
- Protein: 3g
- Carbs: 58g
- Fiber: 1g
- Sugar: 42g
- Fat: 16g
- Saturated Fat: 8g
What’s Good: It’s quick, cheap, and uses pantry staples. The apples provide some fruit content.
What to Know: High in sugar and carbs from the cake mix and apple filling. Not suitable for low-sugar diets unless you use sugar-free versions.
Final Thoughts
So that’s my go-to cinnamon apple dump cake! I’ve probably talked your ear off at this point, but when you make a recipe this often, you have a lot to say about it. This has saved weeknight dinners more times than I can count. It’s my answer to “what’s for dessert?” when I’m tired, don’t want takeout, and still want something that tastes really good. My kids are happy, my husband’s happy, and I’m happy because I’m not stressed about cooking.
Make it yours! Try different add-ins, swap in your favorite fruits, or adjust the spices. The best recipes are the ones you adapt to your family’s tastes. If you make this, drop a comment and let me know what you think! I love hearing how recipes turn out in your kitchen. And if something doesn’t work, tell me that too—I’m here to help troubleshoot.
Happy cooking! And I hope your kitchen smells half as good as mine does right now.
Frequently Asked Questions
Can I use fresh apples instead of canned?
Yes, but you’ll need to peel and slice about 6-7 large apples. Toss them with 1 tablespoon of flour and 1 tablespoon of sugar to help thicken the juices. You’ll need to bake it for 55-60 minutes instead of 45-50. It’s more work, but the flavor is fresher.
Why did my dump cake turn out dry?
This usually happens if you didn’t use enough butter or if your oven runs hot. Make sure you drizzle the butter evenly over the entire surface. If your oven is hot, check it 5 minutes early. The cake should be bubbly, not dry.
Can I make this ahead of time?
You can prep it ahead! Assemble the cake in the dish, cover it tightly with plastic wrap, and refrigerate for up to 24 hours. When you’re ready, take it out and let it sit on the counter for 20 minutes before baking. You might need to add 5 minutes to the bake time since it’s starting cold.
What kind of cake mix works best?
Yellow cake mix is the classic choice. Spice cake mix is great for extra cinnamon flavor. White cake mix works but is milder. Avoid chocolate cake mix unless you want a very different flavor profile.
How do I reheat leftovers?
Microwave individual slices for 30-60 seconds. For the whole dish, cover with foil and warm in a 350°F oven for 10-15 minutes. Adding a scoop of ice cream helps rehydrate it.
Can I freeze this?
Yes! Bake it, let it cool completely, wrap tightly in plastic and foil, and freeze for up to 2 months. Thaw in the fridge overnight and reheat in the oven.
Is this recipe gluten-free?
Not traditionally, as cake mix contains wheat. But you can use a gluten-free yellow cake mix to make it GF. Just ensure your apple filling is also certified gluten-free.
Pin This Recipe!
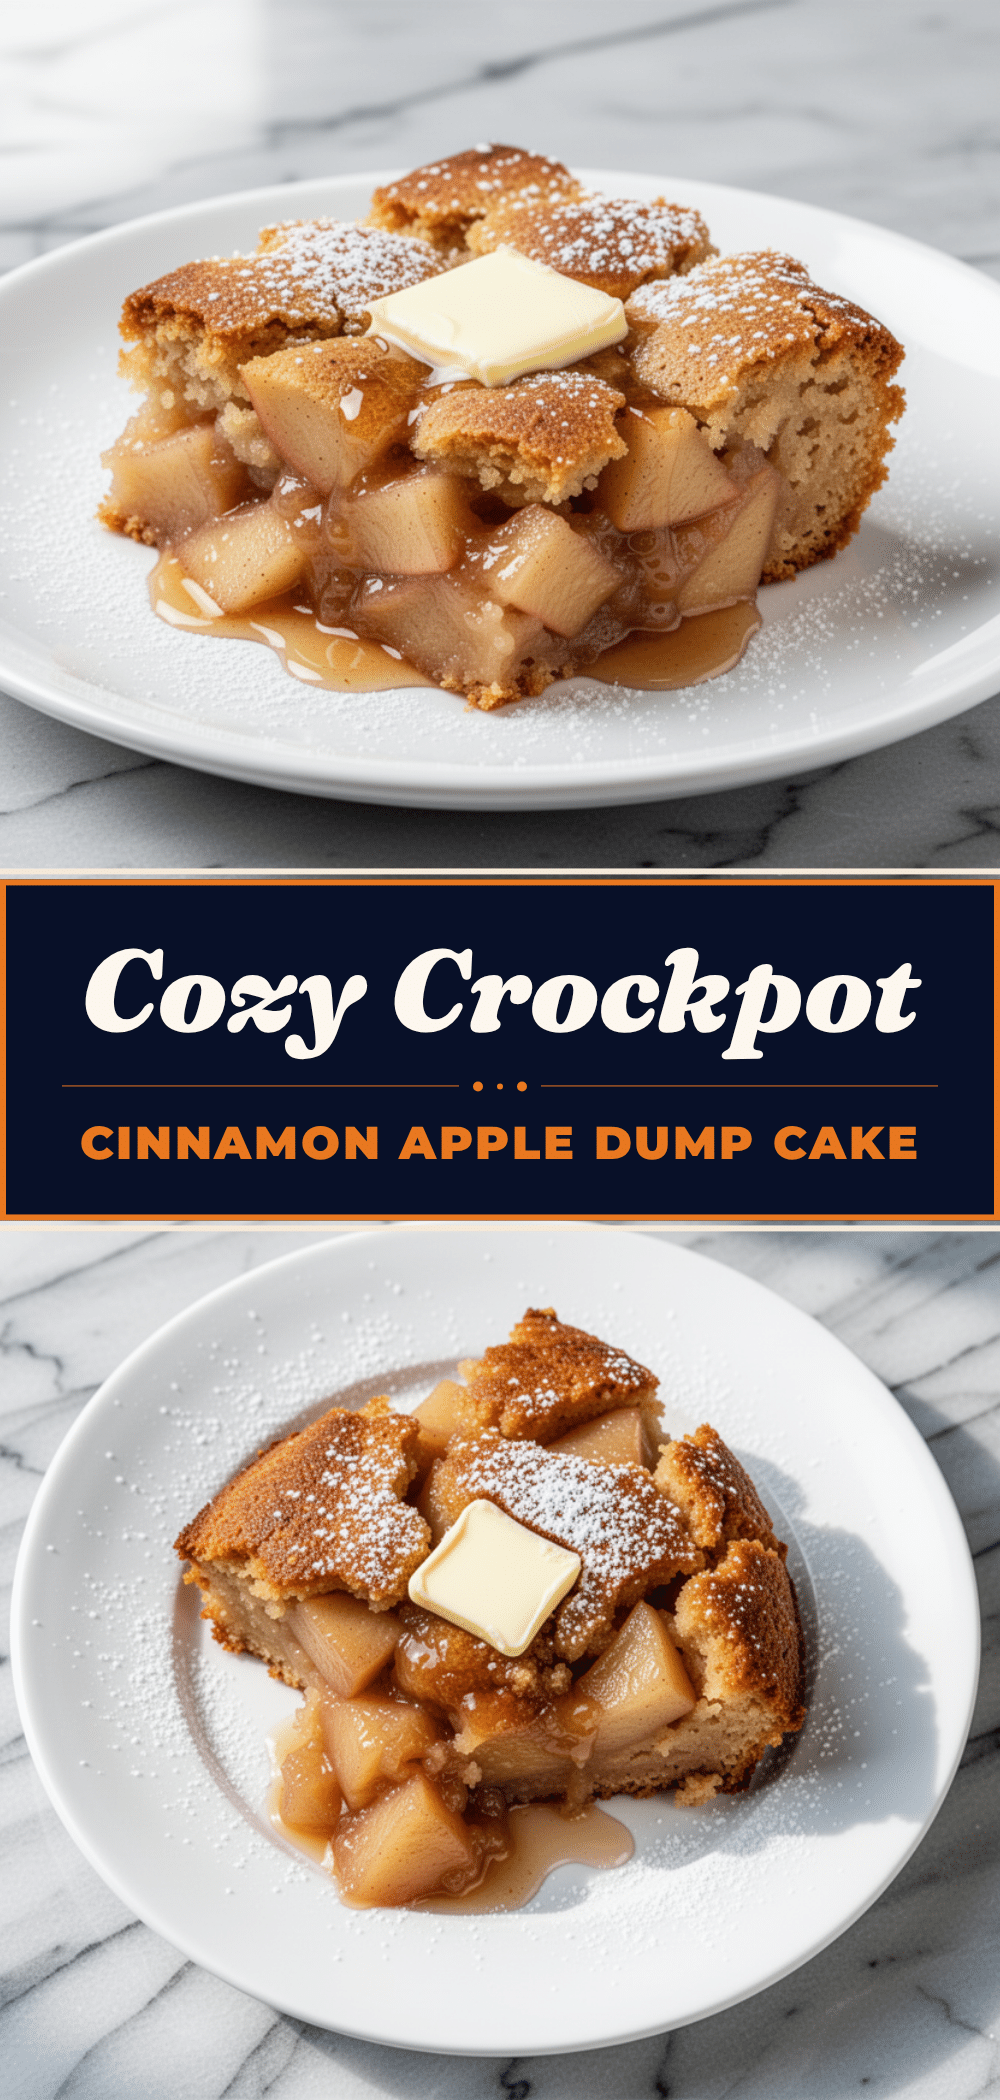
Cinnamon Apple Dump Cake: Easy 3-Ingredient Fall Dessert
- Total Time: 1 hour
- Yield: 9 servings 1x
Description
A cozy, no-fuss fall dessert made with just three main ingredients: canned apple pie filling, yellow cake mix, and butter. This dump cake offers a soft, saucy bottom with a crunchy, golden-brown crumble topping, ready in under an hour.
Ingredients
- 2 cans (21 oz each) canned apple pie filling
- 1 box (15.25 oz) yellow cake mix
- 1/2 cup (1 stick) unsalted butter, melted
- 1 teaspoon ground cinnamon (optional)
- 1/2 cup chopped walnuts or pecans (optional)
- 2 tablespoons maple syrup (optional)
Instructions
- Preheat oven to 350°F (175°C) and lightly grease a 9×13 inch baking dish.
- Pour the canned apple pie filling evenly into the prepared baking dish and spread it out level.
- Sprinkle the dry yellow cake mix evenly over the apples, covering the entire surface.
- Drizzle the melted butter evenly over the cake mix. Use a fork to spread it if necessary to ensure full coverage.
- Bake for 45-50 minutes, or until the top is golden brown and the filling is bubbly.
- Remove from oven and let cool for at least 10-15 minutes to allow the filling to set.
- Serve warm with vanilla ice cream or whipped cream.
Notes
Do not add water, eggs, or oil to the cake mix; use it dry. Letting the cake cool for 10-15 minutes is crucial to prevent a soupy texture. For a gluten-free version, use a gluten-free cake mix and ensure the apple filling is certified gluten-free. For a vegan version, use vegan cake mix and vegan butter or coconut oil.
- Prep Time: 5 minutes
- Cook Time: 50 minutes
- Category: Dessert
- Cuisine: American
Nutrition
- Serving Size: 1 slice
- Calories: 380
- Sugar: 42
- Fat: 16
- Saturated Fat: 8
- Carbohydrates: 58
- Fiber: 1
- Protein: 3
Keywords: dump cake, apple dessert, fall recipes, easy dessert, 3 ingredient recipe, cinnamon apple, comfort food, quick baking