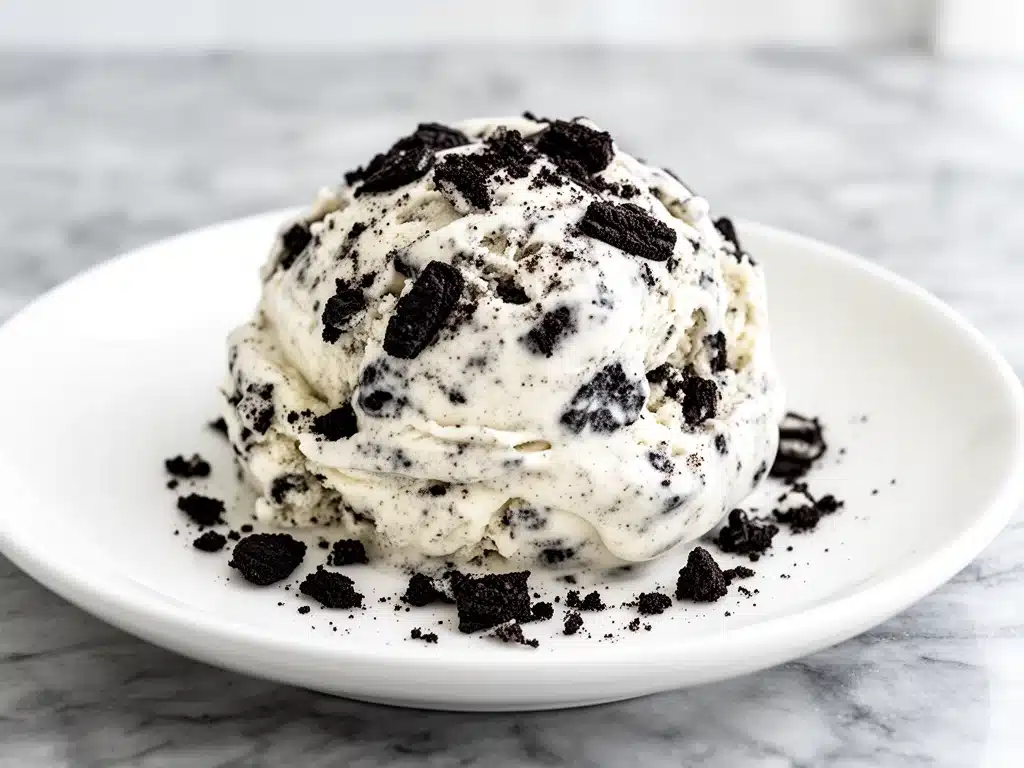
It was a Tuesday in July, the kind of humid, sticky heat that makes the idea of turning on the oven feel like a personal attack. I was standing in front of our freezer, staring at an empty ice cream tub, feeling that specific kind of desperation that only happens when you want a cold treat but don’t want to drive to the store. The store was too far, the heat was too much, and honestly, I just wanted something sweet.
So, I did what any lazy cook would do: I raided the pantry. I found a package of Oreos, a can of sweetened condensed milk, and a carton of heavy cream. I figured, “How hard can it be to just mix these things together?”
I was wrong. It wasn’t hard to make, but the first batch was icy. The second batch was too sweet. The third batch? Perfect. Creamy, dreamy, and packed with cookie crunch.
That was three summers ago. Since then, this no-churn cookies and cream ice cream has become my summer ritual. It’s the dessert I make when I have guests over last minute. It’s the treat I hide from my kids (okay, maybe I don’t hide it enough). It’s the recipe I come back to when I need comfort, simplicity, and a little bit of indulgence without the hassle of an ice cream maker.
If you’ve ever wanted homemade ice cream but thought you needed a fancy machine, this is your sign to stop thinking and start mixing. This no-churn cookies and cream ice cream you’ll make on repeat, I promise. It’s easier than making a smoothie, tastes better than anything from the grocery store, and requires zero special equipment. Just a mixer, a bowl, and a freezer.
Why You’ll Love This No-Churn Cookies and Cream Recipe
There are a hundred reasons to keep this recipe in your rotation, but let’s be real—you’re here because you want ice cream that tastes incredible without the work. Here’s why this specific version wins every time:
- Zero Machine Required — Seriously. If you own a hand mixer or a stand mixer, you can make this. No ice cream maker? No problem. The secret is in how you whip the cream, which traps air and creates that fluffy, scoopable texture we all crave.
- Ready in 15 Minutes (Plus Freezing Time) — The actual hands-on time is less than 15 minutes. After that, you just dump it in a container and wait. I love this because I can make it on a whim after dinner, and it’s ready by the weekend. It’s perfect for last-minute parties or when you just need a pick-me-up on a Wednesday.
- Customizable Crunch — While I’m a purist about using classic Oreos, this base recipe is a blank canvas. You can swap in chocolate chip cookies, peanut butter cookies, or even crushed shortbread. I’ve made it with crushed no-bake chocolate oat cookies for a chewier texture, and it was amazing. The cookie pieces get soft but still provide that satisfying crunch in every bite.
- Ingredients You Already Have — You likely have sweetened condensed milk, heavy cream, and vanilla in your kitchen right now. The only thing you might need to grab is cookies. It’s pantry-friendly in the best way possible.
- Better Than Store-Bought — I’ve compared this to the premium tubs from the grocery store, and honestly? This wins. It’s creamier, the cookie flavor is more intense, and there are no weird stabilizers or gums. It’s just real, rich dairy and cookies.
- Perfect for Meal Prep — Make one batch on Sunday, and you have dessert sorted for the week. It stores beautifully in the freezer. I often make two batches—one for my family and one for my “secret stash.”
This isn’t just ice cream; it’s a mood lifter. It’s the dessert that says, “I made this myself, and it was easy, and you’re going to love it.”
Ingredients You’ll Need for No-Churn Cookies and Cream
Here’s the beauty of this no-churn cookies and cream ice cream recipe: the ingredient list is short, simple, and mostly pantry staples. But because there are only four main components, the quality of each one matters. I’m particular about a few things here, so let me walk you through exactly what to buy and why.
For the Creamy Base
Heavy whipping cream (2 cups / 480ml) — This is the backbone of your ice cream. It must be cold. I mean, fridge-cold. If your cream is warm, it won’t whip up properly, and your ice cream will be icy. Use full-fat heavy cream. Light cream or half-and-half won’t have enough fat to hold the air bubbles. I buy the small cartons just for this so it stays fresh for other recipes like my soft apple cinnamon oatmeal bars, where a little heavy cream adds richness to the batter.
Sweetened condensed milk (14 oz / 1 can / about 395g) — This is what makes it “no-churn.” It adds sweetness and, more importantly, texture. Because it’s thick and syrupy, it interferes with ice crystal formation, keeping the ice cream smooth and scoopable. Don’t skip this for evaporated milk—they are not interchangeable. Condensed milk is sweet and thick; evaporated is unsweetened and thin.
Pure vanilla extract (1 teaspoon) — A good quality vanilla adds depth. I use pure extract, not imitation. It makes a subtle but noticeable difference in the flavor profile. If you want a more intense vanilla flavor, you can increase this to 2 teaspoons.
Pinch of salt — Just a tiny pinch. Salt enhances the sweetness and the vanilla flavor. It’s the secret ingredient that makes the ice cream taste “balanced” rather than just sugary.
For the Cookie Crunch
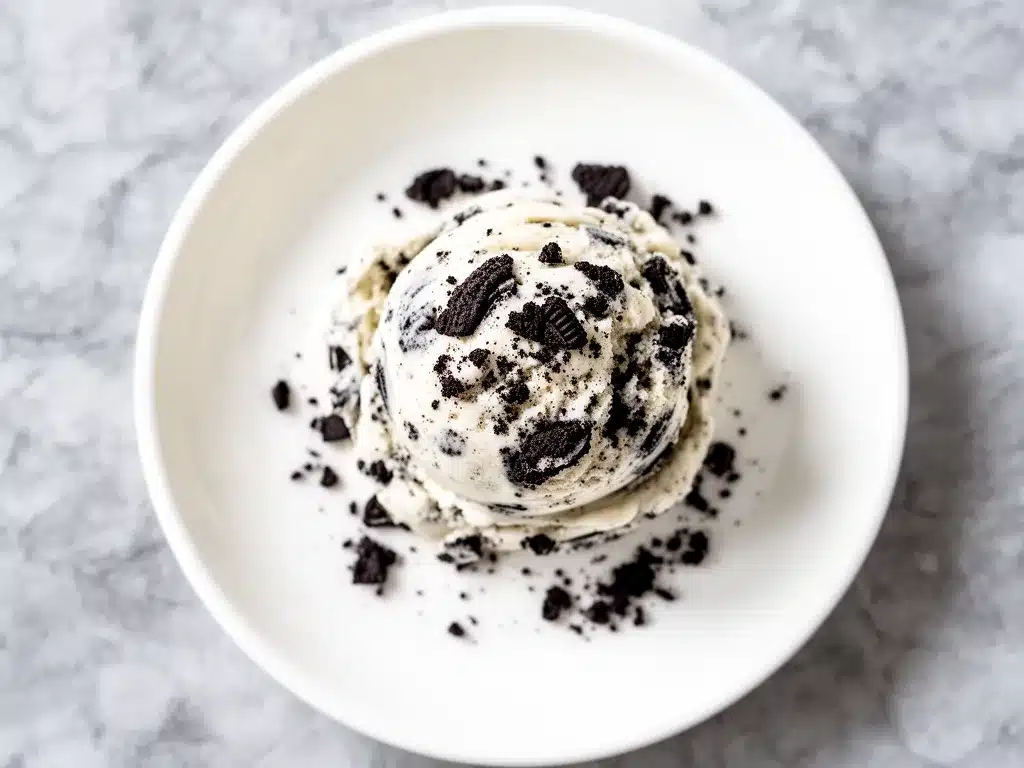
Oreo cookies (1 package / 15.25 oz / about 36 cookies) — The classic choice. I use the original Oreos because the dark cookie and white creme filling create that iconic look and flavor. You can use gluten-free Oreos if needed, or try different flavors like Golden Oreos for a milder taste, or Double Stuf for extra creaminess. Just remember: the more cookies, the more crunch (and sweetness).
Optional: Extra cookie crumbs — I like to crush a few extra cookies into fine crumbs and sprinkle them on top before freezing. It adds a nice visual appeal and a bit of extra crunch on the surface.
Substitutions & Notes
- Gluten-Free: Use gluten-free sandwich cookies. I’ve tested this with several brands, and they work well. Just chop them finely so they distribute evenly.
- Dairy-Free: This is trickier. You’d need dairy-free heavy cream (like coconut cream) and dairy-free condensed milk. It changes the texture significantly, but it’s doable if you’re lactose intolerant. I haven’t perfected a dairy-free version yet, but I’m working on it!
- Less Sweet: If you find Oreos too sweet, reduce the amount to 10-12 cookies. But I recommend sticking with the full package for the classic experience.
Pro Tip: Keep your heavy cream cold until the very last second. If your bowl or beaters are warm, your cream won’t whip. I keep my mixing bowl in the fridge for 30 minutes before I start.
Equipment Needed
You don’t need a lot of fancy gear for this. Here’s what I actually use:
- Stand mixer or hand mixer — A stand mixer is easiest because it frees up your hands, but a hand mixer works perfectly fine. Just make sure it’s powerful enough to whip the cream to stiff peaks.
- Large mixing bowl — Metal or glass works best. Avoid plastic if it’s warm, as it can affect whipping.
- 8×4 inch loaf pan or similar container — A loaf pan is ideal because it fits nicely in most freezers. You can also use a 9×9 square pan or a large plastic storage container. Just make sure it has a lid or can be covered tightly with plastic wrap.
- Whisk or spatula — For folding the cookies into the cream gently.
- Ziploc bag or food processor — To crush the cookies. I prefer the Ziploc bag method because it’s less messy and I can control the crunch level.
I’m not going to lie, I used to use a food processor to crush the cookies, but it often turned them into dust. Now I put them in a Ziploc bag and use a rolling pin. It’s more fun, and I get perfectly chunky pieces every time.
How to Make It: Step-by-Step
Alright, let’s make this! I’m walking you through exactly how I do it, including the little tricks I’ve picked up over the years. This process is forgiving, but following these steps will ensure you get that perfect, scoopable texture.
Step 1: Crush the Cookies (5 minutes)
Open your package of Oreos. You want about 30-35 cookies for this recipe. Place them in a large Ziploc bag. Squeeze out as much air as possible and seal it tight. Now, use a rolling pin, a meat mallet, or even a heavy can to crush the cookies. You want chunks, not powder. I aim for pieces about the size of a pea or a small marble. Too fine, and they’ll dissolve into the cream. Too big, and you’ll get mouthfuls of just cookie. Aim for a mix of sizes for the best texture.
Pro Tip: Save about 2 tablespoons of the finest crumbs for sprinkling on top later. These will add a nice decorative touch.
Step 2: Whip the Heavy Cream (3-5 minutes)
In your chilled mixing bowl, pour the cold heavy whipping cream. Start mixing on medium speed, then increase to high. Whip until you see stiff peaks form. What does that look like? When you lift the beaters, the cream should stand up straight in peaks that don’t droop. Be careful not to over-whip! If you whip it too long, it will start to separate and turn into butter. Stop as soon as you see stiff peaks. This usually takes 3-5 minutes with a stand mixer or 5-7 minutes with a hand mixer.
Visual Cue: The cream should look thick, glossy, and hold its shape. If it looks grainy, you’ve gone too far.
Step 3: Fold in the Sweetened Condensed Milk (2 minutes)
Pour the entire can of sweetened condensed milk into the whipped cream. Add the vanilla extract and the pinch of salt. Using a silicone spatula, gently fold the mixture together. Folding means using a slow, deliberate motion: cut down through the center, scrape the side, and turn the bowl. Do this until the milk is just incorporated. You don’t want to deflate the cream, so be gentle. The mixture will become lighter and fluffier. It should look like a thick, airy mousse.
Why this matters: Folding preserves the air bubbles you created in Step 2. These air bubbles are what make the ice cream light and creamy instead of dense and icy.
Step 4: Add the Cookie Chunks (2 minutes)
Now, add the crushed cookies to the cream mixture. Again, use your spatula to gently fold them in. Make sure they are evenly distributed. You want a cookie in every bite. If you’re using the reserved fine crumbs, save them for now.
Don’t Overmix: Just a few folds are enough. You want the cookies to be suspended in the cream, not crushed further.
Step 5: Pack and Freeze (6+ hours)
Transfer the mixture into your prepared loaf pan or container. Smooth the top with the spatula. Sprinkle the reserved fine cookie crumbs on top for decoration. Cover tightly with plastic wrap or a lid. Make sure there are no air gaps. Place it in the freezer.
Freeze for at least 6 hours, but ideally overnight. The longer it freezes, the firmer it gets. I usually make it the night before I want to eat it, so it’s ready by morning.
Visual Cue: After 6 hours, the ice cream should be firm to the touch. If you press your finger into it, it should leave an indent that doesn’t spring back immediately.
Step 6: Scoop and Serve
Let the ice cream sit at room temperature for 5-10 minutes before scooping. This makes it softer and easier to serve. Scoop it into bowls and enjoy! You can add whipped cream, chocolate sauce, or extra cookie pieces on top if you’re feeling fancy.
Total Time: About 15 minutes active, plus 6+ hours freezing.
Expert Tips & Tricks for Perfect No-Churn Ice Cream
Here’s everything I’ve learned from making this dozens of times. These tips will save you from my mistakes and ensure your ice cream is always perfect.
The Cold Cream Rule
This is non-negotiable. Your heavy cream, your mixing bowl, and your beaters should all be cold. If your cream is even slightly warm, it won’t whip properly. I keep my bowl in the freezer for 15 minutes before I start. If you’re in a rush, you can put the bowl in the freezer for 5 minutes while you crush the cookies. Trust me on this. Cold cream = fluffy ice cream.
Don’t Over-Whip
It’s easy to go from “stiff peaks” to “butter” in seconds. Watch your mixer closely. As soon as the cream holds its shape, stop. If you over-whip, the fat separates, and your ice cream will be grainy and dense. If you accidentally over-whip, you can try to rescue it by adding a tiny splash of cold milk and gently folding, but it’s better to avoid it in the first place.
Chop Cookies Evenly
I know I said this before, but it bears repeating. If you have huge chunks of cookie, you’ll get uneven texture. If you have too much dust, the ice cream will be sweet and soft. Aim for consistent, bite-sized chunks. This ensures every scoop has the right balance of cream and crunch.
Use a Loaf Pan
A loaf pan is the best container for no-churn ice cream. It has a narrow shape, which means the ice cream freezes more evenly and quickly. Square or round containers can result in uneven freezing, with the edges getting icy while the center stays soft. If you don’t have a loaf pan, use a rectangular container that’s roughly the same shape.
Let It Temper Before Scooping
No-churn ice cream is harder than commercial ice cream because it lacks stabilizers. If you try to scoop it straight from the freezer, it will be like a rock. Let it sit on the counter for 5-10 minutes before serving. This softens it just enough to make it scoopable and creamy.
Storage Tips
Store your ice cream in an airtight container to prevent freezer burn. Press plastic wrap directly onto the surface of the ice cream before closing the lid. This prevents ice crystals from forming on top. It will keep well in the freezer for up to 2 weeks.
Variations & Substitutions
Once you’ve mastered the basic version, here’s how you can mix it up. I’ve tried all of these, and they’re all delicious.
Chocolate Chip Cookie Dough
Instead of Oreos, use chopped chocolate chip cookies. You can also add mini chocolate chips to the cream mixture for extra chocolatey goodness. This is a favorite in my house.
Golden Oreos
For a milder, vanilla-forward flavor, use Golden Oreos. The ice cream will be lighter in color and have a more subtle cookie taste. Great for those who don’t like the strong chocolate flavor of regular Oreos.
Double Stuf
If you love extra creaminess, use Double Stuf Oreos. The extra creme filling will add more sweetness and richness. Just be aware that the ice cream will be sweeter, so you might want to reduce the amount of condensed milk slightly (though I usually don’t).
Gluten-Free
Use any brand of gluten-free sandwich cookies. I’ve tested this with gluten-free Oreos and other brands, and they work perfectly. Just chop them finely.
Less Sweet
If you find the standard recipe too sweet, reduce the number of cookies to 10-12. You can also use a less sweet cookie, like shortbread or graham crackers, for a different flavor profile.
Add-Ins
You can add other mix-ins to the cream mixture before freezing. Try crushed pretzels for a salty-sweet combo, chopped nuts for crunch, or swirl in some caramel or chocolate sauce. I’ve even added a layer of peanut butter in the middle for a peanut butter cookies and cream variation.
Serving & Storage
How to Serve:
I usually serve this straight from the loaf pan with a nice ice cream scoop. It looks rustic and homemade. But here are other ways I’ve enjoyed it:
- Ice Cream Sundaes: Top with whipped cream, chocolate syrup, and a cherry. It’s a classic for a reason.
- Cookie Sandwiches: Use two large cookies to sandwich a scoop of this ice cream. It’s like a gourmet ice cream sandwich.
- Parfaits: Layer the ice cream with crushed cookies and whipped cream in a glass. It’s beautiful and Instagram-worthy.
- With Fruit: Surprisingly, this pairs well with fresh berries. The tartness of the berries cuts through the sweetness of the ice cream.
Storage Instructions:
- Refrigerator: This is ice cream, so it doesn’t go in the fridge. It needs to stay in the freezer.
- Freezer: Store in an airtight container for up to 2 weeks. Press plastic wrap onto the surface to prevent freezer burn. It will keep its quality for about 2 weeks, but it’s usually gone in 3 days!
- Reheating: You don’t reheat ice cream. You temper it. Let it sit at room temperature for 5-10 minutes before serving. This makes it softer and easier to scoop.
Pro Tip: If your ice cream is too hard to scoop, don’t microwave it. It will melt unevenly and become soupy. Just let it sit on the counter.
Nutrition Information
I’m not a nutritionist, but here’s the breakdown if you’re tracking. Please note that this is an estimate and can vary based on the specific brands of cookies and cream you use.
Per Serving (based on 8 servings):
- Calories: 320
- Protein: 4g
- Carbs: 42g
- Fiber: 1g
- Sugar: 35g
- Fat: 16g
- Saturated Fat: 10g
- Cholesterol: 50mg
- Sodium: 220mg
What’s Good:
- It’s a treat, so enjoy it!
- Homemade means you control the ingredients.
- It’s less processed than store-bought ice cream.
What to Know:
- High in sugar and calories from the cookies and condensed milk.
- Contains dairy and gluten.
- Portion control is key. A little goes a long way.
My Take:
Look, this is ice cream. It’s supposed to be sweet and indulgent. It’s not a health food. But it’s way better than store-bought because you know exactly what’s in it. When I make this, I enjoy it as a special treat, not an everyday snack. That mindset helps me enjoy it more without feeling guilty.
Final Thoughts
So that’s my no-churn cookies and cream ice cream! I’ve probably talked your ear off at this point, but when you make a recipe this often, you have a lot to say about it. This has saved my summer desserts more times than I can count. It’s my answer to “what’s for dessert?” when I’m tired, don’t want to bake, and still want something that tastes really good. My kids are happy, my husband’s happy, and I’m happy because I’m not stressed about cooking.
Make it yours! Try different cookies, add mix-ins, or adjust the sweetness. The best recipes are the ones you adapt to your family’s tastes. I love seeing how people customize this recipe. It’s a blank canvas for your creativity.
If you make this, drop a comment and let me know what you think! I love hearing how recipes turn out in your kitchen. And if something doesn’t work, tell me that too—I’m here to help troubleshoot. Happy cooking! And I hope your kitchen smells half as good as mine does right now (it smells like vanilla and cookies).
Frequently Asked Questions
Can I use light heavy cream?
No, you need full-fat heavy whipping cream. Light cream doesn’t have enough fat to whip into stiff peaks. Without those air bubbles, your ice cream will be icy and dense. Don’t skip this step—full-fat cream is essential for the creamy texture.
Why is my ice cream icy?
Icy texture usually means one of two things: either your cream wasn’t whipped enough (not enough air), or your mixture froze too quickly without being stirred. Since this is no-churn, we rely on the whipped cream for air. Make sure you whip it to stiff peaks. Also, make sure your freezer is cold enough (0°F or below). If your freezer is too warm, the ice cream will form large ice crystals.
Can I make this ahead for a party?
Absolutely! This is perfect for make-ahead desserts. You can make it up to 2 days before your party. Just keep it covered tightly in the freezer. Let it sit on the counter for 10 minutes before serving to make it scoopable. It holds up well in the freezer.
Why did my ice cream turn out soft?
If your ice cream is too soft after freezing, it might not have frozen long enough. Try freezing it for an additional 2-4 hours. Also, check your freezer temperature. If it’s not cold enough, the ice cream won’t firm up. If it’s still soft after freezing, you might have used too much liquid (like milk) instead of just cream and condensed milk. Stick to the recipe ratios for best results.
Can I use milk instead of heavy cream?
No, milk won’t work. Milk doesn’t have the fat content to whip into peaks. The whipped cream is what gives the ice cream its light, airy texture. Without it, you’ll just have sweetened milk with cookies in it, which freezes into a solid block. Heavy cream is non-negotiable for this method.
How do I store leftovers?
Store leftovers in an airtight container in the freezer. Press plastic wrap directly onto the surface of the ice cream to prevent freezer burn. It will keep well for up to 2 weeks. Just let it sit at room temperature for 5-10 minutes before scooping.
Can I freeze this ice cream?
Yes, this is designed to be frozen. That’s the whole point! But once it’s frozen, don’t refreeze it. Take out what you need, and put the rest back in the freezer. Refreezing can cause texture issues and ice crystals to form.
Pin This Recipe!
No-Churn Cookies and Cream Ice Cream
- Total Time: 6 hours 15 minutes
- Yield: 8 servings 1x
Description
A creamy, dreamy no-bake dessert made with heavy cream, sweetened condensed milk, and crushed Oreos. This easy recipe requires no ice cream machine and delivers a rich, scoopable texture perfect for summer.
Ingredients
- 2 cups (480ml) heavy whipping cream, cold
- 1 can (14 oz / 395g) sweetened condensed milk
- 1 teaspoon pure vanilla extract
- Pinch of salt
- 1 package (15.25 oz / ~36 cookies) Oreo cookies
- Optional: Extra cookie crumbs for topping
Instructions
- Crush the Oreo cookies in a large Ziploc bag using a rolling pin or meat mallet until you have chunky pieces (about the size of a pea). Reserve 2 tablespoons of fine crumbs for topping.
- In a chilled large mixing bowl, whip the cold heavy cream on high speed until stiff peaks form (about 3-5 minutes). Be careful not to over-whip.
- Pour the sweetened condensed milk, vanilla extract, and pinch of salt into the whipped cream.
- Gently fold the mixture together with a spatula until just incorporated, preserving air bubbles.
- Fold in the crushed cookie chunks until evenly distributed.
- Transfer the mixture to an 8×4 inch loaf pan or similar container. Smooth the top and sprinkle with reserved fine crumbs.
- Cover tightly with plastic wrap or a lid and freeze for at least 6 hours, or ideally overnight.
- Before serving, let the ice cream sit at room temperature for 5-10 minutes to soften slightly for easier scooping.
Notes
Ensure all equipment (bowl, beaters) and the heavy cream are very cold to ensure proper whipping. Do not over-whip the cream or it will turn to butter. For best texture, freeze overnight. Store in an airtight container with plastic wrap pressed directly onto the surface to prevent freezer burn.
- Prep Time: 15 minutes
- Cook Time: 0 minutes
- Category: Dessert
- Cuisine: American
Nutrition
- Serving Size: 1 scoop
- Calories: 320
- Sugar: 35
- Sodium: 220
- Fat: 16
- Saturated Fat: 10
- Carbohydrates: 42
- Fiber: 1
- Protein: 4
Keywords: no-churn ice cream, cookies and cream, no bake dessert, easy ice cream recipe, summer dessert, homemade ice cream, oreo ice cream



