I still remember the exact moment I knew this Mexican Chocolate Flan Cake with Cajeta was a keeper. It was a rainy Tuesday in November, the kind where you don’t want to leave the house, and my family was asking for something “special” for dessert. Usually, “special” means I’m going to spend three hours standing over a stove, and I was already halfway to just making toast. But I had this weird craving for something rich, chocolatey, and with that deep, caramelized kick that only cajeta can provide.
So I threw together what I thought would be a messy compromise. I layered chocolate cake batter over flan, baked it in a water bath, and prayed. When I pulled it out of the oven, the kitchen smelled like a high-end Mexican bakery. And then came the moment of truth: flipping it onto the plate. I held my breath. Would it collapse? Would the cake and flan separate into a sad, greasy mess?
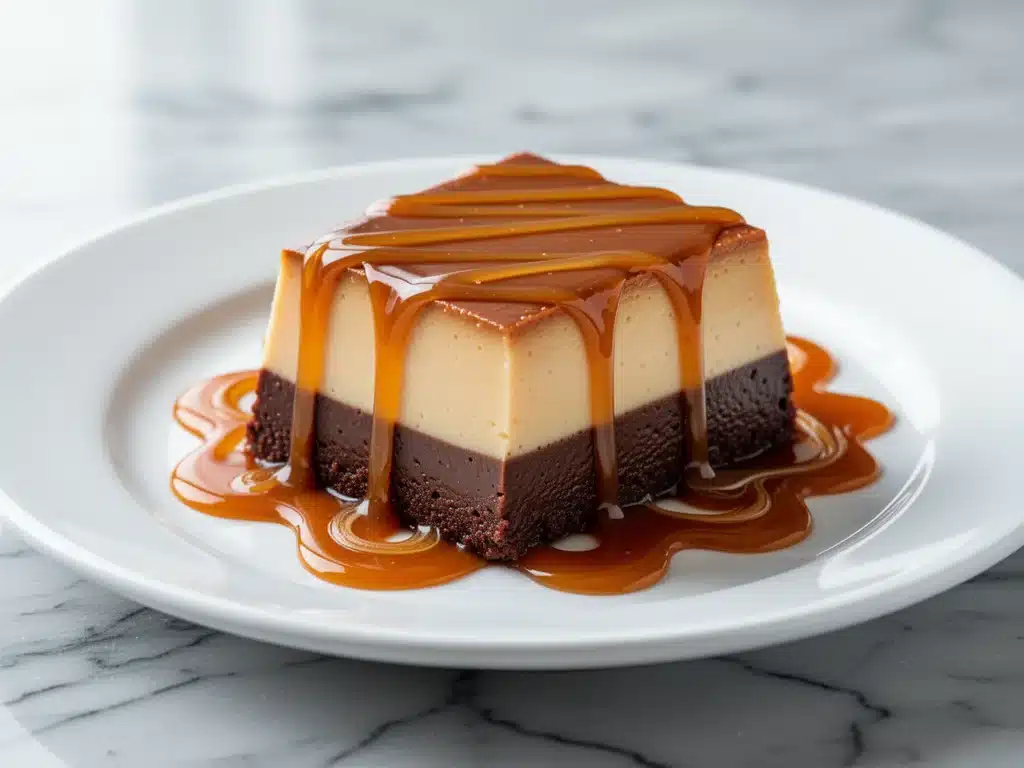
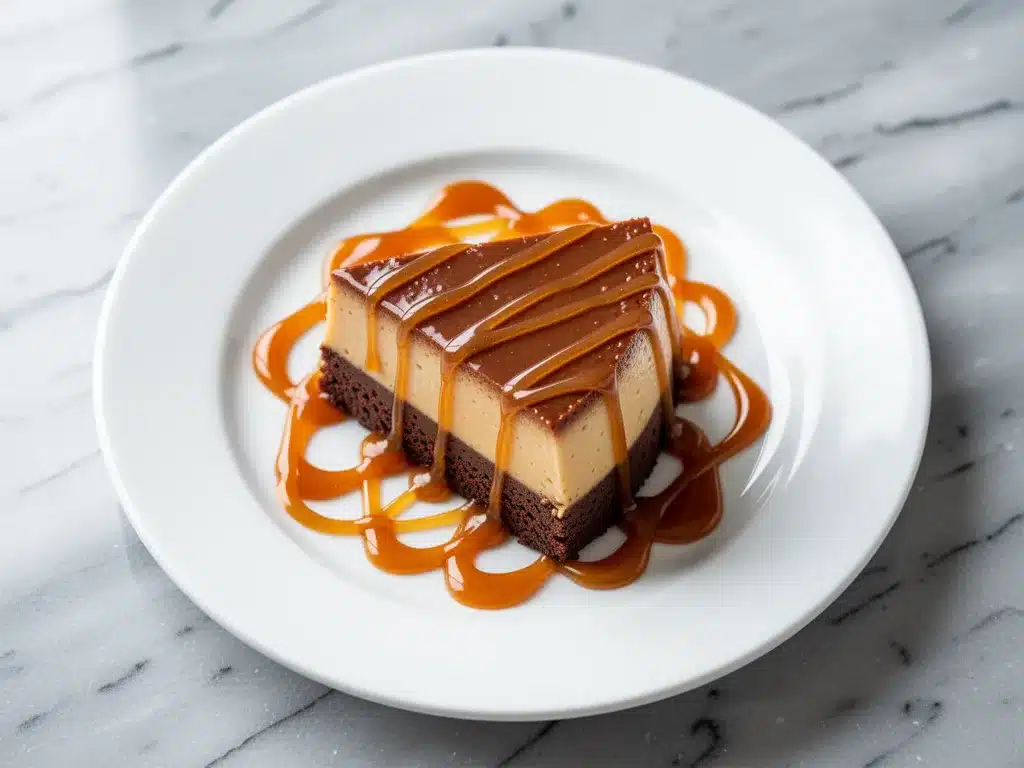
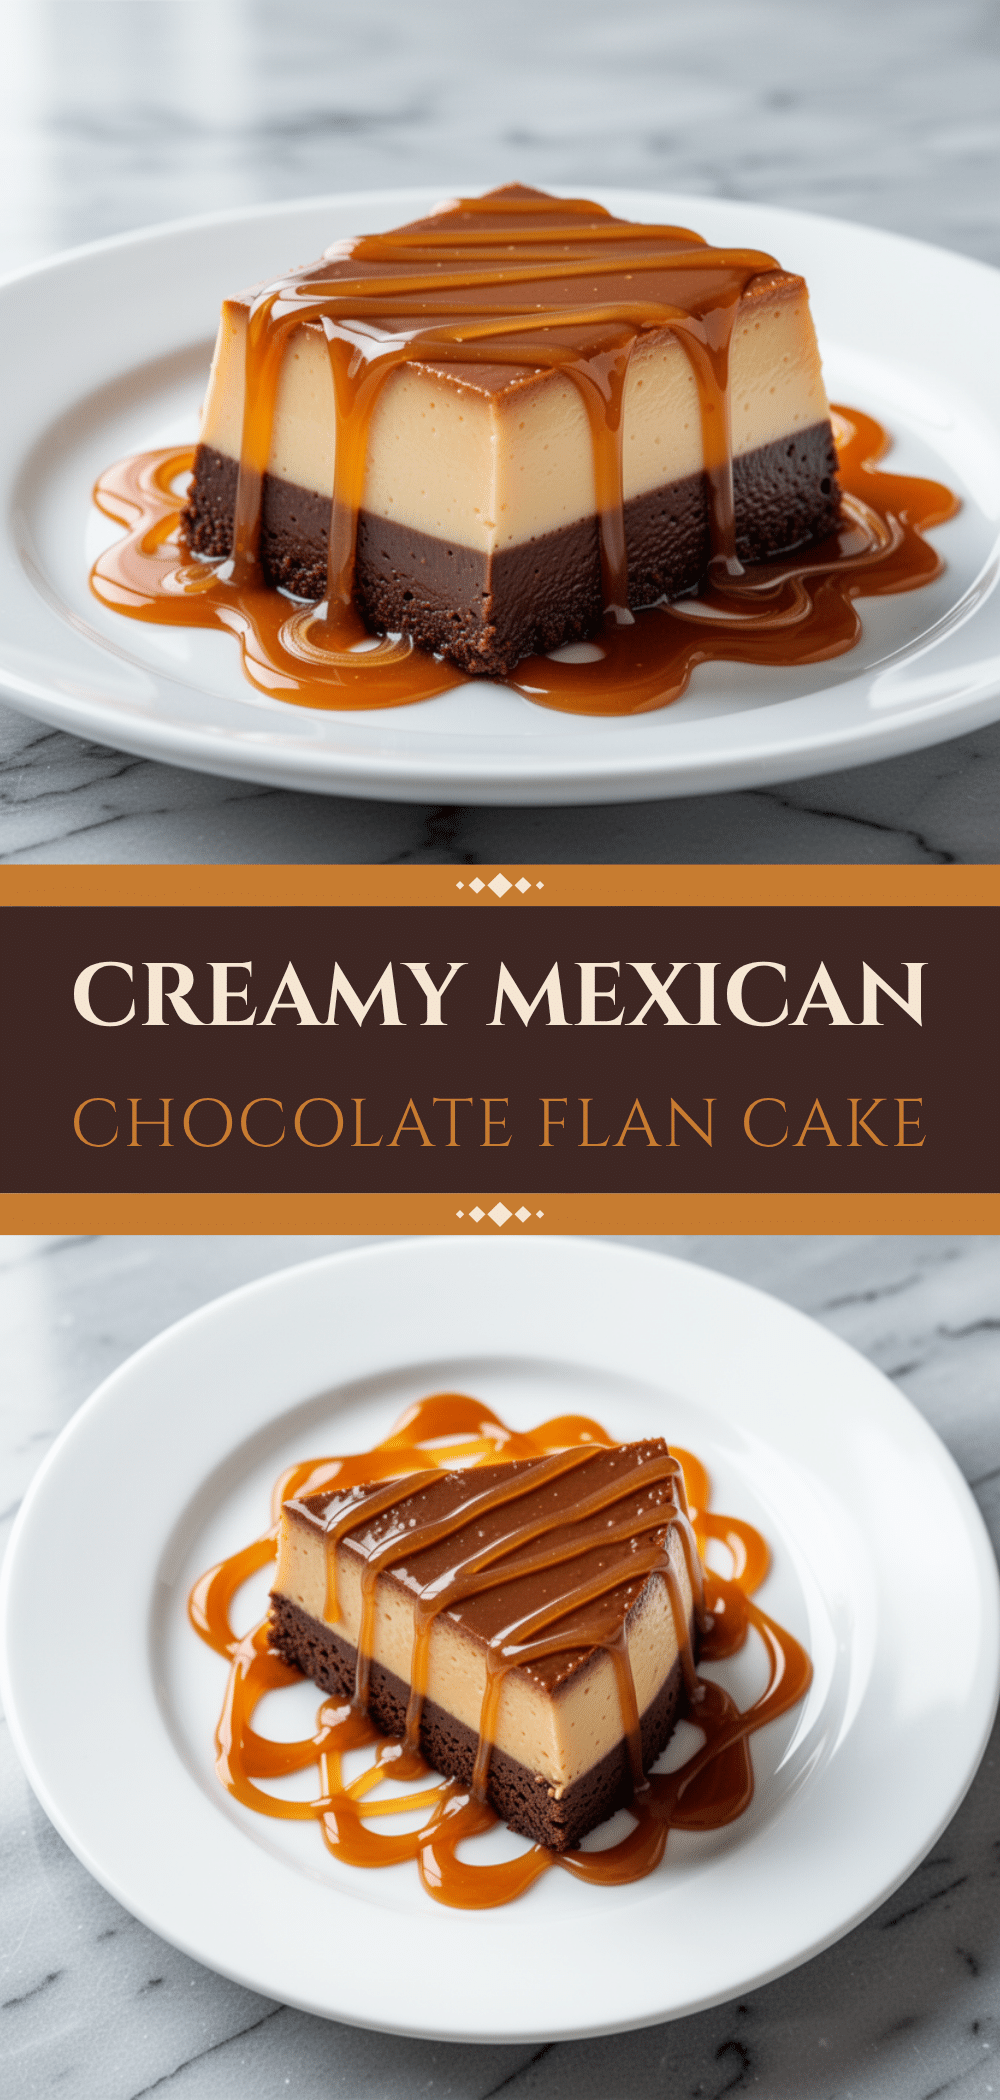
It didn’t. It slid out like a dream. The top was a glossy, dark chocolate crust, the middle was a silky, jiggly custard, and the bottom… well, the bottom was soaked in golden cajeta. My kids, who usually complain about anything that isn’t ice cream, went quiet. That’s the good kind of quiet. The kind where they’re too busy chewing to argue.
This Mexican Chocolate Flan Cake with Cajeta is my secret weapon. It’s technically a two-in-one dessert: you get the fudgy richness of a chocolate cake and the creamy, eggy smoothness of a classic flan, all in one slice. The cajeta (which is basically Mexican caramel sauce) adds this nutty, goat’s milk depth that elevates it from “good homemade dessert” to “I can’t believe you made this yourself.” And the best part? It’s incredibly forgiving. You don’t need to be a pastry chef. You just need to follow the layers, and let the oven do the heavy lifting.
I’ve made this at least a dozen times since that rainy Tuesday. I’ve served it at dinner parties where people asked for the recipe three times, and I’ve made it for lazy Sunday mornings when we just want something sweet. It’s become a staple in my house, right up there with my pumpkin spice cheesecake and my cinnamon roll apple cobbler. If you’re looking for a dessert that tastes complicated but is actually simple, this is it.
Why You’ll Love This Recipe
There are a lot of desserts out there, but this Mexican Chocolate Flan Cake with Cajeta sits in a category of its own. It’s not just another cake or just another pudding. It’s a texture party. Here’s why it keeps me coming back:
- Two Desserts in One — Seriously, it’s like getting two for the price of one. You get the dense, moist crumb of a chocolate cake and the silky, custard-like texture of flan. It’s the best of both worlds. I love how the cake soaks up some of the flan mixture while baking, creating this unique, fudgy middle layer that’s unlike anything else.
- Cajeta Changes Everything — If you haven’t used cajeta yet, you’re missing out. It’s not just regular caramel. It’s made with goat’s milk, which gives it this slightly tangy, nutty flavor that cuts through the sweetness of the chocolate. It’s deeper and more complex than dulce de leche. I keep a jar in my pantry just for this recipe, and sometimes just to drizzle over vanilla ice cream.
- Make-Ahead Friendly — This is a lifesaver for hosting. You can make it the night before, let it chill in the fridge, and just flip it out when your guests arrive. It actually tastes better after it’s had time to set and chill. The flavors meld together overnight, making the chocolate even richer and the caramel more pronounced.
- Impressive but Easy — Your guests will think you spent hours on this. They’ll ask about the water bath, the flipping technique, the special ingredients. But the truth? It’s mostly just mixing and pouring. The hard part is waiting for it to bake and chill. I’ve walked my teenage daughter through this recipe, and she made it perfectly. If she can do it, you can too.
- Perfect for Any Occasion — Whether it’s a holiday dinner, a birthday, or just a Tuesday night treat, this fits. It’s rich enough to feel like a celebration but simple enough for a weeknight. I’ve served it with nothing but a dusting of powdered sugar, and it was a hit. I’ve also served it with whipped cream and fresh berries, and it was equally amazing.
This is my go-to when I want to impress without stressing. It’s reliable, delicious, and always gets a second slice.
Ingredients You’ll Need
Here’s the thing about this recipe: the ingredients are simple, but the quality matters. You don’t need anything fancy from the grocery store, but you do need to pick the right versions of a few key items. I’m particular about three things here, and I’ll tell you exactly why.
For the Cajeta (Caramel Sauce)
Cajeta (1 cup / 240ml) — This is the star. You can buy it bottled (I love the brand La Morena), or you can make it from scratch. If you make it from scratch, you’ll need milk, sugar, and a pinch of baking soda. But honestly? Buying it saves time and tastes just as good. Look for it in the international aisle or near the dulce de leche.
Condensed milk (1 can / 14oz / 397g) — Don’t substitute with evaporated milk. You need the sweetness and thickness of condensed milk for the flan base. It’s what gives it that rich, creamy texture.
Eggs (4 large) — Room temperature eggs mix better into the custard. If you’re in a rush, just drop them in warm water for 5 minutes. Don’t use cold eggs straight from the fridge; they can cause the custard to curdle.
Vanilla extract (1 teaspoon) — Use pure vanilla extract, not imitation. The flavor is subtle in the flan, but it makes a difference. I use McCormick or Nielsen-Massey for baking.
For the Chocolate Cake Batter
All-purpose flour (1 cup / 125g) — Standard flour works fine. No need for cake flour here; we want a slightly dense, fudgy cake, not a light sponge.
Cocoa powder (½ cup / 40g) — Use good quality unsweetened cocoa powder. Dutch-process cocoa gives a deeper, darker color and richer flavor, but regular natural cocoa works too. Avoid “processed with alkali” if you can’t find Dutch-process, but it’s not a dealbreaker.
Sugar (¾ cup / 150g) — White granulated sugar. Don’t use brown sugar; it will make the cake too moist and sticky in a way that doesn’t mix well with the flan.
Butter (½ cup / 115g, melted) — Unsalted butter is best so you can control the salt. Melt it and let it cool slightly before mixing. If it’s too hot, it’ll cook the eggs in the flan layer.
Milk (½ cup / 120ml) — Whole milk works best for richness. You can use 2% if you’re watching fat, but whole milk makes a better cake.
Egg (1 large) — Just one egg for the cake layer. It binds the batter without making it too eggy.
Baking powder (1 teaspoon) — Make sure it’s fresh. Old baking powder won’t give the cake the lift it needs.
Salt (¼ teaspoon) — Enhances the chocolate flavor. Don’t skip it.
Equipment Note
You’ll need a 9-inch springform pan. This is crucial because the cake needs to be released from the sides after baking. A regular round pan will make flipping it out a nightmare. I also recommend a large roasting pan for the water bath (bain-marie). If you don’t have one, a large baking dish works too.
Equipment Needed
You don’t need fancy gadgets for this. Here’s what I actually use:
- 9-inch Springform Pan — This is non-negotiable. The latch lets you remove the sides easily. Grease the bottom and sides well to prevent sticking.
- Large Roasting Pan — For the water bath. It needs to be big enough to hold the springform pan with room for water around it.
- Blender or Whisk — A blender makes the flan mixture super smooth, which is key for that silky texture. A whisk works too, but you’ll need to strain the mixture to remove any lumps.
- Measuring Cups and Spoons — Standard stuff. Be precise with the flour and cocoa.
- Colander or Fine-Mesh Sieve — If you’re whisking the flan instead of blending, you’ll need this to strain out any cooked egg bits or chalks.
- Aluminum Foil — To wrap the bottom of the springform pan. This prevents water from seeping in during the water bath. I use two layers for safety.
How to Make It: Step-by-Step
Alright, let’s make this! I’m walking you through exactly how I do it. It’s easier than it looks, but there are a few tricks to get that perfect separation of layers.
Step 1: Prep the Pan and Oven
Preheat your oven to 350°F (175°C). Take your 9-inch springform pan and grease the bottom and sides generously with butter or non-stick spray. Then, wrap the outside bottom of the pan tightly with two layers of heavy-duty aluminum foil. This is critical to keep water out during the bath. Set it aside.
Step 2: Make the Cajeta Base
Pour about ¼ cup of cajeta into the bottom of the prepared springform pan. Use a spoon or your fingers to spread it around, creating an even layer. Don’t worry if it’s not perfect; it’ll swirl up during baking. Set aside.
Step 3: Make the Flan Layer
In a blender, combine the condensed milk, eggs, vanilla extract, and the rest of the cajeta (about ¾ cup). Blend on high for 30-45 seconds until completely smooth and slightly frothy. If you’re whisking by hand, whisk vigorously until smooth. Pour this mixture over the cajeta layer in the pan. It should cover the caramel evenly.
Step 4: Make the Chocolate Cake Batter
In a separate bowl, mix the flour, cocoa powder, sugar, baking powder, and salt. In another bowl, whisk the melted butter, milk, and the single egg. Pour the wet ingredients into the dry ingredients and stir until just combined. Don’t overmix; a few lumps are fine. The batter will be thick and dark.
Step 5: Layer the Cake
This is the fun part. Drop spoonfuls of the chocolate cake batter onto the surface of the flan mixture. Don’t spread it evenly. Just dollop it around. Some people like to swirl it, but I prefer distinct blobs. The batter will sink slightly into the flan as it bakes, creating that beautiful marbled effect.
Step 6: The Water Bath
Place the springform pan inside the large roasting pan. Pour hot water into the roasting pan until it reaches about halfway up the side of the springform pan. Be careful not to splash water into the cake. The water bath creates a gentle, even heat that cooks the custard slowly without curdling it.
Step 7: Bake
Place the roasting pan in the oven and bake for 50-60 minutes. The cake is done when the edges are set and the center still has a slight jiggle (like Jell-O). It will firm up as it cools. If the top is browning too quickly, tent it loosely with aluminum foil after 30 minutes.
Step 8: Cool and Chill
Remove the springform pan from the water bath and let it cool on a wire rack for 10 minutes. Then, run a thin knife around the edge to loosen it from the sides. Carefully remove the springform ring. Let it cool completely to room temperature, then cover and refrigerate for at least 4 hours, preferably overnight. This step is crucial for the flan to set and the flavors to meld.
Step 9: The Flip
When you’re ready to serve, place a large serving plate upside down over the cake. Holding the plate and the pan together firmly, quickly flip them over. The cake should slide out onto the plate, with the cajeta layer now on top. If it doesn’t slide out completely, gently tap the bottom of the pan or run a knife around the edge again. Drizzle any remaining cajeta from the pan over the top.
Expert Tips & Tricks
Here’s everything I’ve learned from making this dozens of times. These tips will save you from my mistakes.
Don’t Skip the Water Bath
This is the most important part of the recipe. The water bath ensures the flan cooks gently and evenly. Without it, the edges might overcook while the center stays runny. If you’re worried about water leaking, wrap the pan in foil twice and place a towel at the bottom of the roasting pan for extra cushioning.
Blend Until Silky
For the smoothest flan, blend the mixture until it’s completely homogeneous. Any lumps of egg or condensed milk will result in a grainy texture. If you don’t have a blender, whisk vigorously and then strain the mixture through a fine-mesh sieve. It’s an extra step, but it’s worth it.
Chill Overnight
I know you want to eat it right away, but patience pays off. The flan needs time to set. If you flip it too soon, it might be too soft and fall apart. Overnight chilling also allows the chocolate and caramel flavors to deepen. Trust me, it’s worth the wait.
Room Temperature Ingredients
Use room temperature eggs and milk for the flan. Cold ingredients can cause the custard to separate or curdle. If you forget, just soak the eggs in warm water for 5 minutes.
Don’t Overbake
The cake should still have a slight jiggle in the center when you take it out. It will continue to cook from the residual heat as it cools. Overbaking will make the flan dry and rubbery.
Variations & Substitutions
Once you’ve nailed the basic version, here’s how you can mix it up. I’ve tried all of these.
Espresso Flan Cake
Add 1 tablespoon of instant espresso powder to the chocolate cake batter. It enhances the chocolate flavor without making it taste like coffee. This is my favorite variation for a richer, more adult dessert.
Coconut Version
Substitute the milk in the cake batter with coconut milk. Use full-fat coconut milk for richness. It adds a tropical twist that pairs beautifully with the cajeta.
Dulce de Leche Swap
If you can’t find cajeta, use dulce de leche. It’s similar but made with cow’s milk, so it’s slightly sweeter and less tangy. It still works, but the flavor profile is different.
Gluten-Free
Use a 1:1 gluten-free flour blend for the cake batter. Make sure it contains xanthan gum, or add ½ teaspoon. The texture might be slightly different, but it’s still delicious.
Dairy-Free
This is tricky because flan relies on dairy. You can use coconut condensed milk and coconut milk in the cake, but the texture will be different. It won’t set the same way. I’d recommend sticking to the original recipe for the best results.
Serving & Storage
How to Serve
I usually serve this straight from the plate, sliced into wedges. It’s rich, so a small slice goes a long way. I like to add a dollop of whipped cream on top for contrast. Fresh berries, like raspberries or strawberries, also work well to cut the sweetness. I’ve also served it with a scoop of vanilla ice cream, and it was amazing.
Storage
Refrigerator: Store leftovers in an airtight container in the fridge for up to 4 days. The cake will firm up as it sits, which is normal. Bring it to room temperature for 20 minutes before serving for the best texture.
Freezing: I don’t recommend freezing this dessert. The flan texture changes when frozen and thawed; it can become watery or grainy. It’s best enjoyed fresh or chilled.
Nutrition Information
I’m not a nutritionist, but here’s the breakdown if you’re tracking. This is a rich dessert, so portion control is key.
Per Serving (based on 8 servings):
- Calories: 380
- Protein: 8g
- Carbs: 52g
- Fiber: 2g
- Sugar: 42g
- Fat: 16g
- Saturated Fat: 9g
Look, this is a dessert. It’s sweet, rich, and indulgent. It’s not a health food. But it’s made with real ingredients, and you control what goes in. When I make it, I often serve smaller slices and pair it with fresh fruit to balance it out. Enjoy it as a special treat, not an everyday snack.
Final Thoughts
So that’s my Mexican Chocolate Flan Cake with Cajeta! I know it sounds complicated, but I promise it’s one of the easiest desserts you’ll ever make. It’s the kind of recipe that makes you feel like a pro in the kitchen, even if you’re just following instructions.
This dessert has saved my holiday dinners more times than I can count. It’s my answer to “what’s for dessert?” when I want something that feels luxurious but doesn’t require a degree in pastry arts. My family loves it, my friends beg for it, and I love making it. It’s become a tradition in our house, especially during the fall and winter months.
Make it yours! Try adding espresso powder, swap the cajeta for dulce de leche, or top it with your favorite garnish. The best recipes are the ones you adapt to your tastes. If you make this, drop a comment and let me know how it turned out! I love hearing from you. And if something doesn’t work, tell me—I’m here to help.
Happy baking! And I hope your kitchen smells like heaven when you’re done.
Frequently Asked Questions
Can I use dulce de leche instead of cajeta?
Yes, you can! Dulce de leche is very similar to cajeta, but it’s made with cow’s milk instead of goat’s milk. It’s slightly sweeter and less tangy. It still works beautifully in this recipe, though the flavor will be a bit milder. I’ve used it when I couldn’t find cajeta, and it was still delicious.
Why did my flan turn out watery?
This usually happens if the flan wasn’t baked long enough or if the water bath wasn’t hot enough. Make sure the water is simmering gently, not boiling vigorously. Also, check that your oven temperature is accurate. If the center is still runny after cooling, it might need more time in the oven next time.
Can I make this ahead of time?
Absolutely! This is actually better made ahead. You can make it up to 2 days in advance. Just cover it tightly and refrigerate. The flavors meld together overnight, making it even better. Just remember to let it sit at room temperature for 20 minutes before flipping and serving.
Why did my cake sink in the middle?
A slight sink is normal for custard-based cakes. If it sinks significantly, it might be overbaked or underbaked. Make sure you’re using the water bath correctly, and check for doneness with the jiggle test. Also, avoid opening the oven door too early, as sudden temperature changes can cause collapsing.
Can I use a regular pan instead of a springform pan?
I don’t recommend it. The springform pan is essential for releasing the cake without damaging it. If you don’t have one, you can try a regular round pan, but you’ll need to line it with parchment paper and invert it carefully. It’s riskier and more stressful. I’d buy or borrow a springform pan for this recipe.
How do I store leftovers?
Store leftovers in an airtight container in the fridge for up to 4 days. The cake will firm up as it sits. Bring it to room temperature for 20 minutes before serving for the best texture. Don’t freeze it, as the flan texture will suffer.
Pin This Recipe!
Mexican Chocolate Flan Cake with Cajeta
- Total Time: 4 hours 80 minutes
- Yield: 8 servings 1x
Description
A unique two-in-one dessert featuring a fudgy chocolate cake layer and a silky flan custard, topped with rich cajeta (Mexican caramel sauce). It is baked in a water bath for a tender texture and is make-ahead friendly.
Ingredients
- 1 cup cajeta (Mexican caramel sauce)
- 1 can (14oz / 397g) condensed milk
- 4 large eggs, room temperature
- 1 teaspoon pure vanilla extract
- 1 cup all-purpose flour
- ½ cup unsweetened cocoa powder
- ¾ cup white granulated sugar
- ½ cup unsalted butter, melted and cooled
- ½ cup whole milk
- 1 large egg
- 1 teaspoon baking powder
- ¼ teaspoon salt
Instructions
- Preheat oven to 350°F (175°C). Grease a 9-inch springform pan and wrap the outside bottom tightly with two layers of heavy-duty aluminum foil.
- Pour ¼ cup of cajeta into the bottom of the prepared pan and spread into an even layer.
- In a blender, combine condensed milk, 4 eggs, vanilla extract, and remaining ¾ cup cajeta. Blend until smooth and frothy. Pour over the cajeta layer in the pan.
- In a separate bowl, whisk together flour, cocoa powder, sugar, baking powder, and salt. In another bowl, whisk melted butter, milk, and 1 egg.
- Combine wet and dry ingredients for the cake batter, stirring until just combined. Do not overmix.
- Drop spoonfuls of chocolate cake batter onto the surface of the flan mixture. Do not spread evenly; leave as distinct dollops.
- Place the springform pan inside a large roasting pan. Pour hot water into the roasting pan until it reaches halfway up the side of the springform pan.
- Bake for 50-60 minutes until edges are set and the center has a slight jiggle. Tent with foil if browning too quickly.
- Remove from water bath and cool on a wire rack for 10 minutes. Run a knife around the edge and remove the springform ring.
- Cool completely to room temperature, then cover and refrigerate for at least 4 hours or overnight.
- To serve, place a large plate upside down over the cake, hold firmly, and flip. The cake should slide out with the cajeta on top. Drizzle with remaining sauce if desired.
Notes
The water bath is crucial for gentle cooking of the custard. Ensure eggs are at room temperature to prevent curdling. The cake must be chilled overnight for the flan to set properly. If using a blender, strain the mixture if any lumps remain. Do not freeze as the texture will become watery.
- Prep Time: 20 minutes
- Cook Time: 60 minutes
- Category: Dessert
- Cuisine: Mexican
Nutrition
- Serving Size: 1 slice
- Calories: 380
- Sugar: 42
- Fat: 16
- Saturated Fat: 9
- Carbohydrates: 52
- Fiber: 2
- Protein: 8
Keywords: Mexican chocolate flan cake, cajeta recipe, flan cake, dessert, make-ahead dessert, chocolate cake, custard, cajeta caramel