Let me tell you about the last time I tried to make dessert for a Super Bowl party. I was stressed. The living room was already buzzing with people, the smell of wings was wafting through the house, and I had decided—on a whim—that I wanted to serve something “fancy.” I pulled out a delicate fruit tart. A fruit tart. In a room full of people wearing jerseys and holding plates of nachos. It was a disaster. The tart slid off the platter, the crust got soggy from the humidity, and half my guests looked at it like it was an alien artifact. I ended up serving the actual game day food: chips, dip, and those little chocolate-covered peanut butter balls we all know and love.
That was the year I realized something crucial: Game Day desserts need to be tough. They need to survive being carried across a crowded room in a humid house, they need to be eaten with sticky fingers, and they need to taste so good that people don’t care that they’re getting chocolate on their new shirt.
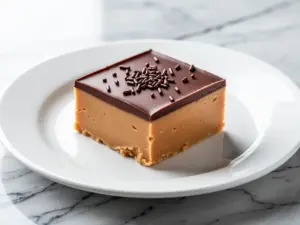
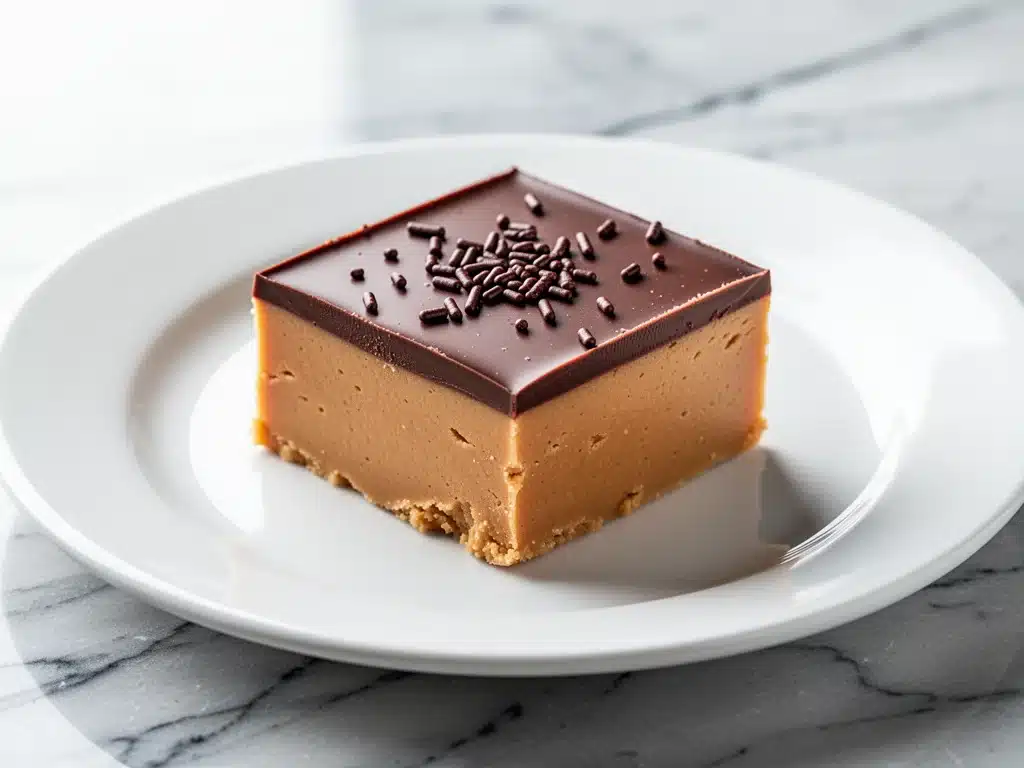
Enter the Football Season Buckeye Peanut Butter Fudge Squares. These aren’t just a dessert; they’re a game-changer. I’ve been making these for every season now—whether it’s the playoffs, the big game, or just a random Tuesday when the craving hits. They are the perfect hybrid between a chewy fudge and a classic Buckeye candy. You get that dense, rich peanut butter base with a smooth, sweet chocolate ganache on top. It’s indulgent, it’s easy, and it’s absolutely irresistible.
I’ve tested this recipe at least a dozen times over the last two football seasons. I’ve tweaked the ratios, experimented with different chocolates, and even tried making them in a loaf pan versus a square pan. This version? It’s the winner. It’s the one I bring to potlucks and the one I hide in the back of the fridge when my kids beg for “just one more.” If you’re looking for a dessert that’s as reliable as a field goal and as satisfying as a touchdown, you’re in the right place. Let’s get into the kitchen.
Why You’ll Love This Buckeye Fudge Recipe
There are a million ways to spend a Sunday watching football, but eating these Buckeye Peanut Butter Fudge Squares is definitely one of the best. I’ve made this recipe for everyone from my picky nephew (who usually only eats chicken nuggets) to my wine-drinking friends who claim they “don’t like overly sweet desserts.” Everyone comes back for seconds. Here’s why this recipe has earned a permanent spot in my rotation:
- Zero Baking Required — Seriously. If you can melt chocolate and mix a bowl, you can make this. I’ve made this while watching the game, using one hand to stir and the other to hold my drink. No oven, no mess, no waiting for things to cool down for hours.
- Make-Ahead Friendly — This is the ultimate stress-buster for hosts. You can make these three days in advance. In fact, they taste better after they’ve chilled overnight. The flavors meld together, and the texture becomes perfectly fudgy. I usually make them on Saturday morning so they’re ready for Sunday night.
- Perfectly Portioned — Cut into squares, these are the ideal size for a party. Not too big to feel guilty, not too small to be annoying. They’re substantial enough to feel like a real treat but manageable for grazing.
- Rich and Decadent — This isn’t some light, airy mousse. This is real, dense, peanut buttery goodness with a silky chocolate top. It hits that sweet spot between savory and sweet that keeps people coming back.
- Budget-Smart — You don’t need fancy ingredients. Peanut butter, chocolate chips, butter, and powdered sugar. You probably have most of this in your pantry already. It’s way cheaper than buying a box of expensive chocolates at the store.
This is my go-to when I need a dessert that just works. No complicated techniques, no weird ingredients, just reliable, delicious food that makes everyone happy. Plus, they pair perfectly with a cold beer or a coffee. Honestly, they might be even better than the actual game.
Ingredients You’ll Need
Here’s the best part: you probably have most of this already. This recipe relies on simple, pantry-friendly ingredients. The magic isn’t in exotic spices; it’s in the ratio of peanut butter to chocolate. I’m particular about three things here: the type of peanut butter, the chocolate quality, and the butter. Let’s break it down.
For the Peanut Butter Fudge Base
Creamy Peanut Butter (1 cup / 250g) — This is the star. I use a standard brand like Jif or Skippy. No natural peanut butter here! Natural peanut butter separates and has too much oil, which will make your fudge greasy and messy. You want that processed, stable creaminess. If you must use natural, freeze it first to solidify the oils, but honestly, stick to the standard stuff.
Unsalted Butter (½ cup / 115g, softened) — This adds richness and helps bind the fudge. Softened is key. If you melt it, you’ll change the texture. I take my butter out of the fridge about 20 minutes before I start. If you’re in a rush, you can microwave it for 5 seconds, but don’t turn it into soup.
Powdered Sugar (3 cups / 360g) — Also known as confectioners’ sugar. This is what gives the fudge its structure and sweetness. Don’t skip the sifting if it’s lumpy, though modern brands are usually fine. You need a smooth, lump-free base.
Vanilla Extract (1 teaspoon) — Just a splash to round out the flavors. Pure vanilla is best, but imitation works in a pinch. I keep a bottle of Nielsen-Massey on hand because I’m a vanilla snob, but it’s not mandatory.
For the Chocolate Ganache Top
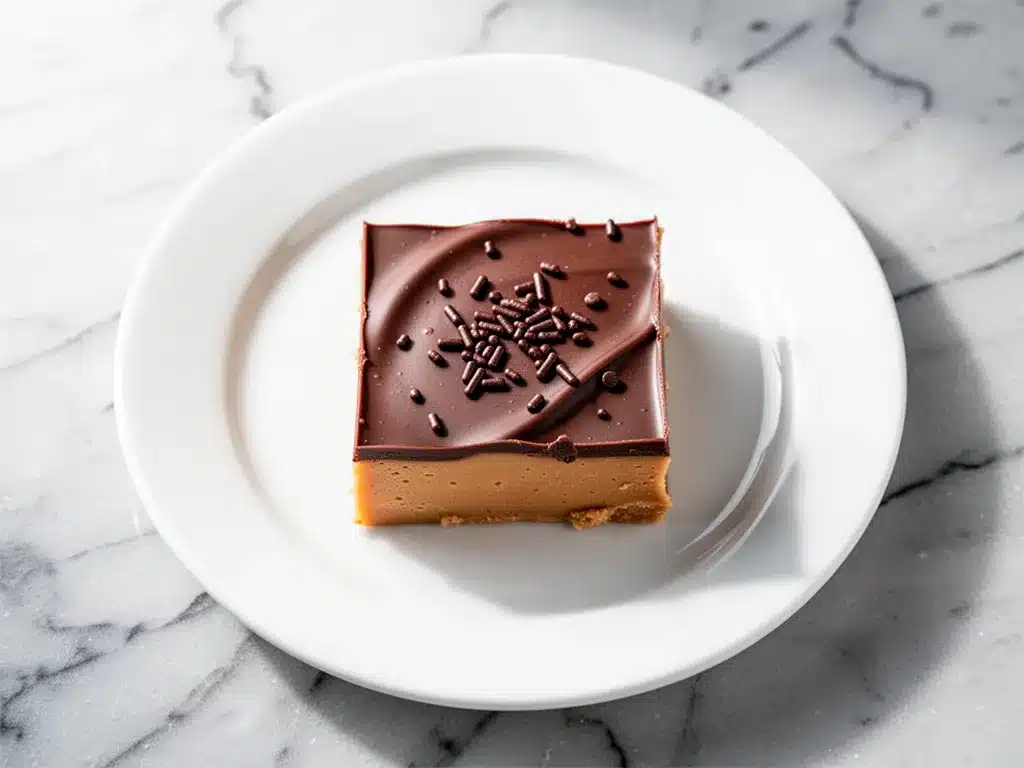
Semi-Sweet Chocolate Chips (1 cup / 170g) — I use Ghirardelli or Nestlé Toll House. Semi-sweet is the perfect balance. It’s not too bitter, and it’s not as sweet as milk chocolate. Milk chocolate might be too sweet when paired with the peanut butter. Dark chocolate chips (60% cacao) work too if you want a slightly more sophisticated, less sugary top.
Heavy Cream (½ cup / 120ml) — This creates the ganache. Full-fat only. Half-and-half won’t be rich enough, and skim milk will make it grainy. You need that fat content to create a smooth, glossy finish.
Pinch of Salt — Just a tiny pinch to enhance the chocolate flavor. It sounds weird, but trust me. It cuts the sweetness and makes the chocolate taste more like chocolate.
Optional: Crushed Peanuts — For garnish. If you want that extra crunch and visual appeal, sprinkle some chopped peanuts on top while the chocolate is still soft. I do this for parties because it looks pro.
Pro Tip: I always buy a bag of peanuts just for this. It feels fancy, and the texture contrast is amazing. But if you’re skipping it, no judgment.
Equipment Needed
You don’t need fancy equipment for this. Here’s what I actually use. Most of this is stuff you already have in your kitchen.
8×8 Inch Baking Pan — I use a glass Pyrex pan. Glass is nice because you can see the layers, but metal works too. Line it with parchment paper! I can’t stress this enough. If you don’t line it, you will struggle to get these out. Leave an overhang on the sides so you can lift the whole block out easily.
Microwave-Safe Bowl — For melting the chocolate and cream. I use a large glass measuring cup with a spout. It makes pouring the ganache much easier than a bowl. If you don’t have one, a regular bowl works, just be careful with the steam.
Large Mixing Bowl — For the peanut butter mixture. Any size works, as long as it’s big enough to mix comfortably. I use a stainless steel bowl because it’s sturdy and easy to clean.
Electric Mixer or Spatula — You can use a hand mixer, but honestly, a sturdy silicone spatula works fine. It’s a bit of an arm workout, but it’s not hard. If you have a mixer, use it on low speed. Don’t go too fast or you’ll incorporate air bubbles, and you want dense fudge, not airy mousse.
Knife or Pizza Cutter — For slicing. A sharp knife works, but a pizza cutter is my secret weapon. It makes clean cuts without squishing the fudge. If you use a knife, wipe it clean between cuts for neat squares.
Parchment Paper — Non-negotiable. I use it to line the pan and sometimes to cover the fudge while it chills. It keeps everything clean and makes cleanup a breeze.
How to Make It: Step-by-Step
Alright, let’s make this! I’m walking you through exactly how I do it, including the little tricks I’ve picked up. This is a no-bake recipe, so it’s quick, but you need to be methodical.
Step 1: Prep Your Pan (2 minutes)
Line your 8×8 inch baking pan with parchment paper. I like to lay it down in a cross pattern, like a plus sign (+), so you have overhang on all four sides. This acts as handles to lift the fudge out later. Spray the parchment lightly with non-stick spray if you want to be extra safe, though it’s usually not necessary.
Step 2: Mix the Peanut Butter Base (5-8 minutes)
In your large mixing bowl, combine the softened butter and the creamy peanut butter. If you’re using a mixer, beat them together on low until they are smooth and combined. If you’re using a spatula, just mix vigorously until there are no lumps. It should look like a uniform, creamy paste.
Now, add the powdered sugar. Add it in two or three batches. If you dump it all in at once, you’ll create a sugar cloud. Mix on low speed or stir by hand until the sugar is incorporated. It will get thick. Add the vanilla extract. Mix until everything is fully combined. The mixture should be smooth, thick, and hold its shape. If it feels too dry and crumbly, add a teaspoon more peanut butter. If it’s too sticky, add a little more powdered sugar. You want a firm, pliable dough.
Step 3: Press Into the Pan (3 minutes)
Transfer the peanut butter mixture into your prepared pan. Here’s a pro tip: use your hands. Dust your hands with a little powdered sugar to prevent sticking, then press the mixture firmly and evenly into the pan. You want it to be a solid, flat layer. Don’t just drop it in and hope for the best. Press it down hard. Use the bottom of a measuring cup to smooth the top if you want it perfectly flat. It should be about ½ inch thick.
Step 4: Chill the Base (15-20 minutes)
Pop the pan into the fridge. You need this base to firm up before you add the chocolate. If you add the ganache to soft peanut butter, it will mix together and look like a muddy mess. Chill it for at least 15 minutes. While it’s chilling, make the ganache.
Step 5: Make the Chocolate Ganache (5 minutes)
Place the chocolate chips and heavy cream in your microwave-safe bowl. Microwave on high for 1 minute. Remove and stir. If there are still unmelted chips, microwave for 30-second intervals, stirring in between, until smooth. Do not overheat! If the cream boils, it can seize the chocolate. You want it warm and glossy, not hot.
Stir in the pinch of salt. The mixture should be smooth, shiny, and pourable. If it looks too thick, add a teaspoon more cream. If it’s too thin, let it sit for a minute to cool slightly.
Step 6: Pour and Finish (2 minutes)
Take the pan out of the fridge. Pour the warm chocolate ganache over the chilled peanut butter base. Use a spatula to spread it evenly to the edges. Don’t worry about it being perfect; it’s rustic. If you’re using crushed peanuts, sprinkle them on top now. The chocolate will set quickly.
Step 7: Set and Slice (30+ minutes)
Put the pan back in the fridge for at least 30 minutes, or until the chocolate is completely set. If you’re in a rush, you can put it in the freezer for 15 minutes, but the fridge is safer so you don’t freeze the peanut butter layer too hard. Once set, lift the fudge out using the parchment paper. Place it on a cutting board. Use a sharp knife or pizza cutter to slice into squares. I cut them into 16 squares (4×4 grid), but you can make them smaller if you want more pieces.
Total Time: About 1 hour (5 minutes active, 50 minutes chilling)
Expert Tips & Tricks
Here’s everything I’ve learned from making this dozens of times. These tips will save you from my mistakes.
Use Standard Peanut Butter
I can’t say this enough. Natural peanut butter is oily. When you mix it with powdered sugar, the oil separates, and you end up with a greasy, grainy fudge that won’t hold its shape. Stick to Jif, Skippy, or store-brand creamy peanut butter. It’s the key to the right texture.
Don’t Skip the Chill
Patience is a virtue here. If you skip the chilling step for the peanut butter layer, the ganache will sink in. You want distinct layers. The cold base acts as a barrier for the warm chocolate.
Warm the Knife for Clean Cuts
If you’re struggling with messy cuts, dip your knife in hot water and wipe it dry before each cut. The heat helps slice through the cold fudge cleanly. This is a restaurant trick that works wonders.
Adjust the Sweetness
If you find the fudge too sweet, use a higher percentage dark chocolate for the ganache. The bitterness of 70% cacao balances the sweetness of the peanut butter and powdered sugar perfectly. I’ve tried it, and it’s delicious.
Storage is Key
These squares are best stored in the fridge. They keep well in an airtight container for up to a week. If you leave them out, the peanut butter can go rancid (slowly) and the chocolate can bloom. Keep them cool.
Variations & Substitutions
Once you’ve nailed the basic version, here’s how you can mix it up. I’ve tried all of these variations, and they all work.
Salted Caramel Buckeyes
Drizzle salted caramel sauce over the peanut butter layer before adding the chocolate. Or swirl some caramel into the ganache. It’s sweet, salty, and totally addictive. I made this for a Halloween party, and it was a hit.
White Chocolate Ganache
Swap the semi-sweet chips for white chocolate chips. It’s sweeter and milder, which makes the peanut butter flavor stand out more. Great for kids who don’t like dark chocolate.
Chocolate Peanut Butter Cups
Instead of spreading the peanut butter in the pan, roll it into balls. Dip half of each ball in the chocolate ganache. This is the classic Buckeye candy shape. It’s more work, but fun for parties.
Gluten-Free
This recipe is naturally gluten-free! Just make sure your chocolate chips and peanut butter are certified gluten-free (some brands process in facilities with wheat). No substitutions needed.
Reduced Sugar
Use a sugar-free powdered sugar substitute. Note: the texture will be slightly different, and it might be a bit crumblier. I haven’t tested this extensively, but it works in a pinch for low-carb diets.
Flavor Twists
Add a tablespoon of espresso powder to the chocolate ganache. It enhances the chocolate flavor without making it taste like coffee. Or add a teaspoon of cinnamon to the peanut butter layer for a warm, autumn vibe.
Serving & Storage
How to serve these squares? They’re perfect for game day, but they also travel well. Here’s how I handle them.
How to Serve:
I usually serve them straight from the fridge. Cold fudge is firm and easy to eat. I arrange them on a platter with some napkins. They’re messy, so have plenty of napkins ready. Pair them with cold coffee or milk. A hot beverage might melt them too fast.
Side Dishes:
These are dessert, so they don’t need much. But if you’re having a full game day spread, they go well with salty snacks like pretzels or chips. The sweet and salty combo is irresistible.
Storage Instructions:
Store in an airtight container in the fridge for up to 1 week. Layer them with parchment paper if you’re stacking them to prevent sticking. They freeze well too! Wrap individual squares in plastic wrap and freeze for up to 3 months. Thaw in the fridge before serving.
Reheating:
You don’t need to reheat these. In fact, don’t. They’re meant to be eaten cold or room temperature. If they get too cold and hard, let them sit out for 10 minutes before eating.
Nutrition Information
I’m not a nutritionist, but here’s the breakdown if you’re tracking. These are rich, so a little goes a long way.
Per Square (based on 16 servings):
- Calories: 220
- Protein: 5g
- Carbs: 22g
- Fiber: 1g
- Sugar: 18g
- Fat: 14g
- Saturated Fat: 6g
- Cholesterol: 15mg
- Sodium: 80mg
What’s Good:
Decent protein from the peanut butter. No baking means no added unhealthy fats from oils used in baking. It’s a simple ingredient list.
What to Know:
High in sugar and fat. It’s a treat, not a health food. Enjoy in moderation. If you’re watching your sugar, use the sugar-free substitutions mentioned above.
Final Thoughts
So that’s my go-to Football Season Buckeye Peanut Butter Fudge Squares! I’ve probably talked your ear off at this point, but when you make a recipe this often, you have a lot to say about it. This has saved my dessert game more times than I can count. It’s my answer to “what’s for dessert” when I’m tired, don’t want to bake, and still want something that tastes really good. My kids are happy, my husband’s happy, and I’m happy because I’m not stressed about cooking.
Make it yours! Try different chocolates, add crunch, or change the size. The best recipes are the ones you adapt to your family’s tastes. If you make this, drop a comment and let me know what you think! I love hearing how recipes turn out in your kitchen. And if something doesn’t work, tell me that too—I’m here to help troubleshoot.
Happy cooking! And I hope your kitchen smells half as good as mine does right now.
Frequently Asked Questions
Can I use crunchy peanut butter?
Yes, you can! I actually like crunchy peanut butter for the texture contrast. Just make sure it’s well-mixed before you start. If the peanuts are too big, you might need to mix a bit longer to distribute them evenly. It’s a personal preference, but it works great.
Why did my ganache turn grainy?
This usually happens if the chocolate was overheated. When chocolate gets too hot, the cocoa solids can separate from the fat, making it grainy. To fix this, make sure you microwave in short bursts (30 seconds) and stir well. If it’s already grainy, you can try adding a teaspoon of warm cream and whisking vigorously, but it’s hard to fix completely. Prevention is key!
Can I make these ahead of time?
Absolutely. In fact, they taste better after they’ve chilled overnight. You can make them up to 3 days in advance. Just keep them in the fridge in an airtight container. If you make them too far in advance, the chocolate might absorb fridge odors, so wrap them well.
Can I freeze these squares?
Yes! Wrap individual squares in plastic wrap and place them in a freezer-safe bag. They’ll last for up to 3 months. Thaw them in the fridge overnight before serving. Don’t thaw them at room temperature, or they’ll get too soft and sticky.
What if I don’t have an 8×8 pan?
You can use a 9×13 pan, but the layers will be thinner. Adjust the chilling time accordingly—they’ll set faster. Or, you can double the recipe to fill a 9×13 pan properly. Just keep an eye on the oven (if baking, though this is no-bake) and the fridge space.
Can I substitute the heavy cream with milk?
I wouldn’t recommend it. Heavy cream has enough fat to create a smooth ganache. Milk has too much water, which can make the chocolate seize or become grainy. If you must, use half-and-half, but heavy cream is the best choice for that silky texture.
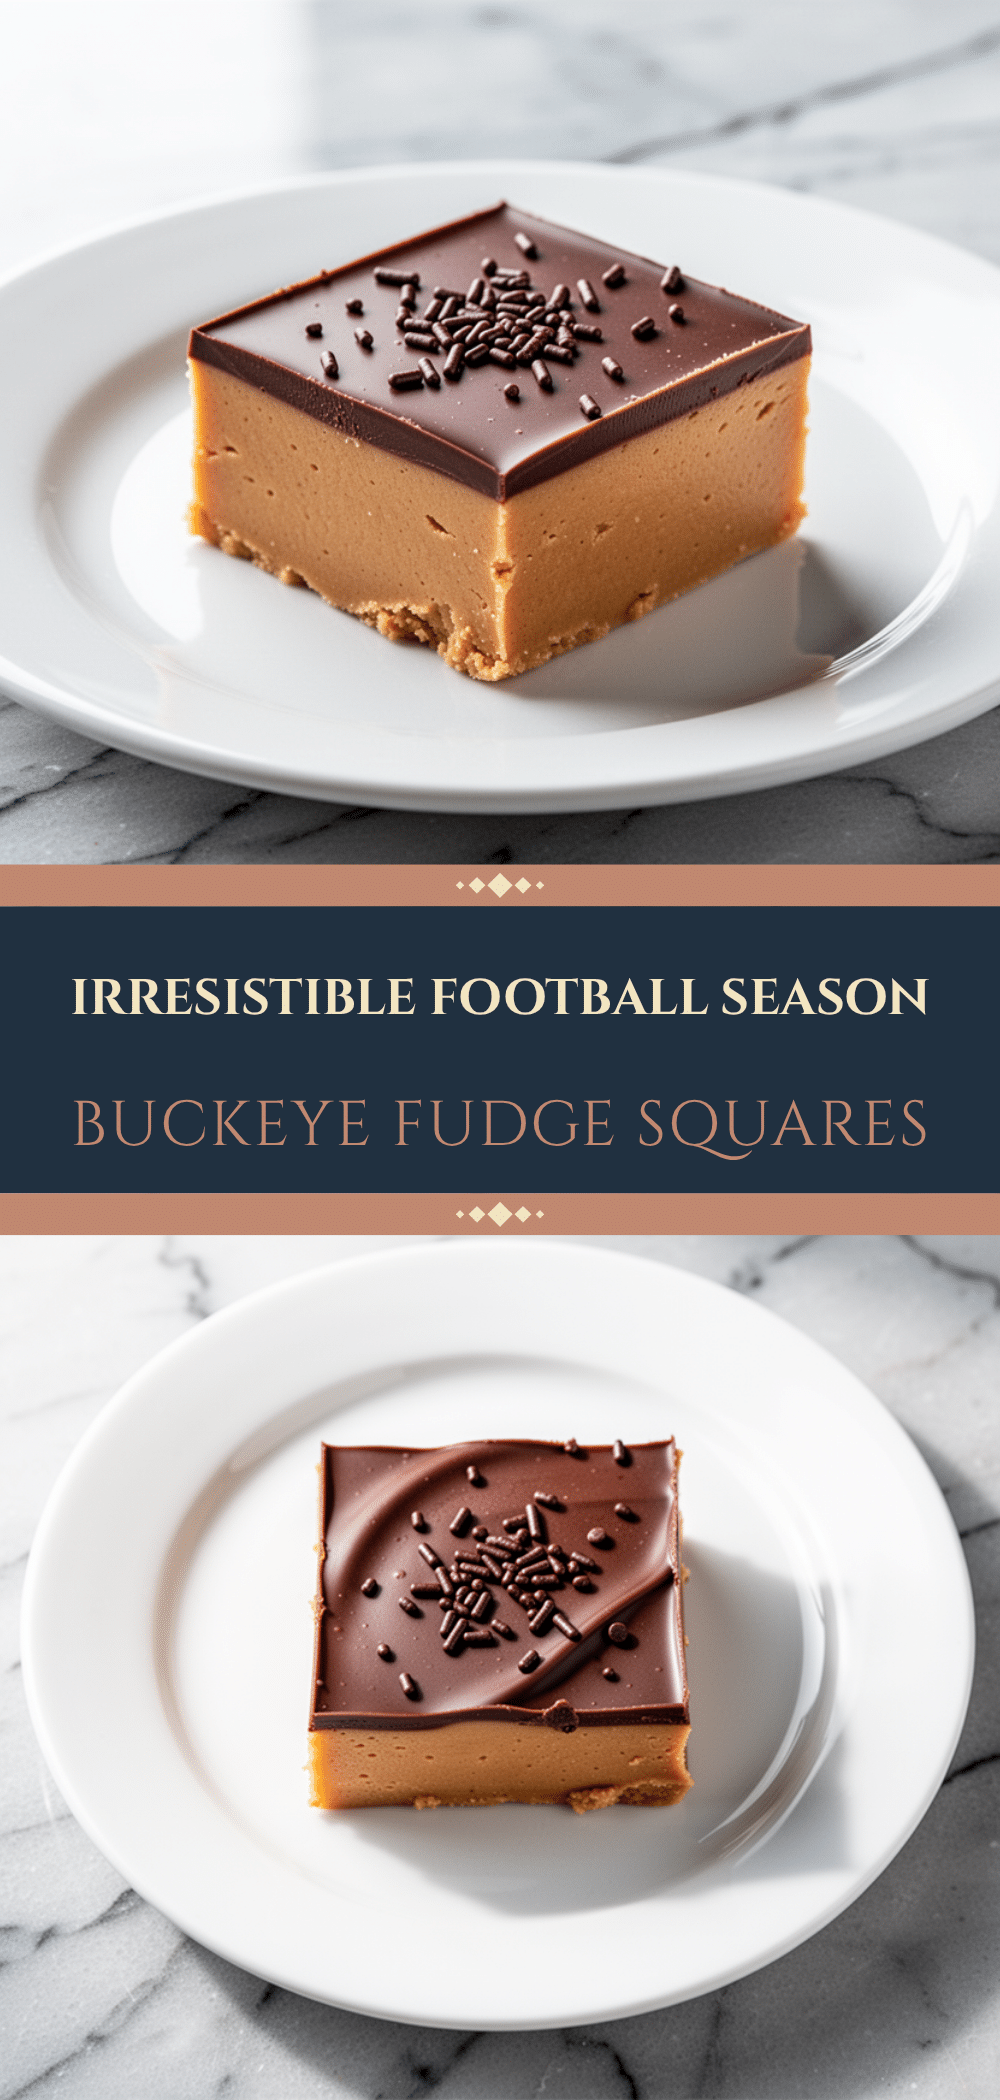
Pin This Recipe!
Football Season Buckeye Peanut Butter Fudge Squares
- Total Time: 1 hour
- Yield: 16 servings 1x
Description
A no-bake, game-day friendly dessert that combines a dense, rich peanut butter fudge base with a smooth, sweet chocolate ganache topping. These squares are easy to make, make-ahead friendly, and perfect for parties.
Ingredients
- 1 cup (250g) creamy peanut butter (standard brand like Jif or Skippy)
- 1/2 cup (115g) unsalted butter, softened
- 3 cups (360g) powdered sugar
- 1 teaspoon vanilla extract
- 1 cup (170g) semi-sweet chocolate chips
- 1/2 cup (120ml) heavy cream
- Pinch of salt
- Optional: Crushed peanuts for garnish
Instructions
- Line an 8×8 inch baking pan with parchment paper, leaving an overhang on the sides for easy removal.
- In a large mixing bowl, combine the softened butter and creamy peanut butter. Mix until smooth and uniform.
- Add the powdered sugar in batches and mix until incorporated. Stir in the vanilla extract. The mixture should be thick and hold its shape.
- Transfer the peanut butter mixture to the prepared pan. Dust hands with powdered sugar and press the mixture firmly and evenly into the pan to form a solid layer about 1/2 inch thick.
- Chill the pan in the refrigerator for 15-20 minutes to firm up the base.
- While the base chills, place chocolate chips and heavy cream in a microwave-safe bowl. Microwave on high for 1 minute, then stir. If needed, microwave in 30-second intervals until smooth and glossy. Stir in the pinch of salt.
- Remove the pan from the fridge and pour the warm chocolate ganache over the chilled peanut butter base. Spread evenly to the edges.
- If using, sprinkle crushed peanuts on top while the chocolate is still soft.
- Refrigerate for at least 30 minutes, or until the chocolate is completely set.
- Lift the fudge out of the pan using the parchment paper overhang. Slice into 16 squares using a sharp knife or pizza cutter.
Notes
Use standard creamy peanut butter, not natural peanut butter, to avoid a greasy texture. Do not skip the chilling step for the peanut butter base, or the ganache will mix into it. For clean cuts, dip your knife in hot water and wipe it dry between slices. Store in an airtight container in the fridge for up to a week.
- Prep Time: 15 minutes
- Cook Time: 0 minutes
- Category: Dessert
- Cuisine: American
Nutrition
- Serving Size: 1 square
- Calories: 220
- Sugar: 18
- Sodium: 80
- Fat: 14
- Saturated Fat: 6
- Carbohydrates: 22
- Fiber: 1
- Protein: 5
Keywords: football season, buckeye, peanut butter fudge, game day dessert, no bake, easy dessert, party food, chocolate ganache