It was 6:45 PM on a Tuesday, and I was standing in my kitchen staring at a loaf of bread that had gone slightly stale by noon. The kids had already asked for dinner twice, my husband was checking his watch, and I was convinced that buying frozen biscuits from the grocery store was my only option. I hate them. They taste like cardboard and regret. So, I decided to attempt a from-scratch recipe I’d seen online. I got impatient. I overmixed the dough. And what came out of the oven? Hard, dense hockey pucks that I couldn’t even cut with a butter knife.
I was ready to give up on homemade biscuits forever. Then, I remembered my grandmother’s rule: “Biscuits are like toddlers. Treat them gently, and they’ll behave.”
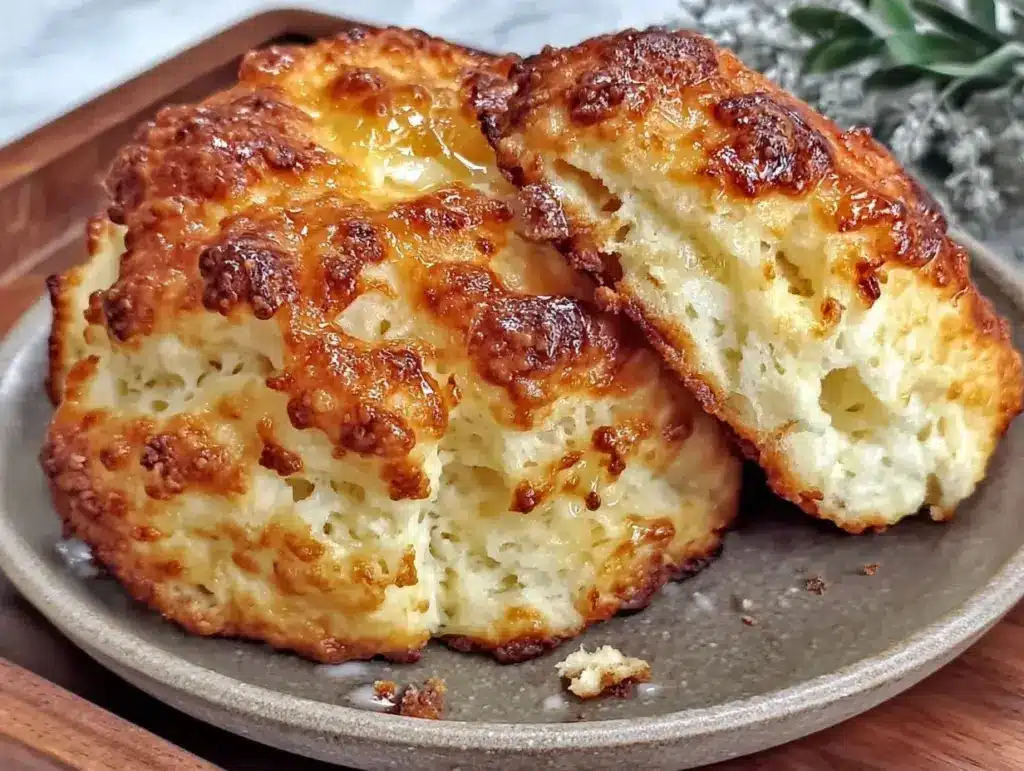
I tried again the next morning, with more coffee and more patience. This time, I followed a simple method that relies on pantry staples I already had. I didn’t need fancy buttermilk powder or expensive cultured butter. I used what I had. And when I pulled that first tray out of the oven, golden brown and fluffy, smelling like heaven, my son walked in, took one look, and said, “These are better than store-bought.” They were. Way better.
These Golden Buttermilk Biscuits have become my secret weapon for busy weeknights. They take 5 ingredients, 15 minutes of active time, and cost less than $2 to make a batch of eight. I’ve tested this recipe at least a dozen times—some mornings when I’m rushing to get the kids to school, some evenings when I need a side for cozy fall turkey chili (seriously, the combination is life-changing). I’ve even made them for breakfast with jam, or as a side for our Sunday roast. But mostly? I make them because they work. Every. Single. Time.
If you’ve been intimidated by baking, or if you think biscuits are too complicated for a weeknight, let me reassure you: they’re not. You just need to know the one trick that keeps them tender instead of tough. And once you master these golden buttermilk biscuits, you’ll never look at the refrigerated tube of dough again.
Why You’ll Love This Recipe
There are a lot of biscuit recipes out there. Some are fancy. Some require a stand mixer. Some need ingredients you have to drive to three different stores to find. This one? It’s the opposite. It’s practical, affordable, and ridiculously delicious. Here’s why this batch of golden buttermilk biscuits has earned a permanent spot in our weekly rotation:
- Stupid Simple Ingredients — Seriously, you probably have everything in your pantry right now. Flour, baking powder, salt, butter, and buttermilk. That’s it. No weird flours, no expensive cheeses, no complicated techniques. If you can scoop and pour, you can make these.
- Lightning Fast — From start to finish, these take about 20 minutes. I’m talking 5 minutes of prep, 10 minutes of baking, and 5 minutes of cooling. I’ve made these after getting home from work at 7 PM, and they were ready before the TV even turned on. Perfect for when you’re hungry and impatient.
- Budget-Friendly — Making biscuits from scratch saves you so much money compared to the fancy bakery ones, and way more than the store-bought tubes. A batch of eight costs me about $1.50 to $2.00. That’s pennies per biscuit. When you’re feeding a family, those savings add up fast.
- Kid-Approved — My picky eaters, who usually turn their noses up at anything that isn’t fried, love these. They’re soft, buttery, and not too sweet. I serve them plain with butter, or with a little honey. They disappear in minutes. I’ve also paired them with our roasted red pepper and smoked gouda soup for a cozy meal that feels like a hug.
- Make-Ahead Friendly — Here’s the best part: you can make the dough ahead of time. I often mix the dry ingredients and cut in the butter on Sunday, then refrigerate it. When I need dinner, I just scoop and bake. Or, you can freeze the raw biscuits and bake them straight from frozen later. It’s like having fresh biscuits on tap.
Real talk: these biscuits are my answer to “what’s for dinner?” when I’m tired. They’re comforting, they’re cheap, and they make my house smell amazing. You don’t need to be a baker to make these. You just need to be willing to try.
Ingredients You’ll Need
Here’s the good news: you don’t need to go to the store for this. Most of these ingredients are pantry staples. I’m not going to lie to you—quality matters a little bit here, but you don’t need to buy the most expensive stuff. You just need to be smart about what you pick up.
For the Dough:
All-purpose flour (2 cups / 250g) — Don’t use cake flour or bread flour. All-purpose is the sweet spot. It gives you that tender crumb without being too chewy. I use Gold Medal or King Arthur, but any brand works. Just don’t scoop it too tightly, or your biscuits will be dry.
Baking powder (1 tablespoon / 15g) — This is what makes them rise. Make sure it’s fresh! If your baking powder has been sitting in the back of the cupboard since 2021, toss it. Test it by dropping a teaspoon in hot water—if it doesn’t fizz, it’s dead. Dead baking powder means flat biscuits.
Salt (1 teaspoon / 6g) — Essential for flavor. Don’t skip it. I use kosher salt, but table salt works too. Just use a little less if you’re using table salt.
Unsalted butter (½ cup / 115g, cold and cubed) — This is the most important ingredient. The butter creates the flaky layers. It MUST be cold. If it’s melted, you’re making a cake, not a biscuit. I keep a stick in the fridge specifically for baking. You can use salted butter, but reduce the salt in the recipe to ½ teaspoon.
Buttermilk (¾ cup / 180ml) — This is what gives them that tangy flavor and tender texture. If you don’t have buttermilk, you can make a substitute: add 1 tablespoon of white vinegar or lemon juice to a measuring cup, then fill the rest with whole milk. Let it sit for 5 minutes until it curdles. It’s not exactly the same, but it works in a pinch. I love the real deal, though.
For Topping:
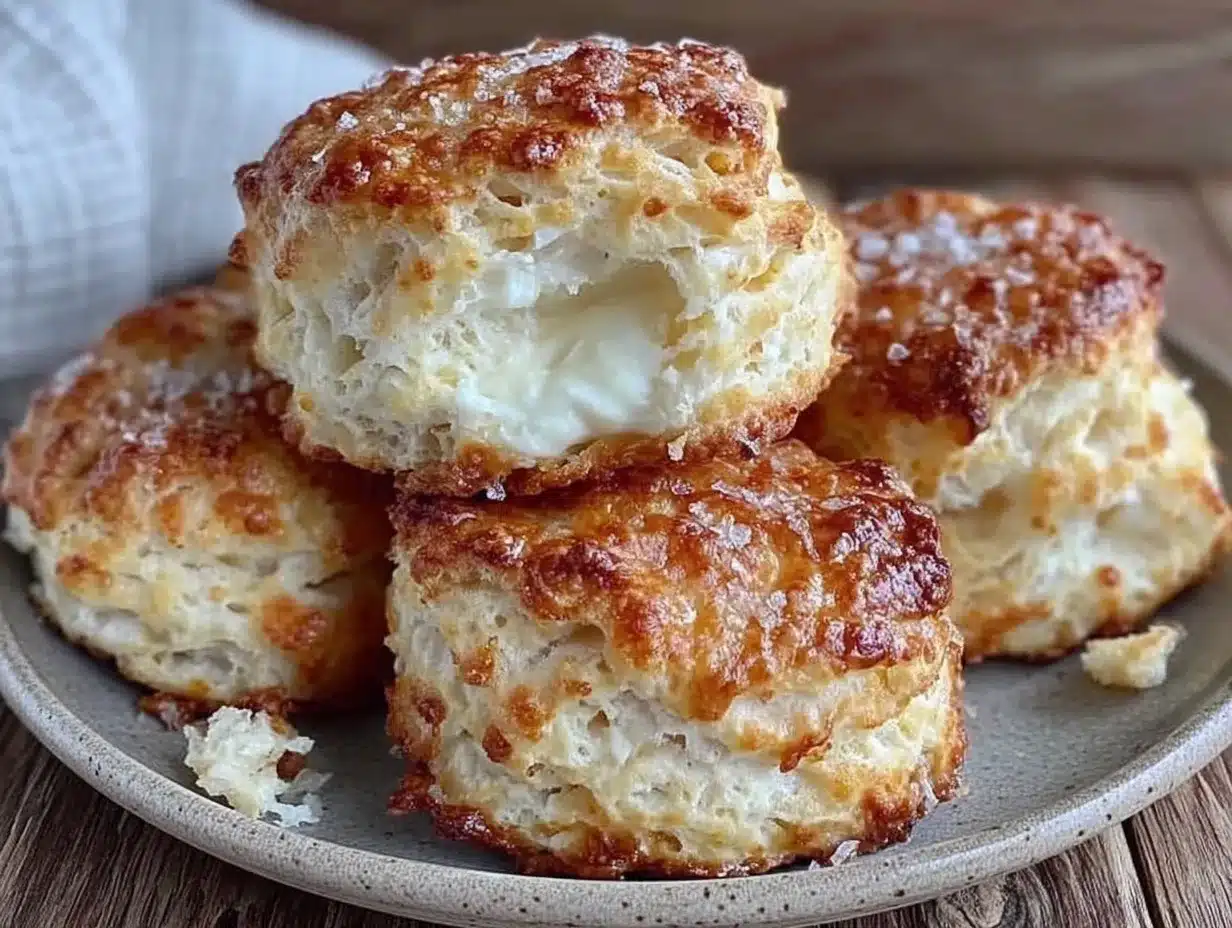
Melted butter (¼ cup / 60g) — For brushing on top after baking. It adds that golden color and rich flavor. I use salted butter here because it tastes better.
Optional: Honey or Jam — For serving. I keep a jar of local honey on the table. It’s perfect for drizzling over warm biscuits.
Equipment Needed
You don’t need fancy gadgets. Here’s what I actually use in my kitchen:
Bowl (large) — I use a big mixing bowl. Anything that can hold 3 cups of ingredients comfortably. A glass or ceramic bowl works best.
Fork or Pastry Cutter — To cut the butter into the flour. I use a fork because it’s what I have on hand. A pastry cutter is easier, but not necessary. I’ve also used my hands when I’m in a rush, but be quick so the butter doesn’t melt.
Baking Sheet — I use a standard half-sheet pan. Line it with parchment paper for easy cleanup. I don’t grease it because the butter in the dough is enough.
Rolling Pin — Optional, but helpful. I actually just pat the dough out with my hands. It’s faster and less stressful. If you use a rolling pin, make sure it’s clean and dry.
Biscuit Cutter or Glass — I use a 2-inch biscuit cutter. If you don’t have one, use a drinking glass. Just dip the rim in flour so it doesn’t stick. Don’t twist the cutter when you press down—that seals the edges and stops them from rising.
Brush — For the melted butter topping. A silicone brush works great, or you can just use a spoon.
How to Make It: Step-by-Step
Alright, let’s make these biscuits! I’m going to walk you through exactly how I do it, including the little tricks I’ve learned over the years. This method is foolproof if you follow it.
Step 1: Prep Your Oven and Pan (2 minutes)
Preheat your oven to 425°F (220°C). This high heat is crucial. It creates steam quickly, which helps the biscuits rise tall and golden. Line your baking sheet with parchment paper. I don’t grease it, but if you’re worried about sticking, you can lightly spray it with non-stick spray.
Step 2: Mix the Dry Ingredients (2 minutes)
In your large bowl, whisk together the flour, baking powder, and salt. I like to whisk it for a full minute to make sure the baking powder is evenly distributed. If it’s not mixed well, you’ll get some biscuits that rise and some that don’t. It’s a small step, but it makes a big difference.
Step 3: Cut in the Butter (3-4 minutes)
Add the cold, cubed butter to the flour mixture. This is the key step. Use your fork, pastry cutter, or fingers to work the butter into the flour. You want the mixture to look like coarse crumbs with some pea-sized chunks of butter remaining. Those chunks of butter are what create the flaky layers. Don’t overmix here. If the butter is all gone and the mixture looks like sand, your biscuits will be dense. Stop when you see little bits of butter.
Step 4: Add the Buttermilk (1 minute)
Pour in the buttermilk. Use a fork or a spatula to gently mix it in. Just until the dough comes together. It will look shaggy and messy. That’s okay. Do not overmix. If you keep stirring, the gluten will develop, and your biscuits will be tough. Stop as soon as there are no dry spots left.
Step 5: Pat and Cut (3 minutes)
Turn the dough out onto a lightly floured surface. Pat it out with your hands or a rolling pin to about ¾-inch thickness. Don’t roll it too thin, or they’ll be flat. Don’t roll it too thick, or they’ll be doughy in the middle. Once it’s at the right thickness, use your biscuit cutter or glass to cut out rounds. Press straight down. Do not twist. Twist the cutter, and you seal the edges, which prevents rising.
Step 6: Bake (12-15 minutes)
Place the biscuits on the prepared baking sheet, leaving about an inch between them. If you want taller biscuits, stack two rounds on top of each other before baking. I do this sometimes for extra fluffiness. Bake for 12-15 minutes, or until they are golden brown on top. If they’re browning too fast, cover them loosely with foil. If they’re still pale after 15 minutes, give them another 2-3 minutes.
Step 7: Brush and Serve (2 minutes)
While the biscuits are baking, melt your topping butter. As soon as the biscuits come out of the oven, brush them generously with the melted butter. This gives them that shiny, golden crust and adds flavor. Serve them warm. They’re best eaten fresh, but they’re still good the next day.
Expert Tips & Tricks
Here’s everything I’ve learned from making these golden buttermilk biscuits dozens of times. These tips will save you from my mistakes.
- Keep Everything Cold — This is the #1 rule. Cold butter, cold buttermilk, cold hands (if possible). If the butter melts before it hits the oven, you lose the flaky layers. I even chill my bowl and flour before starting if it’s a hot day. It’s a small effort that makes a huge difference.
- Don’t Overmix — I know I said this twice, but it’s that important. Mix until just combined. Lumps are good. Lumps mean tender biscuits. Smooth dough means tough biscuits.
- Use a Biscuit Cutter, Not a Knife — If you cut with a knife, you compress the edges. A round cutter leaves the edges loose, which allows the biscuit to rise evenly. If you don’t have a cutter, use a glass. Just make sure the rim is floured.
- Stack Them for Height — If you want those tall, bakery-style biscuits, cut two rounds and stack them on top of each other before baking. They’ll rise together into one tall, fluffy biscuit. My kids love these the best.
- Freeze the Dough — If you’re making these ahead of time, you can scoop the dough onto a baking sheet and freeze it solid. Then transfer to a bag. When you’re ready to bake, just put the frozen dough on the pan and add 2-3 minutes to the bake time. It’s a lifesaver for meal prep.
Variations & Substitutions
Once you’ve nailed the basic version, here’s how you can mix it up. I’ve tried all of these, and they all work.
- Cheesy Biscuits — Add ½ cup of shredded cheddar cheese to the dry ingredients before adding the butter. These are amazing with our cozy fall chicken and dumplings. The cheese adds a nice savory kick.
- Herb Biscuits — Add 1 tablespoon of dried chives or parsley to the flour. Great with soups or salads. It adds a fresh flavor without being overpowering.
- Garlic Biscuits — Add 1 teaspoon of garlic powder to the dry mix. These are perfect for dipping in tomato soup. My husband requests these weekly.
- Gluten-Free — Use a 1-to-1 gluten-free flour blend. The results are slightly different—less flaky, more cake-like—but still delicious. I use Bob’s Red Mill or King Arthur’s blend.
- Dairy-Free — Use coconut oil instead of butter (keep it cold and solid), and use soy or oat buttermilk. The flavor is slightly different, but the texture is still good.
Serving & Storage
These biscuits are best fresh out of the oven, but let’s be real—leftovers happen. Here’s how to handle them.
Serving Suggestions: I serve these plain with butter, or with honey. They’re also amazing with jam, or as a side for autumn sweet potato casserole. For a full breakfast, pair them with scrambled eggs and bacon. They’re versatile enough for any meal.
Storage: Store leftover biscuits in an airtight container at room temperature for up to 2 days. They’ll stay soft if you keep them sealed. Do not refrigerate them—they’ll get stale faster.
Reheating: To reheat, wrap them in a damp paper towel and microwave for 20-30 seconds. Or, bake them at 350°F for 5 minutes. They’ll taste almost as good as fresh. Don’t try to freeze baked biscuits—they lose their texture. Freeze the raw dough instead.
Nutrition Information
I’m not a nutritionist, but here’s the breakdown if you’re tracking. Per biscuit (based on 8 biscuits):
- Calories: 280
- Protein: 5g
- Carbs: 32g
- Fat: 14g
- Fiber: 1g
- Sugar: 1g
- Sodium: 350mg
Look, these are biscuits. They have butter and flour. They’re not a diet food. But they’re made from simple ingredients, and they’re way better than the processed stuff from the store. When I make them, I try to keep portions reasonable, but I also enjoy them. That’s the balance.
Final Thoughts
So that’s my go-to golden buttermilk biscuits recipe! I know I’ve talked a lot about them, but when you make a recipe this often, you have a lot to say. These biscuits have saved my weeknight dinners more times than I can count. They’re my answer to “what’s for dinner?” when I’m tired, don’t want takeout, and still want something that tastes really good. My kids are happy, my husband’s happy, and I’m happy because I’m not stressed about cooking.
Make them yours! Try different add-ins, swap in your favorite herbs, or just enjoy them plain. The best recipes are the ones you adapt to your family’s tastes. If you make these, drop a comment and let me know what you think! I love hearing how recipes turn out in your kitchen. And if something doesn’t work, tell me that too—I’m here to help troubleshoot.
Happy cooking! And I hope your kitchen smells half as good as mine does right now.
Frequently Asked Questions
Can I use milk instead of buttermilk?
You can, but the biscuits will be less tender and lack that tangy flavor. If you must use milk, add 1 tablespoon of vinegar or lemon juice to the milk and let it sit for 5 minutes to curdle. This creates a buttermilk substitute. It’s not exactly the same, but it works in a pinch. I prefer the real thing, though.
Why are my biscuits dense?
Usually, this means you overmixed the dough or the butter was too warm. Remember: mix until just combined, and keep the butter cold. Also, make sure your baking powder is fresh. Old baking powder won’t make them rise.
Can I make these ahead of time?
Yes! You can mix the dough, scoop it onto the baking sheet, and freeze it. Once frozen, transfer to a bag. When you’re ready to bake, put the frozen dough on the pan and bake at 425°F for 15-18 minutes. It’s a great meal-prep hack.
How do I store leftovers?
Store in an airtight container at room temperature for up to 2 days. Do not refrigerate. Reheat in the microwave with a damp paper towel for 20-30 seconds.
Can I double this recipe?
Absolutely! Double everything and use a larger bowl. The cooking time stays the same. Just make sure your baking sheet isn’t overcrowded. You might need two sheets.
Why did my biscuits spread instead of rise?
This usually happens if the butter was too soft or the oven wasn’t hot enough. Make sure your oven is fully preheated to 425°F, and keep the butter cold until the moment it hits the pan.
Pin This Recipe!

Golden Buttermilk Biscuits: 5 Easy Pantry Ingredients
- Total Time: 20 minutes
- Yield: 8 servings 1x
Description
Fluffy, golden homemade buttermilk biscuits made with just 5 simple pantry ingredients. Ready in 20 minutes, these budget-friendly biscuits are tender, buttery, and perfect for any meal.
Ingredients
- 2 cups (250g) all-purpose flour
- 1 tablespoon (15g) baking powder
- 1 teaspoon (6g) salt
- ½ cup (115g) unsalted butter, cold and cubed
- ¾ cup (180ml) buttermilk
- ¼ cup (60g) melted butter (for topping)
- Honey or jam (optional, for serving)
Instructions
- Preheat oven to 425°F (220°C). Line a baking sheet with parchment paper.
- In a large bowl, whisk together the flour, baking powder, and salt for one minute to ensure even distribution.
- Add the cold, cubed butter to the flour mixture. Use a fork, pastry cutter, or fingers to work the butter into the flour until the mixture resembles coarse crumbs with pea-sized chunks of butter remaining.
- Pour in the buttermilk. Gently mix with a fork or spatula just until the dough comes together and there are no dry spots. Do not overmix.
- Turn the dough out onto a lightly floured surface. Pat it out to about ¾-inch thickness. Cut out rounds using a 2-inch biscuit cutter or glass, pressing straight down without twisting.
- Place biscuits on the prepared baking sheet, leaving about an inch between them. For taller biscuits, stack two rounds on top of each other.
- Bake for 12-15 minutes, or until golden brown on top. Cover loosely with foil if browning too quickly.
- While baking, melt the topping butter. As soon as biscuits come out of the oven, brush them generously with the melted butter.
- Serve warm.
Notes
Keep all ingredients cold for flaky layers. Do not overmix the dough to avoid tough biscuits. If you don’t have buttermilk, substitute with milk plus 1 tablespoon of vinegar or lemon juice per cup, let sit for 5 minutes. Biscuits can be frozen raw and baked from frozen, adding 2-3 minutes to bake time. Do not refrigerate baked biscuits as they will stale faster.
- Prep Time: 5 minutes
- Cook Time: 12-15 minutes
- Category: Side Dish
- Cuisine: American
Nutrition
- Serving Size: 1 biscuit
- Calories: 280
- Sugar: 1
- Sodium: 350
- Fat: 14
- Saturated Fat: 8
- Carbohydrates: 32
- Fiber: 1
- Protein: 5
Keywords: buttermilk biscuits, homemade biscuits, easy biscuit recipe, pantry staples, quick dinner, gluten-free option, dairy-free option



