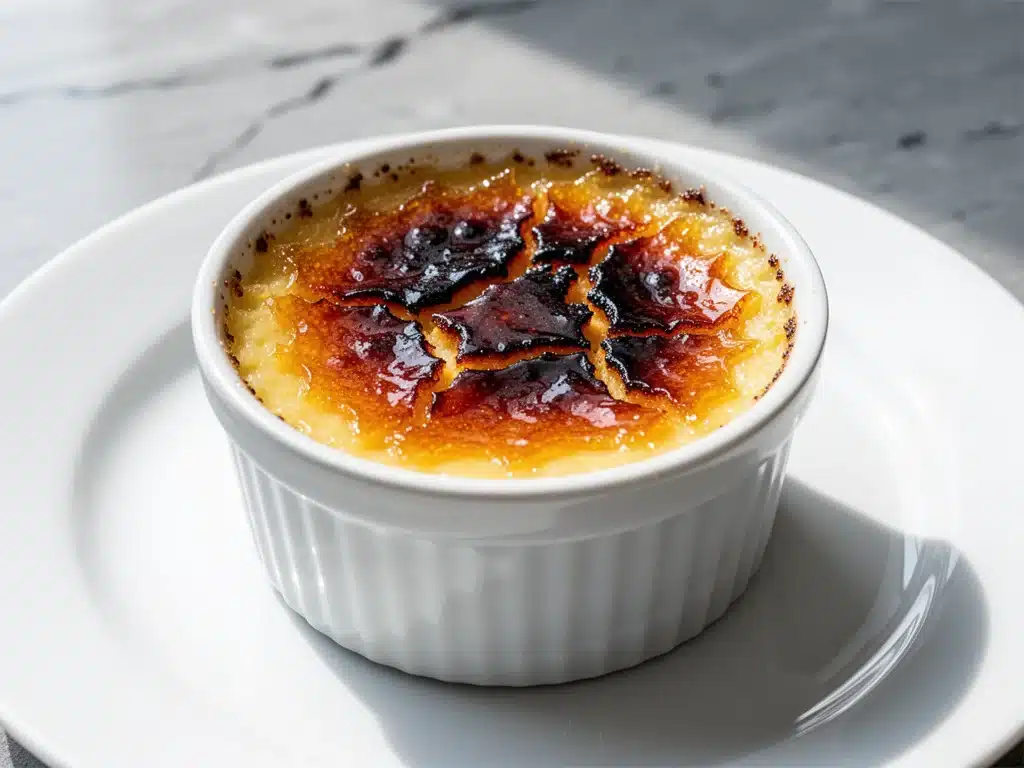
I still remember the first time I made crème brûlée for my in-laws. I was twenty-four, trying way too hard to impress a family that already thought I was “the one who doesn’t know how to cook.” I had watched a few fancy cooking shows, grabbed some ramekins from my good china drawer, and went for it. The custard came out perfect—silky, vanilla-infused heaven. But then came the torching part. I panicked. I held the flame too close, for too long, and watched in horror as my beautiful custards developed cracks. The tops weren’t the glass-like sheets I’d seen in restaurants; they were jagged, burnt islands floating on vanilla pudding. I served them anyway, sweating through my shirt, while my mother-in-law politely tapped her spoon and said, “Well, it’s… crunchy.”
That failure haunted me for years. Every time I saw crème brûlée on a menu, I’d order it just to prove to myself that I could do it. But it wasn’t until last winter, during a particularly cold and lazy weekend, that I finally cracked the code. I wasn’t trying to impress anyone. I was just craving something rich and comforting. I decided to treat the recipe like a science experiment, adjusting variables one by one: the oven temperature, the sugar thickness, the cooling time. I made it seven times in two weeks. Six were good. The seventh? It was perfect. That crackly, glass-shattering top. The contrast of cold, creamy vanilla custard against hot, bitter caramel. It’s the kind of dessert that makes you close your eyes and sigh.
This foolproof crème brûlée isn’t about fancy techniques or expensive equipment. It’s about understanding a few simple rules that prevent cracking, curdling, and watery bottoms. Once you get the hang of it, you’ll realize that making restaurant-quality dessert at home is actually easier than making a complicated weeknight dinner. And honestly? It’s way more fun than scrubbing pots. I’ve included some tips on how to pair this with other treats, like these cinnamon roll apple cobbler, if you’re hosting a big holiday meal where you need multiple desserts to wow the crowd.
Why You’ll Love This Recipe
There are about ten reasons I keep coming back to this recipe, but here are the big ones that make it my absolute favorite dessert to make when I want to feel like a professional chef without the stress.
It’s Actually Foolproof — Seriously, the “bain-marie” (water bath) method sounds intimidating, but it’s just a fancy way of saying “put your ramekins in a hot water bath.” It keeps the oven temperature gentle so the eggs don’t scramble. I’ve made this recipe for beginners who swore they couldn’t boil water, and they’ve all come back with perfect custards. The key is patience, and I’ll walk you through exactly why that matters.
The Texture is Unbeatable — I’m obsessed with the contrast. The custard should be as smooth as silk, but the top needs to shatter. Not just a hard crust, but a true glass-like sheet. When you tap the spoon, you want to hear that satisfying *crack*. It’s the most rewarding part of the entire process. I’ve tried different sugars and torching methods, and this specific ratio is the only one that gives you that restaurant-standard snap without tasting like burnt sugar.
You Can Make It Ahead — This is the secret weapon for hosts. The custard needs to chill for at least four hours, preferably overnight. That means you can make it on Tuesday morning, and it’s ready for Friday night dinner. The torching is the only part you do right before serving, which takes about 30 seconds per ramekin. It’s the ultimate low-stress dessert strategy. Unlike my pumpkin spice cheesecake, which needs to be served fresh, this one actually improves in the fridge as the flavors meld.
It Feels Fancy But Costs Little — You don’t need a pastry degree or a $200 torch. You need heavy cream, egg yolks, sugar, and vanilla. That’s it. Four ingredients. You probably have three of them in your kitchen right now. It’s expensive to buy at a restaurant ($12-$15 per person), but making it at home costs about $4 total. That’s a win in my book.
It’s Customizable — While classic vanilla is king, this base is a blank canvas. Swap the vanilla bean for espresso, stir in some chocolate, or add a splash of liqueur. I’ve even made a savory version with rosemary for appetizers, but let’s stick to the sweet stuff for now.
Ingredients You’ll Need
Here’s the best part: this recipe doesn’t require a trip to a specialty grocery store. The ingredients are simple, but the quality matters. Since there are only four main ingredients, each one has to pull its weight. I’m particular about a few things here, and I’ll tell you exactly why.
For the Custard
Heavy Cream (2 cups / 480ml) — Do not substitute with half-and-half or milk. You need the high fat content to create that rich, velvety texture. If you use low-fat dairy, the custard will be watery and lack body. I buy the small cartons of heavy cream for this, and I usually freeze the leftovers for coffee or baking. Look for cream that is at least 36% fat.
Egg Yolks (5 large / about 90g) — We’re using yolks, not whole eggs. The fat in the yolk is what emulsifies the cream and gives the custard its structure. If you use whole eggs, the custard will be jiggly and runny. Five yolks is the perfect ratio for two cups of cream. I save the whites for macarons or angel food cake, so nothing goes to waste.
Vanilla Bean (1 whole) or High-Quality Vanilla Extract (2 teaspoons) — I always recommend using a real vanilla bean if you can find one. Split it, scrape the seeds, and toss the pod in with the cream while heating. It adds those beautiful black specks and an intense, floral flavor. If you’re using extract, make sure it’s pure vanilla, not imitation. Imitation vanilla tastes chemical and harsh in a delicate dessert like this. I keep a jar of dark chocolate raspberry truffles nearby for when I need a quick chocolate fix, but for this, vanilla is the star.
Granulated White Sugar (½ cup / 100g) — This goes into the custard. White sugar dissolves completely and doesn’t add any color or flavor, letting the vanilla shine. Brown sugar would make it too molasses-heavy. Don’t skimp on the sugar; it’s not just for sweetness, it’s for texture. Too little sugar, and the custard is rubbery.
For the Topping
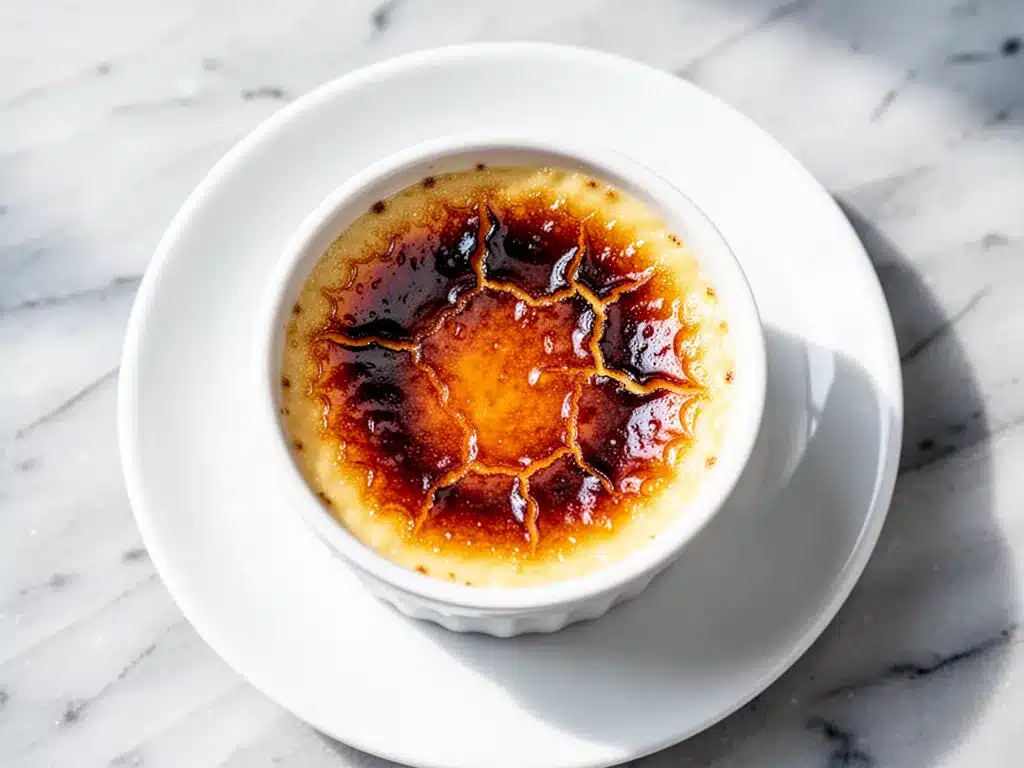
Superfine Sugar (or regular granulated) (about ¼ cup per ramekin) — This is the caramel layer. Superfine sugar (also called baker’s sugar or caster sugar) melts faster and more evenly, giving you a smoother glass top. If you don’t have it, you can pulse regular granulated sugar in a blender or food processor for 10 seconds. It’s a quick hack that makes a huge difference. Do not use brown sugar for the top—it contains moisture and will make a sticky, chewy toffee instead of a crisp glass.
Optional: A Pinch of Salt — Adding a tiny pinch of sea salt to the custard mixture enhances the vanilla flavor. It’s a pro trick that balances the sweetness. I always keep flaky sea salt on hand for finishing touches.
Substitutions & Tips
Can I use a different sugar? — For the topping, no. White sugar is essential for that clear, crackly finish. For the custard, you can use coconut sugar, but it will darken the custard and add a caramel note that changes the flavor profile.
What if I don’t have a torch? — You can use the broiler in your oven, but it’s harder to control. You’ll need to put the ramekins on the top rack and watch them like a hawk. The torch gives you precision, but the broiler works in a pinch.
Brand Recommendations: — I use Land O’Lakes heavy cream because it’s consistent. For vanilla beans, I prefer Madagascar Bourbon beans for their rich, creamy flavor. They’re pricier, but you only need one per batch.
Equipment Needed
You don’t need a fancy kitchen to make this. Here’s what I actually use, and what you can substitute.
Ramekins (6-8 small, about 6oz each) — Ceramic ramekins are traditional because they hold heat well. I use small ones because they look elegant and the portion size is perfect. You can use larger ones, but you’ll need to adjust the baking time. Make sure they are oven-safe. I’ve also made this in a single 9-inch pie dish if I’m feeding a crowd, but individual servings are more impressive.
Saucepan — Medium-sized. For heating the cream. I prefer stainless steel because it heats evenly, but heavy-bottomed non-stick works too. Just make sure it’s clean—any leftover residue can affect the flavor.
Whisk — A standard wire whisk is perfect for blending the eggs and sugar smoothly. I use a silicone spatula to scrape the bowl to get every bit of mixture.
Kitchen Torch — This is the tool that makes the magic happen. I have a small, handheld torch that cost about $15 at a department store. It’s lightweight and easy to handle. You don’t need a professional-grade one. Just make sure it has a steady flame. I keep mine in a drawer, and it’s always ready to go.
Deep Roasting Pan or Casserole Dish — For the water bath. This needs to be large enough to hold your ramekins with space between them for water to circulate. I use a 9×13 baking dish. It’s deep enough to hold the water without overflowing.
Strainer (Optional but Recommended) — A fine-mesh strainer helps remove any bits of cooked egg or vanilla bean pod fragments, ensuring a perfectly smooth custard. I always strain my custard before pouring it into the ramekins. It’s an extra step, but it guarantees that silky texture.
Blender or Food Processor — For making superfine sugar if you don’t have it. Just a quick pulse is all you need.
How to Make It: Step-by-Step
Alright, let’s make this! I’m walking you through exactly how I do it, including the little tricks I’ve picked up over the years. This process takes about 45 minutes of active time, plus chilling time. Don’t let the chilling time scare you—it’s mostly hands-off.
Step 1: Prep Your Oven and Ramekins (5 minutes)
Preheat your oven to 325°F (165°C). This is a low temperature, which is crucial. High heat will scramble the eggs. Place your ramekins inside a deep roasting pan or large baking dish. We’ll add water to this later. Set this aside for now. While the oven heats, get your saucepan ready.
Step 2: Heat the Cream and Vanilla (5 minutes)
Pour the heavy cream into the saucepan. If using a vanilla bean, split it lengthwise with a sharp knife. Use the tip of the knife to scrape out the tiny black seeds. Add both the seeds and the empty pod to the cream. If using extract, wait until later. Heat the cream over medium-low heat. You’re looking for a gentle simmer—small bubbles around the edges. Do not let it boil vigorously. Once it’s hot, remove it from the heat. If using extract, stir it in now. Let the cream steep for 10 minutes. This allows the vanilla flavor to infuse into the fat. If you’re impatient, you can skip the steep, but the flavor won’t be as deep.
Step 3: Whisk Eggs and Sugar (3 minutes)
In a medium bowl, whisk the egg yolks and the ½ cup of white sugar together. Whisk vigorously for about 2 minutes. You want the mixture to become pale yellow and slightly thickened. This incorporates air and dissolves the sugar completely. If you don’t do this, you might get grainy sugar in the finished custard. I usually whisk until my arm feels a little tired. It’s worth it.
Step 4: Temper the Eggs (2 minutes)
This is the most important step to prevent curdling. Slowly pour about ½ cup of the hot cream into the egg mixture while whisking constantly. This raises the temperature of the eggs gradually. Then, pour the egg mixture back into the saucepan with the rest of the cream, whisking constantly. This ensures everything is combined smoothly. Do not skip this. If you pour the hot cream all at once, you’ll make scrambled eggs in a saucepan.
Step 5: Strain and Pour (5 minutes)
Place a fine-mesh strainer over a large measuring cup or bowl. Pour the custard mixture through the strainer to catch any bits of cooked egg or vanilla bean pod. This guarantees a silky smooth texture. Carefully pour the strained custard into the ramekins. Fill them almost to the top, leaving about ¼ inch of space. If any bubbles form on the surface, pop them with a knife or spoon. Smooth the tops with the back of a spoon.
Step 6: The Water Bath (Bain-Marie)
Place the roasting pan with the ramekins into the oven. Carefully pour boiling water into the pan until it comes halfway up the sides of the ramekins. The water should be hot to help the cooking process along. Be careful not to splash water into the custard. The water bath creates a gentle, moist heat environment that cooks the custard evenly.
Step 7: Bake (35-45 minutes)
Bake for 35-45 minutes. The custards are done when the edges are set but the centers still jiggle slightly when you shake the pan. They should look like jiggly gelatin, not liquid. If the centers are still very liquid, bake for another 5-10 minutes. Overbaking will cause cracks and a rubbery texture. I usually check at 35 minutes. The goal is a soft set, not firm.
Step 8: Cool and Chill (4 hours minimum)
Remove the ramekins from the water bath. Let them cool at room temperature for 30 minutes. Then, cover them tightly with plastic wrap and refrigerate for at least 4 hours, preferably overnight. This chilling time is essential for the custard to fully set and for the flavors to meld. I usually make this the night before I plan to serve it.
Step 9: Torch the Sugar (2 minutes per ramekin)
Just before serving, take the ramekins out of the fridge. Sprinkle a thin, even layer of superfine sugar over the top of each custard. Use about 1-2 teaspoons per ramekin. Tap off any excess sugar. Light your kitchen torch. Hold the flame about 2-3 inches away from the sugar. Move the flame in a circular motion to melt the sugar evenly. You’re looking for the sugar to bubble and turn a deep amber color. Don’t burn it! It should be a light golden brown. Once caramelized, let it sit for 30 seconds to harden. It will turn back into a glass-like sheet almost instantly.
Expert Tips & Tricks
Here’s everything I’ve learned from making this dozens of times. These tips will save you from my mistakes.
Don’t Skip the Strainer — I know it’s an extra step, but it’s the difference between “good” and “amazing.” Any little bits of cooked egg will ruin the smooth texture. Straining is non-negotiable for this recipe.
The Water Bath Level — Make sure the water is hot when you add it to the pan. Cold water will lower the oven temperature and extend cooking time, which can lead to overcooking. Also, don’t fill the pan too high. You want the water halfway up the ramekins, not splashing over the top.
How to Tell When It’s Done — The jiggle test is your best friend. The custard should wobble like Jell-O, not slosh like water. If it’s firm, you’ve overbaked it. It will continue to cook slightly from residual heat as it cools, so pull it out when it’s still a bit jiggly in the center.
Torching Technique — Keep the flame moving. If you hold it in one spot, you’ll burn the sugar. You want an even color. If you see dark spots, you’re holding it too long. The sugar melts quickly, so work fast. If you mess up, you can scrape off the burnt sugar and try again, but it’s better to get it right the first time.
Storage — Once torched, the sugar coating will start to dissolve if it sits too long. Serve immediately after torching. If you make ahead, store the untorched custards in the fridge for up to 3 days. Torch right before serving.
Avoiding Condensation — When you take the ramekins out of the fridge, wipe the outside dry. If there’s moisture on the surface, the sugar won’t stick properly. Use a paper towel to gently pat the top if needed.
Variations & Substitutions
Once you’ve nailed the basic version, here’s how you can mix it up. I’ve tried all of these, and they all work.
Chocolate Crème Brûlée — Add 2 ounces of melted dark chocolate to the warm cream mixture before tempering the eggs. This creates a rich, mocha-like flavor. It’s my personal favorite. I pair it with a few raspberries for a pop of color.
Espresso Crème Brûlée — Dissolve 1 tablespoon of instant espresso powder into the hot cream. This adds a deep coffee flavor that pairs beautifully with the vanilla. It’s perfect for coffee lovers.
Lavender Crème Brûlée — Add 1 tablespoon of dried culinary lavender to the cream while heating. Let it steep, then strain it out before mixing with the eggs. It adds a floral, sophisticated note. I love this for spring desserts.
Caramel Crème Brûlée — Swirl 1 tablespoon of salted caramel sauce into the custard before baking. It creates beautiful ribbons of caramel throughout. This is a crowd-pleaser.
Dairy-Free Version — Use full-fat coconut cream instead of heavy cream. The custard will be slightly firmer and have a coconut flavor. It works surprisingly well, especially with chocolate or espresso variations. I’ve made this for friends with dairy allergies, and they loved it.
Gluten-Free — This recipe is naturally gluten-free, so no changes needed. Just make sure your vanilla extract and sugar are certified gluten-free if you have celiac disease.
Serving & Storage
I usually serve this straight from the fridge, with the torching done right at the table. It’s a fun, interactive dessert. Here are some ideas for serving it.
How to Serve
Classic — Just the crème brûlée. The simplicity is the point. Maybe a mint leaf on top for color.
With Fruit — Fresh berries (strawberries, raspberries, blueberries) are perfect on the side. The acidity cuts through the richness. I often serve it with a small bowl of mixed berries.
With Pastry — A piece of lemon bar or a caramel pecan sticky bun can be served alongside if you’re having a big dessert spread. But honestly, the crème brûlée is usually the star.
Storage Instructions
Refrigerator — Store untorched custards in the fridge for up to 3 days. Cover tightly with plastic wrap to prevent them from absorbing fridge odors. The sugar topping should be added just before serving.
Freezing — I don’t recommend freezing crème brûlée. The texture of the custard can become grainy or watery after thawing. The sugar topping will also dissolve. It’s best made fresh.
Reheating — Do not reheat. Serve cold. The contrast between the cold custard and hot caramel is key.
Pro Tip
If you’re serving a crowd, make the custards in a large dish and slice it into portions. Then torch the sugar on top of each portion. It’s faster and easier than torching individual ramekins. The texture is the same, and it’s less stressful.
Nutrition Information
I’m not a nutritionist, but here’s the breakdown if you’re tracking. This is a rich dessert, so portion control is key.
Per Serving (based on 6 ramekins):
- Calories: 380
- Protein: 6g
- Carbs: 28g
- Fiber: 0g
- Sugar: 26g
- Fat: 28g
- Saturated Fat: 17g
- Cholesterol: 180mg
- Sodium: 45mg
What’s Good:
– High in protein from the egg yolks
– Gluten-free naturally
– No refined flour
What to Know:
– High in saturated fat due to heavy cream
– High in sugar
– Calorie-dense
My Take:
“Look, this is crème brûlée. It’s a treat. It’s not a health food. But it’s made with simple, real ingredients. When I make it, I enjoy a small ramekin and savor it. It’s better than a processed dessert because I know exactly what’s in it. If you’re watching your sugar, reduce the topping sugar by half, but it won’t crack as nicely.”
Final Thoughts
So that’s my foolproof crème brûlée! I know it sounds complicated, but once you try it, you’ll see how simple it really is. It’s the kind of dessert that makes you feel like a pro, even if you’re just a home cook like me. I’ve made this for birthdays, anniversaries, and random Tuesdays, and it never fails to impress. The crackly top is the best part—it’s the sound of success.
Make it yours! Try different flavors, use different ramekins, or serve it with your favorite fruit. The best recipes are the ones you adapt to your tastes. If you make this, drop a comment and let me know how it turned out. I love hearing about your kitchen adventures. And if something doesn’t work, tell me that too—I’m here to help troubleshoot.
Happy cooking! And I hope your kitchen smells as good as mine does right now. There’s nothing quite like the smell of vanilla and caramelized sugar.
Frequently Asked Questions
Can I use a broiler instead of a torch?
Yes, you can, but it’s trickier. Place the ramekins on the top rack of your oven and turn the broiler to high. Watch them closely—they can go from perfect to burnt in seconds. Rotate the pan halfway through if your broiler has hot spots. The torch gives you more control, but the broiler works in a pinch.
Why did my crème brûlée crack?
Cracks usually happen if the custard is overbaked or cooled too quickly. Make sure you pull it out when it’s still jiggly in the center. Also, avoid placing it in the freezer to cool it down. Let it cool at room temperature first, then refrigerate. Slow cooling helps prevent cracks.
Can I make this ahead of time?
Yes! In fact, it’s better if you make it ahead. The custard needs to chill for at least 4 hours, preferably overnight. You can make it up to 3 days in advance. Just don’t add the sugar topping until you’re ready to serve it.
Why is my custard watery?
This usually happens if you didn’t bake it long enough or if you didn’t use enough egg yolks. Make sure you’re using the correct ratio of eggs to cream. Also, check your oven temperature. If it’s too low, the custard might not set properly.
Can I use brown sugar for the topping?
I don’t recommend it. Brown sugar contains molasses, which adds moisture. This will create a sticky, chewy toffee layer instead of a crisp, glass-like crust. Stick to white granulated or superfine sugar for the best results.
How do I fix a burnt sugar topping?
If you burn the sugar, scrape it off with a knife and start again. You can also try to salvage it by sprinkling a little more sugar over the burnt area and torching it gently, but it’s usually easier to just scrape and restart.
Can I make this in a larger dish?
Yes, you can make it in a 9-inch pie dish or a large casserole dish. Adjust the baking time to 45-55 minutes, and check for doneness with the jiggle test. Torch the sugar over the entire surface before slicing.
Pin This Recipe!
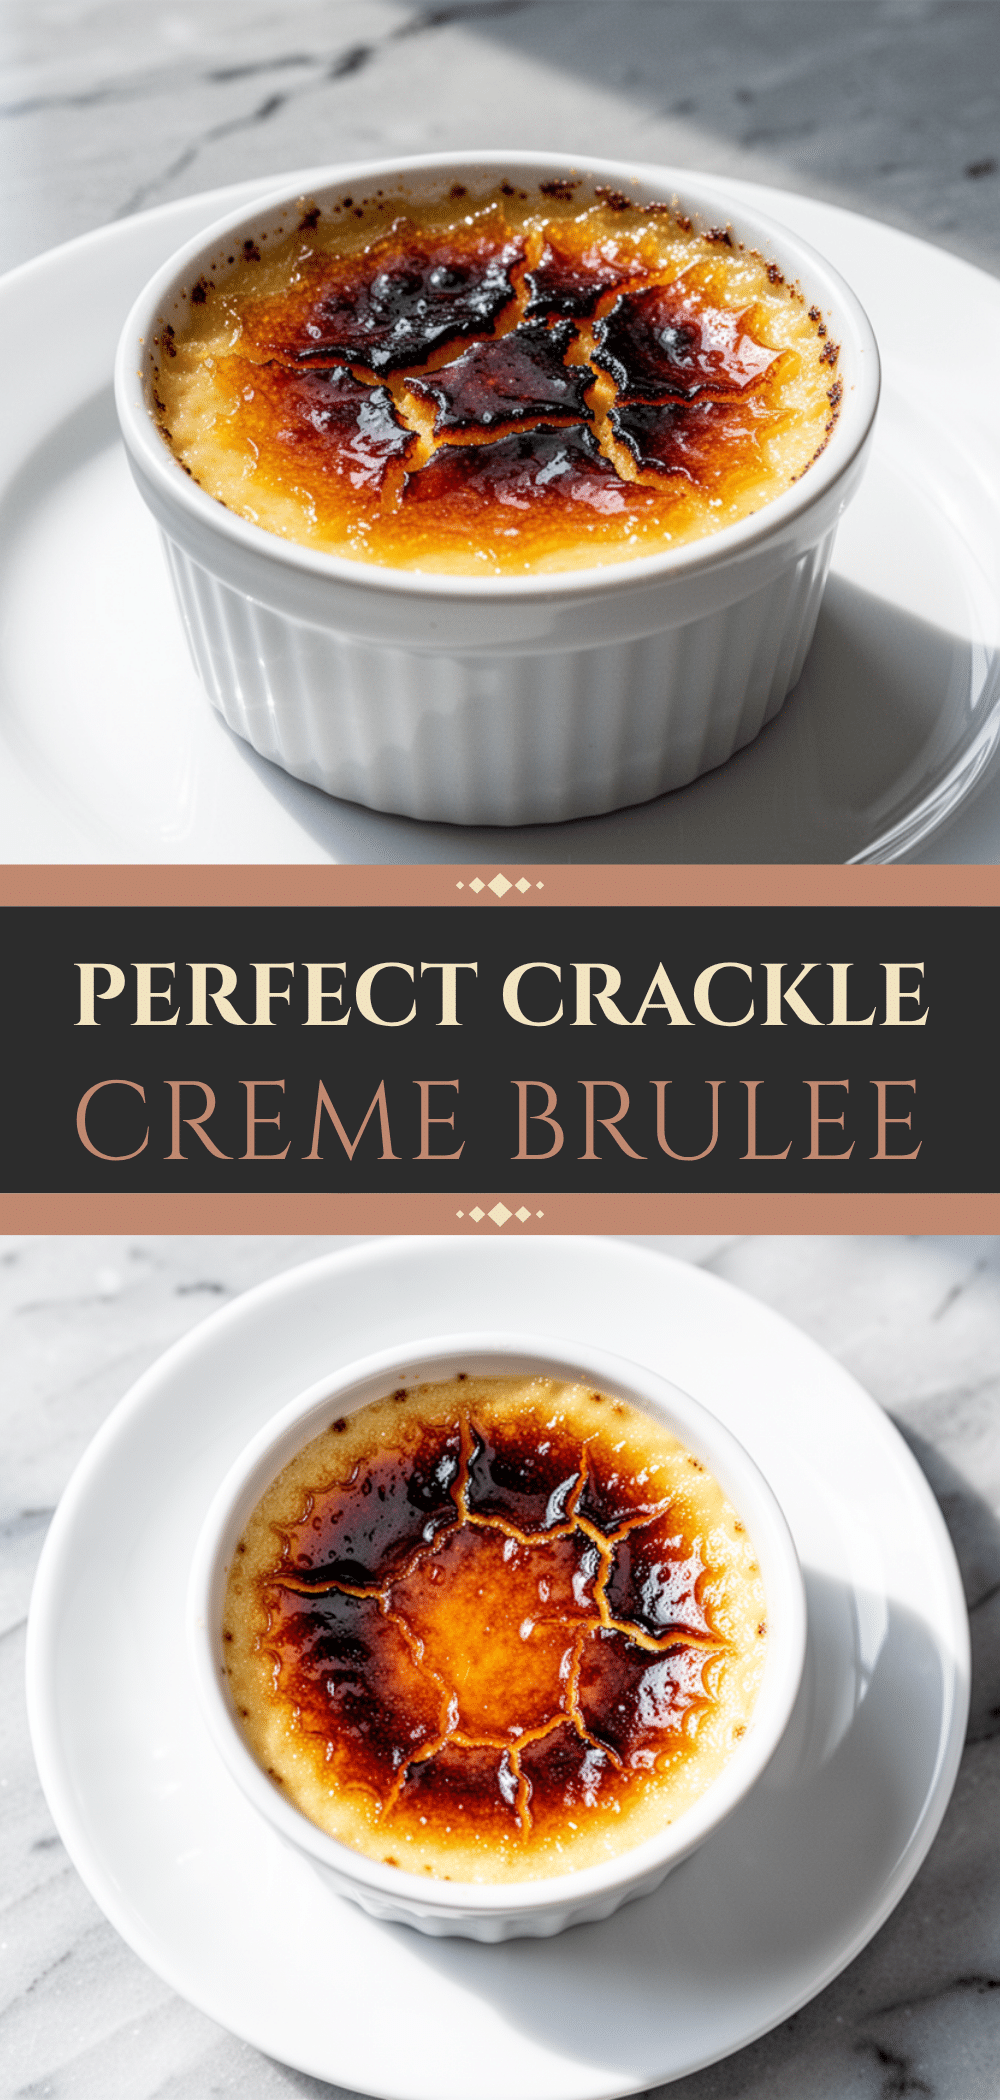
Foolproof Creme Brulee: Easy Crackly Caramelized Top
- Total Time: 4 hours 60 minutes
- Yield: 6 servings 1x
Description
A foolproof recipe for classic vanilla crème brûlée featuring a silky, smooth custard and a perfectly crackly, glass-like caramelized sugar top. This dessert is easy to make ahead and requires only a few simple ingredients.
Ingredients
- 2 cups (480ml) Heavy Cream (at least 36% fat)
- 1 whole Vanilla Bean (split and scraped) OR 2 teaspoons High-Quality Vanilla Extract
- 5 large Egg Yolks (about 90g)
- ½ cup (100g) Granulated White Sugar
- ¼ cup Superfine Sugar (or regular granulated pulsed in blender) per ramekin for topping
- Pinch of Sea Salt (optional)
Instructions
- Preheat oven to 325°F (165°C). Place ramekins inside a deep roasting pan or large baking dish.
- Pour heavy cream into a saucepan. If using a vanilla bean, add seeds and pod. Heat over medium-low until gently simmering (do not boil). Remove from heat and let steep for 10 minutes. Stir in vanilla extract if using.
- In a medium bowl, whisk egg yolks and ½ cup white sugar vigorously for 2 minutes until pale and thickened.
- Slowly temper the eggs by whisking in about ½ cup of the hot cream. Then pour the egg mixture back into the saucepan with the rest of the cream, whisking constantly.
- Strain the custard mixture through a fine-mesh strainer into a measuring cup to remove any cooked egg bits or vanilla pod fragments.
- Pour the strained custard into the ramekins, filling almost to the top. Pop any surface bubbles.
- Place the roasting pan in the oven and carefully pour boiling water into the pan until it comes halfway up the sides of the ramekins (water bath).
- Bake for 35-45 minutes until edges are set but centers still jiggle slightly. Do not overbake.
- Remove ramekins from the water bath and let cool at room temperature for 30 minutes.
- Cover tightly with plastic wrap and refrigerate for at least 4 hours, preferably overnight.
- Just before serving, sprinkle a thin, even layer of superfine sugar over each custard. Tap off excess.
- Torch the sugar until it bubbles and turns deep amber/golden brown. Let sit for 30 seconds to harden into a glass-like sheet before serving.
Notes
The water bath is crucial for gentle cooking to prevent curdling. Ensure the custard is jiggly like Jell-O when removed from the oven, as it will set further while cooling. Do not freeze the finished dessert as the texture may become grainy. The sugar topping should be added immediately before serving to maintain the crackly texture.
- Prep Time: 15 minutes
- Cook Time: 45 minutes
- Category: Dessert
- Cuisine: French
Nutrition
- Serving Size: 1 ramekin
- Calories: 380
- Sugar: 26
- Sodium: 45
- Fat: 28
- Saturated Fat: 17
- Carbohydrates: 28
- Protein: 6
Keywords: crème brûlée, vanilla custard, caramelized sugar, French dessert, easy dessert, make ahead dessert, gluten-free dessert



