
Last autumn, I was standing in my kitchen at 9 PM on a Tuesday, feeling that specific brand of exhaustion that comes from a long work week and a house that still needs tidying. I didn’t want anything complicated. I didn’t want to bake a cake that required three bowls and a whisk. I just wanted something that tasted like childhood but felt like a proper dessert. Something warm, chewy, and undeniably comforting.
I pulled out the old box of oatmeal cookies I used to love, but I wanted more. I wanted that nostalgic, pillowy marshmallow center that you get in those classic cream pies, but I wanted it homemade. So, I started experimenting. I tried too much flour. I tried under-baking them until they were raw in the middle. I tried marshmallow fluff that was too sweet and didn’t hold its shape. It took me about five attempts to get it right, but the sixth time? I pulled a tray out of the oven and immediately wanted to give one to my neighbor.
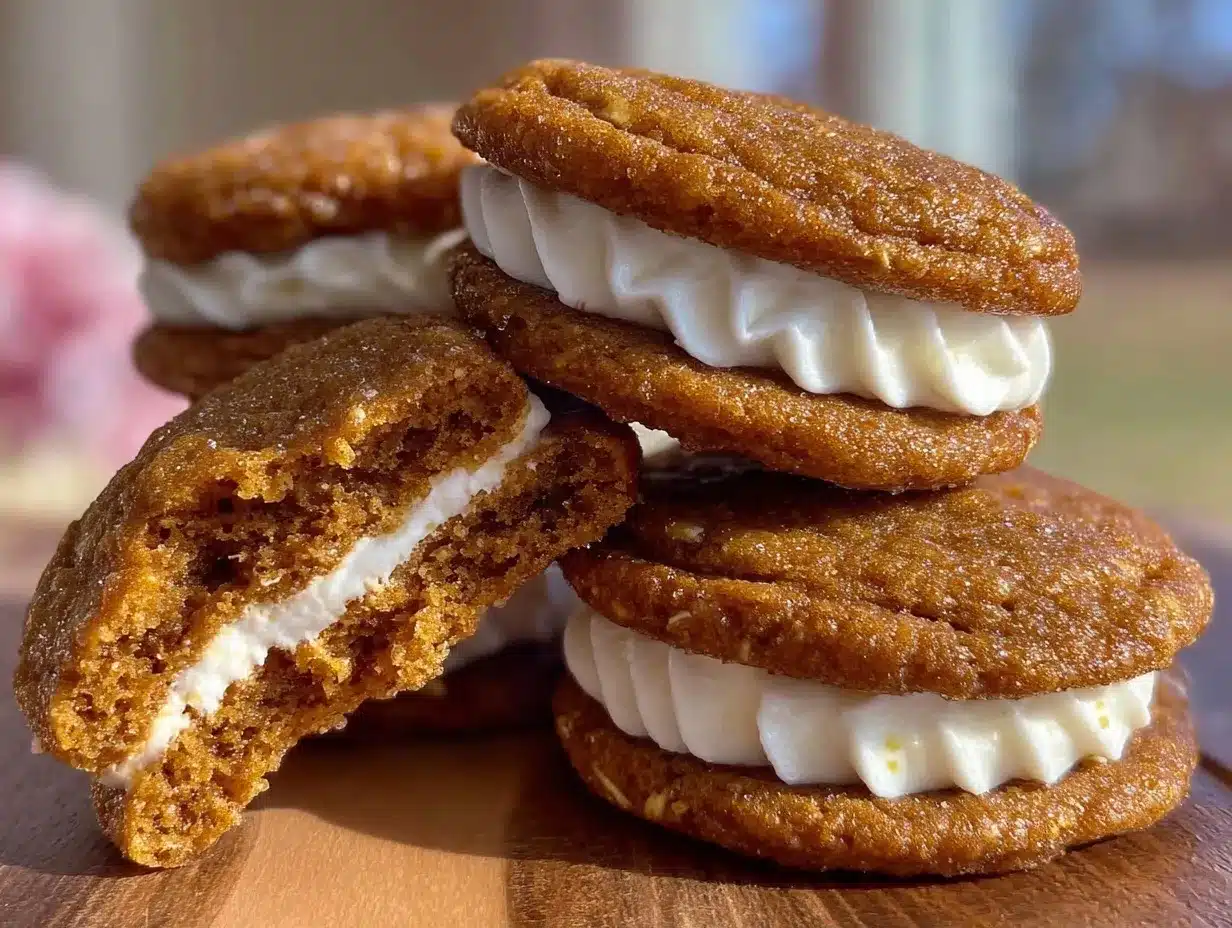
That was the moment I knew I had struck gold. These chewy brown sugar oatmeal cream pies have become my go-to comfort bake. They’re soft, spiced with warm cinnamon, and filled with a homemade marshmallow fluff that’s actually stable enough to hold its own. If you’ve ever wanted to impress friends with a treat that tastes like it came from a fancy bakery but is actually easier to make than pumpkin spice rice krispie treats, you need to try this recipe. It’s the ultimate cozy bake for when you need a hug in cookie form.
Why You’ll Love This Recipe
There are a dozen reasons I keep coming back to these oatmeal cream pies, but here’s the real talk: they solve the problem of wanting a fancy dessert without the fuss.
They’re Stupidly Chewy — Seriously. The secret is the brown sugar. It keeps these cookies moist for days. I’ve left one on my counter for three days (I know, I know, bad habits), and it was still soft. Not dry, not crumbly. Just perfectly chewy.
The Filling is Homemade Magic — Most people use store-bought marshmallow fluff, and don’t get me wrong, it’s fine. But making your own? It’s a game-changer. It’s not overly sweet, and it has this incredible silkiness that you just can’t buy. Plus, it’s easier than you think. You just whisk sugar and syrup over heat. No fancy thermometers required.
They Taste Like Fall in Every Bite — The cinnamon and brown sugar combination is classic for a reason. It smells like autumn in your kitchen. If you love the vibe of fall caramel apple cider sangria, you’ll love how these cookies capture that same spiced, warm feeling. It’s a flavor profile that just makes you feel calm.
Perfect for Gifting — Because they hold their shape well (thanks to that sturdy cookie base), they’re amazing in a tin. I wrapped a dozen in cellophane and tied them with twine for a host gift last week. The recipient said it was the best gift they’d received all year. Easy win.
They’re Better Than Store-Bought — I’m not ashamed to admit I used to buy the generic brands. But once you make these, you’ll never go back. The texture is superior, the flavor is deeper, and the marshmallow isn’t waxy. It’s real, fluffy, and delicious.
This recipe is my answer to “what’s for dessert?” when I want something that feels special but doesn’t require a degree in pastry arts. It’s reliable, it’s tasty, and it makes your house smell amazing.
Ingredients You’ll Need
Here’s the best part: you probably have most of this already in your pantry. I’m particular about a few things, but for the most part, this is standard baking fare.
For the Chewy Oatmeal Cookies
Unsalted butter (1 cup / 226g) — I use European-style butter if I have it because of the higher fat content, but regular unsalted works perfectly. Make sure it’s softened to room temperature. You should be able to press a finger into it easily.
Brown sugar (1 cup / 200g, packed) — This is the star. Don’t use light brown if you can avoid it; dark brown gives that deeper molasses flavor. Pack it tightly into the cup for accuracy.
Granulated sugar (½ cup / 100g) — Just enough sweetness to balance the brown sugar and help with the slight crispness on the edges.
Large egg (1) — Room temperature. It helps emulsify the dough. If it’s cold, just let it sit on the counter for 10 minutes.
Vanilla extract (1 teaspoon) — Use real vanilla, not imitation. It makes a huge difference in the flavor profile.
All-purpose flour (2 cups / 250g) — Spoon and level, don’t scoop. Scooping packs the flour and makes dry cookies. I always use Gold Medal or King Arthur.
Old-fashioned rolled oats (2 cups / 160g) — Do not use quick oats. They’ll turn your cookies into mush. You need that chewy texture that only rolled oats provide.
Baking soda (1 teaspoon) — Fresh is key. If your baking soda is more than six months old, toss it. Test it with a little vinegar; if it doesn’t fizz, it’s dead.
Ground cinnamon (1 teaspoon) — For that warm, cozy spice.
Salt (½ teaspoon) — To balance the sweetness.
For the Homemade Marshmallow Filling
Granulated sugar (1 cup / 200g) — For the marshmallow syrup.
Light corn syrup (½ cup / 170g) — This prevents crystallization. You can use honey, but it changes the flavor slightly. Corn syrup is the traditional choice for a reason.
Water (¼ cup / 60ml)
Egg whites (2 large, from room-temperature eggs) — I like to let them sit out while I make the syrup. Cold egg whites whip up slower.
Cream of tartar (¼ teaspoon) — Stabilizes the egg whites. If you don’t have it, a squeeze of lemon juice works too.
Vanilla extract (1 teaspoon)
Pinch of salt
Optional Add-ins
Mini chocolate chips — I sometimes add a handful to the cookie dough for a twist. It’s like an oatmeal cookie meets a chocolate chip cookie.
Chopped pecans — Adds a nice crunch. If you like fall brown sugar bourbon pecan pie bars, you’ll love the nutty addition here.
Equipment Needed
You don’t need fancy gadgets for this. Here’s what I actually use.
Mixer — A stand mixer is great, but a hand mixer works fine. You need to cream the butter and sugar well, so muscle power is optional but helpful.
Saucepan — Small to medium, heavy-bottomed. For the marshmallow syrup. I use a 2-quart saucepan.
Candy thermometer — Highly recommended for the marshmallow filling. It ensures the syrup hits the soft-ball stage (240°F). If you don’t have one, you can do the cold water test, but it’s riskier.
Piping bags or Ziploc bags — For piping the marshmallow filling. Or you can just spread it with a knife if you’re feeling casual.
Baking sheets — Two large ones. I line them with parchment paper for easy cleanup. Silicone mats work too.
Whisk — For the egg whites. A balloon whisk is best.
Measuring cups and spoons — Standard stuff. Dollar store versions are fine.
Cooling rack — Essential. Don’t skip this step.
How to Make It: Step-by-Step
Alright, let’s make these! I’m walking you through exactly how I do it, including the little tricks I’ve picked up over the years.
Step 1: Make the Marshmallow Filling First
It’s best to make the filling ahead of time because it needs to cool and thicken. In a small saucepan, combine 1 cup sugar, ½ cup corn syrup, and ¼ cup water. Heat over medium-high, stirring until the sugar dissolves. Once it boils, stop stirring and attach your candy thermometer. Let it cook until it reaches 240°F (soft-ball stage). This takes about 5-7 minutes.
While the syrup heats, beat the 2 egg whites and cream of tartar in a mixer until soft peaks form. Once the syrup hits 240°F, carefully pour it in a thin stream into the beating egg whites. Don’t pour it on the whisk! Keep beating on high speed until the bowl is cool to the touch and the mixture is thick, glossy, and white. This takes about 5-7 minutes. Stir in the vanilla and salt. Set aside to cool completely. It will thicken as it cools.
Step 2: Prepare the Dough
Preheat your oven to 350°F (175°C). Line two baking sheets with parchment paper. In a large bowl, beat the softened butter, brown sugar, and granulated sugar until light and fluffy. This takes about 3 minutes. Beat in the egg and vanilla.
In a separate bowl, whisk together the flour, baking soda, cinnamon, and salt. Gradually add the dry ingredients to the wet ingredients, mixing on low speed just until combined. Fold in the rolled oats (and chocolate chips/pecans if using). The dough will be thick and sticky. This is normal.
Step 3: Scoop and Bake
Use a cookie scoop or tablespoon to drop dough onto the prepared baking sheets. Space them about 2 inches apart because they spread. Bake for 10-12 minutes. You want the edges to be set and slightly golden, but the centers should still look soft and puffy. They will firm up as they cool. Don’t overbake!
Step 4: Cool and Assemble
Let the cookies cool on the baking sheet for 5 minutes, then transfer to a wire rack to cool completely. This is crucial. If you try to fill warm cookies, the marshmallow will melt and slide off. Once cool, take a generous spoonful (or piped dollop) of the marshmallow filling. Spread it on the flat side of one cookie, then sandwich it with another cookie.
I like to press them gently together and then roll the edges in a little extra granulated sugar for a pretty finish. It’s optional, but it looks pro.
Step 5: Store and Enjoy
Store in an airtight container at room temperature for up to 5 days. They actually get chewier after a day or two. If they start to dry out, add a slice of bread to the container—the cookies will absorb the moisture.
Expert Tips & Tricks
Here’s everything I’ve learned from making these dozens of times. These tips will save you from my mistakes.
Room Temperature Ingredients — I can’t stress this enough. Cold butter doesn’t cream properly. Cold eggs don’t whip well. Take everything out of the fridge at least an hour before you start. It’s worth the wait.
Don’t Overmix the Dough — Once you add the flour, mix just until you don’t see streaks. Overmixing develops gluten, and you’ll end up with tough cookies instead of chewy ones.
The Syrup Temperature Matters — For the marshmallow, if the syrup is under 240°F, your filling will be runny. If it’s over 245°F, it’ll be too stiff and hard to spread. Use a thermometer. It’s not optional if you want perfect results.
Piping vs. Spreading — If you want those pretty swirls, use a piping bag with a large round tip. If you’re lazy, just spread it with a knife. It still tastes the same. I usually do both—pipe for guests, spread for me.
Cookie Size Consistency — Use a scoop! If your cookies are different sizes, they’ll bake unevenly. Uniform cookies mean uniform baking. I use a #40 scoop (about 2 tablespoons).
Storage Hack — If you’re making these ahead for a party, make the cookies and filling separately. Assemble the day before. This prevents the cookies from getting soggy if you make them too far in advance.
Variations & Substitutions
Once you’ve nailed the basic version, here’s how you can mix it up. I’ve tried all of these.
Chocolate Chip Oatmeal Cream Pies — Add ½ cup mini chocolate chips to the dough. It’s a classic combo and always a hit.
Pumpkin Spice Twist — Swap the cinnamon for 2 teaspoons of pumpkin pie spice. Add 2 tablespoons of pumpkin puree to the dough (reduce butter by 1 tablespoon). It’s like a fall-themed version of fall brown butter pumpkin cookies.
Maple Pecan — Add ½ cup chopped pecans to the dough. Add 1 teaspoon maple extract to the marshmallow filling. It’s rich and nutty.
Gluten-Free — Use a 1-to-1 gluten-free flour blend. The texture might be slightly more crumbly, but it still works. I’ve used Bob’s Red Mill and it’s fine.
Dairy-Free — Use vegan butter (like Miyoko’s) and ensure your marshmallow filling is made with aquafaba instead of egg whites if you’re strict vegan. The rest is naturally dairy-free.
Serving & Storage
How to Serve: I usually serve these with a cold glass of milk. It’s the classic combo. But they’re also great with coffee or tea. If you’re having a party, arrange them on a platter with some fresh fruit or nuts. They look beautiful stacked in a tiered stand.
Side Dishes: These are desserts on their own, so they don’t need much else. But if you’re having a full dinner, they pair well with fig and honey ricotta galette if you want a more sophisticated spread.
Storage Instructions:
Refrigerator: Store in an airtight container for up to 5 days. They’ll stay chewy. If your kitchen is very humid, keep them in the fridge to prevent sticking.
Freezing: You can freeze the assembled cookies for up to 2 months. Wrap them tightly in plastic wrap, then put them in a freezer bag. Thaw at room temperature. The texture holds up surprisingly well.
Meal Prep: Make the dough and freeze it in balls. Bake fresh whenever you want a warm cookie. Or make the filling ahead and store in the fridge for up to a week.
Pro tip: If you’re gifting them, wrap them in wax paper and put them in a tin. It keeps them fresh and looks rustic and charming.
Nutrition Information
I’m not a nutritionist, but here’s the breakdown if you’re tracking. Keep in mind, this is a treat, so enjoy it!
Per Serving (1 cookie sandwich):
– Calories: 220
– Protein: 3g
– Carbs: 38g
– Fiber: 1g
– Sugar: 24g
– Fat: 8g
– Saturated Fat: 5g
– Cholesterol: 25mg
– Sodium: 120mg
What’s Good: It has some fiber from the oats. It’s not loaded with protein, but it’s a satisfying treat. The homemade marshmallow is less sugary than store-bought versions.
What to Know: It’s high in sugar and carbs, which is expected for a cookie. If you’re watching sugar, stick to one or two. The brown sugar adds depth, but it’s still sugar.
My Take: Look, this is a dessert. It’s meant to be enjoyed. I don’t guilt-trip myself over these. I have one with my coffee in the morning, and I’m happy. Balance is key.
Final Thoughts
So that’s my go-to chewy brown sugar oatmeal cream pies! I’ve probably talked your ear off at this point, but when you make a recipe this often, you have a lot to say about it. These cookies have saved my dessert game more times than I can count. They’re my answer to “what’s for dessert?” when I want something that feels homemade and special but doesn’t take all day.
My kids love them, my husband requests them for his lunchbox, and my friends ask for the recipe. They’re versatile, delicious, and surprisingly easy to make. Make them yours! Try different add-ins, swap in your favorite spices, or just enjoy them as is. The best recipes are the ones you adapt to your family’s tastes.
If you make this, drop a comment and let me know what you think! I love hearing how recipes turn out in your kitchen. And if something doesn’t work, tell me that too—I’m here to help troubleshoot. Happy cooking! And I hope your kitchen smells half as good as mine does right now.
Frequently Asked Questions
Can I use quick oats instead of rolled oats?
You can, but the texture will be different. Quick oats are thinner and will make the cookies cakier rather than chewy. For the authentic oatmeal cream pie texture, stick with old-fashioned rolled oats. If you must use quick oats, chop them up a bit in a food processor to mimic the larger flakes.
Why did my marshmallow filling turn out runny?
Usually, this means the sugar syrup didn’t reach 240°F (soft-ball stage). The temperature is critical for structure. If it’s too low, the filling won’t set. Use a candy thermometer to be sure. Also, make sure you’re beating the egg whites until the bowl is cool to the touch before adding the syrup.
Can I make these ahead for a party?
Yes! In fact, they taste better after a day. Make the cookies and filling separately, store them in airtight containers, and assemble 24 hours before the party. This allows the flavors to meld and the cookies to soften slightly around the edges. Just don’t assemble more than 2 days ahead, or they might get too soft.
Why did my cookies spread too much?
This usually happens if the butter was too soft or melted. Make sure it’s softened to room temperature, not liquid. Also, chill the dough for 30 minutes before baking if your kitchen is warm. This helps the cookies hold their shape. Another cause could be old baking soda—check its freshness.
Can I freeze the dough?
Absolutely! Scoop the dough into balls, freeze them on a baking sheet, then transfer to a freezer bag. Bake straight from frozen, adding 1-2 minutes to the baking time. This is great for having fresh cookies on demand.
Can I use honey instead of corn syrup?
You can, but it will change the flavor and texture slightly. Honey has a stronger taste and can crystallize differently. If you use honey, use raw honey for the best flavor. The marshmallow might be slightly denser, but it will still be delicious.
How do I store these if I live in a humid climate?
In humid climates, cookies can get sticky. Store them in the refrigerator in an airtight container. You can also place a paper towel at the bottom of the container to absorb excess moisture. Bring them to room temperature before serving for the best texture.
Pin This Recipe!
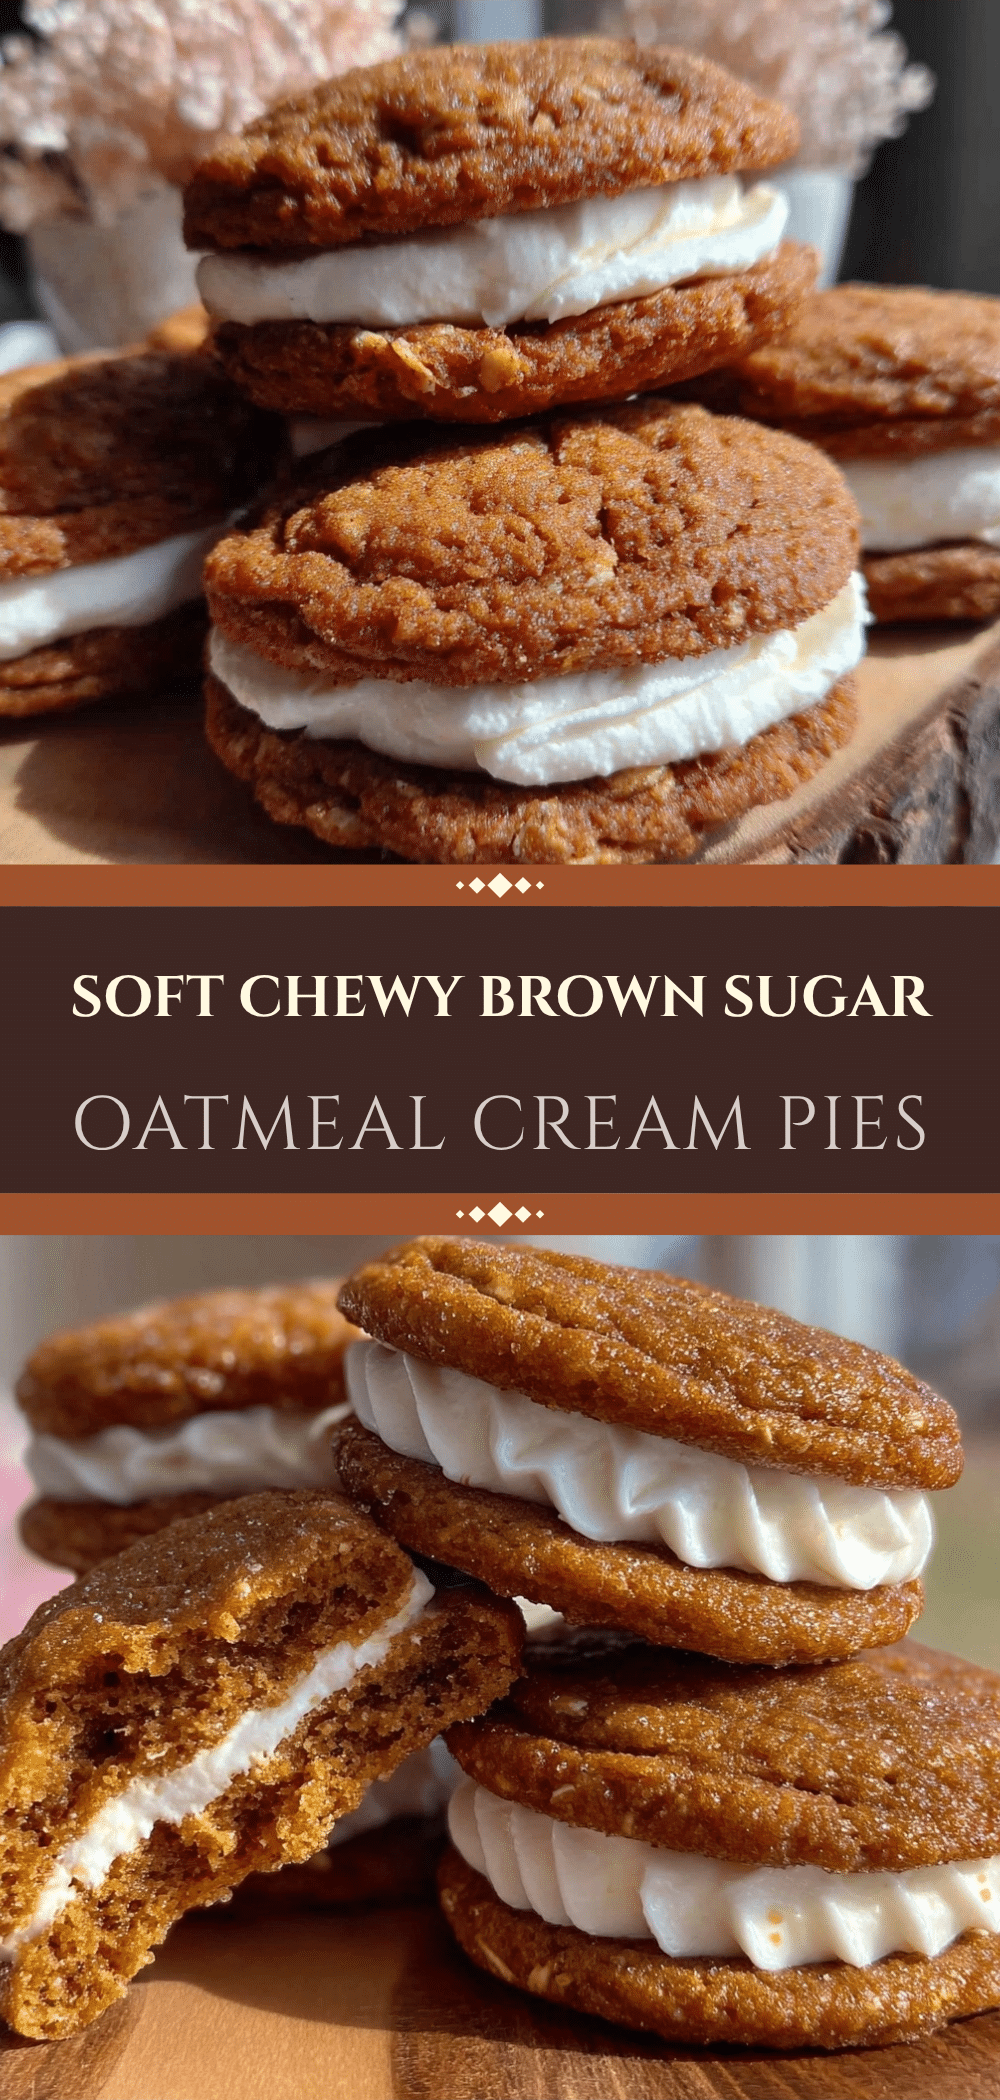

Chewy Brown Sugar Oatmeal Cream Pies
- Total Time: 45 minutes
- Yield: Approximately 24 cookies (12 sandwiches) 1x
Description
Soft, chewy oatmeal cookies sandwiched with a homemade, stable marshmallow fluff filling. These nostalgic treats are easy to make, perfect for gifting, and capture the warm flavors of autumn.
Ingredients
- 1 cup (226g) unsalted butter, softened to room temperature
- 1 cup (200g) dark brown sugar, packed
- 1/2 cup (100g) granulated sugar
- 1 large egg, room temperature
- 1 teaspoon vanilla extract
- 2 cups (250g) all-purpose flour
- 2 cups (160g) old-fashioned rolled oats
- 1 teaspoon baking soda
- 1 teaspoon ground cinnamon
- 1/2 teaspoon salt
- 1 cup (200g) granulated sugar (for filling)
- 1/2 cup (170g) light corn syrup
- 1/4 cup (60ml) water
- 2 large egg whites, room temperature
- 1/4 teaspoon cream of tartar
- 1 teaspoon vanilla extract (for filling)
- Pinch of salt (for filling)
Instructions
- Make the marshmallow filling first: In a small saucepan, combine 1 cup sugar, 1/2 cup corn syrup, and 1/4 cup water. Heat over medium-high, stirring until sugar dissolves. Once boiling, stop stirring and attach a candy thermometer. Cook until 240°F (soft-ball stage), about 5-7 minutes.
- While syrup heats, beat egg whites and cream of tartar in a mixer until soft peaks form. Slowly pour the hot syrup in a thin stream into the beating egg whites. Beat on high speed until the bowl is cool to the touch and mixture is thick, glossy, and white (5-7 minutes). Stir in 1 teaspoon vanilla and a pinch of salt. Set aside to cool completely.
- Preheat oven to 350°F (175°C). Line two baking sheets with parchment paper.
- In a large bowl, beat softened butter, brown sugar, and granulated sugar until light and fluffy (about 3 minutes). Beat in the egg and 1 teaspoon vanilla.
- In a separate bowl, whisk together flour, baking soda, cinnamon, and salt. Gradually add dry ingredients to wet ingredients, mixing on low just until combined. Fold in rolled oats.
- Scoop dough onto prepared baking sheets, spacing cookies 2 inches apart. Bake for 10-12 minutes until edges are set and slightly golden but centers look soft.
- Let cookies cool on the baking sheet for 5 minutes, then transfer to a wire rack to cool completely.
- Once cool, spread a generous amount of marshmallow filling on the flat side of one cookie and sandwich with another. Optionally roll edges in granulated sugar.
- Store in an airtight container at room temperature for up to 5 days.
Notes
Ensure all ingredients are at room temperature for best results. Do not overmix the dough to maintain chewiness. The syrup temperature is critical for the marshmallow structure; use a thermometer. Cookies can be frozen as dough balls or assembled cookies.
- Prep Time: 30 minutes
- Cook Time: 12 minutes
- Category: Dessert
- Cuisine: American
Nutrition
- Serving Size: 1 cookie sandwich
- Calories: 220
- Sugar: 24
- Sodium: 120
- Fat: 8
- Saturated Fat: 5
- Carbohydrates: 38
- Fiber: 1
- Protein: 3
Keywords: oatmeal cream pies, brown sugar cookies, marshmallow filling, homemade marshmallow, fall dessert, comfort food, easy baking, nostalgic treats



