I have a confession to make: three years ago, I thought buying salmon was a mistake. I’d buy it on a whim, think it was too expensive, then stare at it in the fridge for two days until it started smelling like the ocean decided to throw up. I’d end up throwing it out and ordering takeout, which cost me $25 and left me feeling guilty. That was until I realized I was cooking it all wrong.
I was tired of paying for restaurant meals when I could feed my family four times over for the same price. So, I stopped buying fancy fillets and started buying the family pack of salmon fillets—the thick, wild-caught kind that’s often on sale. I needed a method that would make it taste like something from a nice bistro but cook in the time it takes to boil water. Enter this baked salmon with crispy garlic butter crust. It’s become the backbone of my weeknight dinners. It’s affordable, it’s fast, and my kids actually ask for it. Like, actively ask for it.
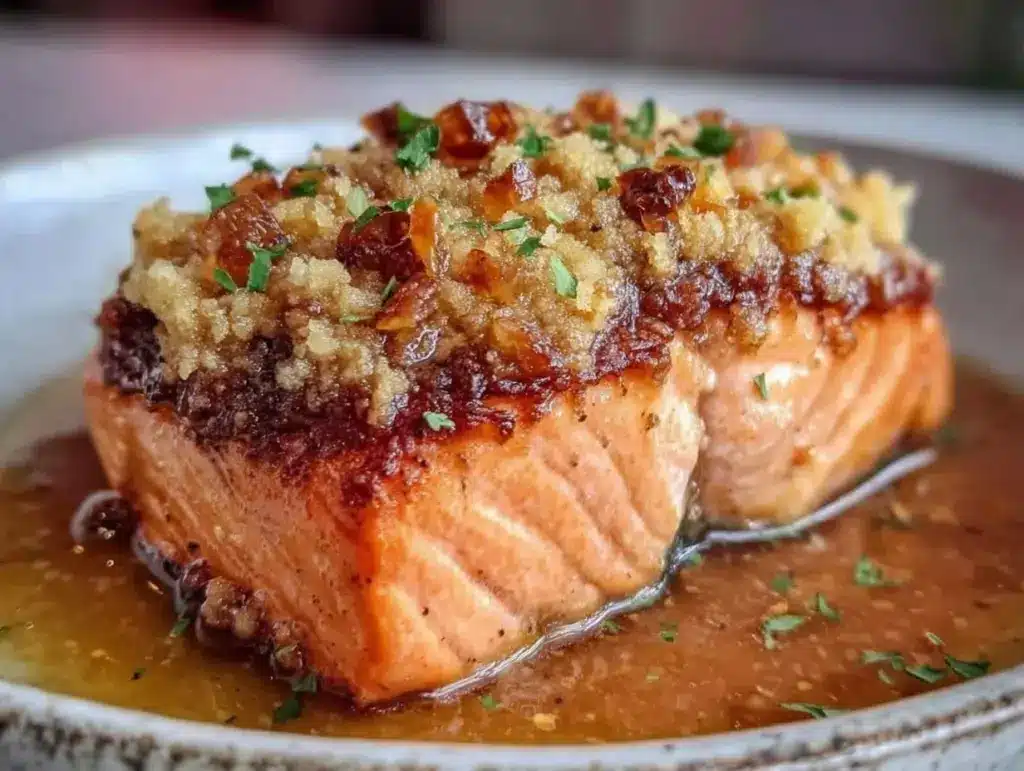
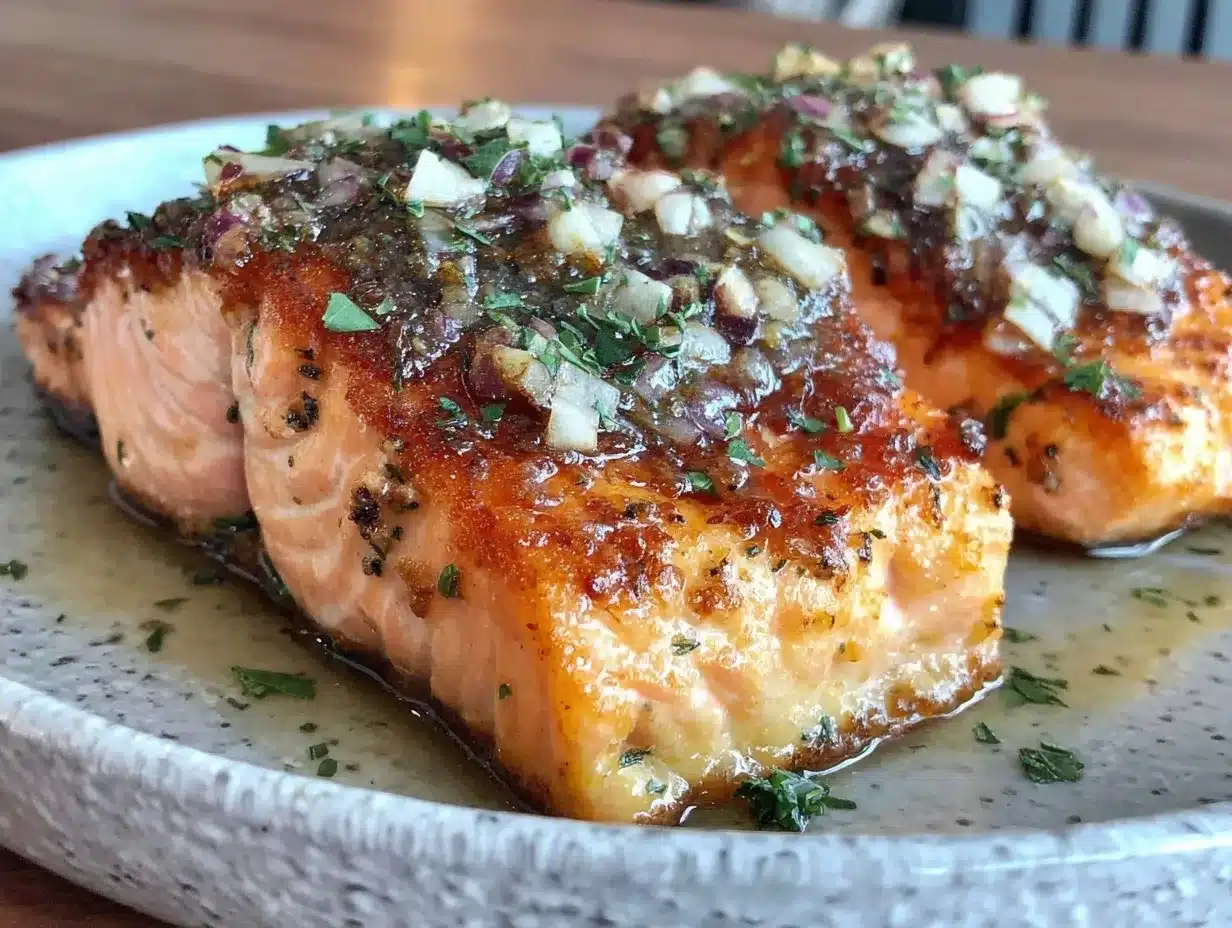
This isn’t just “baked fish.” The garlic butter crust is the game-changer. It keeps the fish moist, adds that savory crunch, and smells so good that people will think you spent hours in the kitchen. Spoiler: you didn’t. You just prepped five ingredients and waited. If you’ve ever struggled with dry, bland salmon, this is the recipe that will change your relationship with seafood forever.
Why You’ll Love This Recipe
There are a million ways to cook fish, but this method is the one I keep coming back to. It’s practical, it’s forgiving, and it works even when I’m running late. Here’s why this garlic butter salmon has earned a permanent spot in my weekly rotation.
- Stupidly Simple — Seriously, if you can melt butter and sprinkle garlic, you can make this. I’ve made it while holding a toddler on one hip. There’s no searing, no flipping, and no complicated sauce making. Just mix, top, and bake.
- Ready in 20 Minutes — From the time I take the salmon out of the fridge to the time it hits the table, it’s about 20 minutes. That’s faster than waiting for a delivery driver, and it’s way healthier than anything that comes in a box.
- Uses Pantry Staples — You don’t need to go to the store for this. Butter, garlic, lemon, parsley, salt, and pepper. If you have those, you’re good. I don’t even buy fresh herbs anymore because I keep a jar of dried parsley, and it works just fine here.
- Kid-Approved Flavor — My kids are notorious for pushing fish around their plates. But the garlic butter crust? They love it. It’s familiar flavor profiles—savory, buttery, slightly tangy—that picky eaters usually go for. Plus, it’s easy to eat.
- Super Affordable — Salmon can be pricey, but this recipe stretches the value. I buy the family pack when it’s on sale, freeze what I don’t use immediately, and this method makes even the most basic fillet taste gourmet. It’s budget-friendly luxury.
- One Pan Cleanup — Line your baking sheet with foil. Done. That’s it. No scrubbing pans, no washing dishes. Just peel off the foil and toss it. This is crucial for weeknights when I’m already exhausted.
This is my go-to when I need dinner to just work. No stress, no splurging, just reliable, delicious food that makes everyone happy.
Ingredients You’ll Need
Here’s the best part: you probably have most of this already. I’m particular about a few things, but mostly, this is about using what you have. Let’s break it down.
For the Salmon
Salmon Fillets (1.5 to 2 pounds / 680-900g) — Look for wild-caught if you can find it on sale, but farmed is fine too. The key is thickness. Avoid those tiny, paper-thin fillets because they overcook instantly. I buy the family pack, portion it out, and freeze the rest. It’s the smartest way to shop for salmon.
Garlic (4-5 cloves, minced / about 1 tablespoon) — Fresh garlic is non-negotiable here. Jarred garlic has a weird metallic taste that clashes with the butter. Fresh cloves take 2 minutes to mince and make a huge difference in flavor. Don’t skimp. You want that punch.
Butter (4 tablespoons / 60g, melted) — Use real butter. Margarine doesn’t give you that rich, savory crust. I use unsalted butter so I can control the sodium, but salted works too if you reduce the added salt later. Melt it in the microwave—don’t bother with a saucepan.
Lemon (1 medium) — You’ll need the juice and the zest. The zest adds brightness that cuts through the richness of the butter. The juice gets drizzled on at the end. If you don’t have a fresh lemon, bottled juice works for the drizzle, but you can’t substitute the zest. It’s essential.
Dried Parsley (1 tablespoon) — I know, I know, fresh is “better.” But for this recipe, dried parsley holds up better to the heat and gives a nice speckled look. Fresh parsley burns if you’re not careful. I keep a jar of dried parsley because it lasts forever and does the job perfectly.
Salt and Black Pepper — Kosher salt is my go-to because it’s easier to pinch and distribute evenly. Freshly cracked black pepper adds a nice kick. Use about ½ teaspoon salt and ¼ teaspoon pepper for the crust mixture.
Parmesan Cheese (Optional) (2 tablespoons, grated) — I add this sometimes for an extra savory kick. It helps the crust get even crispier. If you’re watching dairy or carbs, skip it, but it’s delicious.
For Serving
Lemon Wedges — For squeezing over the top right before eating. Fresh lemon juice wakes up the whole dish.
Extra Parsley — For garnish if you want it to look fancy. It’s not necessary, but it looks nice on Instagram (or Pinterest, if you’re saving it for later).
Tip: I always buy pre-minced garlic cloves if I’m being lazy, but honestly, mincing fresh takes seconds and tastes way better. Also, if your salmon fillets are very thick, you might want to pound them slightly with a meat mallet or the bottom of a heavy pan to make them even. This helps them cook uniformly.
Equipment Needed
You don’t need fancy equipment for this. Here’s what I actually use.
- Baking Sheet — I use a standard half-sheet pan (13×18 inches). It fits four fillets comfortably without crowding. Crowding makes the fish steam instead of bake, which ruins the crust.
- Aluminum Foil — Line your baking sheet. This is the cleanup hack. Seriously. Just crumple up the foil and toss it. No scrubbing baked-on butter.
- Small Bowl — For mixing the garlic butter. A ramekin or even a coffee mug works if you don’t want to use another bowl.
- Measuring Spoons — Standard stuff. Dollar store versions work fine.
- Microplane or Zester — For the lemon zest. If you don’t have one, a regular grater works, just be careful not to get the white pith (it’s bitter).
- Spatula — To transfer the salmon. A wide spatula is best so you don’t break the fillets.
Tool Tip: Don’t have a microplane? Just grate the lemon carefully with a box grater. And if you’re worried about sticking, you can lightly grease the foil with a little olive oil, though it’s usually not necessary if you’re using butter.
How to Make It: Step-by-Step
Alright, let’s make this! I’m walking you through exactly how I do it, including the little tricks I’ve picked up over years of burning (and saving) dinner.
Step 1: Prep Your Oven and Pan (5 minutes)
Preheat your oven to 400°F (200°C). While it heats, line your baking sheet with aluminum foil. I prefer shiny side up, but it doesn’t really matter. The goal is easy cleanup. Pat your salmon fillets dry with paper towels. This is important! If the fish is wet, the crust won’t stick, and it’ll steam instead of bake. Dry fish = crispy crust.
Step 2: Make the Garlic Butter Crust (2 minutes)
In a small bowl, combine the melted butter, minced garlic, lemon zest, dried parsley, salt, and pepper. Stir it well. It should look like a fragrant, golden sludge. If you’re adding Parmesan, mix it in now. Taste the mixture? It should smell amazing. If it doesn’t smell good, it won’t taste good. Adjust salt if needed.
Step 3: Assemble the Salmon
Place the salmon fillets on the prepared baking sheet. Space them out! They shouldn’t touch. Spoon the garlic butter mixture generously over the top of each fillet. Use a spoon to spread it evenly, making sure to cover the edges too. The butter needs to get into the nooks and crannies to keep the fish moist.
Step 4: Bake
Slide the baking sheet into the oven. Bake for 12-15 minutes. The exact time depends on the thickness of your fillets. A general rule: 10 minutes for thin fillets (less than 1 inch thick), 12-15 minutes for standard thickness (1-1.5 inches). Do not overcook! Salmon continues to cook slightly after it comes out of the oven.
Step 5: Check for Doneness
How do you know it’s done? The salmon should be opaque (pinkish-orange all the way through, not translucent) and flake easily with a fork. If you press it gently, it should feel firm but still juicy. If it’s still translucent in the middle, give it 2 more minutes. If it’s already flaking apart, it’s done. Remove from oven.
Step 6: Rest and Serve
Let the salmon rest for 2-3 minutes. This allows the juices to redistribute. Drizzle with fresh lemon juice right before serving. This adds brightness and cuts the richness. Serve immediately.
Total Time: About 20 minutes (5 minutes prep, 15 minutes cook).
Troubleshooting Tips Built In:
- Sauce too runny? Make sure you pat the fish dry. Excess water makes the butter slide off.
- Crust not crispy? Your oven might not be hot enough. Use an oven thermometer to check. 400°F is key.
- Dry salmon? You cooked it too long. Start checking at 10 minutes. Fish cooks fast.
Expert Tips & Tricks
Here’s everything I’ve learned from making this dozens of times. These tips will save you from my mistakes.
Don’t Overcrowd the Pan
This is the #1 mistake people make. If the fillets are touching, they steam each other. The steam prevents the crust from crisping up. Give them space. If you have more than four fillets, use two baking sheets. It’s worth it for the texture.
Pat Dry, Always
I know it’s annoying, but use paper towels to dry the salmon thoroughly. Moisture is the enemy of crispiness. If the surface is wet, the butter will just pool on top instead of sticking to the fish. Dry fish = better crust.
Use Fresh Garlic, Not Jarred
I’ve tried jarred garlic in this recipe. It tastes metallic and bitter when baked. Fresh garlic, minced fine, melds with the butter to create that savory, aromatic crust. It takes 2 minutes. Do it.
Low and Slow is Wrong Here
Some recipes say bake at 350°F. I don’t recommend it. 400°F is the sweet spot. It cooks fast enough to keep the fish moist but hot enough to crisp the butter and garlic. If you cook it lower and slower, the butter just soaks into the fish and it gets soggy.
Rest Before Serving
Letting the salmon rest for 2-3 minutes after baking is crucial. It allows the juices to settle. If you cut into it immediately, the juices run out, and the fish dries out. Trust me, a 2-minute wait is worth it.
Pro Trick: Broil for the Last Minute
If you want a darker, crispier crust, turn the broiler on for the last 1-2 minutes of cooking. Watch it closely! Garlic burns fast. I do this sometimes for extra crunch, but it’s optional.
Variations & Substitutions
Once you’ve nailed the basic version, here’s how you can mix it up. I’ve tried all of these.
Herb Crusted
Swap the dried parsley for a mix of dried thyme, rosemary, and oregano. It gives a more Mediterranean vibe. Great with roasted potatoes.
Honey Garlic
Add 1 tablespoon of honey to the butter mixture. It caramelizes in the oven and gives a sweet-savory glaze. My kids love this version. It’s like a teriyaki vibe but baked.
Cajun Spice
Add 1 teaspoon of Cajun seasoning to the butter. It adds a spicy kick. Serve with cornbread for a Southern twist.
Lemon Dill
Swap parsley for dried dill. Dill and lemon are a classic pairing. This is lighter and more refreshing.
Dietary Modifications:
- Gluten-Free — This recipe is naturally gluten-free. Just check your Parmesan (some brands add flour as an anti-caking agent).
- Dairy-Free — Replace butter with olive oil. It won’t have the same rich crust, but it will still be delicious. Use avocado oil for a higher smoke point.
- Keto/Low-Carb — This is perfect for keto. Just skip the Parmesan if you’re watching carbs, though it’s fine in moderation.
Side Dish Pairings:
Since this is a sheet pan meal, you can roast veggies on the same pan. Asparagus, broccoli, or green beans work great. Just add them to the pan for the last 10 minutes of cooking. I also love serving it with brown butter garlic mashed potatoes or a simple honey roasted carrots.
Serving & Storage
How to Serve
I usually serve this straight from the baking sheet at the dinner table—it looks rustic and stays warm. But here are other ways I’ve enjoyed it:
Side Dishes:
- Steamed rice or quinoa (to soak up the garlic butter)
- Roasted asparagus or broccoli
- A simple green salad with lemon vinaigrette
- Crusty bread (for mopping up the sauce)
Storage Instructions:
Refrigerator: Store leftovers in an airtight container for up to 3 days. The salmon will hold up well, though the crust might soften slightly.
Reheating: Best method: Reheat in a 350°F oven for 10 minutes. This keeps the texture decent. Microwave? It will get rubbery. I know, I’ve tried. If you must microwave, do it in 30-second bursts and add a splash of water.
Freezing: You can freeze cooked salmon, but the texture changes. It’s best to freeze the raw fillets with the garlic butter on top. Freeze them in a single layer on a baking sheet, then transfer to a freezer bag. Thaw overnight in the fridge and bake as directed. This works much better than freezing cooked fish.
Pro Tip: If you’re meal prepping, this is great for lunches. It’s cold-friendly too. I often eat it cold over salad for lunch the next day. It’s like a fancy salmon salad.
Nutrition Information
I’m not a nutritionist, but here’s the breakdown if you’re tracking.
Per Serving (based on 4 servings):
- Calories: 350
- Protein: 34g
- Carbs: 2g
- Fiber: 0g
- Fat: 22g
- Saturated Fat: 8g
- Cholesterol: 95mg
- Sodium: 280mg
What’s Good:
- High in protein
- Rich in Omega-3 fatty acids
- Low carb
What to Know:
- Higher in fat due to butter (but it’s good fat!)
- Contains dairy
My Take: Look, this is a healthy, high-protein meal. The butter adds calories, but it’s also what makes it delicious. When I want to make it lighter, I use 2 tablespoons of butter instead of 4. But usually? I just enjoy the richness. It’s worth it.
Final Thoughts
So that’s my go-to baked salmon with crispy garlic butter crust! I’ve probably talked your ear off at this point, but when you make a recipe this often, you have a lot to say about it.
This has saved weeknight dinners more times than I can count. It’s my answer to “what’s for dinner” when I’m tired, don’t want takeout, and still want something that tastes really good. My kids are happy, my husband’s happy, and I’m happy because I’m not stressed about cooking.
Make it yours! Try different herbs, add some chili flakes for heat, or serve it with different veggies. The best recipes are the ones you adapt to your family’s tastes. If you make this, drop a comment and let me know what you think! I love hearing how recipes turn out in your kitchen.
Happy cooking! And I hope your kitchen smells half as good as mine does right now.
Frequently Asked Questions
Can I use frozen salmon?
Yes, but you need to thaw it completely first. Pat it dry thoroughly before adding the garlic butter. If you bake it while still frozen, it will release too much water and the crust will be soggy. I recommend thawing it in the fridge overnight.
Why did my salmon turn out dry?
Most likely, you overcooked it. Salmon cooks very quickly. Start checking at 10 minutes. If it’s opaque and flakes easily, it’s done. If you wait until it’s “well done,” it will be dry. Remember, it continues to cook after you take it out of the oven.
Can I make this ahead for a dinner party?
Yes! Prep the salmon with the garlic butter up to 4 hours ahead. Cover and refrigerate. When guests arrive, just pop it in the oven. It will bake in the same amount of time. This is a lifesaver for hosting.
What kind of salmon is best?
Wild-caught sockeye or king salmon have a firmer texture and richer flavor. Farmed Atlantic salmon is milder and fattier, which is also delicious. The key is thickness. Avoid thin fillets.
Can I substitute the butter?
You can use olive oil, but it won’t create the same rich, crispy crust. Butter has milk solids that brown and crisp up. Olive oil stays liquid. If you’re dairy-free, try ghee (clarified butter) for a similar effect without the lactose.
How do I know when the salmon is done?
Use a fork to gently press the thickest part. It should feel firm but still have a little give. It should also be opaque throughout, not translucent. If you’re unsure, cut into the center of one fillet. It should be pinkish-orange all the way through.
Can I double this recipe?
Absolutely! Just use two baking sheets. Make sure they fit in your oven with space for air circulation. If you can’t fit two sheets, bake in batches. It’s better to bake in batches than to crowd the pan.
Pin This Recipe!
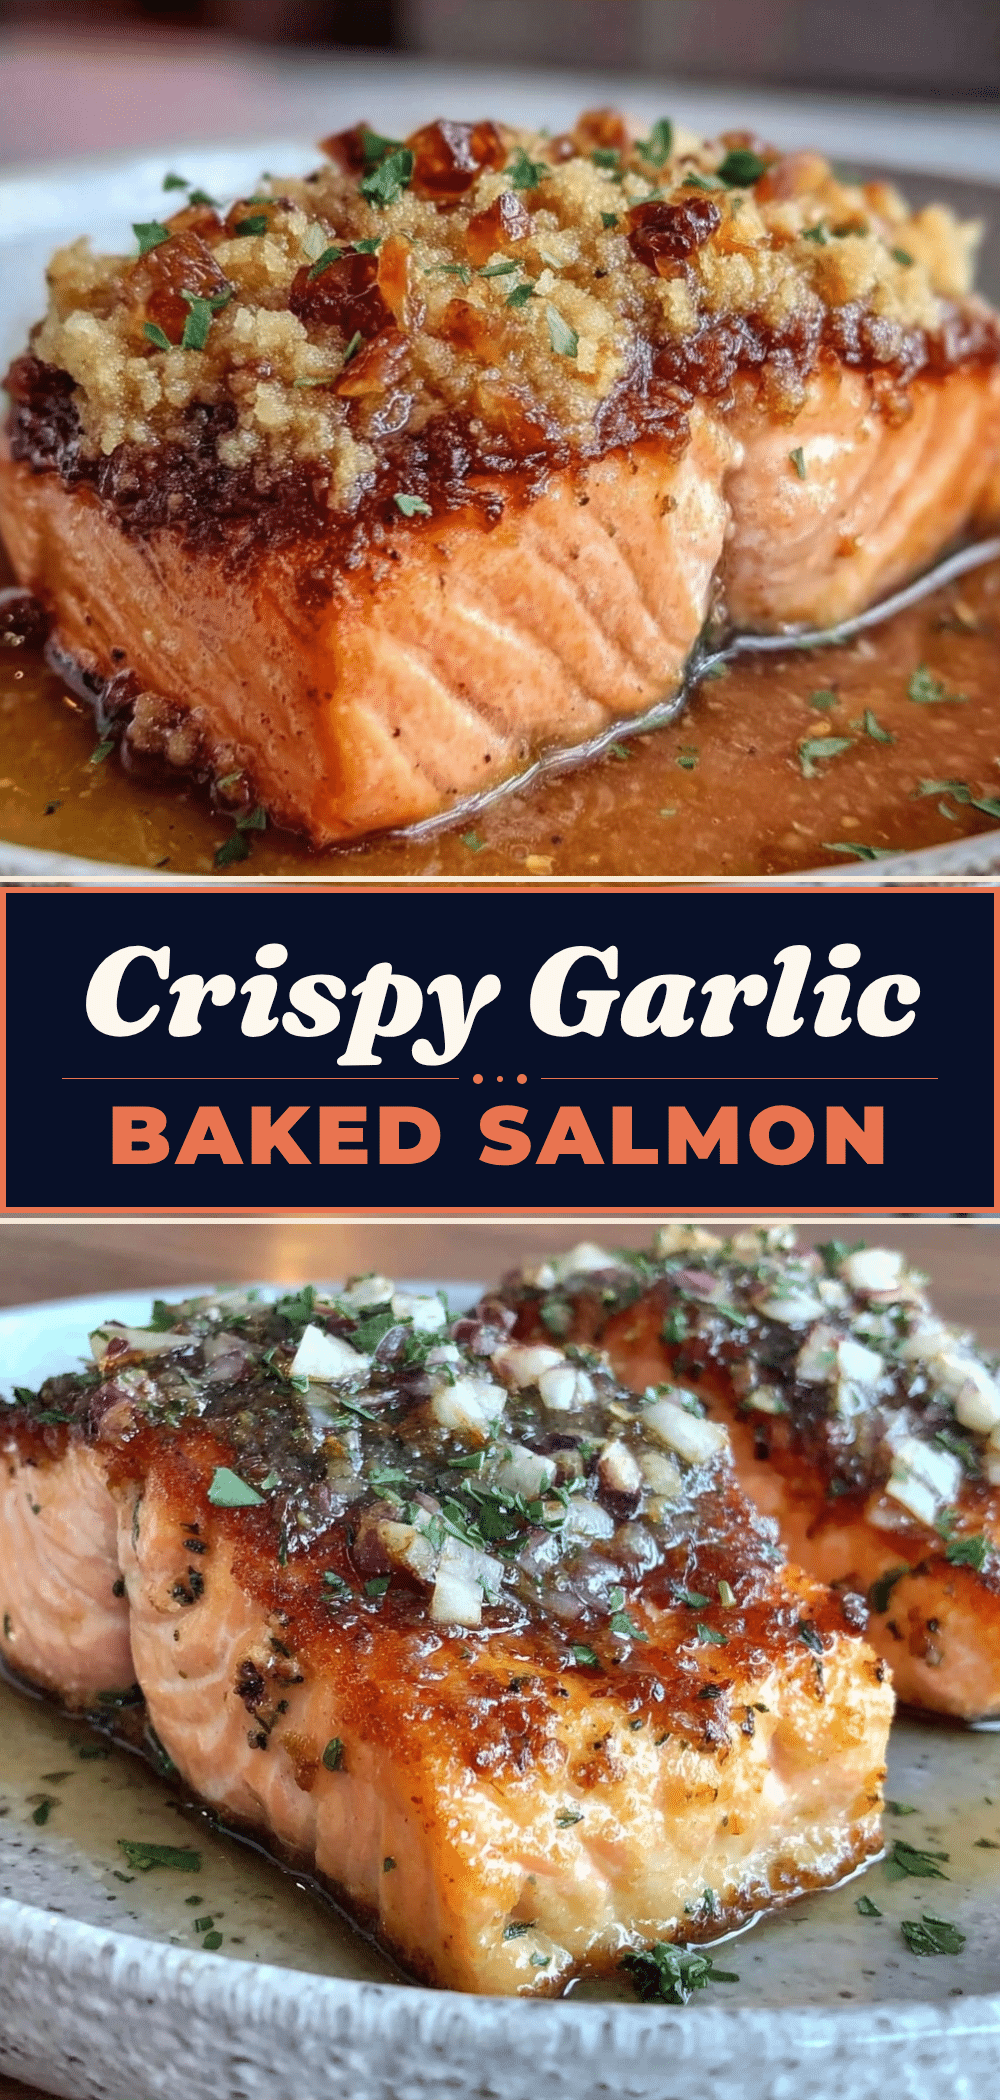
Baked Salmon: Easy Garlic Butter Dinner for Families
- Total Time: 20 minutes
- Yield: 4 servings 1x
Description
A quick, affordable, and kid-approved baked salmon recipe featuring a crispy garlic butter crust. This one-pan meal is ready in 20 minutes and uses simple pantry staples for a bistro-quality dinner.
Ingredients
- 1.5 to 2 pounds salmon fillets (wild-caught preferred, thick cut)
- 4 tablespoons butter, melted
- 4–5 cloves garlic, minced
- 1 medium lemon (zest and juice)
- 1 tablespoon dried parsley
- 1/2 teaspoon kosher salt
- 1/4 teaspoon black pepper
- 2 tablespoons grated Parmesan cheese (optional)
- Lemon wedges for serving
- Extra parsley for garnish (optional)
Instructions
- Preheat oven to 400°F (200°C). Line a half-sheet baking pan with aluminum foil.
- Pat salmon fillets dry with paper towels to ensure the crust sticks and crisps.
- In a small bowl, combine melted butter, minced garlic, lemon zest, dried parsley, salt, and pepper. Stir until fragrant. Mix in Parmesan cheese if using.
- Place salmon fillets on the prepared baking sheet, ensuring they are not touching.
- Spoon the garlic butter mixture generously over each fillet, spreading it evenly to cover the edges.
- Bake for 12-15 minutes (10 minutes for thin fillets, 12-15 for standard thickness) until salmon is opaque and flakes easily with a fork.
- Optional: Broil for the last 1-2 minutes for a darker, crispier crust, watching closely to prevent burning.
- Remove from oven and let rest for 2-3 minutes to allow juices to redistribute.
- Drizzle with fresh lemon juice and serve immediately with lemon wedges.
Notes
Pat the salmon dry thoroughly before baking to prevent steaming and ensure a crispy crust. Do not overcrowd the pan; use two sheets if necessary. Salmon continues to cook slightly after removal from the oven, so avoid overcooking. For dairy-free, substitute butter with olive oil or ghee.
- Prep Time: 5 minutes
- Cook Time: 15 minutes
- Category: Main Course
- Cuisine: American
Nutrition
- Serving Size: 1 fillet per serving
- Calories: 350
- Sodium: 280
- Fat: 22
- Saturated Fat: 8
- Carbohydrates: 2
- Protein: 34
Keywords: baked salmon, garlic butter salmon, easy dinner, weeknight meals, family friendly, one pan meal, healthy seafood, gluten free, keto friendly