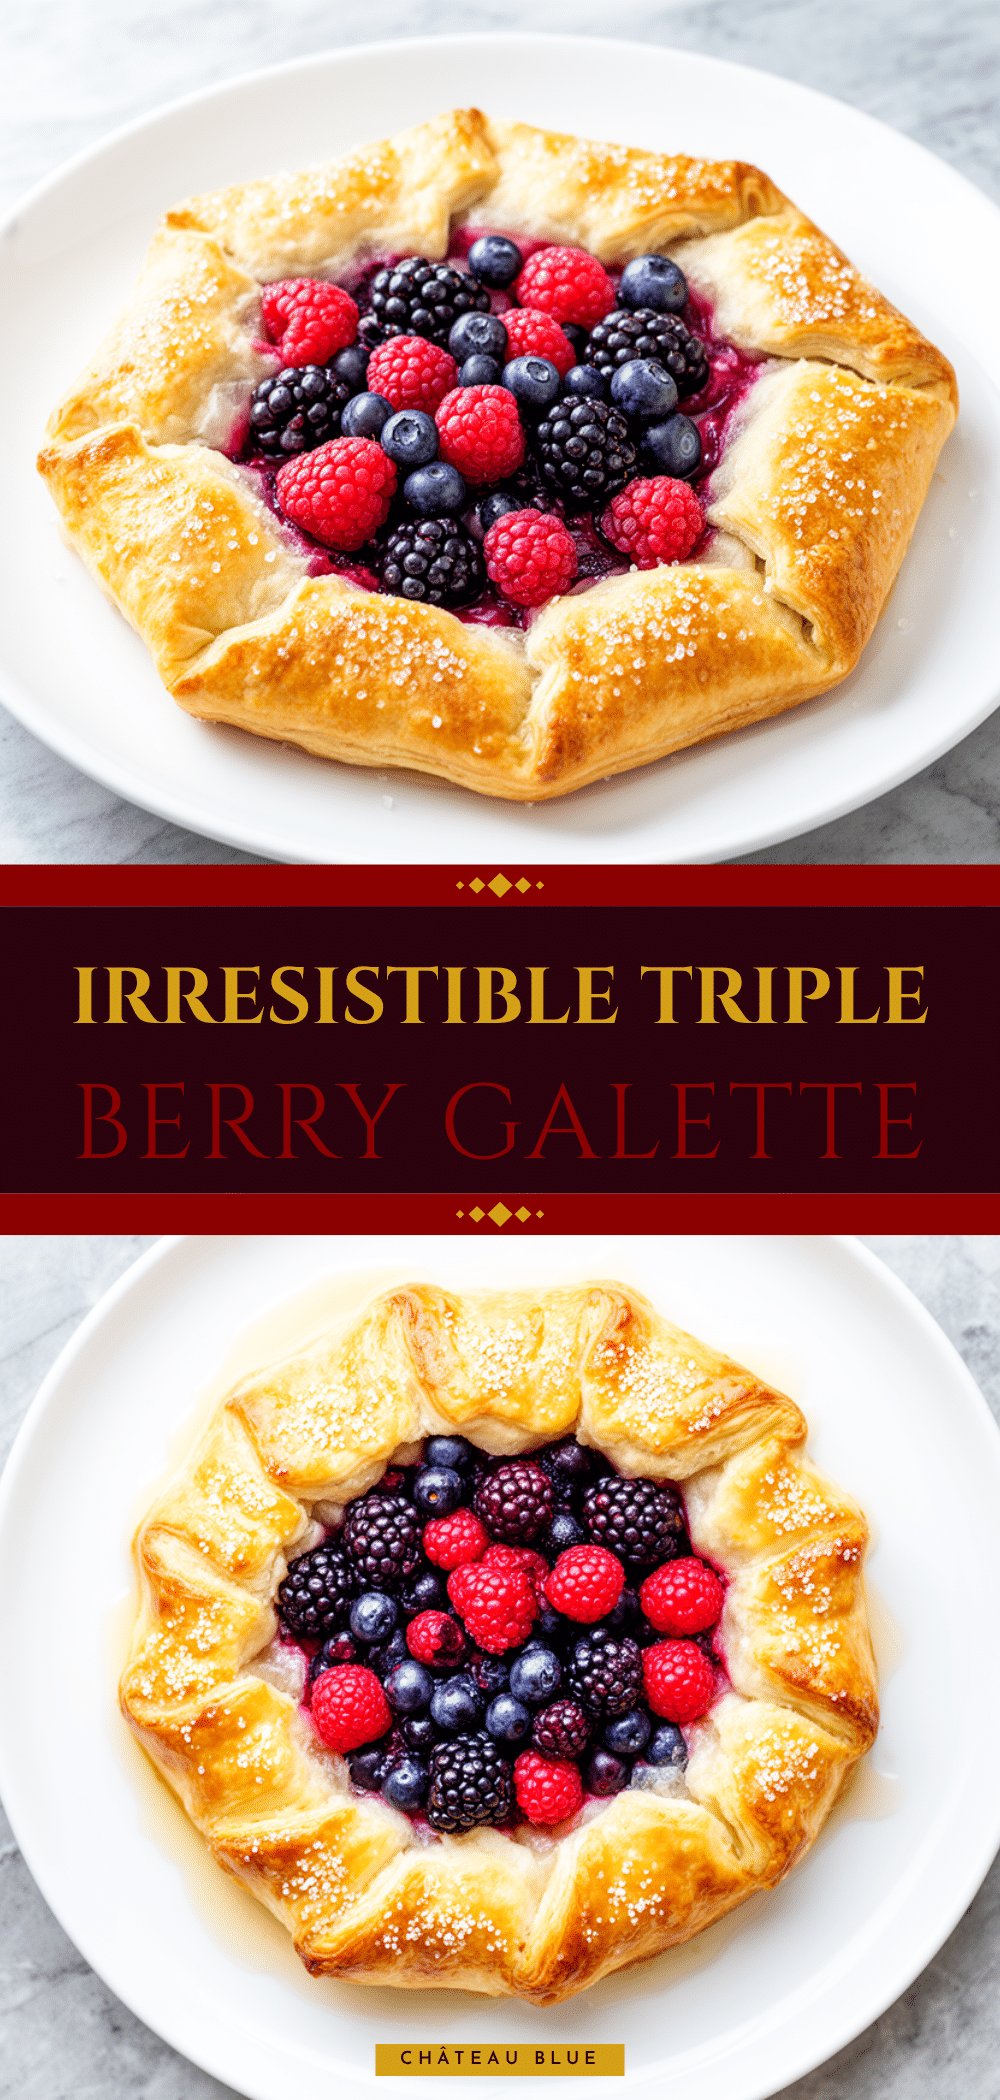
I still remember the exact moment I knew this triple berry galette was a keeper. It was late July, the kind of humid evening where the air feels thick and your appetite is non-existent. My husband had come home from work, wiped sweat from his forehead, and asked the dreaded question: “What’s for dessert?”
Normally, I’d reach for something simple—maybe those after-school peanut butter banana energy bites I keep in the freezer, or just some fruit. But that Saturday, I had a bag of berries that were past their prime. The strawberries were a little soft, the blueberries were bursting with juice, and the raspberries were trembling. I didn’t want to let them go to waste, so I threw them on a sheet of dough I’d made that morning, folded the edges over haphazardly, and popped it in the oven.
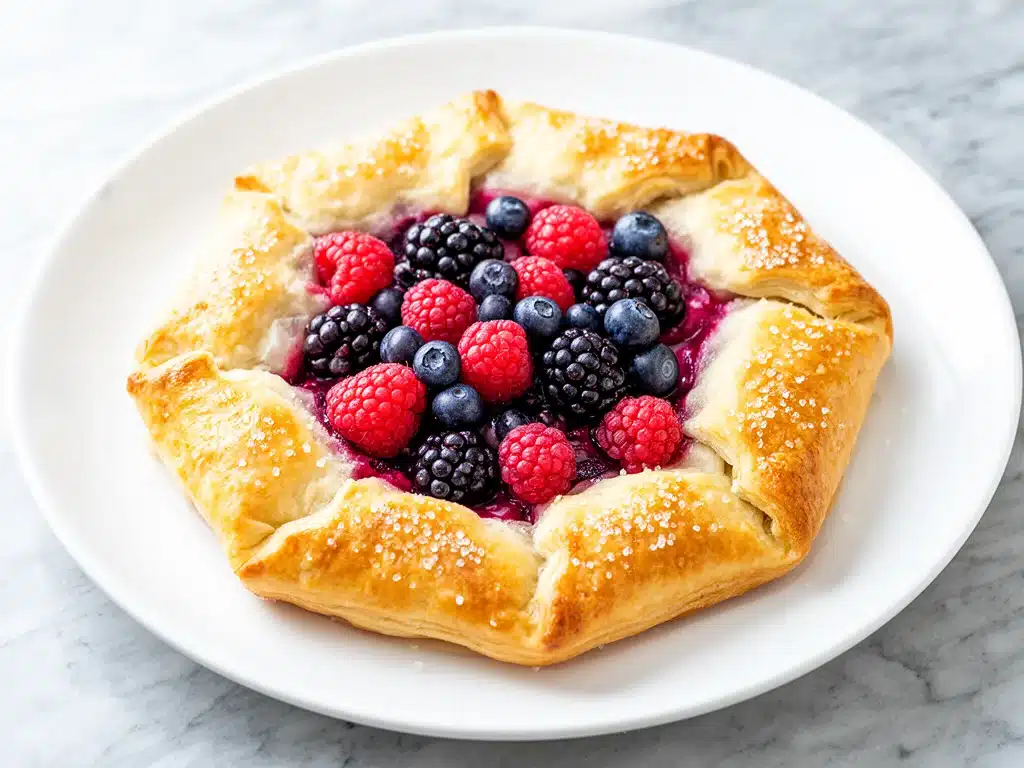
Twenty minutes later, my kitchen smelled like a French bakery. When I pulled it out, the crust was golden brown and flaky, and the berries had bubbled up in the center, creating this jammy, ruby-red pool of sweetness. I sliced a warm piece for my husband. He took one bite, closed his eyes, and said, “You have to make this every summer.”
That was three years ago. Now, this triple berry galette is the dessert everyone at our dinner parties asks for. It’s not because it’s fancy (though it looks like it came from a patisserie). It’s because it’s honest. It tastes like summer. It’s rustic, imperfect, and incredibly forgiving.
Most people think making a galette is intimidating. They picture rolling out perfect circles and doing delicate lattice work. But here’s the secret: a galette is just a pie that didn’t try too hard. It’s for when you have good fruit, some butter, and a desire to look like a genius baker without actually doing any hard work. I’ve tested this recipe dozens of times—sometimes with just three berries, sometimes with four if I’m feeling wild—and I’ve learned exactly how to keep that crust flaky and the filling from getting soggy.
If you’ve ever been intimidated by fruit tarts or worried about making your own pie dough, this is your entry point. This triple berry galette is the perfect bridge between “I can’t bake” and “I’m a master chef.” Let’s get into why this rustic tart is about to become your new obsession.
Why You’ll Love This Triple Berry Galette
There are about a dozen reasons I keep making this galette, but if I had to narrow it down to the things that really sell it to you, they’d be these:
It’s Forgiving — Seriously, you cannot mess this up. If the edges are uneven, that’s charming. If the fruit spills out a little, that’s just extra flavor. Unlike a traditional pie where you have to worry about cracks and leaks, a galette embraces the chaos. I’ve made this with frozen berries (thawed and drained) and it still turned out beautiful.
It’s Faster Than a Pie — No blind baking. No intricate crimping. You roll the dough once, dump the fruit in, fold the edges, and bake. From start to finish, you’re looking at about 45 minutes. That’s less time than it takes to order takeout and wait for delivery. It’s my go-to when guests pop in unexpectedly.
Flaky, Buttery Crust — I’m particular about my pastry. This recipe uses a simple four-ingredient dough (flour, butter, salt, ice water) that creates layers of flakiness you won’t find in store-bought crusts. And unlike those soft apple cinnamon oatmeal bars that are more cookie than bar, this crust has actual structure and crunch.
Seasonal Freedom — While this is a triple berry recipe, the method works for peaches, plums, or even sliced apples. But when summer berries are at their peak, the flavor difference is night and day. The natural sugars in the berries caramelize in the oven, creating a jam-like filling that’s irresistible.
Makes You Look Like a Pro — There’s no other way to put it. When you bring this out of the oven, dusted with sugar and cooling on a rack, people assume you spent hours on it. They don’t know it’s basically a rustic tart that takes 10 minutes of prep. It’s the ultimate confidence booster in the kitchen.
This recipe has saved me more times than I can count. It’s my answer to “I want something sweet but I don’t want to buy a whole cake.” It’s light enough for summer evenings but rich enough to feel special. Once you make this, you’ll understand why it’s the dessert everyone always asks for.
Ingredients You’ll Need
Here’s the best part: you probably have most of this already in your pantry. This recipe relies on high-quality basics rather than exotic ingredients. The flavor comes from the fruit and the butter, not from a dozen different extracts.
For the Flaky Crust
All-purpose flour (2 ½ cups / 315g) — The foundation. Don’t try to substitute with whole wheat unless you want a denser crust. I use Gold Medal flour because it has a consistent protein content that gives me that perfect tender-crisp texture.
Unsalted butter (1 cup / 226g, cold) — This is non-negotiable. Use real butter, not margarine. The cold butter creates steam pockets as it bakes, which is what makes the crust flaky. Cube it into ½-inch pieces and keep it in the fridge until the very last second.
Salt (1 teaspoon) — Enhances the flavor of the butter and dough. Use kosher salt if you have it; it’s easier to measure evenly.
Ice water (6-8 tablespoons) — This binds the dough. Make sure the water is actually ice-cold. If your kitchen is warm, use ice cubes in the water and strain them out before adding. Warm water melts the butter too early, leading to a tough crust.
Granulated sugar (1 tablespoon) — Just a little bit to sweeten the dough slightly and help the crust brown. You don’t need much.
For the Triple Berry Filling
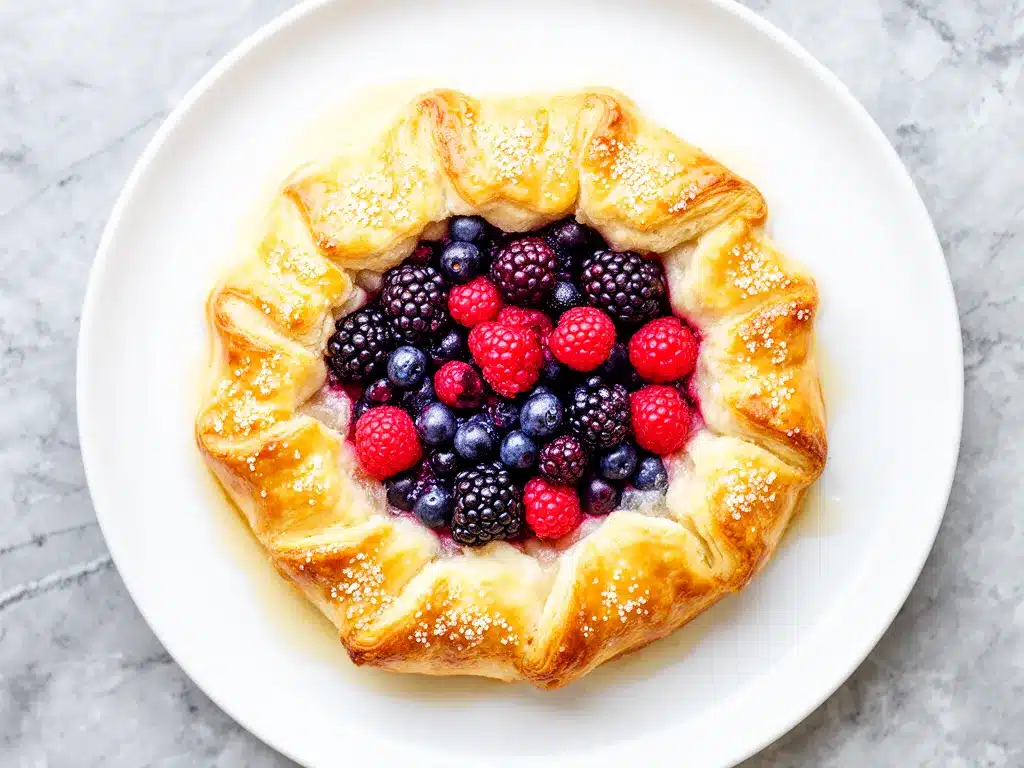
Strawberries (1 ½ cups, hulled and sliced) — The base of the fruit. Use ripe, red strawberries. If they’re white at the tips, they’ll be tart. I like to slice them into quarters so they cook evenly.
Raspberries (1 cup) — These add that beautiful tartness and vibrant red color. They break down a bit during baking, which helps thicken the filling naturally. Handle them gently so they don’t turn into mush before they hit the oven.
Blueberries (1 cup) — The sturdy ones. They hold their shape and provide bursts of flavor. Fresh blueberries are best, but frozen work if you don’t thaw them first (just add 5 minutes to bake time).
Granulated sugar (¼ cup / 50g) — Berries vary in sweetness depending on the season. This amount balances the tartness of raspberries and the natural sweetness of strawberries. Taste your berries first—if they’re super sweet, reduce to 2 tablespoons.
Cornstarch (2 tablespoons) — This is the thickener. Berries release a lot of juice. Without cornstarch, you’ll end up with a soupy galette that leaks onto your baking sheet. Cornstarch creates that glossy, jammy consistency.
Lemon juice (1 teaspoon) — Brightens up the berry flavor. It doesn’t make it taste like lemon; it just makes the berry taste more like berry. Trust me on this.
Zest of 1 lemon — Optional but recommended. The oils in the zest add a floral note that elevates the whole dessert.
For the Finish
Coarse sugar (Turbinado or Demerara) — For sprinkling on top before baking. This gives you that crunchy, sparkling crust that looks professional. Regular granulated sugar works too, but coarse sugar stays crunchy longer.
Vanilla ice cream or whipped cream — For serving. A warm galette with cold vanilla ice cream is the ultimate summer combo. I usually serve it with a dollop of lightly sweetened whipped cream if I’m feeling fancy.
Equipment Needed
You don’t need fancy equipment for this. Here’s what I actually use:
Baking sheet — A large, heavy-duty rimmed baking sheet. I use a half-sheet pan (18×13 inches). Make sure it’s not too small, or the galette will be too crowded.
Rolling pin — Any standard rolling pin works. I prefer wood because it doesn’t stick as much as plastic.
Large mixing bowl — For mixing the dough. A wide bowl makes it easier to work the butter into the flour.
Pastry cutter or food processor — To cut the butter into the flour. A pastry cutter gives you more control, but a food processor is faster. If using a food processor, don’t over-process; you want pea-sized crumbs.
Sharp knife — For slicing strawberries. A serrated knife works well for soft berries.
Pastry brush — Optional, but nice for brushing the edges with milk or egg wash for better browning. I usually just brush with a little milk.
Cooling rack — Essential. Letting the galette cool on the pan can make the bottom soggy. A wire rack allows air to circulate.
How to Make It: Step-by-Step
Alright, let’s make this! I’m walking you through exactly how I do it, including the little tricks I’ve picked up over the years.
Step 1: Make the Dough (10 minutes)
In your large mixing bowl, combine the flour, salt, and 1 tablespoon of sugar. Add the cold, cubed butter. If you’re using a pastry cutter, cut the butter into the flour until the mixture looks like coarse meal with some pea-sized pieces of butter remaining. These butter chunks are crucial—they create the flaky layers.
If you’re using a food processor, pulse it 10-15 times. Do not puree the butter. You want to see distinct pieces.
Gradually add the ice water, one tablespoon at a time, mixing gently with a fork or your hands. Stop when the dough just begins to clump together. It should look shaggy, not like a smooth ball. Overworking the dough develops gluten, which makes the crust tough. If it’s too dry, add another tablespoon of water. If it’s too sticky, add a sprinkle of flour.
Divide the dough into two disks (one slightly larger than the other, or two equal sizes if you prefer). Wrap tightly in plastic wrap and refrigerate for at least 1 hour. This relaxes the gluten and re-chills the butter. I usually make the dough in the morning and bake in the evening.
Step 2: Prepare the Berries (5 minutes)
Preheat your oven to 400°F (200°C). Line your baking sheet with parchment paper. This makes cleanup a breeze and prevents sticking.
In a large bowl, combine the sliced strawberries, raspberries, blueberries, ¼ cup sugar, cornstarch, lemon juice, and lemon zest. Toss gently until the berries are evenly coated. The cornstarch will turn white and powdery—that’s normal. Set this aside.
Step 3: Roll Out the Dough (5 minutes)
Take one disk of dough out of the fridge. On a lightly floured surface, roll it into a 12-inch circle. It doesn’t have to be perfect. If it cracks, just patch it with your fingers. The edges should be slightly irregular; that’s the rustic charm.
Transfer the dough to the prepared baking sheet. If it’s sticky, you can roll it onto the parchment paper first, then slide it to the pan. If it tears, don’t worry. It’s a galette, not a wedding dress.
Step 4: Fill and Fold (10 minutes)
Pile the berry mixture into the center of the dough, leaving a 2-inch border around the edges. Be careful not to overfill; if the filling touches the edge, it will leak. Leave that border empty so you can fold it over.
Starting at one side, fold the dough over the fruit, pleating it as you go. You don’t need to seal it completely. Just drape the dough over the berries. Some fruit can peek out; that’s where the caramelization happens. Repeat all the way around until the fruit is partially enclosed.
This is the fun part. It’s not precise. It’s organic. If a berry falls out, just tuck it back in.
Step 5: Chill and Bake (35-40 minutes)
Place the galette in the fridge for 15 minutes while the oven finishes heating. This helps the dough hold its shape in the oven. After 15 minutes, brush the exposed dough edges with a little milk (or egg wash for a deeper golden color). Sprinkle the coarse sugar over the crust.
Bake at 400°F (200°C) for 35-40 minutes. You’re looking for a golden brown crust and bubbling fruit filling. The bubbling is a good sign—it means the cornstarch has activated and the sugars are caramelizing.
If the edges are browning too quickly, cover them with a strip of aluminum foil for the last 10 minutes of baking.
Step 6: Cool and Serve
Remove from the oven and let it cool on a wire rack for at least 20 minutes. This is the hardest part. The filling needs to set. If you cut into it hot, it will be runny. If you wait 20 minutes, it will be jammy and perfect.
Slice into wedges and serve warm with vanilla ice cream or whipped cream.
Expert Tips & Tricks
Here’s everything I’ve learned from making this dozens of times. These tips will save you from my mistakes.
Keep Everything Cold
This is the #1 rule for flaky crust. If your butter melts before it hits the oven, you lose the flakiness. Keep your bowl chilled. If your dough gets warm while you’re rolling it, pop it back in the fridge for 10 minutes. Cold butter = flaky crust. Warm butter = tough crust. It’s that simple.
Don’t Skip the Cornstarch
Berries are juicy. If you don’t use a thickener, you’ll have a puddle of juice on your baking sheet. Cornstarch creates a glossy jam. You can use tapioca starch, but cornstarch is more reliable. Two tablespoons is the sweet spot for this amount of fruit.
Use a Baking Stone or Steel (Optional)
If you have a baking stone, preheat it with the oven. Place the galette on the stone. This gives you an extra-crispy bottom crust. I don’t always have the energy for this, but when I do, the difference is noticeable.
Leftovers Are Better the Next Day
Actually, the galette tastes even better the next day. The flavors meld together, and the crust stays crisp if stored properly. I usually make it on Sunday and eat it for dessert all week.
Freezing the Dough
You can make the dough ahead and freeze it for up to 3 months. Just thaw it in the fridge overnight before rolling. This is great for meal prepping dessert.
Variations & Substitutions
Once you’ve nailed the basic version, here’s how you can mix it up. I’ve tried all of these.
Peach and Blueberry Galette
Swap the strawberries for sliced peaches. Peaches need less sugar, so reduce it to 2 tablespoons. Add a teaspoon of cinnamon for a cozy fall vibe. This is my go-to in late summer.
Apple Cinnamon Galette
Use thinly sliced apples (like Honeycrisp or Granny Smith) instead of berries. Toss with cinnamon and nutmeg. Apples take longer to cook, so add 5 minutes to the bake time. This is similar in spirit to those soft apple cinnamon oatmeal bars but in a pastry form.
Lemon Ricotta Crust
For a richer, cake-like crust, replace half the flour with ricotta cheese and add lemon zest. This makes a tender, shortbread-like base that pairs beautifully with berries.
Gluten-Free Version
Use a 1:1 gluten-free flour blend. Add ½ teaspoon xanthan gum if your blend doesn’t have it. The texture will be slightly more crumbly but still delicious.
Vegan Option
Use vegan butter (like Miyoko’s or Earth Balance) and skip the milk wash (use almond milk instead). The filling is naturally vegan. The crust might be slightly less flaky, but it’s still great.
Serving & Storage
How to Serve:
I usually serve this straight from the cooling rack. It looks rustic and stays warm. But here are other ways I’ve enjoyed it:
Sides:
- Vanilla Ice Cream — The classic choice. The cold cream contrasts with the warm fruit.
- Whipped Cream — Lightly sweetened with a drop of vanilla. Good for those who want less heaviness.
- Crème Fraîche — A tangy, cultured cream that cuts through the sweetness. Fancy but easy to buy.
- Greek Yogurt — For a protein-packed, lighter option.
Storage Instructions:
Refrigerator:
Store leftovers in an airtight container for up to 3 days. The crust will soften slightly, but the flavor remains great.
Reheating:
Best method: Reheat in a 350°F oven for 10 minutes. This restores the crispness of the crust. Microwave it, and the crust will get chewy. I learned this the hard way with a sad, soggy slice.
Freezing:
You can freeze the baked galette for up to 2 months. Wrap it tightly in plastic and foil. Thaw in the fridge overnight and reheat in the oven. Or, freeze the unbaked galette on the baking sheet, then transfer to a bag. Bake from frozen, adding 5-10 minutes to the cook time.
Nutrition Information
I’m not a nutritionist, but here’s the breakdown if you’re tracking. This is a treat, so enjoy it mindfully.
Per Serving (based on 8 slices):
- Calories: 320
- Protein: 4g
- Carbs: 45g
- Fiber: 3g
- Sugar: 22g
- Fat: 14g
- Saturated Fat: 8g
What’s Good:
- Real fruit provides vitamins and antioxidants.
- Simple ingredients, no artificial additives.
- Portion control is easy with slices.
What to Know:
- Higher in sugar from the fruit and added sugar.
- Contains gluten and dairy.
- Calories are moderate for a dessert slice.
My Take:
Look, this is a dessert with butter and sugar. It’s not a health food. But it’s better than store-bought pastries, and the fruit adds real nutrition. When I make it with less sugar and more berries, it feels like a balanced treat. But usually? I just enjoy a slice and move on. Life’s too short for guilt.
Final Thoughts
So that’s my triple berry galette! I’ve probably talked your ear off at this point, but when you make a recipe this often, you have a lot to say about it.
This has saved summer dinners more times than I can count. It’s my answer to “I want something sweet but I don’t want to bake a cake.” It’s light enough for humid nights but rich enough to feel special. My kids are happy, my husband’s happy, and I’m happy because I’m not stressed about cooking.
Make it yours! Try different berries, adjust the sugar, or add a splash of liqueur to the filling. The best recipes are the ones you adapt to your family’s tastes.
If you make this, drop a comment and let me know what you think! I love hearing how recipes turn out in your kitchen. And if something doesn’t work, tell me that too—I’m here to help troubleshoot.
Happy baking! And I hope your kitchen smells half as good as mine does right now.
Frequently Asked Questions
Can I use frozen berries?
Yes, but you need to be careful. Frozen berries release more water. If you use frozen berries, do not thaw them first. Toss them with the cornstarch while they’re still frozen, and add 5-10 minutes to the baking time. The extra moisture can make the crust soggy if you thaw them first.
Why did my galette leak?
Leaking happens if the filling touches the edge of the dough or if you didn’t use enough thickener. Make sure you leave a 2-inch border. Also, ensure your cornstarch is evenly distributed. If it leaks, it’s not a disaster—just scoop up the caramelized fruit and eat it. It’s basically berry jam.
Can I make this ahead for a party?
Yes! Make the galette the day before. Store it at room temperature, covered. Reheat it in a 350°F oven for 10-15 minutes before serving. This actually helps the flavors meld. Just don’t add the ice cream until you’re ready to eat.
Why is my crust tough?
Tough crust usually means overworked dough. You probably mixed it too much or used warm butter. Remember: handle the dough as little as possible. Keep everything cold. If you’re using a food processor, pulse only until crumbs form.
Can I use honey instead of sugar?
You can, but honey adds moisture. Reduce the honey to 3 tablespoons and reduce the liquid in the dough by 1 tablespoon. The flavor will be more complex, but the texture might be slightly denser.
How do I know when it’s done?
The crust should be golden brown, and the filling should be bubbling vigorously. If the crust is brown but the fruit isn’t bubbling, it’s not done. The bubbling indicates the cornstarch has thickened the juices.
Can I double this recipe?
Yes, but you’ll need two baking sheets. Don’t crowd them. Bake them on separate racks, switching positions halfway through for even browning. The cooking time stays the same.
Pin This Recipe!