It was 6:15 PM on a Tuesday, and the house was already in chaos. My youngest was crying because his shoes didn’t match (they never do), my oldest was complaining that he was “starving to death” after only eating a snack an hour ago, and I was staring into my refrigerator like it held the secrets to the universe. Spoiler alert: It didn’t. It had a half-empty jar of pickles, some wilted spinach, and one sad-looking block of cheddar.
I had exactly 30 minutes before the doorbell rang for soccer practice, and I was out of ideas. No more takeout. No more “just eat toast.” I needed something hot, filling, and cheap enough that I wouldn’t feel guilty about the grocery bill. That’s when I remembered the bag of instant rice in the back of my pantry and the ground beef in the freezer.
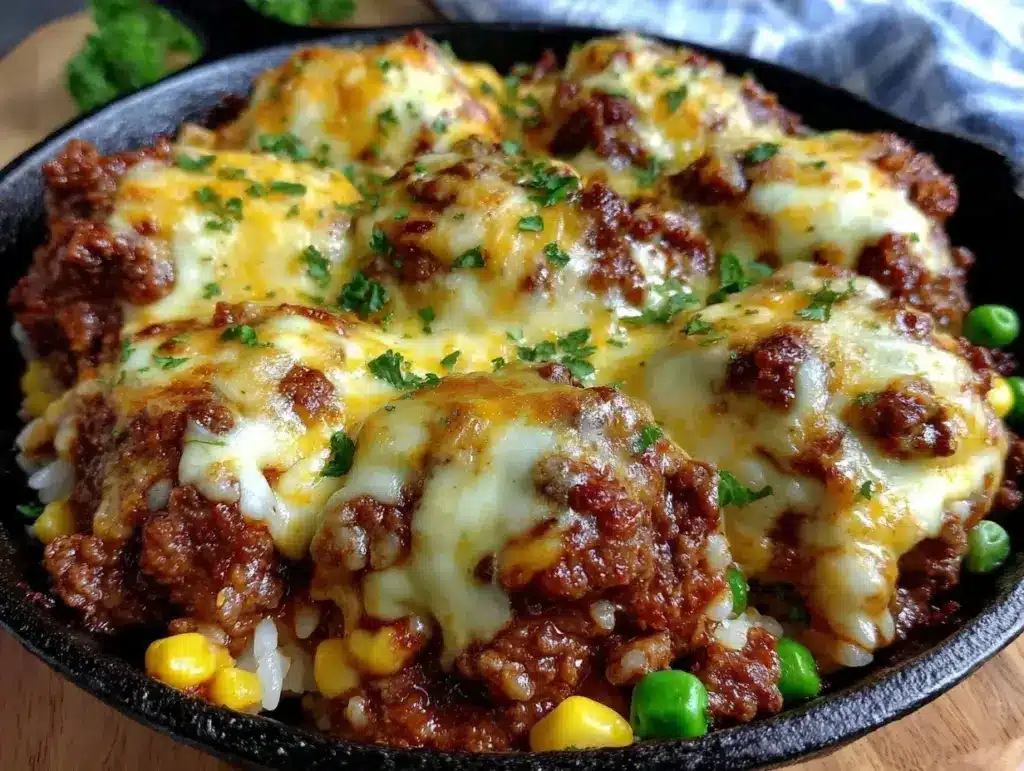
I threw together what I thought would be a mediocre, mushy mess. I called it the Sheet Pan Ground Beef and Rice Skillet. Thirty minutes later, my kids were scraping their plates clean. My husband came home, took one bite, and asked if I wanted to order dessert since he was “too full.” That’s when I knew I had struck gold.
I’ve made this Sheet Pan Ground Beef and Rice Skillet at least 15 times in the last three months. It’s become my secret weapon for those nights when I have zero energy but still want to serve a hot meal that doesn’t cost a fortune. It’s one bowl, one pan, and five ingredients. Seriously. If you can boil water and brown meat, you can make this. And the best part? It’s incredibly budget-friendly, stretching a single pound of ground beef into a full family meal.
Why You’ll Love This Budget-Friendly One-Pan Wonder
Let’s be real for a second. Weeknight cooking is hard. You’re tired, you’re hungry, and you’re trying to feed humans who have different opinions on what constitutes “food” on any given day. This Sheet Pan Ground Beef and Rice Skillet solves the biggest problems I face as a parent:
- Zero Dish Fatigue — Seriously, if you can boil water and chop an onion, you can make this. And you only use one pan (plus a skillet for the beef). I’m talking about washing one skillet and one sheet pan. That’s it. My husband does the dishes, but he still thinks I’m a hero.
- Stupidly Affordable — You probably have most of this already. Ground beef (on sale), instant rice, frozen veggies, and a jar of sauce. We’re talking under $12 for a meal that feeds 4-6 people. That’s less than a single pizza delivery, and way healthier.
- Lightning Fast — 30 minutes from start to finish, and only 10 of those are active cooking. I make this on weeknights when I get home at 7pm and still need to help with homework.
- Kid-Approved (Mostly) — I’ve served this to my picky eater who usually only eats chicken nuggets. He didn’t even notice the vegetables because they were mixed right in with the savory beef and rice. It’s the perfect stealth-veggie dinner.
- Makes Amazing Leftovers — Actually tastes better the next day. I deliberately make extra for lunch throughout the week. The rice soaks up all that flavor and gets even better.
- Freezer Friendly — I often double this batch. Half for dinner, half for the freezer. It reheats beautifully in the microwave for a quick lunch.
This is my go-to when I need dinner to just work. No complicated techniques, no weird ingredients, just reliable, delicious food that makes everyone happy. It’s practical, it’s cheap, and it tastes like comfort.
Ingredients You’ll Need (And Why They Matter)
Here’s the best part: you probably have most of this already. I’m particular about three ingredients here, and I’ll tell you exactly why. This Sheet Pan Ground Beef and Rice Skillet relies on simple, pantry-staple items that won’t break the bank.
For the Base:
Ground beef (1 pound / 450g) — I use 80/20 lean. It’s cheaper and has enough fat to keep the rice moist. If you want to save money, look for sales on 90/10 and drain the grease well. I always buy the family pack when it’s on sale and freeze it in 1-pound portions.
Instant rice (1 cup / 150g) — Yes, instant. Minute rice or similar brands work perfectly here because it cooks quickly and absorbs the sauce well. You don’t need fancy jasmine or basmati for this rustic skillet. Regular white instant rice is fine. Brown rice takes too long and gets mushy.
Water or beef broth (1 cup / 240ml) — I use water to keep it cheap, but if you want extra flavor, swap it for low-sodium beef broth. It costs a little more but adds depth. I usually keep both on hand.
Frozen mixed vegetables (1.5 cups / 200g) — Peas, carrots, corn, green beans. Whatever is on sale. I don’t measure strictly—I just dump in a generous handful. Frozen veggies are cheaper than fresh, don’t spoil, and cook perfectly in the oven. I always keep a bag in the freezer for emergencies like this.
For the Flavor:
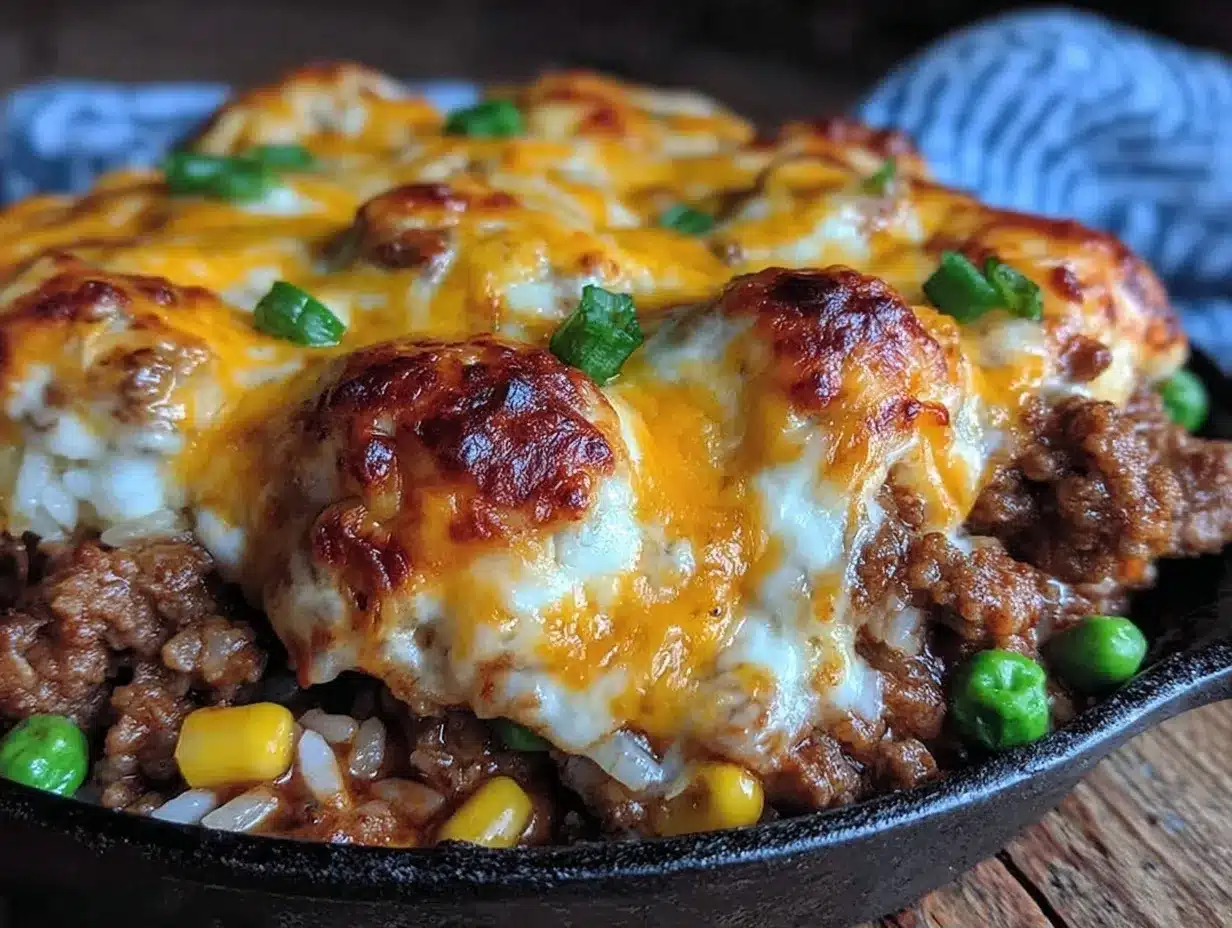
Beef gravy mix (1 packet / 1.2 oz) — This is the secret weapon. It’s cheap, it’s shelf-stable, and it gives you that rich, savory sauce without making a roux. I use the basic brown gravy packet. If you have homemade gravy, use 1 cup, but the packet is faster and easier.
Ketchup (2 tablespoons) — This sounds weird, I know. But it adds sweetness and tang that balances the savory beef. It’s a pantry staple in my house. If you’re out, a teaspoon of sugar and a splash of vinegar works, but ketchup is easier.
Garlic powder (1 teaspoon) — Fresh garlic is great, but for this quick skillet, powder is faster and distributes evenly. I have a jar that’s been open for six months and it’s still good.
Salt and black pepper — To taste. The gravy mix is salty, so go easy on the salt initially. Taste as you go.
Shredded cheddar cheese (Optional, ½ cup / 50g) — I buy the block and shred it myself to save money. Pre-shredded has anti-caking agents that make it grainy. But honestly, if you’re in a rush, the bag stuff works fine. My kids love it with cheese.
Personal Tips:
- Brand recommendations: I use Lipton onion soup mix or basic brown gravy packets—they’re consistent.
- Shopping shortcuts: I buy frozen veggies in bulk during sales. Stock up when they’re $1.
- Substitutions: No gravy mix? Use 1 cup of beef broth + 1 tablespoon soy sauce + 1 teaspoon cornstarch.
- Storage: Ground beef freezes well for up to 3 months. Wrap tightly in plastic and foil.
Equipment Needed
You don’t need fancy equipment for this. Here’s what I actually use.
Large skillet (12-inch) — I use a cast-iron skillet because it holds heat well and goes from stove to oven. Stainless steel works too, but make sure it’s oven-safe. My old non-stick pan works fine for the browning step.
Sheet pan (half-sheet) — Standard 18×13 inch baking sheet. I use a light-colored aluminum one because it promotes even browning. Dark pans can burn the rice on the edges.
Wooden spoon or spatula — For stirring the beef and mixing the rice. Silicone works too. Don’t use metal on non-stick.
Measuring cups and spoons — Pretty standard stuff. Dollar store versions work fine.
Knife and cutting board — For chopping onions if you add them. I usually skip onions to save time, but they’re delicious if you have them.
Oven mitts — Because the pan will be hot. I’ve burned my hands enough times to learn this lesson.
How to Make It: Step-by-Step
Alright, let’s make this! I’m walking you through exactly how I do it, including the little tricks I’ve picked up.
Step 1: Prep Your Oven and Pan (5 minutes)
Preheat your oven to 400°F (200°C). Line your sheet pan with parchment paper or foil for easy cleanup. I use foil because I like to spray it with cooking oil—it makes wiping it down a breeze. While the oven heats, get your ingredients ready.
Step 2: Brown the Beef (5-7 minutes)
Heat your large skillet over medium-high heat. Add the ground beef, breaking it up with your wooden spoon as it cooks. Cook for 5-7 minutes until it’s no longer pink. Drain any excess grease if you want a leaner dish, but leave a little bit for flavor. This step is crucial—browning the beef adds depth that boiling it would miss.
Step 3: Mix the Sauce (2 minutes)
In a small bowl, whisk together the water (or broth), gravy mix, ketchup, and garlic powder until smooth. It should look like thin brown gravy. Pour this mixture over the browned beef in the skillet. Stir well to combine. Let it simmer for 1 minute to thicken slightly. The sauce will bubble and smell amazing.
Step 4: Combine Everything (2 minutes)
Pour the beef and sauce mixture into the prepared sheet pan. Sprinkle the instant rice evenly over the top. Then, add the frozen vegetables. Don’t stir it yet! Just spread everything out evenly. The rice will absorb the sauce as it bakes.
Step 5: Bake Until Tender (15-20 minutes)
Place the sheet pan in the preheated oven. Bake for 15-20 minutes. You’ll know it’s done when the rice is tender and has absorbed most of the liquid. The edges might get slightly crispy, which I love. If you want it crispier, broil for the last 2 minutes, but watch it closely so it doesn’t burn.
Step 6: Add Cheese and Serve (2 minutes)
If you’re using cheese, sprinkle it over the hot skillet right after taking it out of the oven. The residual heat will melt it perfectly. Let it sit for 2 minutes before serving—it’s hot! Serve immediately with a side of garlic bread or a simple green salad.
Total Time: About 30 minutes (10 minutes active, 20 minutes mostly hands-off)
Expert Tips & Tricks
Here’s everything I’ve learned from making this dozens of times. These tips will save you from my mistakes.
Don’t Stir Before Baking
I used to stir everything together before putting it in the oven. Big mistake. The rice gets clumpy and uneven. By leaving it layered, the rice sits on top of the sauce and absorbs it evenly as it bakes. Trust me.
Use Instant Rice
Regular long-grain rice takes 45 minutes and needs more liquid. Instant rice is designed to cook fast and absorb flavor. It’s the key to this 30-minute meal. Don’t substitute unless you want to adjust cooking time significantly.
Drain the Grease
If your ground beef is very fatty, drain the grease before adding the sauce. Too much grease makes the rice soggy and oily. I usually drain it into a measuring cup—I can save a tablespoon to sauté vegetables in another meal.
Customize the Veggies
Frozen peas are classic, but try frozen broccoli florets or diced bell peppers. I once used frozen corn and it was delicious. Just make sure they’re frozen, not fresh, so they cook at the same rate as the rice.
Double the Batch
I often double this recipe. Use two sheet pans or a large roasting pan. It makes perfect meal prep portions. I freeze half in individual containers for lunches. It reheats in the microwave for 2-3 minutes and tastes fresh.
Common Mistakes (and how to avoid them):
- Rice is crunchy: You didn’t bake it long enough. Cover with foil for the last 5 minutes to steam it.
- Sauce is watery: You added too much liquid. Next time, use ¾ cup water instead of 1 cup.
- Beef is dry: You overcooked it before adding sauce. Brown it just until no longer pink.
Variations & Substitutions
Once you’ve nailed the basic version, here’s how you can mix it up. I’ve tried all of these.
Tex-Mex Version
Skip the gravy mix. Use 1 cup of salsa and 1 teaspoon of taco seasoning. Top with shredded Mexican cheese and cilantro. My kids love this version—it’s like a deconstructed burrito bowl.
Cheesy Mushroom
Add 1 cup of sliced mushrooms when you brown the beef. They release moisture and add earthiness. Top with Swiss cheese instead of cheddar. It’s rich and savory.
Lighter Version
Use 93/7 lean ground beef and low-sodium broth. Skip the cheese. It’s still filling because of the rice and veggies. I make this when I’m trying to eat cleaner.
Vegetarian Swap
Replace ground beef with lentils or a plant-based crumble. Use vegetable broth and soy sauce instead of gravy mix. It’s surprisingly satisfying.
Dietary Modifications:
- Gluten-Free: Use GF instant rice and GF gravy mix (or make your own with cornstarch and broth).
- Dairy-Free: Skip the cheese or use dairy-free shreds. The base recipe is naturally dairy-free except for the cheese.
- Low-Carb: Swap rice for cauliflower rice. Reduce liquid to ½ cup. It’s not the same texture, but it works.
Serving & Storage
How to Serve:
I usually serve this straight from the sheet pan at the dinner table—it looks rustic and stays warm. But here are other ways I’ve enjoyed it:
Side Dishes:
- Garlic bread (obviously)
- Simple green salad with balsamic vinaigrette
- Roasted broccoli or green beans
- Crispy baked mozzarella sticks (if I’m feeling fancy)
Toppings Bar:
When I have guests, I put out: shredded cheese, sour cream, hot sauce, fresh chives. Everyone customizes their bowl.
Storage Instructions:
Refrigerator: Store in an airtight container for up to 4 days. The rice will absorb more liquid, so it might look dry. That’s normal.
Reheating: Best method: Add a splash of water or broth to a skillet and heat over medium-low, stirring frequently. Microwave method: Heat in 30-second intervals, stirring between. Add a splash of water if it’s too thick. Never works: Trying to reheat it dry—it will be crunchy and unappetizing.
Freezing: This freezes well! Let it cool completely, then portion into freezer bags or containers. Freeze for up to 3 months. Thaw in the fridge overnight before reheating. I meal-prep this every Sunday for busy weekdays.
Nutrition Information
I’m not a nutritionist, but here’s the breakdown if you’re tracking. Per serving (based on 6 servings):
- Calories: 320
- Protein: 18g
- Carbs: 35g
- Fiber: 2g
- Sugar: 4g
- Fat: 12g
- Sodium: 650mg (varies by gravy mix)
What’s Good: Decent protein from beef, filling carbs from rice, veggies for fiber. What to Know: Higher sodium from the gravy mix. Use low-sodium broth and less gravy to reduce. My Take: Look, this is comfort food. It’s not a diet recipe. But it’s way better than takeout, costs less, and I know exactly what’s in it. When I want to make it lighter, I use lean beef and skip the cheese. But usually? I just eat a reasonable portion and enjoy it.
Final Thoughts
So that’s my Sheet Pan Ground Beef and Rice Skillet! I’ve probably talked your ear off at this point, but when you make a recipe this often, you have a lot to say about it. This has saved weeknight dinners more times than I can count. It’s my answer to “what’s for dinner” when I’m tired, don’t want takeout, and still want something that tastes really good. My kids are happy, my husband’s happy, and I’m happy because I’m not stressed about cooking.
Make it yours! Try different add-ins, swap in your favorite vegetables, adjust the spices. The best recipes are the ones you adapt to your family’s tastes. If you make this, drop a comment and let me know what you think! I love hearing how recipes turn out in your kitchen. And if something doesn’t work, tell me that too—I’m here to help troubleshoot.
Happy cooking! And I hope your kitchen smells half as good as mine does right now.
Frequently Asked Questions
Can I use regular rice instead of instant?
You can, but you’ll need to adjust the liquid and cooking time. Use ½ cup of regular long-grain rice and 1.5 cups of liquid. Bake for 35-40 minutes, checking for doneness. The rice might not get as tender as with instant, so keep an eye on it. Instant is just easier for a quick weeknight meal.
Why did my rice turn out crunchy?
Usually means you didn’t bake it long enough or didn’t have enough liquid. Instant rice absorbs liquid quickly, so make sure it’s submerged or at least well-coated in the sauce. If it’s still crunchy, cover the pan with foil and bake for another 5-10 minutes to steam it.
Can I make this ahead for a dinner party?
Sort of. You can prep everything up to 4 hours ahead and keep it in the fridge. When ready to cook, just add 5-10 minutes to the baking time since it’s starting cold. It won’t be quite as crisp as fresh, but it’s close and saves you stress during the party.
Can I use turkey or chicken instead of beef?
Yes! Ground turkey or chicken works great. Just make sure to brown it well and drain excess grease if needed. Turkey is leaner, so you might want to add a little extra butter or oil for flavor. The sauce will be lighter, but still delicious.
How do I reheat leftovers without it getting dry?
Add a splash of water or broth to a skillet, add your leftover skillet, and heat gently over low heat, stirring frequently. The extra liquid brings back the moisture. Microwave sort of works but tends to dry it out. If you do microwave, definitely add a splash of water first and heat in short bursts, stirring between.
Can I double this recipe?
Absolutely! Double everything and use two sheet pans or a large roasting pan. The cooking times stay the same. I do this when I’m meal-prepping or feeding a crowd. Just make sure your oven has room for both pans.
Looking for more easy family meals? Check out these korean ground beef rice bowls for a spicy twist, or try creamy tuscan garlic chicken for a different protein option. For a side dish, these crispy garlic parmesan smashed potatoes are always a hit!
Pin This Recipe!
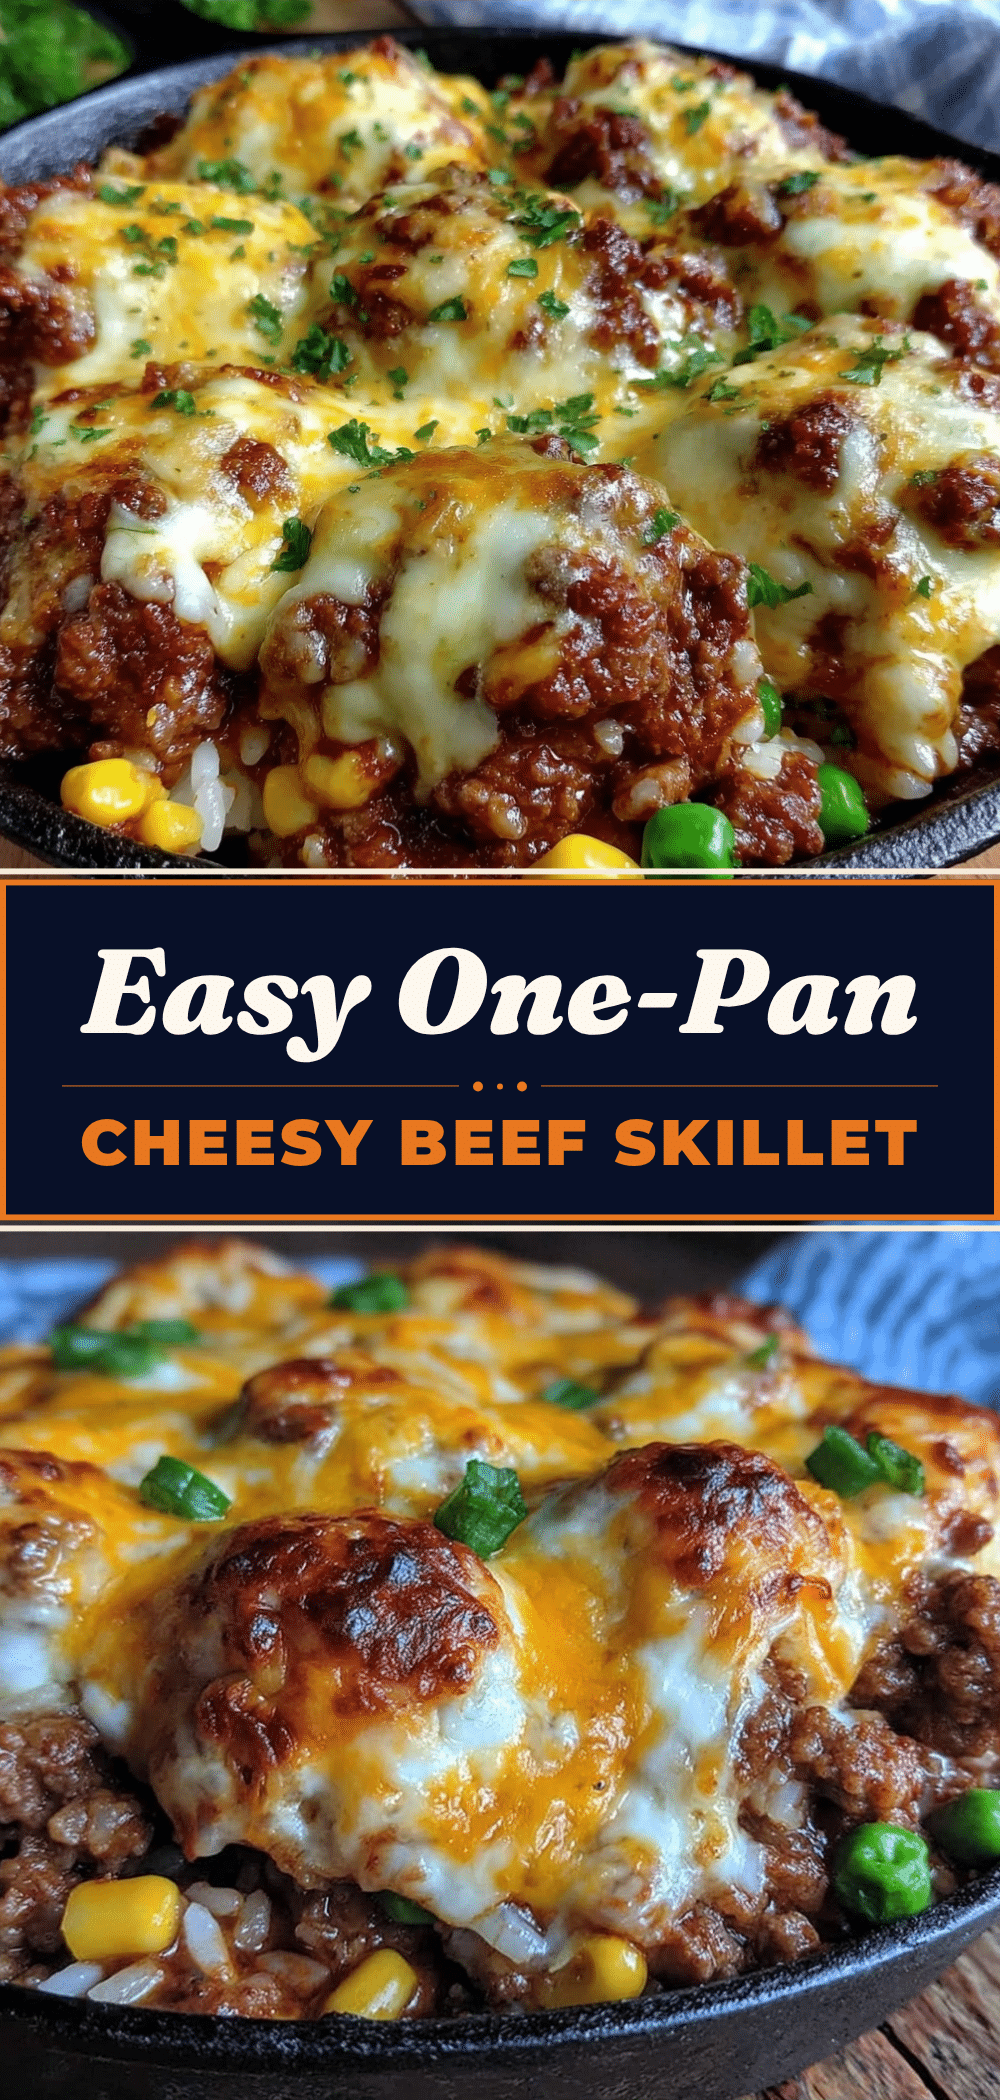

Sheet Pan Ground Beef and Rice Skillet
- Total Time: 30 minutes
- Yield: 6 servings 1x
Description
A budget-friendly, 5-ingredient weeknight dinner that comes together in just 30 minutes. This one-pan meal combines ground beef, instant rice, and frozen vegetables in a savory sauce for a family-friendly comfort food dish.
Ingredients
- 1 pound ground beef (80/20 lean)
- 1 cup instant rice
- 1 cup water or beef broth
- 1.5 cups frozen mixed vegetables
- 1 packet beef gravy mix (1.2 oz)
- 2 tablespoons ketchup
- 1 teaspoon garlic powder
- Salt and black pepper to taste
- 1/2 cup shredded cheddar cheese (optional)
Instructions
- Preheat oven to 400°F (200°C). Line a half-sheet baking pan with foil or parchment paper.
- Heat a large skillet over medium-high heat. Add ground beef and cook for 5-7 minutes, breaking it up with a spoon, until no longer pink. Drain excess grease if desired.
- In a small bowl, whisk together water (or broth), gravy mix, ketchup, and garlic powder until smooth.
- Pour the sauce mixture over the browned beef in the skillet. Stir to combine and let simmer for 1 minute.
- Pour the beef and sauce mixture into the prepared sheet pan. Sprinkle instant rice evenly over the top, then add frozen vegetables. Do not stir; spread ingredients evenly.
- Bake for 15-20 minutes until rice is tender and has absorbed most of the liquid.
- If using cheese, sprinkle it over the hot skillet immediately after removing from the oven. Let sit for 2 minutes before serving.
Notes
Do not stir the ingredients before baking to prevent clumpy rice. Use instant rice for the correct cooking time and texture. If the rice is crunchy, cover with foil and bake for an additional 5 minutes. For a lighter version, use leaner beef and skip the cheese. This recipe freezes well for up to 3 months.
- Prep Time: 10 minutes
- Cook Time: 20 minutes
- Category: Main Course
- Cuisine: American
Nutrition
- Serving Size: 1 serving
- Calories: 320
- Sugar: 4
- Sodium: 650
- Fat: 12
- Saturated Fat: 5
- Carbohydrates: 35
- Fiber: 2
- Protein: 18
Keywords: ground beef, rice skillet, budget dinner, weeknight meals, one pan dinner, family friendly, quick recipes, sheet pan meals