I still remember the first time I attempted a pumpkin roll. It was the year before my wedding, and I was trying to impress my future mother-in-law, who happens to be a retired French pastry chef. I thought I was being clever by skipping the traditional cake and going for something “fancier.” I rolled the cake while it was warm, sure. But I didn’t roll it tightly enough. When I unrolled it to add the filling, it cracked into three distinct pieces. I panicked. I tried to glue it back together with extra frosting, which just made it look like a dessert crime scene.
My mother-in-law took one bite, smiled, and said, “It tastes delicious, but next time, use a towel.” That advice stuck with me. I’ve since made this pumpkin roll with cream cheese filling over twenty times, tweaking the technique until it was foolproof. I’ve learned exactly how to keep the cake moist without being gummy, how to roll it without cracking, and how to balance the spice so it tastes like autumn, not like a spice cabinet explosion.
This isn’t just another holiday dessert. It’s the one that gets scraped clean. I’ve served it at Thanksgiving, Christmas, and even a last-minute potluck where everyone assumed I bought it from a fancy bakery. The truth? It’s easier than it looks, and the result is a show-stopping centerpiece that tastes incredibly rich and festive. If you’ve been intimidated by rolled cakes, let me walk you through my method. It’s the best easy holiday dessert you’ll ever make, and I promise, no more cracked cakes.
Why You’ll Love This Pumpkin Roll
There are a hundred reasons I keep coming back to this pumpkin roll, but let’s be real—some of them are more practical than others. Here’s what makes this recipe a total game-changer for your holiday gatherings.
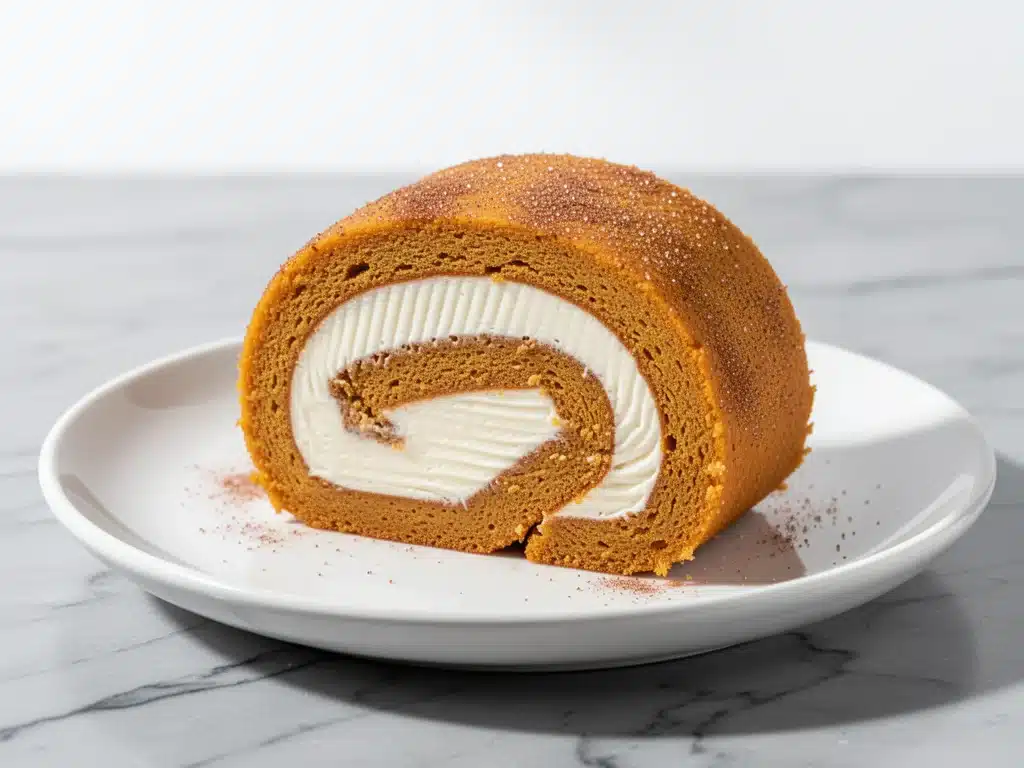
It Looks Impossible but Isn’t — Seriously, when you slice into this, everyone gasps. The spiral of orange cake against white cream cheese looks like something from a high-end patisserie. But the actual baking process? It’s basically mixing batter and rolling a towel. I’ve made this while juggling kids and a phone call. It’s that reliable.
Perfect Spice Balance — Too much cinnamon? Too much nutmeg? This recipe has the ratio dialed in. It’s warm and cozy without tasting like you’re eating a pumpkin pie that lost its crust. The spices complement the tangy cream cheese perfectly.
Make-Ahead Friendly — This is the ultimate stress-buster for holiday hosting. You can bake and roll the cake a day before, store it, fill it the next day, and chill it overnight. When your guests arrive, you just slice and serve. No last-minute scrambling while everyone is waiting for dessert.
Rich but Not Heavy — Holiday meals are heavy. You don’t want to end the night feeling like you need a nap. The cream cheese filling is light and airy, and the cake is moist but not dense. It’s the perfect finish to a big dinner.
Gluten-Free Option — If you have guests with celiac or gluten sensitivity, this recipe works beautifully with a 1:1 gluten-free flour blend. I’ve tested it with multiple brands, and the texture holds up just as well as the original.
This pumpkin roll has saved my holiday reputation more times than I care to admit. It’s elegant, delicious, and surprisingly simple. Once you master the roll, you’ll wonder why you ever bought store-bought versions that were dry and flavorless.
Ingredients You’ll Need
Before we get to the rolling (the scary part for beginners), let’s talk about what goes into this cake. You don’t need anything obscure. Most of this is pantry staples, with a few key items that make the difference between a good cake and a great one.
For the Cake:
Granulated sugar (1 cup / 200g) — I use regular white sugar. Brown sugar can make the cake too dense. You want a light, tender crumb.
Vegetable oil (½ cup / 120ml) — Yes, oil, not butter. Oil keeps the cake moist for days and helps it roll without cracking. Butter would make it too heavy.
Large eggs (3 large) — Room temperature eggs whip better and create a stronger structure. Don’t skip this step. Cold eggs will deflate your batter.
Pumpkin puree (1 cup / 240g) — Use canned pure pumpkin, not pumpkin pie filling. Pie filling has added sugar and spices that will throw off the balance. I prefer Libby’s, but any brand works.
All-purpose flour (1 cup / 125g) — Spoon and level this. Don’t scoop, or you’ll pack in too much flour and get a dry cake. If you’re making gluten-free, use a 1:1 blend like Bob’s Red Mill.
Baking powder (1 teaspoon) — Check the date! Old baking powder won’t give your cake the lift it needs to roll without breaking.
Baking soda (½ teaspoon) — This reacts with the pumpkin to help the cake rise.
Salt (½ teaspoon) — Essential to balance the sweetness.
Pumpkin pie spice (2 teaspoons) — Or make your own mix: 1 tsp cinnamon, ½ tsp ginger, ¼ tsp nutmeg, ¼ tsp cloves. I always keep a jar of pumpkin pie spice on hand for things like my pumpkin spice cheesecake.
Cinnamon (½ teaspoon) — Just a touch more warmth.
For the Filling:
Cream cheese (16 oz / 450g) — Full-fat, brick-style. Not the spreadable kind in a tub. It needs to be firm so the filling holds its shape. Let it come to room temperature before mixing.
Powdered sugar (1 cup / 100g) — Sift this if it’s lumpy. You don’t want gritty sugar in your smooth filling.
Vanilla extract (1 teaspoon) — Real vanilla, please. It adds depth that artificial flavoring can’t match.
Heavy cream (2 tablespoons) — Optional, but it lightens the filling and makes it spreadable. I usually add it.
For Dusting:
Powdered sugar (extra for dusting) — This is what gives it that snowy, festive look.
Pro Tip: I always buy a block of cream cheese and grate it myself before mixing. It blends into the sugar much faster and avoids lumps. It’s an extra minute, but it saves you from scraping bowl sides later.
Equipment Needed
You don’t need a fancy kitchen for this. Here’s what I actually use, and what works just as well.
15×10 inch jelly roll pan — This is the specific size for this recipe. If you use a standard 9×13 pan, the cake will be too thick and won’t roll properly. You can trim a 9×13 to fit if you’re desperate, but a jelly roll pan is worth the investment if you bake often.
Parchment paper — Essential. Line the pan with parchment. I also grease the parchment lightly to ensure the cake doesn’t stick.
Hand mixer or stand mixer — You need to beat the eggs and sugar until they’re pale and fluffy. This takes about 5 minutes. A hand mixer works fine if you’re patient. A stand mixer is faster.
Wire cooling rack — You’ll need this to cool the cake while it’s still in the parchment. It allows air to circulate so the bottom doesn’t get soggy.
Clean kitchen towel — This is your rolling tool. Use a lint-free towel (like a tea towel or a dedicated rolling towel). Wash it first to remove any fabric softener residue, which can affect the taste.
Offset spatula — Great for spreading the cream cheese filling evenly. A regular knife works too, but an offset spatula makes it easier.
Sharp knife or pizza cutter — For trimming the edges of the cake before filling. A pizza cutter is surprisingly effective for clean cuts.
Sifter or fine-mesh strainer — For sifting the powdered sugar. Lumpy sugar is the enemy of a smooth filling.
Optional but nice: A rolling pin to help guide the initial roll, and a brush for dusting the powdered sugar evenly.
How to Make It: Step-by-Step
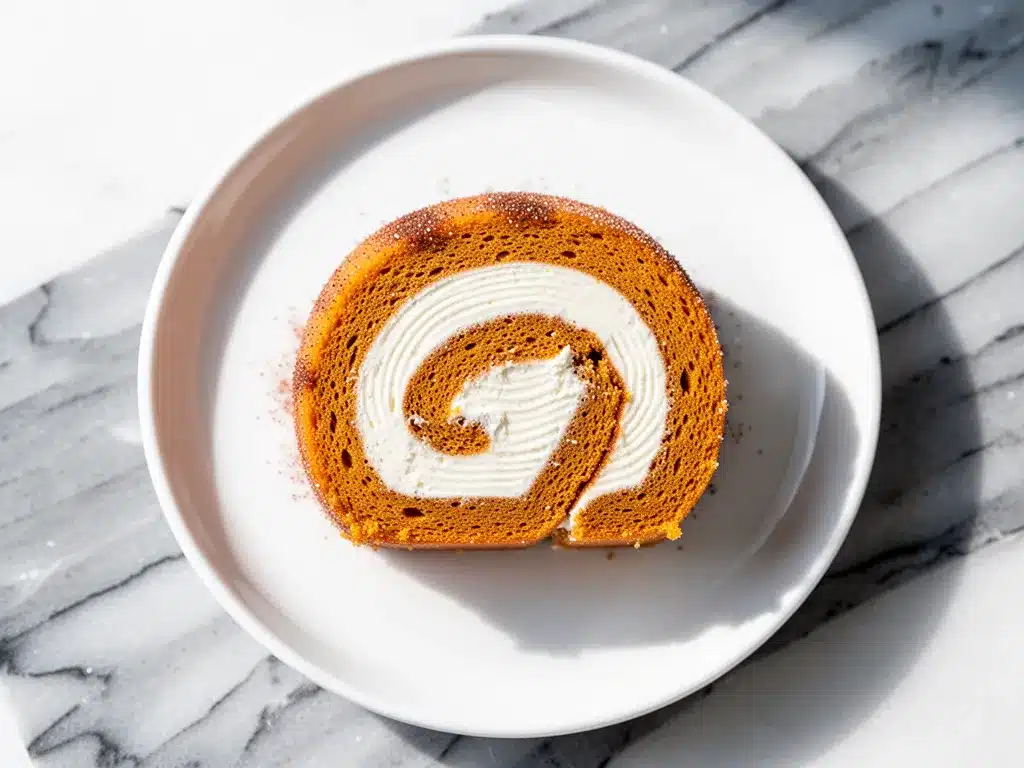
Alright, let’s make this! I’m walking you through exactly how I do it, including the little tricks I’ve picked up over the years. Don’t worry about the rolling—it’s easier than it looks.
Step 1: Prep Your Pan and Oven (5 minutes)
Preheat your oven to 375°F (190°C). Line your 15×10 inch jelly roll pan with parchment paper. Grease the parchment lightly with butter or non-stick spray. This step is crucial. If the cake sticks, it will tear when you try to roll it. I also sprinkle a little flour on the parchment and tap out the excess for extra insurance.
Step 2: Beat the Eggs and Sugar (5 minutes)
In a large bowl, beat the eggs and granulated sugar together on medium-high speed until the mixture is pale, thick, and doubles in volume. This is called the ribbon stage. When you lift the beaters, the batter should fall in a ribbon that sits on the surface for a few seconds before dissolving. This step incorporates air, which makes the cake light and fluffy. Don’t rush this—if you skip it, your cake will be dense.
Step 3: Mix in the Wet Ingredients (2 minutes)
Reduce the mixer to low speed. Add the vegetable oil and pumpkin puree. Mix until just combined. Be careful not to overmix, or you’ll deflate the air you just worked so hard to incorporate. The batter should be smooth and orange.
Step 4: Fold in the Dry Ingredients (3 minutes)
In a separate bowl, whisk together the flour, baking powder, baking soda, salt, pumpkin pie spice, and cinnamon. Gently fold this mixture into the wet batter using a spatula. Fold until no streaks of flour remain. Stop as soon as it’s combined. Overmixing at this stage is a common mistake that leads to a tough cake.
Step 5: Bake the Cake (12-15 minutes)
Pour the batter into the prepared pan and spread it evenly into the corners. Bake for 12-15 minutes. The cake is done when it springs back when lightly touched and the edges pull away slightly from the pan. Do not overbake. If it’s dry, it will crack when you roll it. A toothpick inserted in the center should come out clean or with just a few moist crumbs.
Step 6: The First Roll (The Critical Moment)
While the cake is still hot, place a clean kitchen towel on the counter and dust it generously with powdered sugar. Carefully invert the hot cake onto the towel. Peel off the parchment paper. Using the towel to help, roll the cake up from the short end, starting about an inch from the edge. Roll it tightly, but not so tight that it squishes. The towel helps create the memory of the roll. Let it cool completely in the rolled-up position on the rack. This step sets the shape so it doesn’t crack later.
Step 7: Make the Filling (10 minutes)
While the cake cools, beat the room-temperature cream cheese until smooth. Add the powdered sugar, vanilla, and heavy cream. Beat on medium-high until light and fluffy. Taste it. It should be sweet but with a nice tang. If it’s too thick, add a teaspoon more cream. If it’s too thin, add a bit more powdered sugar.
Step 8: Unroll, Fill, and Re-Roll
Once the cake is completely cool, gently unroll it. If it resists, let it sit for a minute—it’s just trying to hold its shape. Use a knife to trim off the dry edges (about ½ inch from each side). Spread the cream cheese filling evenly over the cake, leaving a ½-inch border on the long sides. Carefully roll the cake back up, this time without the towel. Use parchment paper or wax paper to help guide the roll if needed. Place the finished roll seam-side down on a serving platter.
Step 9: Chill and Serve
Cover the roll loosely with plastic wrap and refrigerate for at least 4 hours, or overnight. This firms up the filling and makes slicing clean. Before serving, dust the top generously with powdered sugar. Slice with a sharp knife or pizza cutter for clean wedges.
Total Time: About 1 hour active, plus cooling and chilling time.
Expert Tips & Tricks
Here’s everything I’ve learned from making this dozens of times. These tips will save you from my early mistakes.
Roll It While Hot — This is the #1 rule. The cake is pliable when hot. If you wait for it to cool, it will crack and break. Roll it immediately after inverting it onto the towel.
Don’t Overbake — A moist cake rolls better. If you bake it for 15 minutes and it’s still a little springy, that’s good. If it’s firm, it’s overbaked. Check it at 12 minutes.
Use a Lint-Free Towel — I learned this the hard way. If your towel sheds lint, it will stick to the cake and look messy. Use a tea towel or a dedicated rolling towel. Wash it without fabric softener.
Sift Your Sugar — Lumpy powdered sugar in the filling is a texture nightmare. Sift it through a fine-mesh strainer for a silky smooth result.
Room Temperature Cream Cheese — Cold cream cheese creates lumps. Take it out of the fridge 30 minutes before you start. If you forget, microwave it in 10-second bursts until it’s soft but not melted.
Chill Before Slicing — I know it’s tempting to slice it right out of the oven, but the filling needs to set. If you slice it warm, it will be messy and the layers will blur. Chill it for at least 4 hours, preferably overnight.
Trim the Edges — The edges of the cake are often drier and darker. Trim them off before filling for a uniform look and texture.
Use Parchment Paper for the Second Roll — When you unroll the cooled cake, it might stick to itself. Place a sheet of parchment paper on top, then gently unroll. This prevents tearing.
Don’t Skimp on the Spice — The spice is what makes it taste like pumpkin. Don’t reduce it. The balance is key.
Make It Ahead — This cake actually tastes better the next day. The flavors meld together. Plan to make it the day before your gathering.
Variations & Substitutions
Once you’ve nailed the basic version, here’s how you can mix it up. I’ve tried all of these, and they work beautifully.
Gluten-Free Version — Use a 1:1 gluten-free flour blend like Bob’s Red Mill or King Arthur. The texture is almost identical. I’ve tested this with multiple brands, and it holds up well. Just make sure your baking powder is gluten-free.
Dairy-Free Version — Replace the cream cheese with a dairy-free cream cheese alternative (like Kite Hill). Use coconut oil instead of vegetable oil in the cake. The flavor will be slightly different, but it’s still delicious.
Spiced Buttercream Filling — Swap half the cream cheese for whipped butter. Add a pinch of cinnamon to the buttercream for a richer, more traditional rolled cake filling. This is closer to what you’d get in a bakery.
Maple Pecan Variation — Add ½ cup chopped pecans to the filling. Toast the pecans first for extra flavor. It adds crunch and makes it feel more like a dessert pie.
White Chocolate Chip — Fold ½ cup white chocolate chips into the cream cheese filling. It adds sweetness and a fun texture. Great for holiday parties.
Chocolate Swirl — Add 2 tablespoons cocoa powder to the cake batter. It creates a marbled effect when rolled. I love this version for chocolate lovers.
Mini Rolls — Divide the batter into two 9×13 pans and bake for 10-12 minutes. Cut into smaller rolls for individual servings. Perfect for potlucks.
Seasonal Spices — Swap pumpkin pie spice for gingerbread spice for a darker, spicier flavor. Or use apple pie spice for a milder taste.
Alcohol Infusion — Add 1 tablespoon of bourbon or rum to the cream cheese filling. It adds a sophisticated kick. Great for adult gatherings.
Serving & Storage
Here’s how to keep your pumpkin roll looking and tasting its best.
How to Serve:
I usually serve this straight from the fridge. The cold filling is firm and slices cleanly. Dust it with powdered sugar right before serving for a festive look. Pair it with a cup of hot coffee or tea. It’s also great with a dollop of whipped cream on the side.
Side Dishes:
Since this is a dessert, it pairs well with savory holiday mains. If you’re hosting a full dinner, this pumpkin roll is the perfect finish. It’s light enough not to weigh down your guests after a heavy meal. For a full menu, consider my cinnamon roll apple cobbler for a warmer, fruitier option, or my vanilla bean panna cotta if you want something lighter and more elegant.
Storage Instructions:
Store the pumpkin roll in an airtight container in the refrigerator for up to 5 days. It actually gets better after a day as the flavors meld. Do not freeze it whole—the cream cheese filling doesn’t freeze well and can become grainy. If you need to make ahead, bake and roll the cake, store it wrapped tightly in plastic wrap at room temperature for 24 hours. Then fill and chill.
Reheating:
Don’t reheat this dessert. It’s meant to be served cold. If you leave it out for more than 2 hours, the cream cheese filling can spoil. Keep it refrigerated until serving time.
Pro Tip:
If you’re transporting it, place the roll on a flat board and wrap it tightly in plastic wrap, then in foil. Keep it cool in a cooler with ice packs if it’s a long drive.
Nutrition Information
I’m not a nutritionist, but here’s the breakdown if you’re tracking. Keep in mind, this is a rich dessert, so portion control is key.
Per Slice (based on 12 slices):
- Calories: 280
- Protein: 4g
- Carbs: 32g
- Fiber: 1g
- Sugar: 22g
- Fat: 15g
- Saturated Fat: 9g
- Cholesterol: 50mg
- Sodium: 250mg
What’s Good:
It’s relatively low in protein, but the pumpkin adds some fiber and vitamins. The cream cheese provides calcium. It’s a moderate-calorie dessert compared to heavy cheesecakes.
What to Know:
It’s high in sugar from the cake and filling. If you’re watching sugar, reduce the powdered sugar in the filling by half and use a sugar substitute. The cake itself is hard to modify without changing the texture.
My Take:
Look, this is a holiday treat. It’s not a health food. But it’s better than buying a store-bought version loaded with preservatives. When I make it, I slice it into smaller portions and share it with friends. It’s about enjoying the moment, not counting every calorie.
Dietary Notes:
Contains: gluten, dairy, eggs.
Can be made: gluten-free, vegetarian.
Not suitable for: vegan (without modifications), dairy-free (without modifications).
Final Thoughts
So that’s my go-to pumpkin roll! I’ve probably talked your ear off at this point, but when you make a recipe this often, you have a lot to say about it. This pumpkin roll has saved my holiday dinners more times than I can count. It’s my answer to “what’s for dessert” when I want something impressive but don’t have hours to spend in the kitchen.
My family loves it. My friends beg for the recipe. And I love it because it’s reliable. Once you master the roll, you’ll feel like a pastry pro. It’s a skill that will serve you well for years to come.
Make it yours! Try different fillings, add nuts, or experiment with spices. The best recipes are the ones you adapt to your family’s tastes. And if you make this, drop a comment and let me know how it turned out! I love hearing how recipes turn out in your kitchen. And if something doesn’t work, tell me that too—I’m here to help troubleshoot.
Happy baking! And I hope your kitchen smells as good as mine does right now.
Frequently Asked Questions
Why did my pumpkin roll crack when I unrolled it?
This usually happens if the cake was overbaked or if you waited too long to unroll it. The cake needs to be rolled while it’s still warm to set the shape. If you let it cool completely before the first roll, it will crack. Also, make sure you didn’t overbake it. A moist cake rolls better. If it cracks, don’t worry—you can still fill it and serve it. It will still taste delicious.
Can I use pumpkin pie filling instead of pure pumpkin?
No, you shouldn’t. Pumpkin pie filling already has sugar and spices added, which will throw off the balance of your cake. You want pure pumpkin puree so you can control the sweetness and spice. If you only have pie filling, you’ll need to reduce the sugar and spices in the recipe, but it’s risky. Stick with pure pumpkin for best results.
Can I make this ahead of time?
Yes! This is actually better made ahead. Bake the cake and roll it up in the towel a day before. Store it wrapped tightly in plastic wrap at room temperature. Then, unroll, fill, and re-roll it the day of your gathering. Chill it overnight. This gives the filling time to set and the flavors to meld.
Why is my cream cheese filling too runny?
This usually means the cream cheese wasn’t cold enough or you added too much liquid. Make sure your cream cheese is room temperature but not melted. If it’s too runny, add more powdered sugar a tablespoon at a time. If it’s still too thin, chill it for 30 minutes before spreading it on the cake.
Can I freeze the pumpkin roll?
I don’t recommend freezing the whole roll. The cream cheese filling can become grainy and separate when thawed. However, you can freeze the baked cake (rolled up in the towel) for up to 3 months. Thaw it overnight in the fridge, then fill and serve. The filling should be made fresh.
What size pan do I need?
You need a 15×10 inch jelly roll pan. If you use a standard 9×13 pan, the cake will be too thick and won’t roll properly. If you don’t have a jelly roll pan, you can use a 9×13 pan, but you’ll need to adjust the baking time and expect a thicker, less delicate roll. It’s not ideal, but it works in a pinch.
Can I use a different spice mix?
Yes! You can use gingerbread spice, apple pie spice, or even just cinnamon and nutmeg. Pumpkin pie spice is traditional, but feel free to experiment. I’ve made it with gingerbread spice, and it was fantastic. Just keep the total amount of spice the same.
How do I slice it cleanly?
Use a sharp knife or a pizza cutter. Dip the knife in hot water and wipe it dry between cuts. This helps the knife glide through the cream cheese without squishing the cake. Chill the roll thoroughly before slicing for the cleanest cuts.
Pin This Recipe!
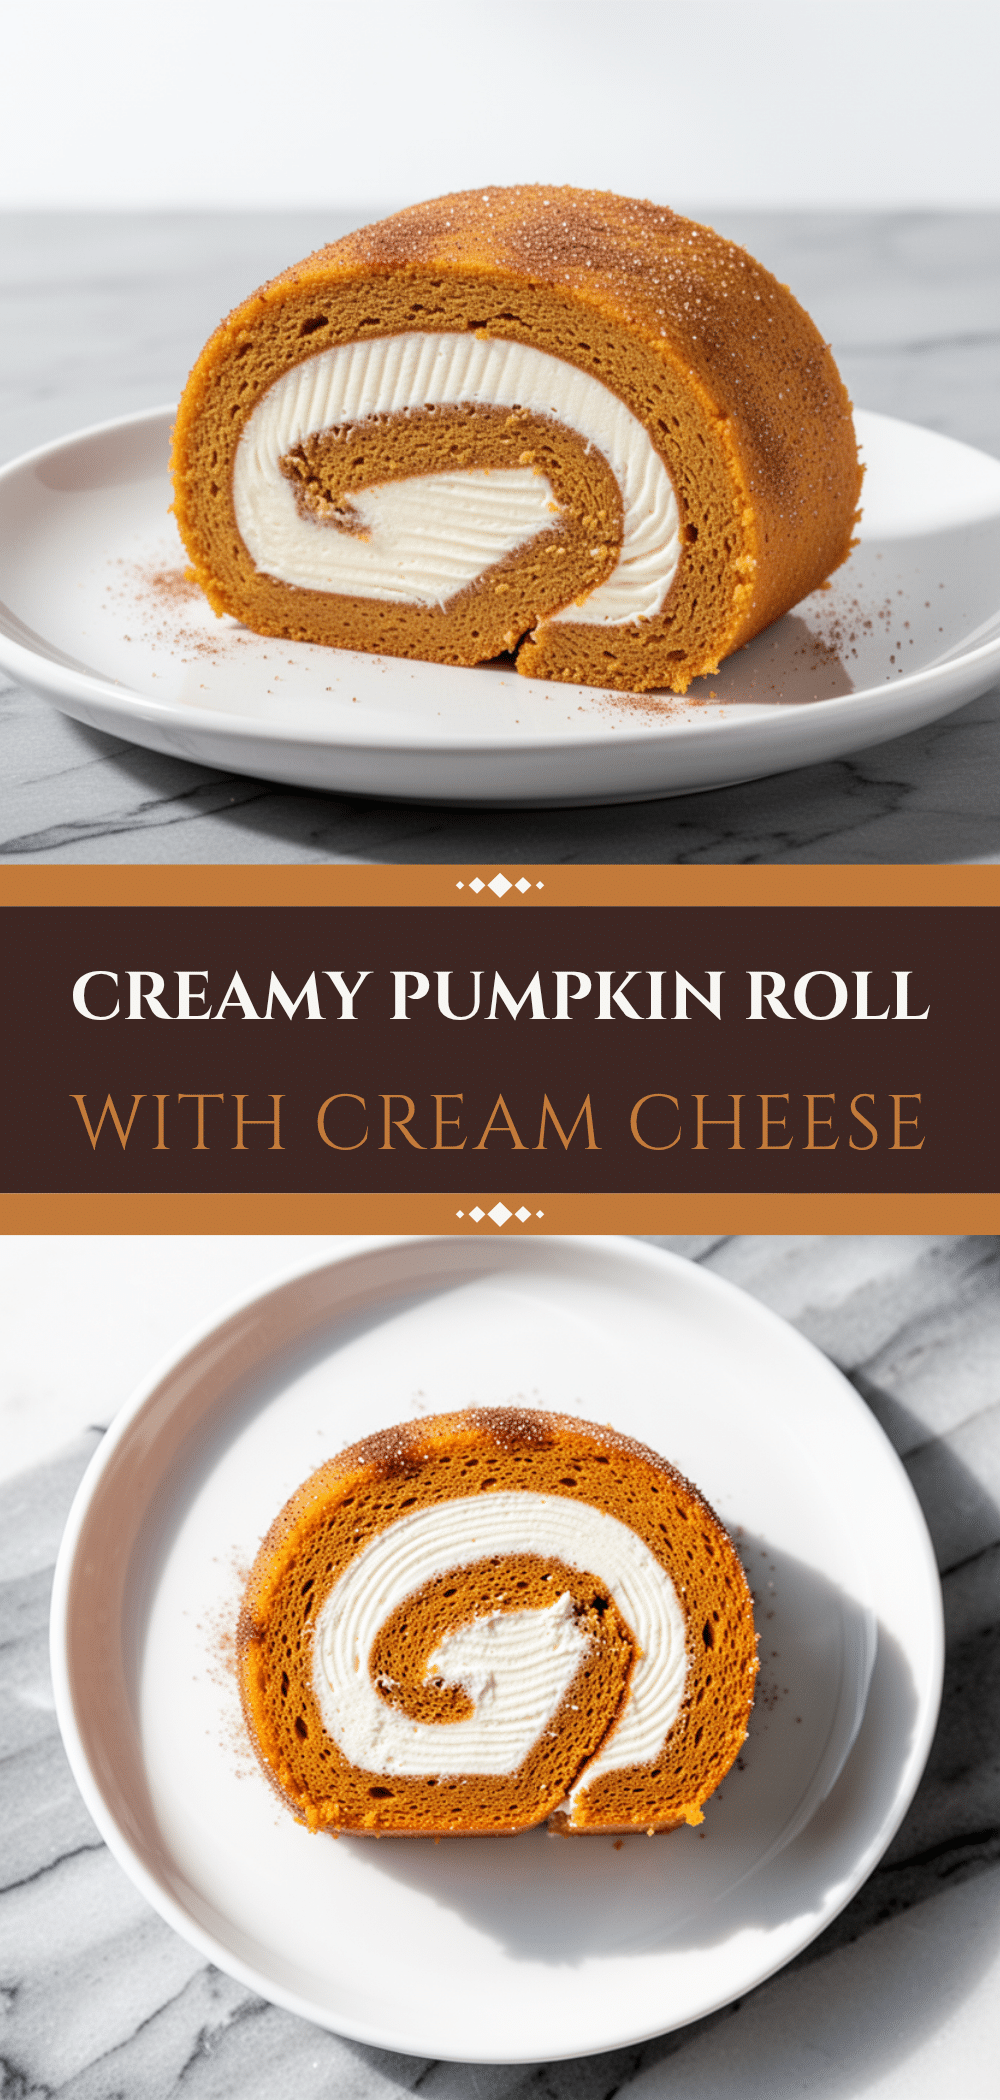
Pumpkin Roll: Best Easy Holiday Dessert
- Total Time: 1 hour active plus cooling and chilling time
- Yield: 12 servings 1x
Description
A foolproof pumpkin roll recipe with a rich cream cheese filling. This elegant holiday dessert is moist, perfectly spiced, and easier to make than it looks with step-by-step guidance to prevent cracking.
Ingredients
- 1 cup granulated sugar
- 3 large eggs, room temperature
- 1/2 cup vegetable oil
- 1 cup pumpkin puree (canned, not pie filling)
- 1 cup all-purpose flour
- 1 teaspoon baking powder
- 1/2 teaspoon baking soda
- 1/2 teaspoon salt
- 2 teaspoons pumpkin pie spice
- 1/2 teaspoon cinnamon
- 16 oz cream cheese, full-fat brick-style, room temperature
- 1 cup powdered sugar
- 1 teaspoon vanilla extract
- 2 tablespoons heavy cream (optional)
- Powdered sugar for dusting
Instructions
- Preheat oven to 375°F (190°C). Line a 15×10 inch jelly roll pan with parchment paper, grease lightly, and dust with flour.
- In a large bowl, beat eggs and granulated sugar on medium-high speed until pale, thick, and doubled in volume (ribbon stage).
- Reduce mixer to low speed; add vegetable oil and pumpkin puree. Mix until just combined.
- In a separate bowl, whisk together flour, baking powder, baking soda, salt, pumpkin pie spice, and cinnamon.
- Gently fold dry ingredients into wet batter until no streaks remain. Do not overmix.
- Pour batter into prepared pan and spread evenly. Bake for 12-15 minutes until edges pull away and center springs back.
- While cake bakes, place a clean lint-free kitchen towel on counter and dust generously with powdered sugar.
- Immediately invert hot cake onto towel. Peel off parchment. Roll cake up tightly from short end using towel. Let cool completely in rolled position.
- Beat cream cheese until smooth. Add powdered sugar, vanilla, and heavy cream. Beat until light and fluffy.
- Unroll cooled cake. Trim dry edges. Spread filling evenly, leaving 1/2-inch border on long sides.
- Re-roll cake without towel. Place seam-side down on serving platter.
- Cover and refrigerate for at least 4 hours or overnight.
- Dust with powdered sugar before serving.
Notes
Roll the cake while it is still hot to prevent cracking. Use full-fat brick-style cream cheese for the best texture. The recipe can be made gluten-free using a 1:1 gluten-free flour blend. Do not freeze the assembled roll as the filling may become grainy.
- Prep Time: 20 minutes
- Cook Time: 15 minutes
- Category: Dessert
- Cuisine: American
Nutrition
- Serving Size: 1 slice
- Calories: 280
- Sugar: 22
- Sodium: 250
- Fat: 15
- Saturated Fat: 9
- Carbohydrates: 32
- Fiber: 1
- Protein: 4
Keywords: pumpkin roll, holiday dessert, cream cheese filling, easy pumpkin recipe, Thanksgiving dessert, Christmas dessert, gluten-free option