Let me take you back to last Tuesday. It was 6:30 PM, the kind of Tuesday where the sun sets too early and my energy hits zero before I even walk through the door. I was staring into the fridge, feeling that specific brand of exhaustion that comes from a day of back-to-back meetings and pretending to care about spreadsheet formatting. The fridge contained a sad half-onion, some wilted spinach, and absolutely zero inspiration for dinner.
I wanted comfort food. But I didn’t have the energy to chop, knead, or babysit a dough for two hours. I didn’t want takeout (don’t get me started on the delivery app fees these days). And I certainly didn’t want to buy that sad, plastic-wrapped loaf from the supermarket that tastes like styrofoam.
Then I remembered the recipe I’d been meaning to try for months. The one that promised crusty, artisan-style bread with zero kneading. I figured, what’s the worst that could happen? I’d end up with a dense brick. So, I mixed three ingredients. I let it sit overnight. And this morning, I woke up to the smell of baking bread wafting through the house like a warm hug.
That smell didn’t just wake me up; it changed my entire week. Now, this no-knead crusty artisan bread is my secret weapon for busy weeknights. It’s not just bread. It’s a pantry staple that makes simple meals feel gourmet, turns leftover soup into a feast, and honestly? It makes my small apartment smell like a French bakery. If you’ve ever felt like baking bread requires a degree in engineering, you need to try this. It’s stupidly simple, incredibly forgiving, and the result is pure magic.
Why You’ll Love This No-Knead Crusty Artisan Bread
I’ve been making this no-knead crusty artisan bread for about a year now, and it has completely replaced my relationship with store-bought bread. Here’s why it’s taken over my kitchen (and likely yours too):
- Zero Kneading Required — Seriously. If you can stir, you can make this bread. I’ve made it while talking on the phone, while watching TV, and once while my toddler was climbing on my leg. The long rest does all the work for you. No punching down, no rolling pin, no arm pain.
- 3 Ingredients Only — Flour, water, salt, and yeast. That’s it. No fancy flours, no expensive starters, no weird grains you can’t pronounce. It’s the ultimate pantry-friendly recipe. I keep these items stocked just so I can pull this off on a whim.
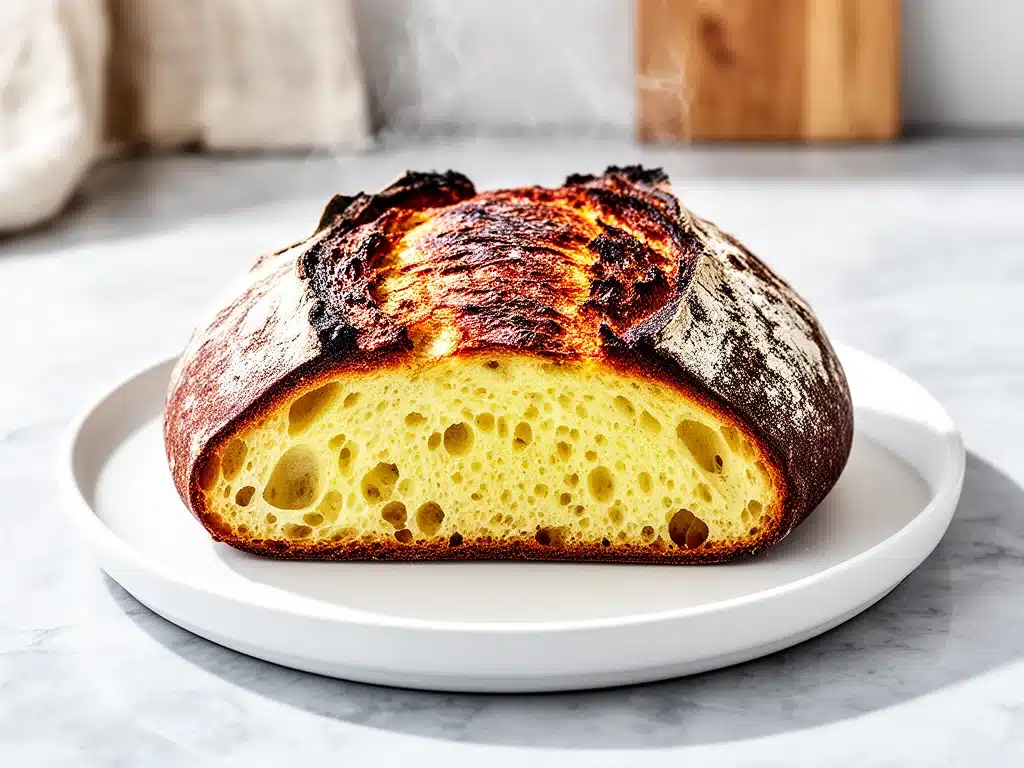
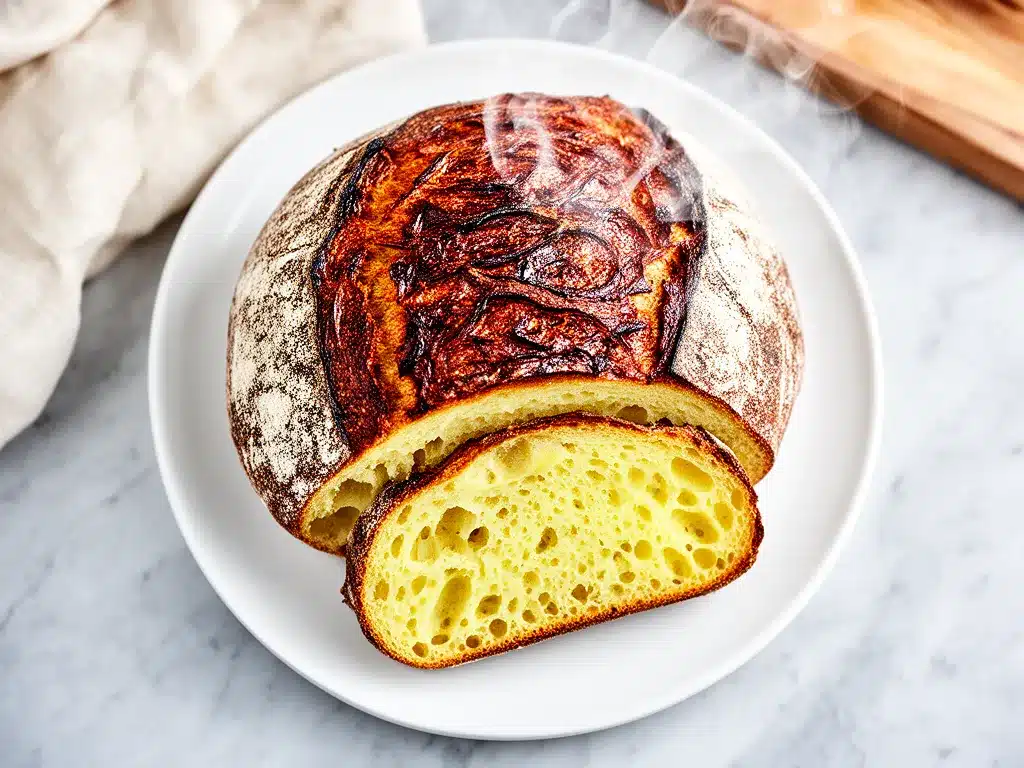
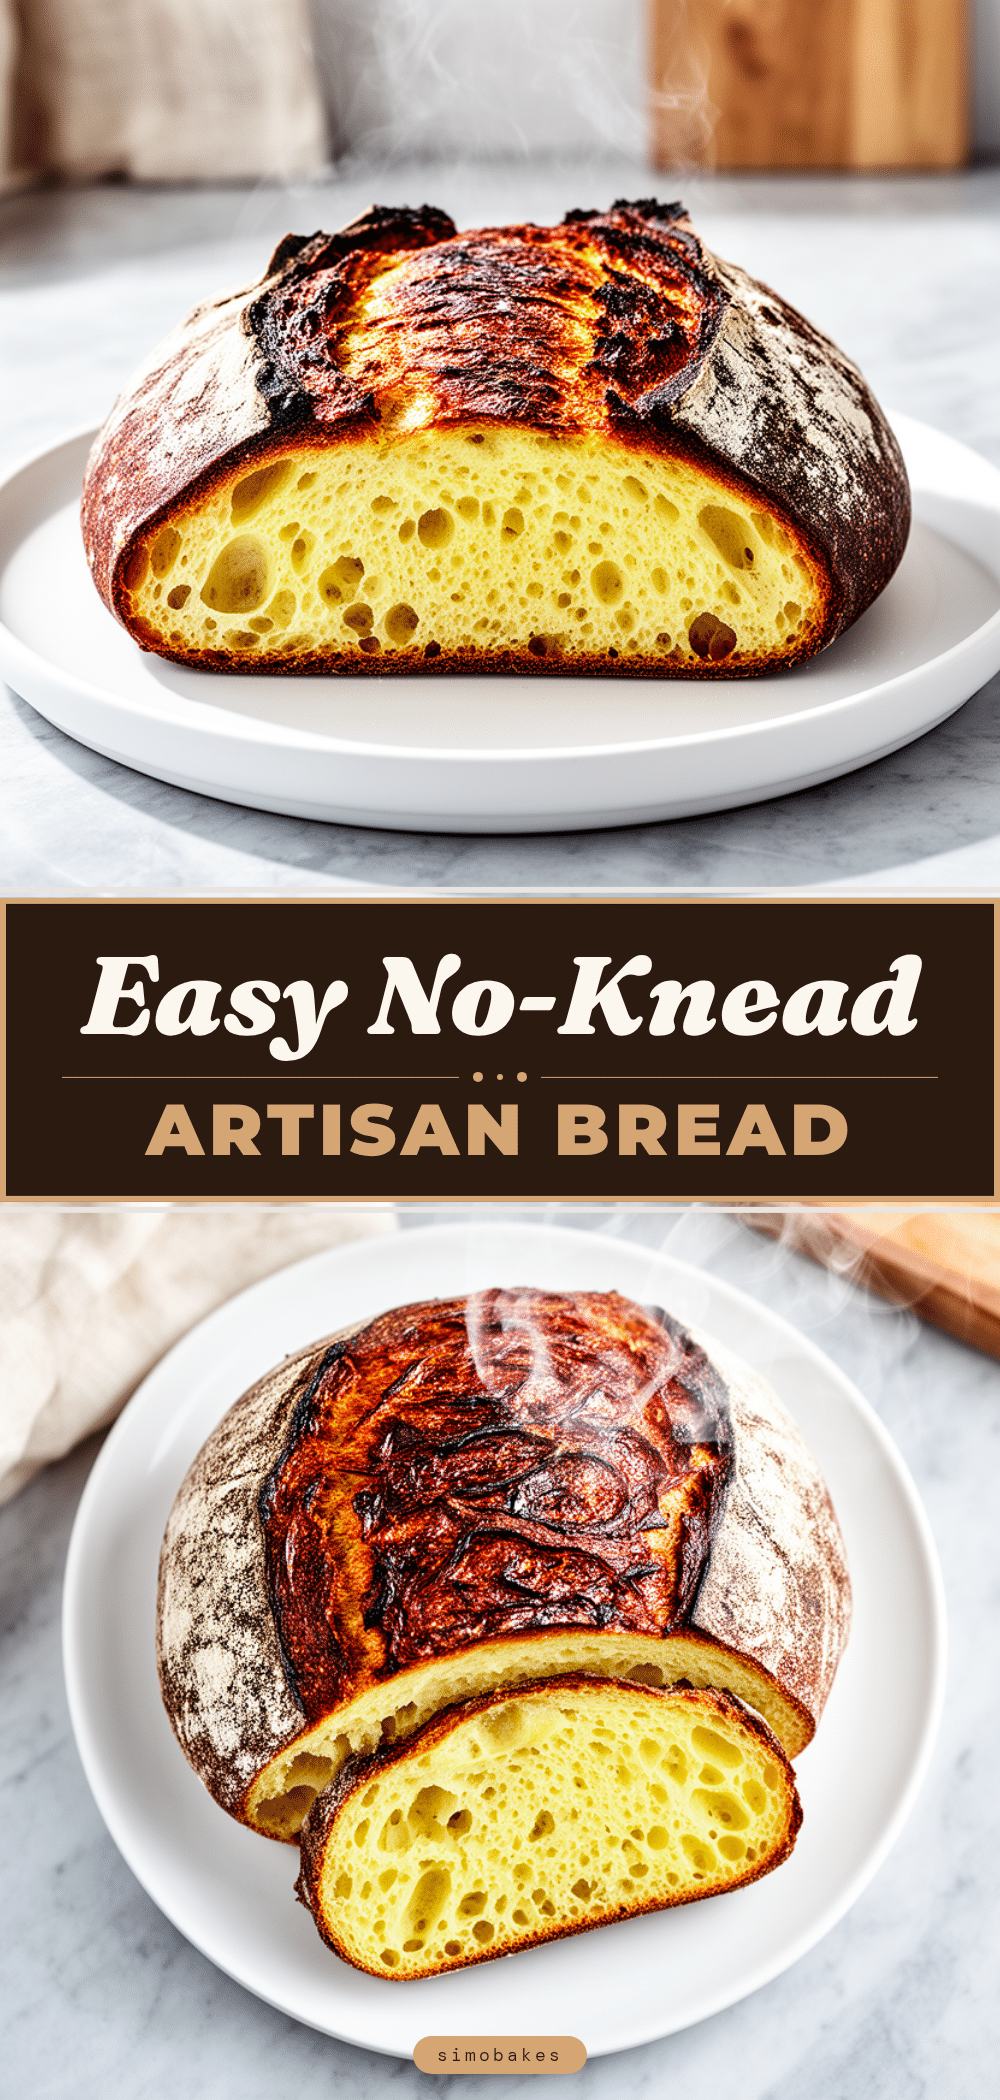
- Restaurant-Quality Crust — I’m not kidding. The crust is shatteringly crisp, and the inside is soft, airy, and chewy. It looks and tastes like something you’d buy at a fancy boulangerie for $8. But this costs about 40 cents per loaf.
- Freezer-Friendly — This bread freezes beautifully. I bake two loaves at a time and freeze one. When I need fresh bread for dinner, I just pull it out. It tastes fresh-baked even after a month in the freezer.
- Perfect for Leftovers — This is hands-down the best way to use up stale bread. When this loaf gets a bit old (after day 3), I slice it, toast it, and make my favorite soft apple cinnamon oatmeal bars style croutons, or I turn it into the ultimate bread pudding. But honestly? It’s usually gone by day two.
Real talk: this recipe has saved me from ordering pizza more times than I can count. It’s my go-to when I need dinner to just work. No stress, no mess, just reliable, delicious food that makes everyone happy. Plus, the smell alone makes my family think I’m some kind of culinary genius.
Ingredients You’ll Need
Here’s the best part: you probably have 90% of this already. This no-knead crusty artisan bread relies on the quality of simple ingredients. You don’t need fancy equipment or specialty stores. Just good basics.
The Dry Stuff
All-purpose flour (17 ounces / 480g) — I use regular all-purpose flour. You don’t need bread flour, though you can swap it if you want a chewier texture. I usually buy the big bag of Gold Medal or King Arthur. It’s cheap, reliable, and works perfectly every time.
Kosher salt (1.5 teaspoons / 9g) — Use kosher salt. Table salt is too dense and salty by volume. If you only have table salt, use half a teaspoon. The salt is crucial for flavor and controlling the yeast, so don’t skip it.
Instant yeast (¼ teaspoon / 1g) — Yes, that’s it. Just a pinch. Instant yeast doesn’t need to be activated in water first. You can sprinkle it right into the flour. Active dry yeast works too, but you might need to let the dough rise a bit longer. I always keep instant yeast on hand because it’s foolproof.
The Wet Stuff
Lukewarm water (15 ounces / 420ml) — This seems like a lot of water, but that’s the secret to the open, airy crumb. The water should be lukewarm, not hot. Think bathwater temperature. If it’s too hot, it’ll kill the yeast. If it’s too cold, the yeast won’t wake up. Just run it for a few seconds and test it on your wrist—it should feel neutral.
Optional Upgrades
Flour dusting — For the crust, you’ll need a bit more flour to dust your bowl or proofing basket. I use a mix of all-purpose and a little semolina for that authentic bakery crunch.
Seeds or herbs — While the classic recipe is pure white flour magic, you can add rosemary, sesame seeds, or poppy seeds if you want. But for the first time? Stick to the basics. You need to fall in love with the plain version first.
Shopping Tips
I buy my flour in bulk. It keeps for months if stored in an airtight container. The yeast is the one thing you should check—make sure it’s not expired. I keep it in the fridge once opened. And the water? Just tap water is fine. No need for filtered or bottled unless your tap water tastes like chlorine.
Equipment Needed
You don’t need fancy equipment for this. Here’s what I actually use, and what you can skip.
Large Mixing Bowl — I use a 6-quart ceramic bowl. It needs to be big because the dough is wet and sticky. A glass bowl works great too. Just make sure it’s large enough to hold the dough as it doubles in size.
Plastic Wrap or Lid — You need to cover the bowl tightly. Plastic wrap works, but I’ve found that a silicone lid or even a large plate works fine. The goal is to keep the moisture in.
Cast Iron Dutch Oven — This is the game-changer. A heavy pot with a tight-fitting lid is essential for creating steam. The steam is what gives the bread its shiny, crackly crust. I use a 5-quart Le Creuset, but any heavy pot works. Ceramic casseroles work too.
Cheesecloth or Paper Towels — For dusting. I line my bowl with cheesecloth dusted with flour. It prevents sticking better than just flour alone. If you don’t have cheesecloth, a floured paper towel works in a pinch.
Sharp Knife or Razor Blade — For scoring the dough. A sharp knife works, but a razor blade gives the cleanest cut. This is optional but highly recommended for that professional look.
Cooling Rack — Essential. You must let the bread cool completely before slicing. If you cut into it hot, the steam escapes, and the inside turns gummy. I know it’s hard to wait, but trust me.
How to Make It: Step-by-Step
Alright, let’s make this! I’m walking you through exactly how I do it, including the little tricks I’ve picked up over dozens of batches.
Step 1: Mix the Dough (5 minutes)
In your large bowl, whisk together the flour, salt, and yeast. Make sure they’re evenly distributed. Then, pour in the lukewarm water. Stir with a wooden spoon or your hand until everything is combined. It will look shaggy, sticky, and messy. That’s normal. Don’t add more flour. Don’t panic. Just mix until there are no dry pockets of flour left. This takes about 30 seconds.
Step 2: The Long Rest (12-18 hours)
Cover the bowl tightly with plastic wrap or a lid. Let it sit at room temperature for 12 to 18 hours. I usually mix it right before bed, and it’s ready the next evening. The dough will bubble up, look puffy, and have a slightly wobbly texture. If it’s cooler in your house, it might take 18 hours. If it’s warm, 12 might be enough. Look for the bubbles, not the clock.
Step 3: Shape the Loaf (10 minutes)
Turn the dough out onto a generously floured surface. Use a bench scraper or your hands to gently fold the dough over itself a few times. You’re not kneading it; you’re just creating surface tension. Shape it into a round ball. Place it seam-side up into a bowl lined with a floured cheesecloth or paper towel. Cover it loosely and let it rest for another 1-2 hours. It should look puffy and jiggle like Jell-O when you shake the bowl.
Step 4: Preheat the Oven and Pot (30 minutes)
About 30 minutes before you’re ready to bake, place your Dutch oven (with the lid on) into the oven. Preheat to 450°F (230°C). This is crucial. The pot needs to be screaming hot to create that instant steam.
Step 5: Score and Bake (40 minutes)
Once the pot is hot, carefully remove it. Lift the dough out of the bowl using the cheesecloth and drop it into the hot pot. It will sizzle—that’s a good sign. Use a sharp knife or razor to slash the top of the dough. A deep slash (about 1 inch) allows the bread to expand. Put the lid on and bake for 20 minutes. Then, remove the lid and bake for another 20 minutes until the crust is deep golden brown.
Step 6: Cool Completely (1 hour)
Remove the bread from the pot and place it on a cooling rack. This is the hardest part. Wait at least one hour before slicing. If you cut it early, you’ll ruin the texture. The inside needs to set. Use this time to make a simple chicken ranch wrap for lunch the next day, using slices of this bread.
Expert Tips & Tricks
Here’s everything I’ve learned from making this dozens of times. These tips will save you from my mistakes.
- Don’t Overmix — The goal is hydration, not gluten development. If you overwork the dough, it’ll become tough. Just mix until combined.
- Watch the Bubbles — The dough is ready when it’s full of bubbles and has collapsed slightly in the middle. If it’s still dense, give it more time.
- Steam is Key — The Dutch oven traps the moisture the bread releases, creating steam. This steam keeps the crust soft initially, allowing the bread to rise fully before setting. Don’t skip the lid!
- Flour Your Hands — The dough is sticky. Use plenty of flour on your hands and the surface. It’s better to add too much flour than to tear the dough.
- Temperature Matters — If your kitchen is cold, the dough will rise slower. If it’s hot, it might rise too fast and taste yeasty. Aim for a consistent room temperature.
Common Mistakes:
- Soggy Bottom: Make sure your Dutch oven is preheated properly. A cold pot leads to a pale, soft bottom.
- Dense Crumb: This usually means the dough didn’t rise enough. Check your yeast freshness and give it more time.
- Burnt Crust: If your oven runs hot, cover the bread with foil after 20 minutes to prevent burning.
Variations & Substitutions
Once you’ve nailed the basic version, here’s how you can mix it up. I’ve tried all of these.
Whole Wheat Version — Swap half the all-purpose flour for whole wheat flour. It adds a nutty flavor and more fiber. The bread will be denser but still delicious.
Herb & Garlic — Add 1 teaspoon of dried rosemary or thyme, and 1 teaspoon of garlic powder to the dry ingredients. It adds a savory kick that’s perfect for dipping in olive oil.
Seeded Loaf — Sprinkle sesame seeds, poppy seeds, or sunflower seeds on top before baking. They stick to the wet dough and toast up beautifully.
Cheddar & Chive — Fold in ½ cup of shredded cheddar cheese and 2 tablespoons of chopped chives after the first rise. It’s like a savory biscuit but with a crust.
Gluten-Free Option — Use a 1:1 gluten-free flour blend. The texture will be different, but it still works. You may need to add a bit more water.
Serving & Storage
How to Serve:
I usually serve this straight from the cooling rack, sliced thick and drizzled with good olive oil and a pinch of flaky salt. It’s perfect with soup, salad, or just as a snack. It also pairs wonderfully with a refreshing watermelon mint agua fresca on a warm evening.
Storage:
Counter: Store in a bread box or a paper bag for up to 3 days. Plastic bags make the crust soft, so avoid them if you want to keep that crunch.
Freezer: Slice the bread, wrap tightly in plastic wrap, and put it in a freezer bag. It freezes for up to 3 months. Toast slices directly from the freezer.
Reheating: If the bread is stale, sprinkle it with water and bake at 350°F for 10 minutes. It’ll taste fresh again.
Nutrition Information
I’m not a nutritionist, but here’s the breakdown if you’re tracking. This is based on 12 slices per loaf.
- Calories: 140
- Protein: 4g
- Carbs: 28g
- Fiber: 1g
- Fat: 0.5g
- Sodium: 280mg
It’s a simple carb source, so pair it with protein or healthy fats for a balanced meal. The lack of added sugar makes it a clean choice compared to store-bought breads.
Final Thoughts
So that’s my go-to no-knead crusty artisan bread! I’ve probably talked your ear off at this point, but when you make a recipe this often, you have a lot to say about it.
This has saved weeknight dinners more times than I can count. It’s my answer to “what’s for dinner” when I’m tired, don’t want takeout, and still want something that tastes really good. My family is happy, and I’m happy because I’m not stressed about cooking.
Make it yours! Try different herbs, seeds, or flours. The best recipes are the ones you adapt to your family’s tastes. If you make this, drop a comment and let me know what you think! I love hearing how recipes turn out in your kitchen. And if something doesn’t work, tell me that too—I’m here to help troubleshoot.
Happy cooking! And I hope your kitchen smells half as good as mine does right now.
Frequently Asked Questions
Can I use active dry yeast instead of instant yeast?
Yes, but you may need to let the dough rise a bit longer. Instant yeast is finer and activates faster. If using active dry, you can sprinkle it in directly, but some people prefer to dissolve it in the water first. The result is the same, just a slightly longer wait.
Why did my bread come out flat?
This usually means the dough didn’t rise enough. Check if your yeast was fresh. Also, make sure the water wasn’t too hot, which could have killed the yeast. If the kitchen is cold, give it more time. The dough should look puffy and bubbly before you shape it.
Can I bake this in a regular loaf pan?
You can, but you won’t get the same crust. The Dutch oven creates steam, which is key for the artisan crust. If you use a loaf pan, the bread will be softer on all sides. It’s still delicious, just different.
How do I know when the bread is done?
Tap the bottom of the loaf. It should sound hollow. The crust should be deep golden brown. If it’s pale, bake it longer. The internal temperature should be around 205°F (96°C) if you have a thermometer.
Can I make this in a slow cooker?
Not really. The slow cooker doesn’t get hot enough to create a crust. This recipe relies on high heat for the crust formation. Stick to the oven.
Why is my bread dense?
This could be due to over-flouring during shaping. The dough is supposed to be sticky. If you add too much flour, it becomes dense. Also, make sure you’re not punching down the dough too aggressively. Gentle handling keeps the air bubbles intact.
Can I add milk or butter to the dough?
You can, but it changes the texture. Adding milk or butter makes the bread softer and less chewy. For the classic crusty artisan texture, stick to water. If you want a softer loaf, try adding a tablespoon of oil or milk.
Pin This Recipe!
No-Knead Crusty Artisan Bread: 3-Ingredient Easy Recipe
- Total Time: 13 hours 55 minutes
- Yield: 1 loaf (12 slices) 1x
Description
This incredibly simple no-knead bread requires only three main ingredients and an overnight rest to produce a restaurant-quality loaf with a shatteringly crisp crust and soft, airy interior.
Ingredients
- 17 ounces (480g) all-purpose flour
- 1.5 teaspoons (9g) kosher salt
- 1/4 teaspoon (1g) instant yeast
- 15 ounces (420ml) lukewarm water
- Additional flour for dusting (optional)
Instructions
- In a large bowl, whisk together the flour, salt, and instant yeast until evenly distributed.
- Pour in the lukewarm water and stir with a wooden spoon or hand until just combined. The dough will look shaggy and sticky; do not add more flour.
- Cover the bowl tightly with plastic wrap or a lid and let it sit at room temperature for 12 to 18 hours until bubbly and puffy.
- Turn the dough out onto a generously floured surface. Gently fold the dough over itself a few times to create surface tension and shape it into a round ball.
- Place the dough seam-side up into a bowl lined with floured cheesecloth or paper towel. Cover loosely and let rest for 1-2 hours until puffy.
- About 30 minutes before baking, place a cast iron Dutch oven (with lid) into the oven and preheat to 450°F (230°C).
- Carefully remove the hot pot, lift the dough using the cheesecloth, and drop it into the pot. Slash the top of the dough with a sharp knife or razor blade.
- Cover with the lid and bake for 20 minutes. Remove the lid and bake for another 20 minutes until the crust is deep golden brown.
- Remove the bread from the pot and place it on a cooling rack. Let it cool completely for at least one hour before slicing.
Notes
The dough is very sticky; use plenty of flour on your hands and surface when shaping. Ensure the water is lukewarm, not hot, to avoid killing the yeast. The bread must cool completely before slicing to prevent a gummy texture. If your kitchen is cold, the rise time may extend to 18 hours.
- Prep Time: 5 minutes
- Cook Time: 40 minutes
- Category: Side Dish
- Cuisine: American
Nutrition
- Serving Size: 1 slice
- Calories: 140
- Sodium: 280
- Fat: 0.5
- Carbohydrates: 28
- Fiber: 1
- Protein: 4
Keywords: no-knead bread, artisan bread, easy bread recipe, crusty bread, 3 ingredient bread, homemade bread, vegan bread