
Last Tuesday, I was staring at a container of coconut flakes in my pantry, wondering if I’d ever actually use them for anything other than decorating a sad-looking cake from 2015. I needed a snack. Not a dessert, not a meal replacement shake, but something I could grab with one hand while scrolling through my phone and eat with the other without making a mess. I wanted protein, I wanted something bright (because let’s be honest, my taste buds are currently mourning the end of heavy fall baking), and I definitely didn’t want to turn on the oven.
So, I threw together what I thought would be a mediocre no-bake bite. I mixed protein powder, coconut, a little honey, and some lemon zest. I rolled them into balls and put them in the fridge. Thirty minutes later, I pulled one out. It crumbled. It was dry. It tasted like chalky regret.
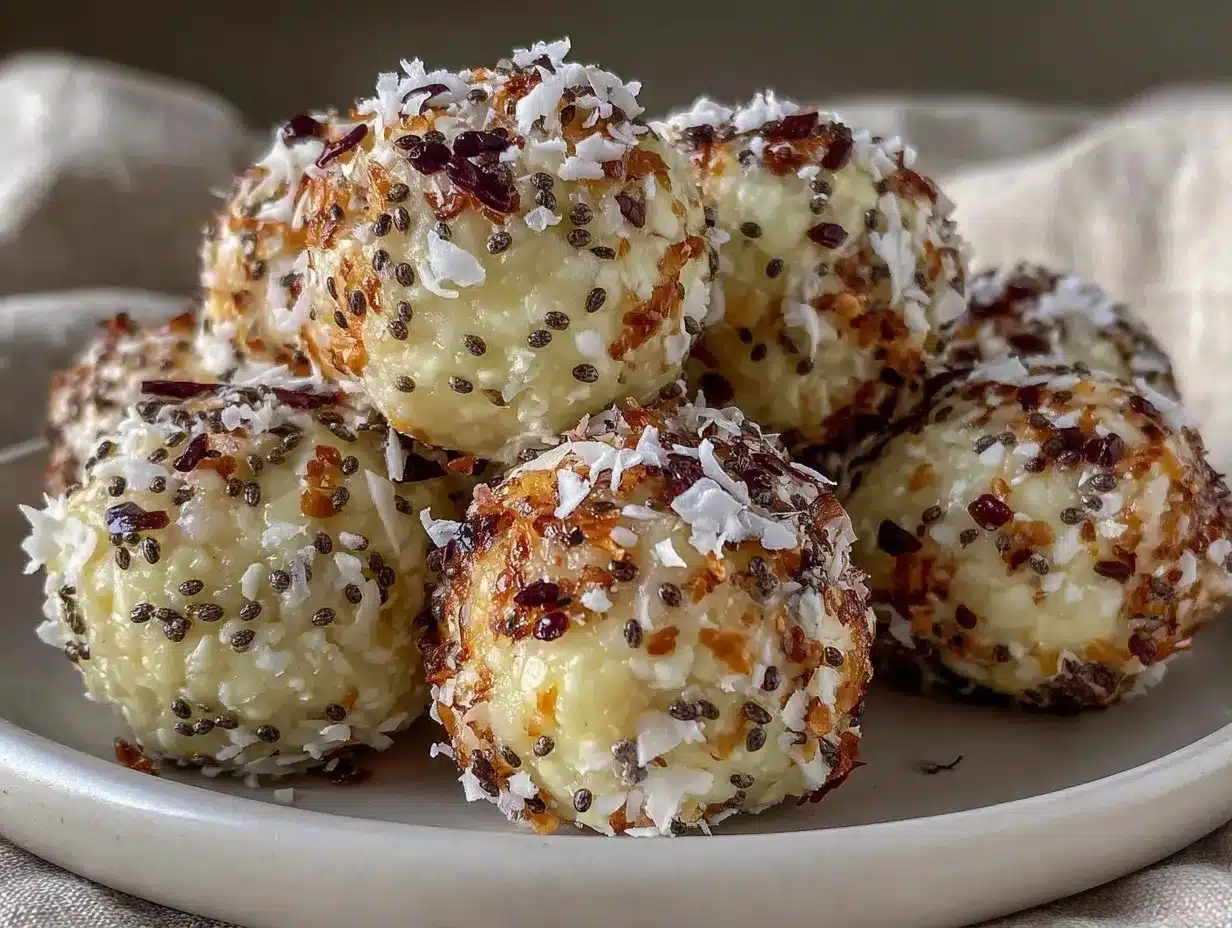
But here’s the thing: I didn’t throw it away. I tasted it again. I realized the flavor profile was actually pretty good—it just had the wrong texture. I went back in, adjusted one thing, and made a second batch. That second batch? It was perfect. Chewy, tangy, sweet, and packed with protein. I’ve since made these no-bake lemon coconut protein bites at least fifteen times in the last two months. They’ve become my go-to for afternoon slumps, pre-workout fuel, and just because I want something that tastes like a vacation.
If you’re tired of dense, heavy energy balls that leave you feeling sluggish, or if you’re like me and just want a snack that feels light but actually keeps you full, you need to try this. It’s not complicated. It’s not fancy. But it works. And once you get the ratio right, you’ll be making these on repeat.
Why You’ll Love This Recipe
I know, I know. Another protein bite recipe? But hear me out. These are different. They’re not dense brick-like spheres of sweetness. They’re bright, they’re chewy, and they don’t require an hour of prep work.
Here’s why these no-bake lemon coconut protein bites have taken over my kitchen:
Zero Baking Required — Seriously. No oven, no stove, no dirty pots. You mix, you roll, you chill. If you can stir a bowl, you can make this. I’ve made these while my kids were doing homework at the table. No heat, no stress.
Actually Tastes Like Lemon — So many no-bake recipes use lemon extract, which tastes like artificial cleaner. I use fresh zest and a tiny splash of juice. It’s bright and real. It wakes you up.
Protein-Packed — Each bite has about 6-8 grams of protein depending on the powder you use. That’s way more than a handful of almonds, and it tastes like a treat. Perfect for keeping hunger at bay between lunch and dinner.
Gluten-Free Friendly — If you use certified gluten-free oats and protein powder, these are naturally gluten-free. I love that I can make a big batch and share them with my celiac friend without worrying about cross-contamination or weird substitutions.
Stays Fresh — These keep in the fridge for up to two weeks. I make a batch on Sunday, and they’re still good (and still chilled) when I need a snack on Thursday. They don’t dry out or get weird.
Real talk? I used to buy those fancy protein balls at the grocery store for $5 a pop. They were okay, but they always had weird ingredients I couldn’t pronounce. Making these at home costs less than $2 to make a batch, and they taste infinitely better. Plus, you control exactly how sweet they are.
Ingredients You’ll Need
This looks like a short list, but every ingredient plays a specific role. I’m not just throwing stuff in a bowl; I’m building a structure. Here’s what you need and why I pick what I pick.
For the Base
Old-Fashioned Rolled Oats (1 ½ cups / 120g) — Do not use instant oats. They’re too fine and will turn your bites into mush. Do not use steel-cut oats; they’re too hard. Old-fashioned rolled oats have the right chew. I buy the store brand because it’s cheaper and works perfectly. Just make sure they’re the big, flat flakes.
Desiccated Coconut (½ cup / 45g) — I use unsweetened, fine-shred coconut. Sweetened coconut makes them too sugary and sticky. Fine shred works better than large flakes here because it helps bind the mixture together. If you only have large flakes, pulse them in a food processor for 10 seconds to break them down.
Protein Powder (½ cup / 50-60g) — This is where you get your protein. I prefer vanilla whey or vanilla plant-based protein. Whey gives a chewier texture; plant-based (like pea or brown rice) can be a bit more crumbly, so you might need a tiny bit more liquid. Avoid chocolate or flavored powders here—lemon and chocolate is a weird combo. Stick to vanilla or unflavored.
For the Flavor & Texture
Fresh Lemon Zest (1 tablespoon) — This is non-negotiable. Bottled lemon juice doesn’t have the oils that give it that punch. You need the zest from one large, organic lemon. I wash the lemon really well before zesting. The zest is what makes these taste like a real lemon dessert, not a chemical one.
Fresh Lemon Juice (1-2 teaspoons) — Just a splash. Enough to add moisture and tang, not enough to make it soupy. Start with 1 teaspoon, add more only if the mixture looks dry.
Nut Butter (2 tablespoons / 32g) — I use smooth peanut butter or almond butter. It acts as the binder. It adds healthy fats and helps hold everything together. If you have a nut allergy, use sunflower seed butter, but the flavor will be slightly different. Avoid chunky PB; it makes rolling messy.
Honey or Maple Syrup (2-3 tablespoons / 30-45ml) — This adds sweetness and stickiness. Honey gives a richer flavor; maple syrup is vegan and adds a subtle depth. I like honey. If you’re using a very sweet protein powder, start with 2 tablespoons. Taste the mixture before rolling—if it tastes bland, add more.
Vanilla Extract (½ teaspoon) — Just a little to round out the lemon. It makes the flavor feel more “dessert-like” without overpowering the citrus.
Salt (a pinch) — Always add a pinch of salt. It enhances the lemon flavor. I know, it sounds counterintuitive, but salt makes citrus taste more like citrus. Trust me.
Optional Add-ins
Chopped Almonds (2 tablespoons) — For a bit of crunch. I like the texture contrast against the soft oats and chewy coconut.
White Chocolate Chips (1 tablespoon) — If you’re feeling extra indulgent, toss in a few mini chips. They melt slightly in the fridge and add little bursts of sweetness.
Equipment Needed
You don’t need fancy gadgets for this. Here’s what I actually use.
Medium Mixing Bowl — Any size that fits the ingredients comfortably. I use a ceramic bowl because it’s heavy and doesn’t slide around.
Microplane or Zester — For the lemon zest. A regular grater works too, but a microplane gets just the yellow part without the bitter white pith. I learned this the hard way once and had to scrape off the bitter bits.
Food Processor or Blender — Optional, but helpful. If you want super-smooth bites, you can pulse the oats into a coarse flour first. I usually just leave them whole for texture, but if you prefer a finer bite, pulse them.
Silicone Spatula — For mixing. You need to get every bit of sticky honey and nut butter out of the corners. A spoon works, but a spatula is easier.
Baking Sheet — Lined with parchment paper. For chilling the bites. I keep a sheet ready so I can just drop the rolled balls onto it.
Measuring Cups and Spoons — Precision matters here, especially with the liquid. I use standard measuring cups for dry ingredients and spoons for wet.
How to Make It: Step-by-Step
Alright, let’s make these! I’m walking you through exactly how I do it, including the little tricks I’ve picked up over fifteen batches.
Step 1: Prep Your Lemon
Wash your lemon thoroughly. Before you cut it, zest it. I like to zest over a small bowl so I don’t lose any of the oils. You need about 1 tablespoon of zest. Then, cut the lemon in half and squeeze out 1-2 teaspoons of juice. Strain out any seeds. Set aside. Having this ready before you mix is key because the mixture comes together fast.
Step 2: Mix the Dry Ingredients
In your medium bowl, combine the rolled oats, desiccated coconut, and protein powder. Whisk them together with a fork or your hand to distribute the protein powder evenly. If you’re using a food processor, you can pulse these together for 5 seconds, but it’s not necessary. Just make sure there are no clumps of white protein powder left.
Step 3: Add the Wet Ingredients
Add the nut butter, honey, lemon zest, lemon juice, vanilla, and salt to the dry mix. Now, here’s the moment of truth. Stir it with your spatula. It will look dry and crumbly at first. Keep stirring. The nut butter and honey will start to coat the oats. If it still looks too dry to hold together, add another ½ teaspoon of lemon juice or a teaspoon of water. You want it to be sticky.
Step 4: The Chilling Step (The Secret Trick)
This is the most important step. Cover the bowl and put it in the fridge for 15-20 minutes. Why? The oats need time to absorb the moisture from the honey and juice. If you try to roll them immediately, they’ll be too sticky and fall apart. Chilling firms up the nut butter and hydrates the oats, making them much easier to handle. I know it’s tempting to skip this, but don’t. It makes a huge difference.
Step 5: Roll the Bites
Take the bowl out of the fridge. Using a small cookie scoop or your hands, portion out the mixture. Roll each portion into a ball between your palms. If it’s too sticky, wet your hands slightly with water. If it’s too dry, press harder. Aim for 1-inch balls. You should get about 12-15 bites depending on how big you make them.
Step 6: Chill Again
Place the rolled balls on a parchment-lined baking sheet. Put them in the fridge for another 30 minutes to set completely. This final chill ensures they hold their shape when you eat them. They’ll be firm and chewy, not soft and mushy.
Total Time
About 30 minutes total, with 15 minutes of active prep and 50 minutes of chilling. Mostly hands-off.
Expert Tips & Tricks
Here’s everything I’ve learned from making this dozens of times. These tips will save you from my mistakes.
The Texture Trick: Hydrate the Oats
I’ve said it once, but I’ll say it again: chill the mixture before rolling. This isn’t just a suggestion. The oats act like sponges. When you mix them with liquid, they start absorbing it immediately, but it takes 15-20 minutes to fully soften. If you roll them right away, the outside might hold together, but the inside will be dry and crumbly. Let them sit. Your patience will be rewarded with a perfect, uniform texture.
Don’t Skimp on the Zest
Lemon juice adds moisture, but lemon zest adds flavor. The oils in the zest are where the real lemon taste lives. If you only use juice, the bites will taste like sweet coconut-oat balls with a hint of sourness. If you use zest, they taste like lemon bars. Use both. At least 1 tablespoon of zest.
Adjusting for Protein Powder Types
Whey protein absorbs more liquid than plant-based protein. If you’re using a plant-based powder (like pea or hemp), the mixture might need an extra teaspoon of nut butter or honey. If you’re using whey, it might need a splash more water or juice. Taste the mixture before rolling. It should be sticky enough to hold together when pressed, but not so wet that it sticks to your hands uncontrollably.
Storage is Key
These bites continue to firm up in the fridge. If you make them and eat them right away, they might be a bit soft. Let them chill for at least 30 minutes after rolling for the best texture. They’re best eaten cold.
Variations & Substitutions
Once you’ve nailed the basic version, here’s how you can mix it up. I’ve tried all of these.
Chocolate-Lover’s Version
Swap the lemon zest and juice for 1 tablespoon of cocoa powder and 1 tablespoon of almond milk. Add mini chocolate chips. They taste like no-bake chocolate truffles. My kids prefer this version.
Peanut Butter Banana
Add ½ a mashed ripe banana to the mixture. Reduce the honey by 1 tablespoon. The banana adds natural sweetness and moisture. These are great for post-workout.
Matcha Green Tea
Replace the lemon zest with 1 teaspoon of culinary-grade matcha powder. Add 1 teaspoon more honey to balance the bitterness. They taste like green tea cookies. Very refreshing.
Gluten-Free
Use certified gluten-free rolled oats and gluten-free protein powder. Everything else is naturally GF. I use Bob’s Red Mill GF oats and they work perfectly.
Dairy-Free
Use plant-based protein powder and maple syrup instead of honey. Use almond or coconut milk if you need extra liquid. They’re still just as good.
Serving & Storage
How to Serve:
I usually eat these straight out of the fridge. They’re cold, chewy, and satisfying. I pair them with a cup of black coffee or green tea. They’re also great in a lunchbox for kids—just pack them in a small container with an ice pack.
Side Dishes:
These are snacks, so they don’t really need sides. But if I’m having them as a pre-workout snack, I might have a piece of fruit on the side. For breakfast, I sometimes crumble one over a bowl of yogurt.
Storage Instructions:
Refrigerator: Store in an airtight container for up to 2 weeks. They stay fresh and chewy. If they start to dry out, add a slice of bread to the container—the bread will give up its moisture to the bites.
Freezer: Yes, you can freeze them! Place them on a baking sheet in the freezer for 1 hour, then transfer to a freezer bag. They’ll last for 3 months. Thaw in the fridge for 30 minutes before eating. I love keeping a batch frozen for busy weeks.
Reheating: No need to reheat. Eat them cold. If you leave them out at room temperature for too long, the nut butter might soften and they’ll get messy.
Nutrition Information
I’m not a nutritionist, but here’s the breakdown if you’re tracking. These are estimates based on standard ingredients.
Per Serving (based on 15 bites, using whey protein and honey):
- Calories: 95
- Protein: 6g
- Carbs: 10g
- Fiber: 1g
- Sugar: 5g
- Fat: 4g
- Saturated Fat: 2g
What’s Good:
- Decent protein for a snack
- Healthy fats from nut butter and coconut
- Fiber from oats
- No refined sugar (just honey)
What to Know:
- Calories vary based on protein powder brand and nut butter used
- Contains nuts (unless you use sunflower seed butter)
- Contains dairy (if using whey protein)
My Take:
Look, these aren’t a meal replacement. They’re a snack. But they’re a *good* snack. They satisfy a sweet tooth without the crash of candy, and they actually give you some fuel. When I’m craving something sweet in the afternoon, these keep me going until dinner without making me feel heavy. That’s a win in my book.
Final Thoughts
So that’s my no-bake lemon coconut protein bites! I’ve probably talked your ear off at this point, but when you make a recipe this often, you have a lot to say about it.
This has saved my afternoons more times than I can count. It’s my answer to “what’s for a snack?” when I’m tired, don’t want to cook, and still want something that tastes really good. My kids are happy, my husband’s happy, and I’m happy because I’m not stressed about cooking.
Make it yours! Try different nut butters, swap the protein powder, or add different zest. The best recipes are the ones you adapt to your family’s tastes. And remember, that chilling step is the secret to success. Don’t skip it.
If you make this, drop a comment and let me know what you think! I love hearing how recipes turn out in your kitchen. And if something doesn’t work, tell me that too—I’m here to help troubleshoot.
Happy snacking! And I hope your kitchen smells half as good as mine does right now.
Frequently Asked Questions
Q: Can I use instant oats instead of rolled oats?
A: I don’t recommend it. Instant oats are too fine and will turn your bites into a paste. They don’t have the chew that rolled oats provide. If you must, you can pulse rolled oats in a food processor to make them smaller, but don’t start with instant oats. The texture will be off.
Q: My mixture is too sticky to roll—what happened?
A: You probably didn’t chill it long enough, or you added too much liquid. Put the bowl back in the fridge for 10 more minutes. If it’s still too sticky after chilling, add a tablespoon more oats or coconut flakes. Wet your hands with water before rolling to prevent sticking.
Q: Can I make these ahead for a party?
A: Absolutely! Make them 2-3 days ahead and store them in the fridge. They actually taste better after a day or two because the flavors have time to meld. Just keep them in an airtight container. They’re perfect for potlucks or office snacks.
Q: Why did my bites fall apart?
A: This usually happens if the mixture was too dry to begin with, or if you didn’t use enough binder (nut butter/honey). Make sure the mixture holds together when you press it with your finger before rolling. If it crumbles, add a teaspoon of water or more nut butter.
Q: Can I use almond flour instead of oats?
A: You can, but the texture will be very different. Almond flour is finer and doesn’t absorb liquid the same way. You’ll need less of it—start with ½ cup and add more if needed. The bites will be denser and more cake-like. I prefer oats for the chew, but almond flour works if you’re going low-carb.
Q: How do I reheat leftovers without it getting dry?
A: You don’t need to reheat these! They’re best eaten cold. If you leave them out at room temperature for too long, they’ll get soft. Just eat them straight from the fridge. If you want them softer, let them sit on the counter for 5 minutes before eating.
Q: Can I double this recipe?
A: Yes! Double everything and use a larger bowl. The process is the same. I do this when I’m meal-prepping for the week. Just make sure you have enough space in the fridge for the baking sheet.
Pin This Recipe!


No-Bake Lemon Coconut Protein Bites
- Total Time: 30 minutes
- Yield: 12-15 servings 1x
Description
Chewy, tangy, and protein-packed no-bake bites made with oats, coconut, and fresh lemon. These gluten-free friendly snacks require no oven and are perfect for a quick, healthy afternoon treat.
Ingredients
- 1 ½ cups (120g) Old-Fashioned Rolled Oats
- ½ cup (45g) Desiccated Coconut (unsweetened, fine-shred)
- ½ cup (50-60g) Vanilla Protein Powder (whey or plant-based)
- 1 tablespoon Fresh Lemon Zest
- 1–2 teaspoons Fresh Lemon Juice
- 2 tablespoons (32g) Smooth Nut Butter (peanut or almond)
- 2–3 tablespoons (30-45ml) Honey or Maple Syrup
- ½ teaspoon Vanilla Extract
- 1 pinch Salt
- Optional: 2 tablespoons Chopped Almonds
- Optional: 1 tablespoon White Chocolate Chips
Instructions
- Wash the lemon thoroughly and zest it to get 1 tablespoon of zest. Cut the lemon in half and squeeze out 1-2 teaspoons of juice, straining out any seeds. Set aside.
- In a medium mixing bowl, combine the rolled oats, desiccated coconut, and protein powder. Whisk to distribute the protein powder evenly.
- Add the nut butter, honey, lemon zest, lemon juice, vanilla extract, and salt to the dry ingredients.
- Stir the mixture with a silicone spatula until it becomes sticky and holds together. If it looks too dry, add another ½ teaspoon of lemon juice or water.
- Cover the bowl and refrigerate the mixture for 15-20 minutes to allow the oats to absorb moisture and the mixture to firm up.
- Remove the bowl from the fridge. Using a small cookie scoop or your hands, portion the mixture and roll into 1-inch balls. If sticky, wet hands slightly with water.
- Place the rolled balls on a parchment-lined baking sheet.
- Refrigerate the bites for another 30 minutes to set completely before serving.
- Store in an airtight container in the refrigerator for up to 2 weeks, or freeze for up to 3 months.
Notes
Do not use instant oats as they will turn the bites into mush. Old-fashioned rolled oats provide the necessary chew. The chilling step is crucial for texture; do not skip it. If using plant-based protein, you may need slightly more liquid. Store in the fridge for up to 2 weeks or freeze for 3 months.
- Prep Time: 15 minutes
- Cook Time: 0 minutes
- Category: Snack
- Cuisine: American
Nutrition
- Serving Size: 1 bite
- Calories: 95
- Sugar: 5
- Fat: 4
- Saturated Fat: 2
- Carbohydrates: 10
- Fiber: 1
- Protein: 6
Keywords: no-bake, protein bites, lemon coconut, healthy snack, gluten-free, vegan option, meal prep, energy balls



