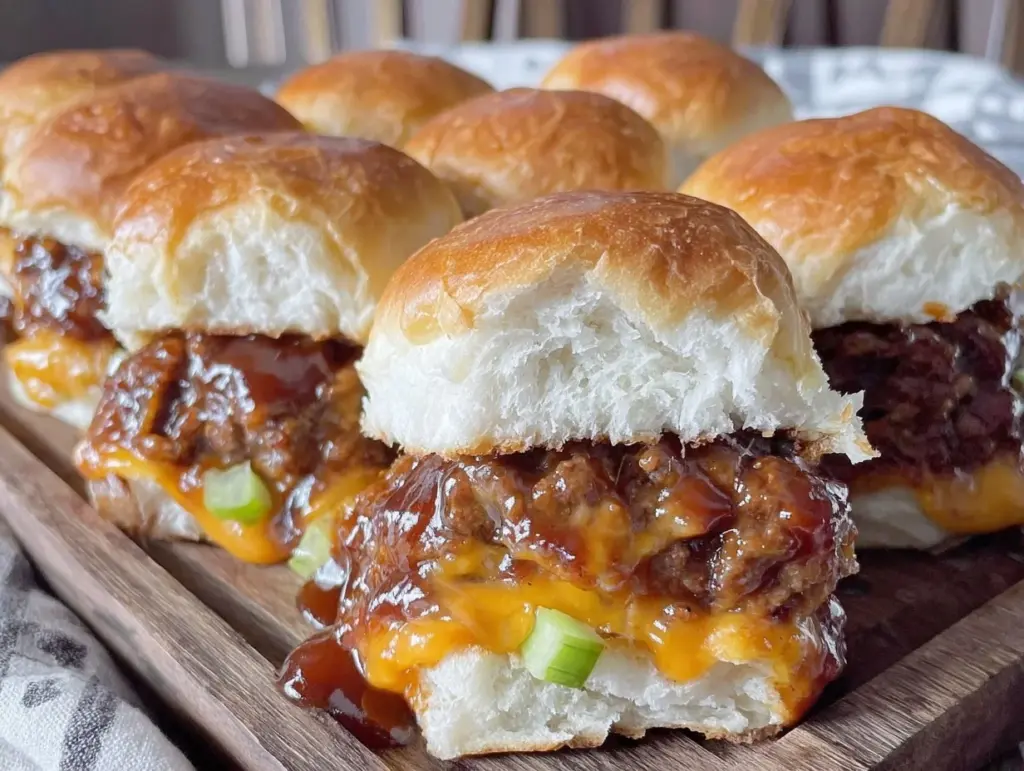
Last Labor Day, I made the mistake of thinking I could wing it. I showed up to my sister’s backyard with a bag of store-bought potato chips and a cooler of soda, expecting everyone to just… graze. Big mistake. Within twenty minutes, the main dish—some sad, overcooked burger patties that had been sitting under a heat lamp for an hour—was gone. The kids were hungry, the adults were grumbling, and I was standing there holding a bag of chips like a total failure. That was the moment I realized I needed a party food strategy that was cheap, filling, and actually delicious. Not just “okay for a potluck,” but genuinely loved by picky eaters and hungry adults alike.
So, I started testing. I wanted something that felt like a real meal but was easy to eat while standing around a grill. I wanted it to be budget-friendly because feeding a crowd of twelve adults and six kids doesn’t come cheap. I experimented with pulled pork (too messy), regular burgers (too much chewing while standing), and even a taco bar (too much prep). Then, I stumbled onto the idea of using ground beef with a tangy BBQ glaze. The result? These Labor Day BBQ Ground Beef Sliders. They are juicy, they hold together perfectly, and they disappear faster than you can say “pass the napkins.”
I’ve made these sliders at least eight times since that disastrous party last year. I’ve tweaked the sauce, tested different types of buns, and even figured out how to prep them the night before so I’m not stressed on the day of. They are hands-down the best crowd-pleaser I’ve ever made. If you’re looking for easy summer party food that won’t break the bank, this is it. Trust me, your guests will ask for the recipe, and you’ll look like a genius for having it ready.
Why You’ll Love This Recipe
There are a lot of reasons I keep coming back to these sliders, but here’s the honest truth about why they work so well for families and parties.
- Stupid Simple Prep — Seriously, if you can brown ground beef and toss it in a sauce, you can make this. I’ve made these while watching TV with my kids. There’s no complex technique here. Just mix, assemble, and bake.
- Budget-Friendly — Ground beef is one of the most affordable proteins you can buy, especially when you stretch it with onions and breadcrumbs. This recipe feeds 12-15 people for under $25. Compare that to buying individual burgers or catering, and you’re saving a ton of money.
- Kid-Approved — My kids usually turn their noses up at “sauce,” but these sliders are different. The BBQ flavor is sweet and tangy, not overwhelming, and the soft buns make them easy to eat. Even my pickiest eater cleans his plate.
- Make-Ahead Magic — This is the game-changer. You can assemble these sliders the night before your party and just pop them in the oven when you’re ready. This means you’re not stuck in the kitchen when everyone is outside having fun. You can actually enjoy your own party.
- Perfect for Crowds — Sliders are the ultimate finger food. No plates needed (well, maybe one for the sauce). No forks required. People can grab one, eat it while standing, and grab another if they’re still hungry. It’s efficient feeding.
This is my go-to when I need dinner to just work, or when I’m hosting a last-minute gathering. No complicated techniques, no weird ingredients, just reliable, delicious food that makes everyone happy. Plus, they taste even better the next day as leftovers, which is a huge bonus for lunch the following day.
Ingredients You’ll Need
Here’s the best part: you probably have most of these ingredients already. This recipe relies on pantry staples and affordable basics. I’m particular about a few things here, so pay attention to the notes below.
For the Beef Mixture
Ground beef (2 pounds / 900g) — I use 80/20 blend. You need that fat content for flavor and juiciness. If you use lean beef, the sliders will be dry. Don’t skimp on the fat here; it’s what makes them taste like a real burger.
Yellow onion (1 medium, finely diced / about 150g) — This adds sweetness and moisture. I dice it really small so it cooks down into the meat and doesn’t have big chunks. You can use a food processor to pulse it if you’re in a rush.
Garlic (3 cloves, minced / about 1 tablespoon) — Fresh garlic only. No jarred stuff. It makes a huge difference in the flavor profile.
Breadcrumbs (½ cup / 50g) — I use plain dry breadcrumbs. This helps bind the meat so the sliders don’t fall apart when you pick them up. If you’re out, you can use crushed crackers, but breadcrumbs are cheaper and easier.
Egg (1 large) — Just one egg to help bind everything together. Room temperature is fine, straight from the fridge works too.
Salt and black pepper — To taste. I usually use about 1 teaspoon of salt and ½ teaspoon of pepper for this amount of meat. Taste the mixture before baking if you’re unsure.
For the BBQ Sauce
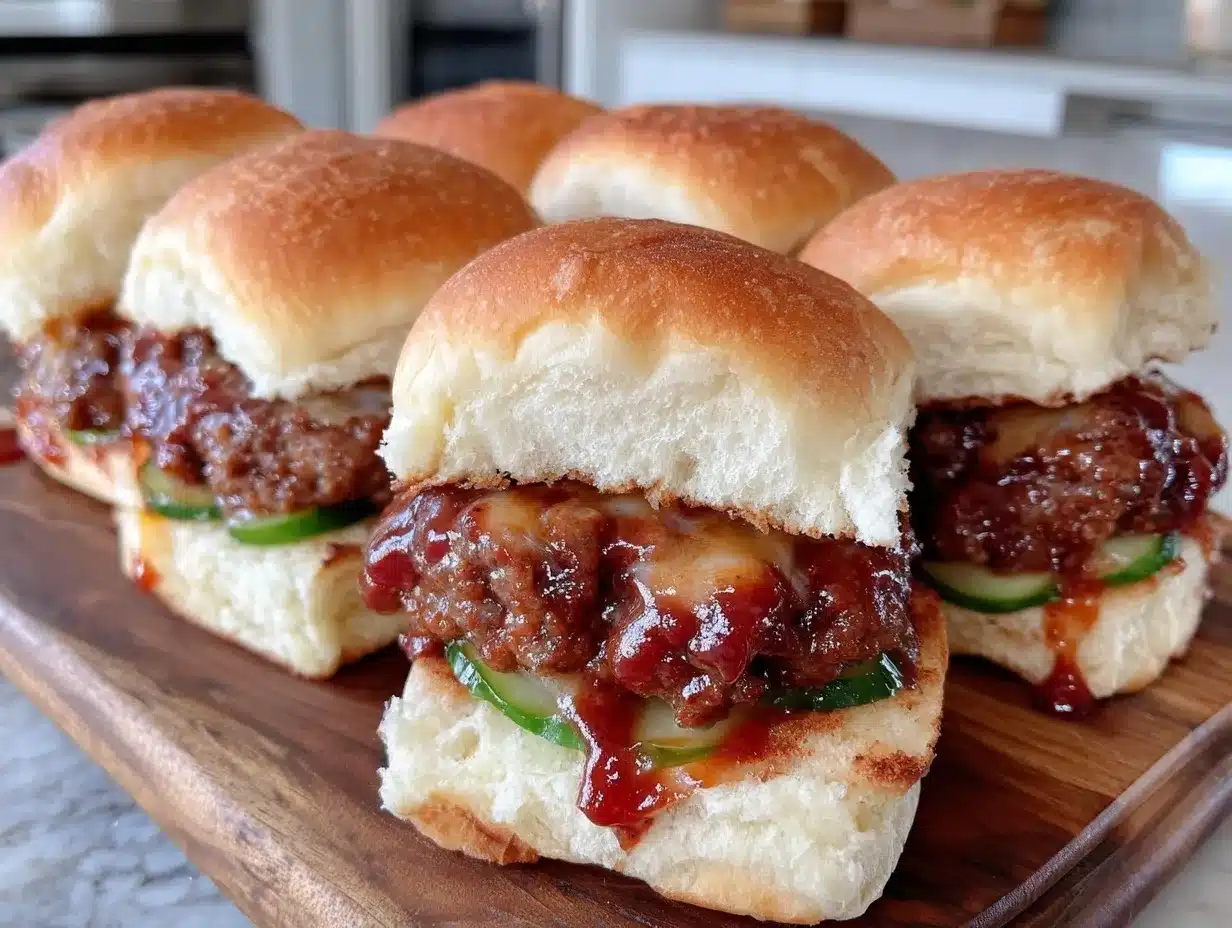
BBQ sauce (1 cup / 240ml) — This is where you can play. I use a sweet and smoky sauce like Sweet Baby Ray’s or a local brand. Avoid vinegar-heavy sauces if you want that classic slider taste. If you want to get fancy, you can make your own, but store-bought saves time and money.
Ketchup (2 tablespoons) — Adds a bit of tang and sweetness to balance the smokiness of the BBQ sauce. It’s a secret ingredient that makes the flavor pop.
Worcestershire sauce (1 teaspoon) — Just a splash. It adds depth and savory umami. If you don’t have it, skip it. It’s not a dealbreaker.
Mustard (1 teaspoon) — Yellow or Dijon works. Again, just a little bit for complexity.
For Assembly
Slider buns (12-15 buns) — I recommend Hawaiian rolls or king’s hawaiian sweet rolls. They are soft, slightly sweet, and hold up well to baking. Regular hamburger buns work too, but they’re harder to keep together. If you use regular buns, you might need to toast them first to prevent sogginess.
Cheddar cheese (1 cup / 100g, shredded) — Sharp cheddar is my favorite. It melts beautifully and adds a nice tang. Pre-shredded cheese has anti-caking agents, so if you have time, shred a block yourself. It melts better. But honestly? Pre-shredded works fine in a pinch.
Butter (2 tablespoons, melted) — For brushing the tops of the buns. This gives them a golden, crispy finish. If you’re dairy-sensitive, you can use olive oil, but butter tastes better.
Optional Add-ins — Pickles! Dill pickle slices are classic with beef sliders. I put them on for half the batch and plain for the other half. Red onion slices are also great if you like a bit of crunch.
Shopping Tips
I always buy the ground beef on sale. Check your local store’s weekly flyer. If beef is expensive, you can mix it with ground pork (50/50) to stretch it further and add juiciness. I’ve done this, and it’s delicious. Also, check the bakery section for Hawaiian rolls—they’re usually cheaper than buying individual slider buns at the grocery store.
Equipment Needed
You don’t need fancy equipment for this. Here’s what I actually use.
Large skillet or Dutch oven — I use a 12-inch cast iron skillet. It holds the beef well and makes cleanup easy. A large pot works too, but a skillet gives you more surface area for browning.
Mixing bowl — Any large bowl works. I use a plastic one because it’s easy to wash.
Baking dish — A 9×13 inch baking dish is perfect. Make sure it’s deep enough to hold the buns and sauce without spilling.
Pastry brush — For brushing the butter on the buns. A silicone brush is great because it’s easy to clean. Or just use a paper towel if you’re being lazy.
Measuring cups and spoons — Standard stuff. Dollar store versions work fine.
Aluminum foil — To cover the sliders while they bake. This keeps them moist.
How to Make It: Step-by-Step
Alright, let’s make this! I’m walking you through exactly how I do it, including the little tricks I’ve picked up.
Step 1: Brown the Beef (10 minutes)
Heat your skillet over medium-high heat. Add the ground beef, breaking it up with a wooden spoon as it cooks. Cook until no pink remains, about 5-7 minutes. If there’s a lot of grease, drain it off, but leave a little bit for flavor. Drain the grease if there’s more than 2 tablespoons.
Step 2: Sauté the Aromatics (3 minutes)
Add the diced onion to the beef. Cook for 2-3 minutes until the onion is soft and translucent. Add the minced garlic and cook for 1 more minute, stirring constantly. Don’t let the garlic burn—it gets bitter quickly.
Step 3: Mix the Seasoning (2 minutes)
Remove the skillet from heat. Let the meat cool for 2-3 minutes (so the egg doesn’t scramble). Add the breadcrumbs, egg, salt, and pepper. Mix gently with your hands or a spoon until just combined. Don’t overmix, or the meat will get tough.
Step 4: Make the Sauce (2 minutes)
In a small bowl, whisk together the BBQ sauce, ketchup, Worcestershire sauce, and mustard. Set aside. Simple, right?
Step 5: Assemble the Sliders (5 minutes)
Preheat your oven to 350°F (175°C). Slice the slider buns in half horizontally. Place the bottom halves in your baking dish. Spoon the beef mixture evenly over the buns, pressing it down slightly. Top with shredded cheddar cheese. If you’re using pickles, add them now.
Step 6: Bake (15 minutes)
Pour half of the BBQ sauce over the sliders. Cover the dish tightly with aluminum foil. Bake for 10 minutes. Then, remove the foil, brush the tops with melted butter, and drizzle the remaining sauce over the top. Bake uncovered for another 5 minutes, or until the cheese is melted and the tops are golden brown.
Step 7: Serve
Let them cool for 2-3 minutes before serving. They’ll be hot! Serve with extra BBQ sauce on the side for dipping. Enjoy!
Total Time: About 30 minutes (15 minutes active, 15 minutes baking).
Expert Tips & Tricks
Here’s everything I’ve learned from making this dozens of times. These tips will save you from my mistakes.
Don’t Overcook the Beef
I used to cook the beef until it was dry. Big mistake. Cook it just until it’s no longer pink. It will finish cooking in the oven. Overcooked beef = dry sliders.
Use Room Temperature Buns
Cold buns straight from the fridge can make the bottom soggy. Let them sit out for 10 minutes before assembling. Or, lightly toast the bottom halves first for a barrier against moisture.
Double the Sauce
I always make double the sauce. I save half for dipping later. Guests love dipping their sliders in extra sauce. It’s a game-changer.
Freeze the Beef Mixture
If you’re meal prepping, you can freeze the beef mixture (without the buns) for up to 3 months. Thaw it in the fridge overnight and use it for these sliders or even regular meatballs.
Keep Them Warm
If you’re hosting a party and can’t serve them immediately, keep the dish covered with foil in a warm oven (200°F) for up to 30 minutes. They’ll stay warm and moist.
Variations & Substitutions
Once you’ve nailed the basic version, here’s how you can mix it up. I’ve tried all of these.
Spicy Sliders
Add 1 teaspoon of cayenne pepper or red pepper flakes to the beef mixture. Or use a spicy BBQ sauce like Texas Pete. Great for those who like a kick.
Bacon & Cheese
Add cooked, crumbled bacon on top of the cheese before baking. Bacon and BBQ go together like peanut butter and jelly. My husband’s favorite variation.
Veggie Sliders
Replace half the beef with finely chopped mushrooms or zucchini. It reduces cost and adds moisture. I do this when I want to stretch the meal further.
Gluten-Free
Use gluten-free slider buns. Everything else is naturally gluten-free. I’ve used Dave’s Killer Bread gluten-free buns, and they work great. Just watch the baking time—they can dry out faster.
Dairy-Free
Skip the cheese and use dairy-free butter for brushing. Use a dairy-free BBQ sauce. It’s not quite the same, but it’s still tasty. My lactose-intolerant friend enjoys these.
Serving & Storage
How to Serve:
I usually serve these straight from the baking dish at the dinner table. They look rustic and stay warm. But here are other ways I’ve enjoyed them:
- Side Dishes: These go great with Labor Day Loaded Bacon Ranch Pasta Salad for a full BBQ spread. Or serve with Honey Roasted Carrots for a lighter option.
- Drinks: Pair with a cold lemonade or iced tea. I also love serving these with No-Bake Strawberry Cheesecake Cups for dessert.
Storage Instructions:
Refrigerator:
Store leftovers in an airtight container for up to 3 days. The buns might get soft, but they’re still good.
Reheating:
Best method: Reheat in the oven at 350°F for 10 minutes. This keeps them moist. Microwave method: Heat in 30-second intervals, but they can get rubbery. If you must microwave, add a splash of water and cover with a damp paper towel.
Freezing:
You can freeze assembled, unbaked sliders for up to 2 months. Wrap tightly in plastic wrap and foil. Thaw in the fridge overnight before baking. Do not freeze baked sliders—the buns will become mushy when thawed.
Meal Prep:
Make the beef mixture ahead of time. Store in the fridge for up to 2 days. Assemble and bake the day of. This saves so much time on party day.
Nutrition Information
I’m not a nutritionist, but here’s the breakdown if you’re tracking. Keep in mind, this is comfort food, so it’s not diet food.
Per Serving (based on 12 sliders):
| Nutrient | Amount |
|---|---|
| Calories | 320 |
| Protein | 18g |
| Carbs | 35g |
| Fat | 12g |
| Sodium | 650mg |
What’s Good:
Decent protein from the beef. Iron from the ground beef. Can be made with whole wheat buns for more fiber.
What to Know:
Higher in sodium from the BBQ sauce and cheese. Contains gluten and dairy. Moderate calories per slider, but easy to overeat because they’re so good.
My Take:
Look, these are sliders. They’re meant to be indulgent. But they’re also practical and affordable. When I want to make them lighter, I use lean beef and less cheese. But usually? I just eat a reasonable portion and enjoy them. Balance is key.
Final Thoughts
So that’s my go-to Labor Day BBQ Ground Beef Sliders! I’ve probably talked your ear off at this point, but when you make a recipe this often, you have a lot to say about it. These sliders have saved my backyard parties more times than I can count. They’re my answer to “what’s for dinner” when I’m tired, don’t want takeout, and still want something that tastes really good. My kids are happy, my husband’s happy, and I’m happy because I’m not stressed about cooking.
Make it yours! Try different add-ins, swap in your favorite vegetables, adjust the sauce (though more is always better in my opinion). The best recipes are the ones you adapt to your family’s tastes. If you make this, drop a comment and let me know what you think! I love hearing how recipes turn out in your kitchen. And if something doesn’t work, tell me that too—I’m here to help troubleshoot.
Happy cooking! And I hope your kitchen smells half as good as mine does right now.
Frequently Asked Questions
Can I use ground turkey instead of beef?
You can, but the sliders will be less juicy. Ground turkey is leaner, so I recommend adding a tablespoon of olive oil to the mixture or using ground turkey thigh meat (which has more fat). The flavor will be milder, so you might want to add a bit more seasoning or use a stronger BBQ sauce. It’s a good option if you want to lighten it up, but beef tastes better.
Why did my sliders fall apart?
This usually happens if you didn’t use enough binder (breadcrumbs or egg) or if you overcooked the beef before mixing. Make sure to drain excess grease but not all of it—the fat helps hold things together. Also, let the beef cool slightly before adding the egg, and don’t overmix the meat. If they’re still falling apart, you can serve them on a plate with a fork instead of as sliders.
Can I make these ahead of time?
Yes! This is one of my favorite things about this recipe. Assemble the sliders completely, cover tightly with plastic wrap, and refrigerate for up to 24 hours. When you’re ready to bake, you might need to add 5 minutes to the baking time since they’re starting cold. This is perfect for party day—you can prep the night before and just bake in the morning.
What kind of buns work best?
Hawaiian rolls are my top choice because they’re sweet and soft, which pairs perfectly with the savory beef and tangy BBQ sauce. King’s Hawaiian brand is reliable. If you can’t find them, use soft white dinner rolls or even brioche buns. Avoid hard rolls like baguettes—they won’t work well for this recipe.
How do I reheat leftovers without them getting dry?
The oven is your best friend. Preheat to 350°F and heat the sliders for 10-15 minutes, covered with foil. This steams them slightly and keeps them moist. If you must use the microwave, add a splash of water and cover with a damp paper towel. Heat in 30-second bursts. Avoid the toaster oven—it can dry them out quickly.
Can I freeze the cooked sliders?
I don’t recommend freezing cooked sliders. The buns will become soggy and lose their texture when thawed. It’s much better to freeze the raw beef mixture (without the buns) and assemble/bake fresh when needed. If you have leftovers, eat them within 3 days or freeze the mixture for later use.
What sides go well with these sliders?
Classic BBQ sides work best. I love serving these with pasta salad, coleslaw, or corn on the cob. For a lighter option, try a simple green salad with vinaigrette. They also pair well with chips and pickles. Think traditional BBQ spread!
Pin This Recipe!
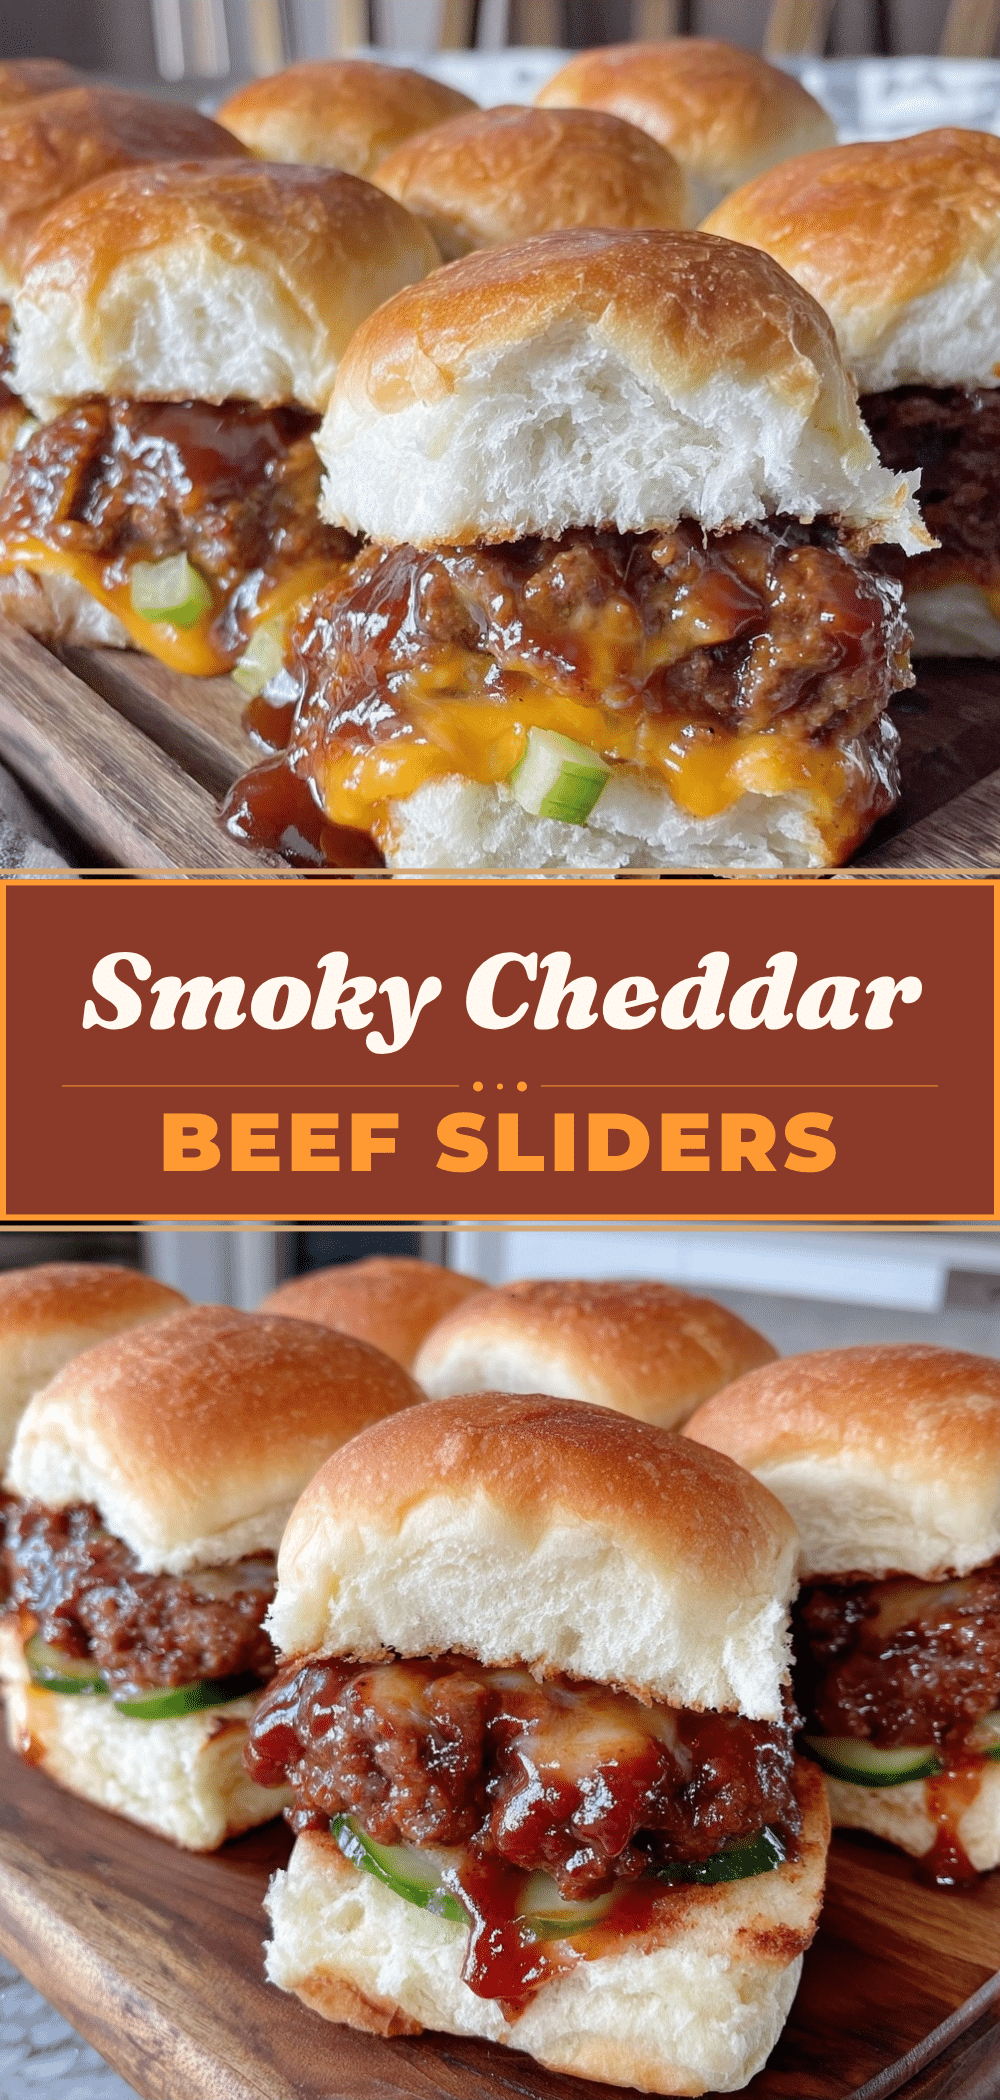
Labor Day BBQ Ground Beef Sliders: Easy Summer Party Food
- Total Time: 30 minutes
- Yield: 12-15 servings 1x
Description
Juicy, budget-friendly ground beef sliders with a tangy BBQ glaze that are perfect for summer parties and crowds. These sliders are easy to make ahead and disappear fast.
Ingredients
- 2 pounds (900g) ground beef (80/20 blend)
- 1 medium yellow onion, finely diced (about 150g)
- 3 cloves garlic, minced
- ½ cup (50g) plain dry breadcrumbs
- 1 large egg
- 1 teaspoon salt
- ½ teaspoon black pepper
- 1 cup (240ml) BBQ sauce
- 2 tablespoons ketchup
- 1 teaspoon Worcestershire sauce
- 1 teaspoon mustard (yellow or Dijon)
- 12–15 slider buns (Hawaiian rolls recommended)
- 1 cup (100g) shredded cheddar cheese
- 2 tablespoons butter, melted
- Optional: Dill pickle slices or red onion slices
Instructions
- Preheat oven to 350°F (175°C).
- Heat a large skillet over medium-high heat. Add ground beef and break it up with a wooden spoon. Cook until no pink remains (5-7 minutes). Drain excess grease if there is more than 2 tablespoons.
- Add diced onion to the beef and cook for 2-3 minutes until soft. Add minced garlic and cook for 1 more minute.
- Remove skillet from heat and let cool for 2-3 minutes. Add breadcrumbs, egg, salt, and pepper. Mix gently until just combined.
- In a small bowl, whisk together BBQ sauce, ketchup, Worcestershire sauce, and mustard.
- Slice slider buns in half horizontally. Place bottom halves in a 9×13 inch baking dish.
- Spoon beef mixture evenly over buns, pressing down slightly. Top with shredded cheddar cheese and optional pickles.
- Pour half of the BBQ sauce over the sliders. Cover tightly with aluminum foil and bake for 10 minutes.
- Remove foil, brush tops with melted butter, and drizzle remaining sauce over the top. Bake uncovered for 5 more minutes until cheese is melted and tops are golden.
- Let cool for 2-3 minutes before serving.
Notes
Do not overcook the beef before baking to keep sliders juicy. Use room temperature buns to prevent sogginess. You can assemble these the night before and refrigerate; add 5 minutes to baking time if baking from cold. For gluten-free, use GF buns. For dairy-free, skip cheese and use dairy-free butter/oil.
- Prep Time: 15 minutes
- Cook Time: 15 minutes
- Category: Main Course
- Cuisine: American
Nutrition
- Serving Size: 1 slider
- Calories: 320
- Sugar: 12
- Sodium: 650
- Fat: 12
- Saturated Fat: 5
- Carbohydrates: 35
- Fiber: 1
- Protein: 18
Keywords: BBQ sliders, ground beef recipe, summer party food, Labor Day recipes, easy dinner, crowd pleaser, make-ahead meals, budget-friendly recipes



