It was a Tuesday in late October, the kind of evening where the wind howls against the windows and the only thing keeping me sane is the thought of something warm and sweet at the end of the night. I had planned to make my usual go-to, maybe those fall pear and almond frangipane tart I love, but the store was out of almonds. Panic set in for about thirty seconds before I remembered I had a jar of local honey and a bunch of pears that were starting to get a little soft.
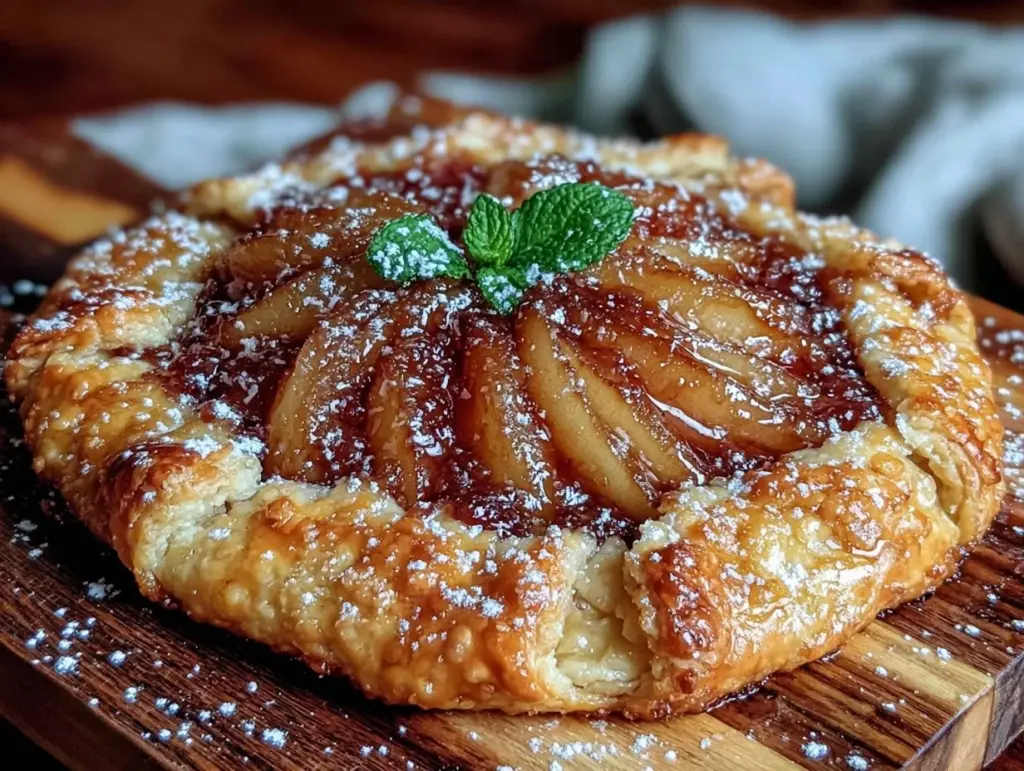
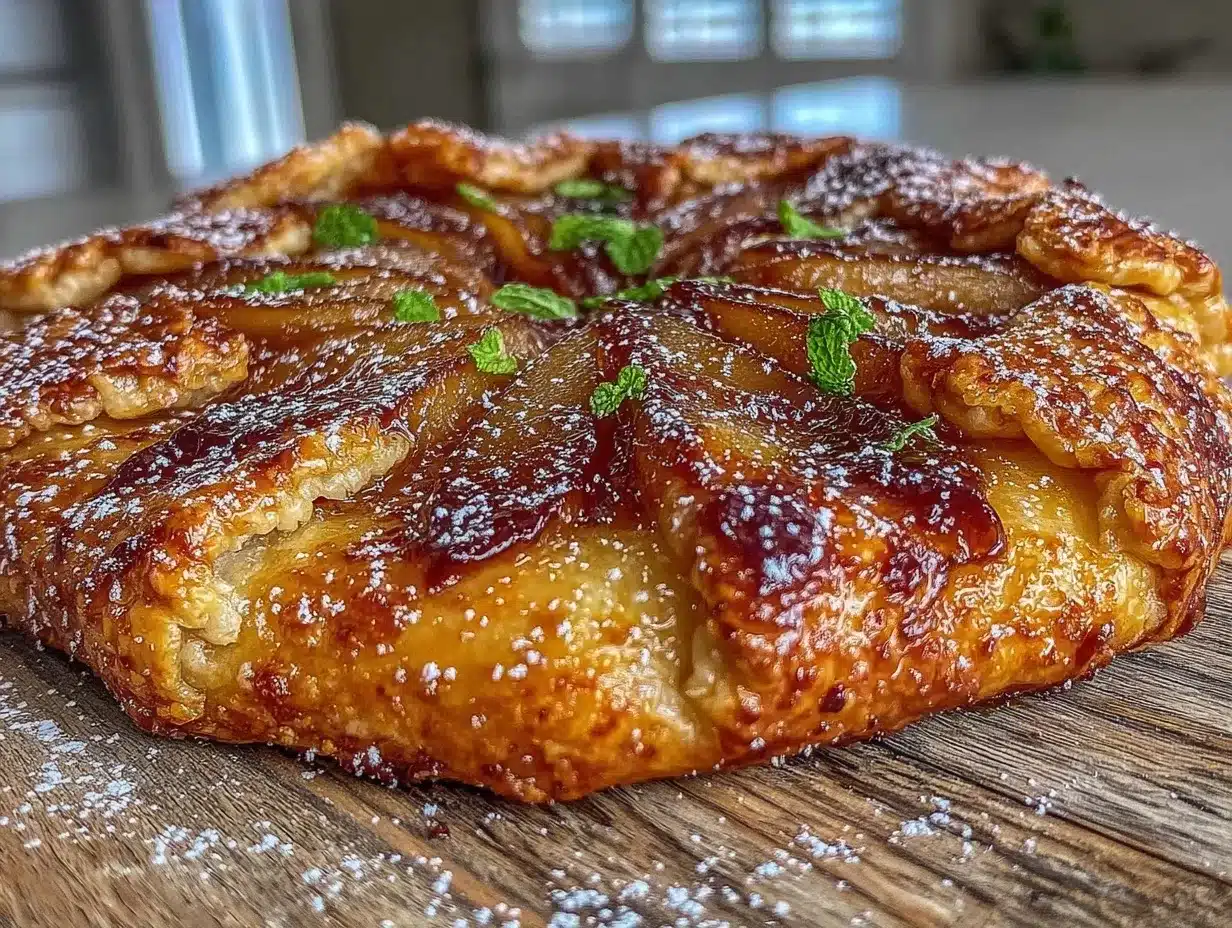
So, I improvised. I poached the pears in honey and water with a cinnamon stick I found in the back of the cabinet, threw them on some store-bought puff pastry, and baked it. I wasn’t aiming for Michelin-star elegance. I was aiming for “edible.” But when I pulled it out of the oven, the honey had caramelized into this glossy, amber glaze, the pears were tender and spiced, and the crust was flaky and golden. It looked like something I’d see in a high-end patisserie window.
My husband took one bite, looked at me, and said, “This is fancy.” And honestly? He was right. This honey poached pear galette is the perfect example of how a little accident and a lot of curiosity can lead to your best creations. It’s elegant enough for dinner parties but stupidly easy to make. If you’ve ever wanted to branch out from basic cookies into something that feels special without requiring a culinary degree, this is your recipe. Your taste buds will thank you for branching out.
Why You’ll Love This Honey Poached Pear Galette
There are about a dozen reasons I keep coming back to this galette, but let’s be real: it’s the balance of effort versus reward that keeps me hooked. Most “elegant” desserts require tempering chocolate, folding egg whites for hours, or baking at temperatures that turn your kitchen into a sauna. This? This is different.
- Zero Stress Factor — Galettes are forgiving. Unlike a pie, you don’t need a perfect crust or a pie dish. You just roll it out, pile the fruit in the middle, fold the edges over haphazardly, and bake. If it looks rustic, that’s the goal. It’s supposed to look like you tried but didn’t try too hard.
- Flavor That Feels Expensive — The honey-poaching step is the secret weapon. It infuses the pears with deep, floral sweetness and softens them so they melt in your mouth. It’s a technique that feels fancy but takes almost no extra work.
- Make-Ahead Magic — This is a huge win for dinner parties. You can poach the pears a day ahead. You can assemble the galette in the morning. You just pop it in the oven while everyone is eating dinner. You get to actually enjoy your own party instead of hiding in the kitchen.
- Seasonal Simplicity — It highlights the natural beauty of pears and honey. It’s not masking flavors with excessive sugar or artificial extracts. It’s just good fruit, good honey, and good pastry. It’s why your taste buds will thank you for branching out into simpler, purer flavors.
It’s the kind of dessert that makes people ask, “Did you make this yourself?” When you say yes, they’ll be surprised. That’s the power of a well-made galette.
Ingredients You’ll Need
Here’s the best part: you probably have most of this already. This isn’t a recipe that requires a trip to a specialty store for obscure items. It’s pantry staples and fresh fruit.
For the Honey-Poached Pears
Ripe but firm pears (4 medium / about 600g) — Bosc or Anjou pears work best because they hold their shape. Avoid Bartletts if they’re too soft; you want them to stay intact. Peel them, but leave the stems on if you want them to look pretty (optional, but nice).
Honey (½ cup / 150ml) — Use a mild honey like clover or orange blossom. Stronger honeys like buckwheat might overpower the delicate pear flavor. I use whatever is on sale, but quality matters here.
Water (1 cup / 240ml) — Just enough to create the poaching liquid. Don’t skip this; pure honey will burn.
Cinnamon stick (1 large) — Adds warmth. If you don’t have one, use 1 teaspoon ground cinnamon, but the stick is easier to remove.
Vanilla bean or extract (1 teaspoon) — A scraped vanilla bean adds specks and depth, but good vanilla extract works fine. This is where you can get fancy if you want.
Star anise (1 piece) — Optional, but adds a subtle licorice note that pairs beautifully with honey. Skip it if you’re not a fan of licorice flavors.
For the Galette Crust
Store-bought puff pastry (1 sheet / 400g) — I’m not going to lie: I use store-bought. Making puff pastry from scratch is a weekend project. This is a Tuesday dessert. Look for brands like Pepperidge Farm or a local bakery brand. Thaw it according to package directions.
Egg wash (1 egg beaten with 1 tablespoon water) — This gives the crust that beautiful golden-brown shine. Don’t skip it.
Sugar (1 tablespoon coarse sugar or turbinado) — Sprinkled on top for that crackly, sweet crunch. Regular granulated sugar works too, but coarse looks better.
Butter (1 tablespoon, melted) — Brushed on the edges before adding the sugar. Helps the sugar stick.
Optional Add-ins
Almond slivers (¼ cup) — I mentioned I was out of almonds for my frangipane tart, but for this, I actually added a handful of slivered almonds. It adds a nice nutty contrast. If you have them, use them.
Vanilla ice cream or whipped cream — For serving. Non-negotiable.
Equipment Needed
You don’t need fancy equipment for this. Here’s what I actually use.
Large skillet or saucepan — Needs to be wide enough to hold the pears in a single layer. If your pears are tall, you might need a deeper pan. I use my 10-inch cast iron skillet because it heats evenly.
Baking sheet — Line it with parchment paper. Puff pastry can drip honey, and cleanup is much easier with parchment. Trust me.
Sharp knife — For peeling and slicing pears if needed. A paring knife is perfect.
Peeler — Y-peeler works best for pears. It’s faster and removes less flesh.
Spatula — For folding the pastry. A flat spatula helps you lift the edges without tearing.
Pastry brush — For the egg wash and melted butter. A silicone brush is easiest to clean.
How to Make It: Step-by-Step
Alright, let’s make this! I’m walking you through exactly how I do it, including the little tricks I’ve picked up over the years.
Step 1: Poach the Pears (20-25 minutes)
Start by peeling your pears. Leave the stems on if you want them to look pretty, but it’s not required. Cut them in half lengthwise and remove the core with a melon baller or a small knife. You want neat, stemless halves.
In your skillet, combine the honey, water, cinnamon stick, vanilla, and star anise. Heat over medium until the honey dissolves and the mixture starts to simmer. Gently place the pear halves in the liquid, cut-side up. They should be mostly submerged. If they’re not, just tilt the pan or add a splash more water.
Poach for 15-20 minutes, basting the pears occasionally with the syrup. They’re done when a knife slides in easily but they still hold their shape. Remove them carefully with a slotted spoon and set them on a plate to cool. Don’t discard the syrup! This is liquid gold. Strain it and keep it for drizzling later.
Step 2: Prep the Pastry (10 minutes)
Preheat your oven to 400°F (200°C). Line a baking sheet with parchment paper.
Roll out your puff pastry sheet on a lightly floured surface. It should be about 12×12 inches. If it’s stuck, just lift it gently with a spatula. You want a roughly square shape.
Arrange the cooled pear halves on the pastry, cut-side up. Leave a 2-inch border around the edges. If you’re adding slivered almonds, sprinkle them around the pears now.
Step 3: Fold the Galette (5 minutes)
This is the fun part. Take the edges of the pastry and fold them over the pears, tucking them in gently. You don’t need to seal it perfectly. The goal is rustic. Some of the pears should be visible. If the pastry tears, just patch it. It’ll bake up fine.
Brush the exposed pastry edges with the egg wash. Then, brush with the melted butter. Sprinkle the coarse sugar evenly over the pastry edges. This creates that sweet, crunchy rim.
Step 4: Bake (25-30 minutes)
Place the baking sheet in the oven. Bake for 25-30 minutes, or until the pastry is puffed and deep golden brown, and the pears are tender. Keep an eye on the edges; if they’re browning too fast, cover them with a piece of foil.
Let it cool on the baking sheet for 10 minutes. This allows the filling to set slightly so it doesn’t run out when you slice it.
Step 5: Serve
Drizzle with the reserved honey syrup. Serve warm with a scoop of vanilla ice cream. The contrast of hot, spiced pears and cold ice cream is perfection.
Expert Tips & Tricks
Here’s everything I’ve learned from making this dozens of times. These tips will save you from my mistakes.
- Don’t Over-Poach — The pears should be tender but not mushy. If they fall apart in the pan, they’ll fall apart on the galette. Aim for firm-tender.
- Save the Syrup — I cannot stress this enough. That honey-cinnamon syrup is amazing drizzled over yogurt, oatmeal, or even pancakes. I usually keep a jar of it in the fridge for weeks.
- Thaw Pastry Properly — If your puff pastry is still frozen in the middle, it won’t roll out evenly. Let it thaw on the counter for 30-40 minutes. It should be pliable but still cold.
- Egg Wash Technique — Don’t get egg wash on the pears or the filling. It’ll make them shiny but can make the fruit soggy. Stick to the pastry edges.
- Cool Before Slicing — I know it’s tempting to dig in immediately, but the filling is hot and runny. Letting it cool for 10 minutes helps it set. Use this time to put out the ice cream.
Variations & Substitutions
Once you’ve nailed the basic version, here’s how you can mix it up. I’ve tried all of these.
Apple Version — Use firm apples like Honeycrisp or Granny Smith. Slice them thinly instead of halving. They take slightly longer to poach, so give them 25 minutes.
Spice Swap — Instead of cinnamon, try cardamom or nutmeg. Cardamom adds a lovely floral note that pairs well with honey.
Gluten-Free — Use a gluten-free puff pastry. Brands like Dufour or a local bakery brand work well. The texture might be slightly different, but it’s still delicious.
Vegan — Use maple syrup instead of honey (it’s thinner, so you might need less liquid). Use a vegan puff pastry (check the label for butter). Skip the egg wash and brush with plant milk and sugar.
With Cheese — Serve with a slice of blue cheese or goat cheese on the side. The salty cheese cuts through the sweetness beautifully. It’s a flavor combo that might sound weird but works amazingly.
Serving & Storage
How to Serve: I usually serve this straight from the baking sheet at the dinner table—it looks rustic and stays warm. But here are other ways I’ve enjoyed it:
- With Ice Cream — Vanilla bean ice cream is classic. Salted caramel ice cream is a twist I love.
- With Whipped Cream — Make your own whipped cream with a little honey and vanilla. It’s lighter than ice cream.
- With Yogurt — Greek yogurt with honey and nuts is a lighter option for breakfast or brunch.
Storage Instructions:
Refrigerator: Store leftovers in an airtight container for up to 3 days. The pastry will soften, but the flavor remains good.
Reheating: Reheat in a 350°F oven for 10 minutes to crisp up the pastry. Microwave will make it soggy. If you’re in a hurry, toast it in a toaster oven.
Freezing: You can freeze the assembled galette before baking. Wrap it tightly in plastic and foil. Bake from frozen, adding 10-15 minutes to the cooking time. The poached pears freeze well, but the pastry texture might be slightly less flaky.
Nutrition Information
I’m not a nutritionist, but here’s the breakdown if you’re tracking. Keep in mind, this is a dessert, so enjoy it in moderation.
Per Serving (based on 8 servings):
| Nutrient | Amount |
|---|---|
| Calories | 320 |
| Protein | 4g |
| Carbs | 42g |
| Fiber | 3g |
| Sugar | 28g |
| Fat | 16g |
| Saturated Fat | 8g |
| Cholesterol | 25mg |
| Sodium | 280mg |
What’s Good: Pears provide fiber and vitamins. Honey has antioxidants. It’s a fruit-based dessert, which is better than a cake or candy.
What to Know: It’s high in sugar from the honey and pastry. The puff pastry is also high in saturated fat. But hey, it’s a treat. Balance it with a salad or veggies earlier in the meal.
Final Thoughts
So that’s my honey poached pear galette! I’ve probably talked your ear off at this point, but when you make a recipe this often, you have a lot to say about it.
This has saved dinner parties more times than I can count. It’s my answer to “what’s for dessert” when I want something that looks impressive but doesn’t require me to spend all day in the kitchen. My guests are happy, my husband’s happy, and I’m happy because I’m not stressed about cooking.
Make it yours! Try different spices, swap in apples, or add nuts. The best recipes are the ones you adapt to your family’s tastes. If you make this, drop a comment and let me know what you think! I love hearing how recipes turn out in your kitchen. And if something doesn’t work, tell me that too—I’m here to help troubleshoot.
Happy cooking! And I hope your kitchen smells half as good as mine does right now.
Frequently Asked Questions
Can I use frozen pears?
You can, but they’ll be softer and release more water. If you use frozen pears, thaw them first and pat them dry. You might need to thicken the syrup with a little cornstarch. Fresh pears are better for this recipe because they hold their shape better.
Why did my galette leak honey?
This usually happens if the pears were too hot when you assembled the galette, or if you didn’t leave enough border. Make sure the pears are completely cool before assembling. Also, ensure you have a 2-inch border so the filling doesn’t spill over the edges.
Can I make the honey syrup ahead?
Yes! Store it in a jar in the fridge for up to 2 weeks. It gets thicker as it cools, so you might need to warm it slightly before drizzling. It’s great on pancakes too.
What if I don’t have puff pastry?
You can use pie crust, but the texture will be different. Puff pastry is flakier and lighter. If you use pie crust, blind bake it for 10 minutes before adding the pears to prevent a soggy bottom.
How do I reheat leftovers without it getting dry?
Reheat in a 350°F oven for 10 minutes. This restores the crispiness of the pastry. Microwave will make it soggy. If you do microwave, do it in short bursts (30 seconds) and let it rest.
Can I double this recipe?
Absolutely! Just use a larger baking sheet or make two smaller galettes. The cooking time might be slightly longer for the larger one. Keep an eye on the edges.
Pin This Recipe!
Honey Poached Pear Galette
- Total Time: 75 minutes
- Yield: 8 servings 1x
Description
An elegant yet easy-to-make dessert featuring tender, honey-poached pears on flaky puff pastry, perfect for dinner parties or a special treat.
Ingredients
- 4 medium ripe but firm pears (Bosc or Anjou), peeled and halved with cores removed
- 1/2 cup (150ml) mild honey (e.g., clover or orange blossom)
- 1 cup (240ml) water
- 1 large cinnamon stick
- 1 teaspoon vanilla bean or extract
- 1 piece star anise (optional)
- 1 sheet (400g) store-bought puff pastry, thawed
- 1 egg beaten with 1 tablespoon water (for egg wash)
- 1 tablespoon coarse sugar or turbinado
- 1 tablespoon butter, melted
- 1/4 cup almond slivers (optional)
Instructions
- Preheat oven to 400°F (200°C) and line a baking sheet with parchment paper.
- In a large skillet, combine honey, water, cinnamon stick, vanilla, and star anise. Heat over medium until honey dissolves and mixture simmers.
- Place pear halves cut-side up in the liquid. Poach for 15-20 minutes, basting occasionally, until tender but firm. Remove pears and set aside to cool. Reserve the syrup.
- Roll out puff pastry into a 12×12 inch square on a floured surface.
- Arrange cooled pear halves on the pastry, leaving a 2-inch border. Sprinkle with almond slivers if using.
- Fold the pastry edges over the pears to create a rustic border.
- Brush the exposed pastry edges with egg wash, then brush with melted butter.
- Sprinkle coarse sugar evenly over the pastry edges.
- Bake for 25-30 minutes until pastry is puffed and deep golden brown.
- Cool on the baking sheet for 10 minutes to allow filling to set.
- Drizzle with reserved honey syrup and serve warm with vanilla ice cream or whipped cream.
Notes
Do not over-poach the pears; they should be tender but not mushy. Ensure pears are completely cool before assembling to prevent leaking. The reserved honey syrup can be stored in the fridge for up to 2 weeks and used on pancakes or yogurt. For a gluten-free version, use gluten-free puff pastry. For a vegan version, use maple syrup and vegan puff pastry, and brush with plant milk instead of egg wash.
- Prep Time: 30 minutes
- Cook Time: 45 minutes
- Category: Dessert
- Cuisine: American
Nutrition
- Serving Size: 1 slice (1/8 of gale
- Calories: 320
- Sugar: 28
- Sodium: 280
- Fat: 16
- Saturated Fat: 8
- Carbohydrates: 42
- Fiber: 3
- Protein: 4
Keywords: honey poached pear galette, pear dessert, puff pastry recipe, easy dinner party dessert, fall baking, rustic tart, honey dessert



