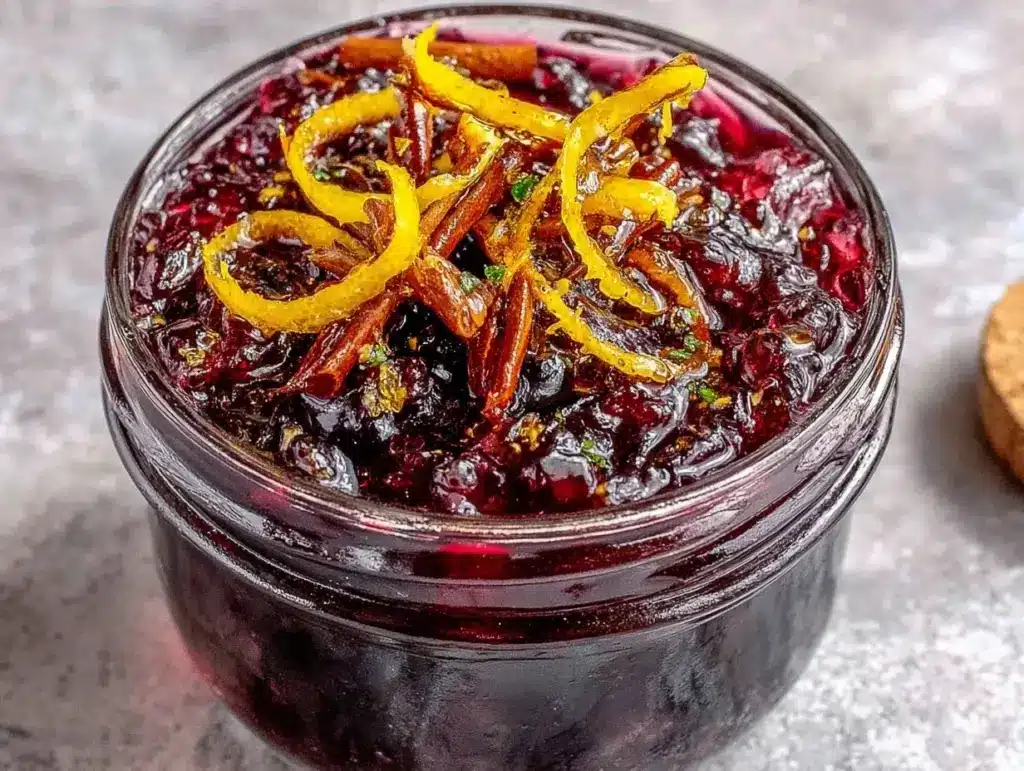
There’s a specific kind of magic that happens in my kitchen when November hits. The air gets crisp, the days get shorter, and my instinct shifts from “light and fresh” to “warm and deeply comforting.” Last week, while rummaging through the pantry for ingredients for my fall caramel apple cider sangria, I stumbled upon a jar of dried elderberries I’d bought on a whim months ago. I remember thinking they looked like little dark jewels, totally unused. Instead of letting them gather dust, I decided to turn them into something special.
I’m not going to lie to you—my first attempt was a disaster. I rushed the simmering process, and the result was a thin, slightly bitter liquid that tasted more like medicine than a treat. I threw it out, frustrated, and swore I’d never make syrup again. But then I remembered a technique I’d picked up from an old herbalist friend: patience and a splash of raw honey make all the difference. I started over, slower this time, adding cinnamon sticks and a touch of ginger, and let it reduce until it was thick, glossy, and deeply flavorful.
The result? Homemade elderberry syrup with raw honey and cinnamon that actually tastes good. Like, “drink it straight from the spoon” good. It’s rich, complex, and smells like a cozy cabin in the woods. I’ve made this batch four times in the last month, and every single time, I find myself drizzling it over oatmeal, stirring it into warm tea, or even using it as a glaze for roasted vegetables. But the real test came when I packaged a few bottles and gave them to neighbors. The response was immediate. People are obsessed. There’s something incredibly generous about gifting homemade syrup. It says, “I made this for you, and I want you to feel better, warmer, and happier.”
If you’ve never made your own syrup before, don’t let the word “herbal” scare you off. This isn’t about brewing tea leaves in a bag. It’s about creating a vibrant, antioxidant-rich condiment that’s as beautiful to look at as it is good to consume. It’s the perfect gift for the holidays, a great way to boost your immune system during cold and flu season, and honestly, just a delicious addition to your morning routine. Let me walk you through how to make it, so you can have some on hand (and plenty to give away).
Why You’ll Love This Homemade Elderberry Syrup
There are a dozen reasons I keep this syrup in my fridge year-round, but if you’re on the fence, here’s what sold me. This isn’t just a health tonic; it’s a flavor experience.
It Actually Tastes Amazing — I know, I know. “Healthy” often implies “bland” or “earthy,” but not this. The natural tartness of the elderberries balances perfectly with the floral sweetness of raw honey and the warm spice of cinnamon. It’s complex. It’s bright. It’s not medicinal at all. My kids ask for it in their oatmeal, which is the highest praise I could ask for.
It’s a Natural Immune Booster — Elderberries have been used for centuries to support the immune system. They’re packed with antioxidants and vitamins C and A. While I’m not a doctor, I do know that having this on hand during flu season gives me peace of mind. It’s a gentle, natural way to support my family’s health without relying on over-the-counter remedies. It’s like a hug in a bottle.
It’s Incredibly Versatile — This isn’t just for colds. I use it in everything. A spoonful in warm water with lemon is my go-to morning ritual. I stir it into pumpkin spice chai frappe for a boost of flavor. I drizzle it over yogurt, pancakes, or even mixed into frozen apple cider slushies for a sophisticated twist. It’s a pantry staple that elevates simple dishes.
It Makes the Best Gifts — Seriously, if you need a last-minute gift for teachers, neighbors, or friends, this is it. It’s inexpensive to make, looks beautiful in clear glass bottles with a rustic label, and feels personal. There’s something deeply caring about giving someone something you made with your own hands, especially when it’s something that promotes health and wellness. I’ve given these out at book clubs, office parties, and holiday dinners, and they are always a hit.
It’s Easy to Make — You don’t need fancy equipment or weeks of prep. You just need a pot, some dried elderberries, water, honey, and spices. The simmering process is mostly hands-off. You can set it on the stove and go read a book or watch a movie. When you come back, you’ll have a jar of liquid gold. It’s the kind of recipe that makes you feel like a culinary wizard without the stress.
Ingredients You’ll Need
Here’s the best part: you probably have most of this already. The ingredients are simple, whole, and easy to find. I’m particular about a few of them, though, so I’ll tell you exactly why they matter.
For the Syrup Base
Dried Elderberries (1 cup / 100g) — This is the star. Make sure you buy dried elderberries, not fresh. Fresh elderberries can be toxic and are rarely available anyway. I love the ones from Mountain Rose Herbs or any reputable health food store. They should be dark purple-black and shriveled. If they look pale or dusty, skip them. You want them to be rich and potent.
Water (4 cups / 960ml) — Just plain, filtered water is fine. No need for spring water or anything fancy. You’re going to strain out most of it anyway, so keep it simple.
Raw Honey (½ cup / 170g) — This is crucial. Do not use processed, pasteurized honey. You want raw, unfiltered honey for its enzyme benefits and complex flavor. Manuka honey is amazing but expensive; a local wildflower or clover honey works beautifully. If you’re vegan, substitute with agave nectar or maple syrup, though the texture will be slightly thinner.
For the Flavor
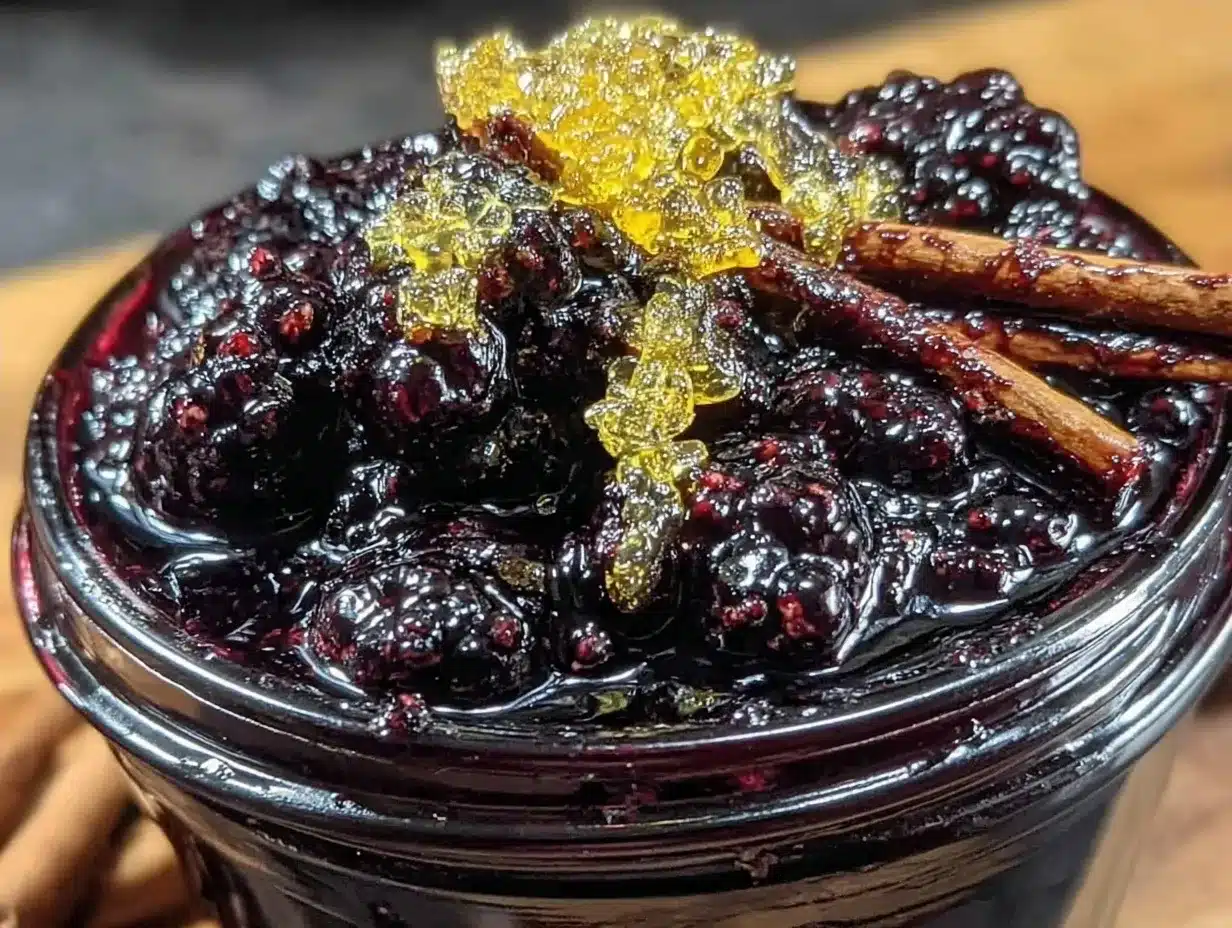
Cinnamon Sticks (2 large sticks) — I prefer Ceylon cinnamon, which is milder and sweeter than the common Cassia variety. It adds a warm, aromatic sweetness without the sharp punch. If you only have Cassia, use one stick to avoid overpowering the elderberries. Do not use ground cinnamon—it will make the syrup gritty and hard to strain.
Whole Cloves (5-6 cloves) — These add a subtle, spicy depth. Don’t overdo it. Five cloves is plenty. They should be whole, not ground. If you don’t have cloves, you can skip them, but they really round out the flavor profile.
Fresh Ginger (1-inch piece, sliced) — Optional, but I highly recommend it. The ginger adds a zesty kick that balances the sweetness of the honey. Slice it into thin coins. If you don’t like ginger, feel free to omit it, but you’ll miss out on that warming sensation.
Orange Peel (1 strip) — Just the peel, no white pith. The pith is bitter. I use an orange that I was going to eat anyway, so no waste. The citrus oils brighten the heavy, earthy notes of the elderberries. It’s a small detail that makes a big difference.
Black Peppercorns (½ teaspoon) — Yes, pepper. It sounds weird, but a few peppercorns add a subtle heat and complexity that makes the syrup taste more “grown-up.” It’s a secret ingredient that you won’t necessarily taste, but you’ll notice the depth.
For the Bottles
Clear Glass Bottles — I use small apothecary-style bottles with cork tops or swing-top lids. They look beautiful on a shelf and keep the syrup fresh. You can also use mason jars or any clean glass jar with a tight lid. Just make sure they’re sterilized.
Equipment Needed
You don’t need fancy equipment for this. Here’s what I actually use.
Medium Saucepan — A 3-quart pot works perfectly. It needs to be large enough to hold the water and berries without boiling over. I use a stainless steel pot because it’s easy to clean and doesn’t react with the acidic berries.
Mesh Strainer — A fine-mesh strainer is essential. You want to catch all the tiny berry bits and spices. I double-strain my syrup just to be sure, using a coffee filter or cheesecloth for the second pass if I want it extra clear.
Cheesecloth or Coffee Filter — Optional, but recommended for a clearer syrup. If you don’t mind a little pulp, you can skip this, but I prefer a smooth, glossy texture.
Funnel — Makes pouring into bottles much easier. No spills. I use a small plastic funnel from the kitchen drawer.
Measuring Cups and Spoons — Standard stuff. Dollar store versions work fine.
Wooden Spoon — For stirring. Don’t use metal on non-stick pots, but stainless steel is fine.
How to Make It: Step-by-Step
Alright, let’s make this! I’m walking you through exactly how I do it, including the little tricks I’ve picked up.
Step 1: Combine the Ingredients (5 minutes)
In your saucepan, combine the dried elderberries, water, cinnamon sticks, cloves, ginger slices, orange peel, and peppercorns. Stir them together gently. You want everything submerged in the water. If the berries float, just give them a push down. This is the easy part. Just throw it all in.
Step 2: Simmer the Berries (30-40 minutes)
Place the pot over medium-high heat and bring it to a boil. Once it boils, reduce the heat to low. Let it simmer gently for 30 to 40 minutes. You’ll see the water turn a deep, dark purple. The berries will swell and soften. Stir occasionally, maybe every 10 minutes, to prevent sticking. The kitchen will start to smell incredible—warm, spicy, and fruity. This is the magic moment.
Step 3: Mash and Steep (10 minutes)
After 30 minutes, turn off the heat. Use a potato masher or the back of a wooden spoon to gently mash the berries. This releases more juice and flavor. Let the mixture sit in the pot for another 10 minutes. This steeping time allows the flavors to meld and intensify. Don’t rush this step. The longer it sits, the stronger the flavor.
Step 4: Strain the Syrup (5 minutes)
Place your mesh strainer over a large bowl or measuring cup. Pour the mixture through the strainer. Press down on the berries and spices with a spoon to extract as much liquid as possible. If you want a clearer syrup, line the strainer with cheesecloth or a coffee filter and let it drip through slowly. This takes a bit longer but results in a beautiful, glossy syrup. Discard the solids. You’ve extracted everything they have to give.
Step 5: Add the Honey (2 minutes)
While the syrup is still warm (but not boiling), stir in the raw honey. Warm syrup mixes with honey much better than cold syrup. If the syrup is too hot, you’ll kill the beneficial enzymes in the honey, so let it cool for a few minutes if it’s still steaming. Stir until the honey is completely dissolved. The syrup will thicken slightly as it cools.
Step 6: Bottle and Store (5 minutes)
Use a funnel to pour the syrup into your clean glass bottles. Seal tightly. Label them with the date and contents. This is a great time to attach cute tags if you’re giving them as gifts. Store in the refrigerator.
Expert Tips & Tricks
Here’s everything I’ve learned from making this dozens of times. These tips will save you from my mistakes.
Don’t Skip the Honey — The honey isn’t just for sweetness; it’s a natural preservative. It helps keep the syrup fresh in the fridge for months. If you’re vegan, agave or maple syrup will work, but the preservation power is less. Keep it in the fridge and use it within a month if you substitute.
Strain Twice for Clarity — I know it’s more work, but straining twice (once through a mesh strainer, once through cheesecloth) makes a huge difference. The second strain catches the tiny bits of pulp and spice dust. The result is a syrup that looks professional and pours smoothly.
Adjust the Sweetness — Elderberries can be quite tart. If you like a sweeter syrup, add more honey. Start with ½ cup and taste after it cools. You can always add more, but you can’t take it out. I like it balanced, but my husband prefers it sweeter.
Use Fresh Ginger — Ground ginger doesn’t work here. It makes the syrup gritty and the flavor is too one-dimensional. Fresh ginger adds a bright, zesty note that cuts through the richness. Slice it thinly so the flavor infuses well.
Cool Completely Before Bottling — If you bottle the syrup while it’s hot, condensation can form inside the bottle, which might lead to mold. Let it cool to room temperature before sealing. This ensures a longer shelf life.
Variations & Substitutions
Once you’ve nailed the basic version, here’s how you can mix it up. I’ve tried all of these.
Elderberry and Elderflower — Add a handful of dried elderflowers along with the berries. It adds a floral, perfumed note that’s absolutely divine. This is a classic combination in European herbalism.
Elderberry and Echinacea — Add 1 tablespoon of dried echinacea root when you simmer the berries. This boosts the immune-supporting properties even more. It adds a slightly bitter, earthy note, so you might want to increase the honey.
Elderberry and Lemon — Instead of orange peel, use lemon peel and add the juice of one lemon after straining. This makes the syrup brighter and more tangy. Great for adding to sparkling water or tea.
Elderberry and Vanilla — Add a split vanilla bean pod during the simmering process. It adds a creamy, sweet aroma that pairs beautifully with the cinnamon. This is my favorite variation for oatmeal.
Gluten-Free & Vegan — This recipe is naturally gluten-free. For a vegan version, substitute the honey with agave nectar or maple syrup. Note that the shelf life will be shorter, so keep it in the fridge and use it within a month.
Elderberry and Apple Cider — Replace half of the water with apple cider. This adds a fruity, autumnal flavor that’s perfect for the fall. It pairs well with the cinnamon and cloves. I love this version for holiday gifts.
Serving & Storage
How to Serve: I usually serve this warm, stirred into hot water with a slice of lemon. It’s my go-to remedy when I feel a cold coming on. But it’s also great cold, stirred into iced tea or smoothies. A spoonful in yogurt or oatmeal is delicious. You can even use it as a glaze for roasted carrots or sweet potatoes. The possibilities are endless.
Storage: Store in the refrigerator in an airtight glass bottle. It will keep for up to 6 months. The honey acts as a preservative, so it lasts a long time. If you notice any mold or off-smells, discard it. But with proper storage, it should be fine for months.
Freezing: You can freeze this syrup! Pour it into ice cube trays and freeze, then transfer the cubes to a freezer bag. Thaw a cube in hot water when you need a quick dose. This is great for portion control or if you make a huge batch.
Pro Tip: If the syrup crystallizes or gets too thick, gently warm it in a bowl of hot water. It will become pourable again. Don’t microwave it directly, as high heat can destroy the honey’s enzymes.
Nutrition Information
I’m not a nutritionist, but here’s the breakdown if you’re tracking. This is per tablespoon.
Per Serving (1 tablespoon):
- Calories: 45
- Protein: 0g
- Carbs: 12g
- Fiber: 1g
- Sugar: 11g
- Fat: 0g
- Sodium: 1mg
What’s Good: Rich in antioxidants from the elderberries. Contains natural enzymes from the raw honey. No artificial ingredients.
What to Know: Higher in sugar due to the honey, but it’s natural sugar. Contains no gluten or dairy. Moderate calorie count.
My Take: Look, this is a concentrated syrup. It’s not a diet food, but it’s a health-supportive condiment. When I use it, I use a tablespoon or two, not a cup. It’s a way to get nutrients and flavor in a small package. Enjoy it as part of a balanced diet.
Final Thoughts
So that’s my homemade elderberry syrup! I’ve probably talked your ear off at this point, but when you make a recipe this often, you have a lot to say about it. This syrup has saved me during cold season, impressed my guests with its beauty and flavor, and given me a reason to slow down and simmer on quiet weekends.
It’s more than just a health tonic; it’s a way to connect with the seasons and share warmth with the people you care about. There’s something deeply satisfying about making something from scratch that’s both useful and beautiful. I hope you try this recipe and find your own ways to enjoy it. Make it yours! Add more ginger, less honey, or a splash of vanilla. The best recipes are the ones you adapt to your taste.
If you make this, drop a comment and let me know what you think! I love hearing how recipes turn out in your kitchen. And if something doesn’t work, tell me that too—I’m here to help troubleshoot. Happy cooking! And I hope your kitchen smells half as good as mine does right now.
Frequently Asked Questions
Q: Can I use fresh elderberries?
A: No, please don’t. Fresh elderberries (except for the specific variety Sambucus nigra) can be toxic. Dried elderberries are safe and widely available. If you forage your own, make sure you know exactly what you’re picking and that you cook them thoroughly. For safety and ease, stick with dried.
Q: How long does this syrup last?
A: In the refrigerator, it will last up to 6 months. The honey acts as a natural preservative. If you freeze it, it can last up to a year. Always check for mold or off-smells before using.
Q: Can I give this as a gift?
A: Absolutely! It’s one of the best homemade gifts. Just pour it into clean, decorative glass bottles, add a label with the date and ingredients, and tie it with a ribbon. It’s thoughtful, healthy, and delicious.
Q: Why is my syrup cloudy?
A: Cloudiness is normal, especially if you didn’t strain it twice. The natural pectin and pulp from the berries can make it cloudy. If you want it clear, strain it through a coffee filter or cheesecloth. It won’t affect the taste.
Q: Can I make this without honey?
A: Yes, you can use agave nectar or maple syrup. However, these are less effective as preservatives, so your syrup will have a shorter shelf life. Keep it in the fridge and use it within a month.
Q: Is this safe for children?
A: Yes, this is safe for children over 1 year old. The honey is safe for kids over 1. For infants under 1, do not use honey. Consult your pediatrician if you have concerns.
Pin This Recipe!
Homemade Elderberry Syrup: Best Cozy Gift for Guests
- Total Time: 45 minutes
- Yield: Approximately 2-3 cups (depending on reduction) 1x
Description
A rich, antioxidant-rich homemade elderberry syrup infused with raw honey, cinnamon, and spices. It serves as a delicious immune-boosting condiment, a versatile morning ritual addition, and a thoughtful homemade gift.
Ingredients
- 1 cup (100g) dried elderberries
- 4 cups (960ml) filtered water
- ½ cup (170g) raw honey
- 2 large cinnamon sticks (preferably Ceylon)
- 5–6 whole cloves
- 1-inch piece fresh ginger, sliced
- 1 strip orange peel (no white pith)
- ½ teaspoon black peppercorns
Instructions
- In a medium saucepan, combine dried elderberries, water, cinnamon sticks, cloves, ginger slices, orange peel, and peppercorns. Ensure ingredients are submerged.
- Place the pot over medium-high heat and bring to a boil. Once boiling, reduce heat to low and simmer gently for 30-40 minutes, stirring occasionally, until the liquid turns deep purple.
- Turn off the heat and gently mash the berries with a potato masher or wooden spoon to release juice. Let the mixture steep for 10 minutes.
- Strain the mixture through a fine-mesh strainer into a bowl, pressing on solids to extract liquid. For clearer syrup, strain a second time through cheesecloth or a coffee filter.
- While the syrup is still warm (but not boiling), stir in the raw honey until completely dissolved.
- Pour the syrup into clean, sterilized glass bottles using a funnel. Seal tightly and store in the refrigerator.
Notes
Do not use fresh elderberries as they can be toxic; always use dried. If using agave or maple syrup instead of honey, the shelf life will be shorter (use within 1 month). Strain twice for a clearer, glossier syrup. Cool completely before bottling to prevent condensation and mold. Can be frozen in ice cube trays for long-term storage.
- Prep Time: 5 minutes
- Cook Time: 40 minutes
- Category: Condiment
- Cuisine: American
Nutrition
- Serving Size: 1 tablespoon
- Calories: 45
- Sugar: 11
- Sodium: 1
- Carbohydrates: 12
- Fiber: 1
Keywords: elderberry syrup, homemade syrup, immune booster, holiday gift, raw honey, cinnamon syrup, vegan syrup, natural remedy, cozy winter recipe



