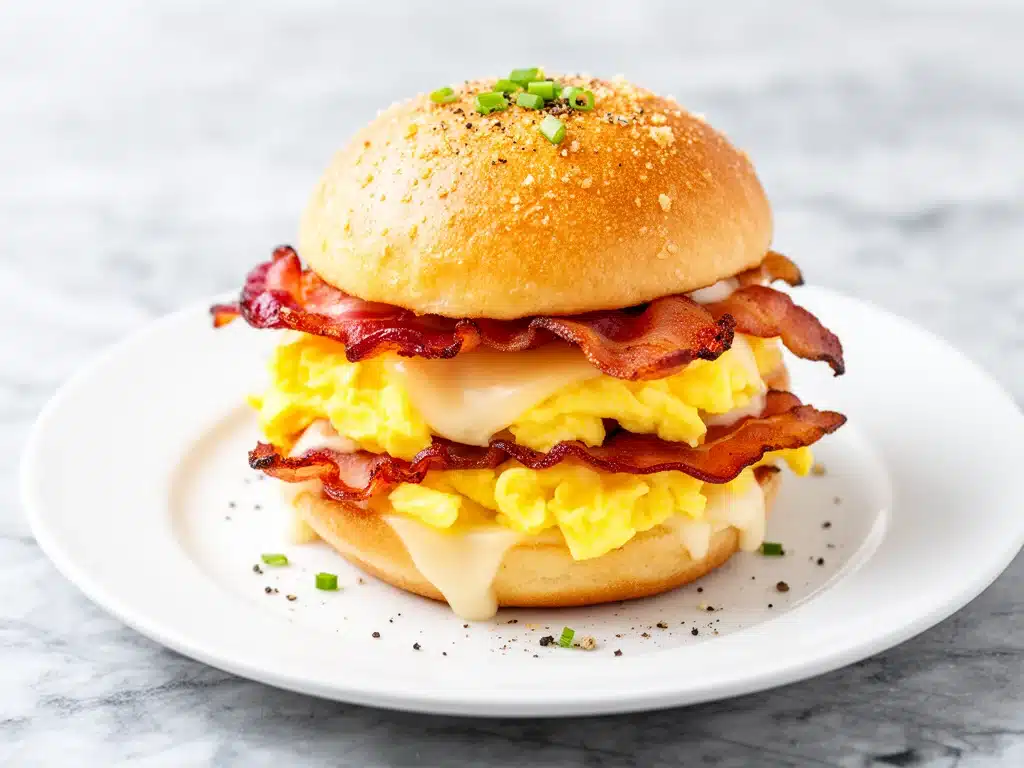
My husband and I have a standing date every Sunday morning: the “I Can’t Decide What We Want to Eat” brunch. It’s usually 10:30 AM, the sun is streaming through the kitchen window, and we’re both running on three hours of sleep and zero motivation to cook anything complicated. For years, this meant toast with jam, or maybe some leftover cereal. But last month, I decided I was done with boring brunches. I wanted something that felt special, something that smelled like a fancy hotel restaurant, but that I could throw together in the time it takes to brew a pot of coffee.
That’s when I discovered these crispy bacon egg and cheese breakfast sliders. I first tried them at a tiny bakery in Portland (the kind with lines out the door and no Wi-Fi), and I was hooked. The contrast of the buttery, toasted slider bun against the salty, crispy bacon and the runny yolk? Pure magic. I tried to recreate it at home, and honestly, my first few attempts were a disaster. The buns got soggy, the eggs were overcooked, and the bacon was either burnt or limp. But after about five tries, I cracked the code. Now, these sliders are our weekend brunch staple. They’re indulgent without being heavy, easy enough to make when you’re half-asleep, and they make your whole house smell incredible.
I’ve made these at least a dozen times since that first successful batch. My family asks for them specifically now. Even my picky eater who usually only eats pancakes will eat three of these in one sitting. It’s become our go-to weekend brunch recipe because it hits all the right notes: savory, salty, cheesy, and totally comforting. If you’re tired of the same old oatmeal or eggs benedict that takes an hour to prep, you need to try this. It’s the perfect balance of lazy weekend vibes and serious flavor.
Why You’ll Love This Recipe
There are about ten reasons I keep coming back to these sliders, but here are the big ones that make them a permanent fixture in our weekend rotation.
- Stupid Simple Assembly — Seriously, if you can toast bread and scramble eggs, you can make this. I’ve made these while my kids were playing in the other room. There’s no complex technique here, just layering good ingredients.
- Lightning Fast — 20 minutes from start to finish. Most of that time is just waiting for the bacon to crisp up. I can have these on the table before the coffee is even done brewing.
- Customizable for Everyone — My husband likes his eggs runny, my daughter likes hers firm, and I like extra cheese. With sliders, everyone builds their own. No more arguing over how the eggs should be cooked.
- Perfect for Crowds — Need to feed a group for a holiday brunch? These are a lifesaver. You can make a huge batch of sliders ahead of time and just warm them up. They’re much easier to serve than individual pancakes or waffles.
- Leftover Friendly — Okay, I’ll be honest: these rarely have leftovers. But if they do, they reheat beautifully in the toaster oven. The bacon stays crispy, and the cheese stays melty.
- Uses Up Leftovers — Did you buy too much bacon for dinner? Have some extra cheddar or swiss sitting in the fridge? These sliders are the perfect way to use up those odds and ends without feeling wasteful.
This is my go-to when I want brunch to feel special but I don’t want to spend the entire morning in the kitchen. It’s reliable, delicious, and makes everyone happy. Plus, the smell of cooking bacon and toasting buns? That’s the best part of waking up on a weekend.
Ingredients You’ll Need
Here’s the best part: you probably have most of this already. I’m particular about three ingredients here, and I’ll tell you exactly why they matter. For the rest, keep it simple. You want the flavors to shine, not compete.
For the Sliders
Slider Buns (12 buns) — I use Hawaiian sweet rolls or brioche buns. They’re soft, slightly sweet, and hold up well to the fillings. Do not use dinner rolls; they’re too dense and dry. The sweetness balances the salty bacon perfectly. If you can’t find slider-sized buns, you can cut standard dinner rolls in half, but the texture won’t be quite as tender.
Bacon (1 pound) — This is where you don’t skimp. Thick-cut bacon is non-negotiable for me. It stays crispy even when it’s sitting on a warm bun. Thin bacon gets too brittle or too greasy. I usually buy the kind that’s already cut into strips, but if you’re buying a full pack, just slice it yourself. The crispy texture is the star of this show.
Eggs (6-8 large eggs) — I use about one egg per slider, depending on how big your buns are. Large eggs are standard, but if you’re using medium, just add an extra one or two. The key is getting the yolk consistency right. For these sliders, I like them cooked just set but still creamy. Scrambled is easiest, but you can also fry them sunny-side up if you’re feeling fancy.
Butter (2 tablespoons, melted) — This is for brushing the buns. It gives them that golden, toasted finish. Don’t skip this. It adds richness and helps the cheese melt evenly. I mix it with a little bit of garlic powder for extra flavor, but plain butter works fine too.
For the Cheese and Extras
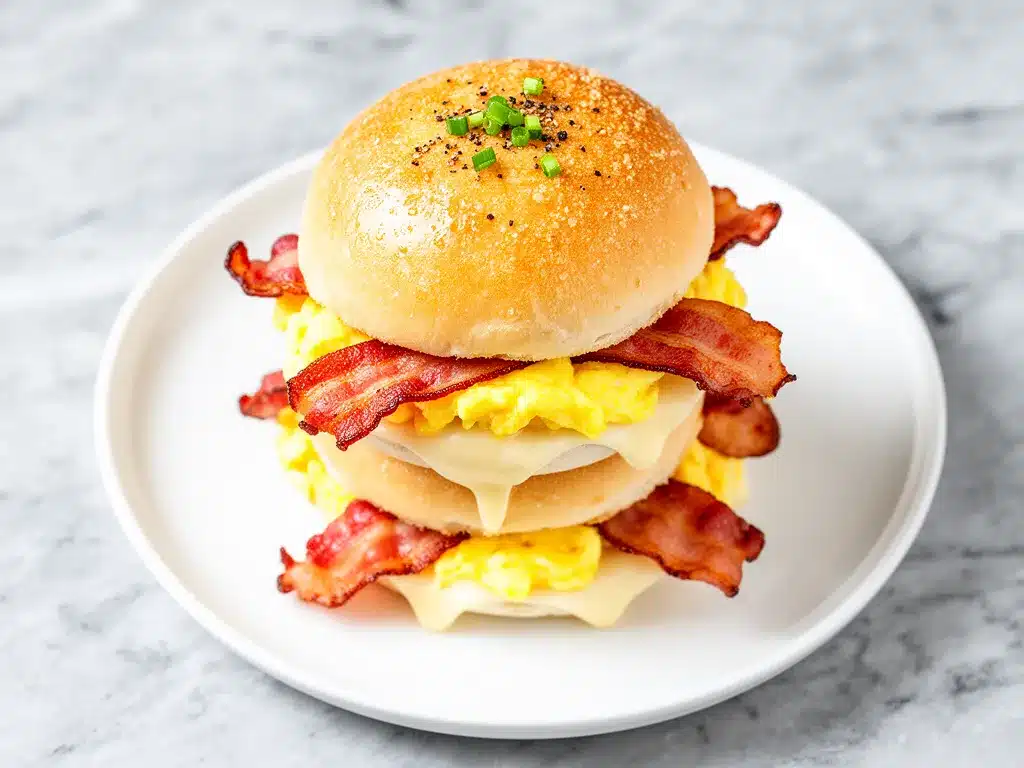
Cheddar Cheese (1 cup, shredded) — Sharp cheddar is my go-to. It has a strong flavor that stands up to the bacon. American cheese melts better, but it doesn’t have the same taste. I blend 50% sharp cheddar and 50% American for the best of both worlds: great flavor and perfect meltability. If you’re a fan of white cheddar, that works too.
Green Onions (2 stalks, sliced) — Optional, but I highly recommend it. They add a fresh, oniony crunch that cuts through the richness of the bacon and cheese. They look pretty on top too.
Salt and Pepper — To taste. I usually add a pinch of salt to the eggs while they’re cooking, but remember the bacon is already salty, so go easy.
Hot Sauce (Optional) — I like a few dashes of sriracha or frank’s redhot on my sliders. If you’re serving kids, you can skip this or put it on the side.
Equipment Needed
You don’t need fancy equipment for this. Here’s what I actually use.
Large Skillet — I use a 12-inch cast iron skillet. It holds heat well and cooks the bacon evenly. If you don’t have cast iron, a stainless steel or non-stick skillet works fine. Just make sure it’s big enough to cook all the bacon strips in a single layer.
Baking Sheet — A standard half-sheet pan is perfect for toasting the buns. I line mine with parchment paper for easy cleanup, though it’s not strictly necessary.
Small Bowl — For whisking the eggs. I use a small glass bowl because it’s easy to pour from.
Whisk — Just a standard whisk. No need for anything fancy.
Pastry Brush — For brushing the melted butter on the buns. A silicone brush is easier to clean, but a regular pastry brush works too.
Cheese Grater — Box grater or microplane. If you’re buying pre-shredded cheese, skip this step. But fresh-shredded cheese melts so much better. I learned this the hard way with a clumpy, grainy cheese sauce once. Never again.
How to Make It: Step-by-Step
Alright, let’s make this! I’m walking you through exactly how I do it, including the little tricks I’ve picked up to ensure your sliders turn out perfect every time.
Step 1: Cook the Bacon (8-10 minutes)
Start by cooking the bacon. I like to cook it in a cold skillet to render out the fat slowly. This helps it get crispy without burning. Lay the strips in a single layer. Turn the heat to medium. As the bacon cooks, flip it every minute or so. You want it dark golden brown and crisp, but not burnt. Once it’s done, transfer it to a plate lined with paper towels to drain. Leave about 1 tablespoon of the bacon grease in the skillet—that’s liquid gold for flavor.
Step 2: Prep the Buns (2 minutes)
While the bacon is cooking, slice your slider buns in half horizontally. You want to create a top and bottom half for each bun. Place them cut-side up on the baking sheet. Brush the cut sides generously with melted butter. This is what gives them that bakery-style toasted finish. If you’re feeling fancy, sprinkle a little bit of garlic powder or sesame seeds on the butter before you put them in the oven.
Step 3: Toast the Buns (3-4 minutes)
Preheat your oven to 375°F (190°C). Place the baking sheet with the buttered buns in the oven. Toast them for 3-4 minutes, just until they’re golden brown and crisp on the edges. Keep a close eye on them—bread goes from perfect to burnt very quickly. Remove them from the oven and set aside. You don’t want them soggy, so this step is crucial.
Step 4: Scramble the Eggs (3-4 minutes)
In the same skillet you cooked the bacon in (with that leftover grease), add a little bit of butter if needed. Whisk the eggs with a pinch of salt and pepper. Pour them into the warm skillet. Cook over medium-low heat, stirring gently with a spatula. You want soft curds, not dry crumbles. Remove them from the heat just before they look fully cooked—they’ll continue to cook from the residual heat. This ensures they stay creamy and moist on the slider.
Step 5: Assemble the Sliders (5 minutes)
This is the fun part. Take your toasted bun bottoms and layer them with a slice of cheese, a portion of scrambled eggs, and a piece of crispy bacon. Top with another slice of cheese (this helps glue everything together) and the bun top. I like to press down gently on each slider to help the cheese melt slightly from the warmth of the bun.
Step 6: Final Toast (2-3 minutes)
For the best texture, I like to toast the assembled sliders briefly. Place them back on the baking sheet and put them in the oven for 2-3 minutes. This melts the cheese perfectly and warms everything through. Keep an eye on them so the buns don’t get too dark. Once the cheese is bubbly and the buns are warm, they’re ready to serve.
Step 7: Garnish and Serve
Remove the sliders from the oven. Sprinkle with sliced green onions and a dash of hot sauce if you like. Serve immediately while they’re hot and cheesy. These are best eaten with your hands, so have plenty of napkins ready.
Total Time: About 20-25 minutes (10 minutes active, 15 minutes mostly hands-off)
Expert Tips & Tricks
Here’s everything I’ve learned from making these dozens of times. These tips will save you from my mistakes and ensure your sliders are restaurant-quality.
Cook the Bacon First
The bacon grease is the secret ingredient. It adds a smoky, savory depth to the eggs that plain butter just can’t match. Don’t wash the skillet after cooking the bacon; just wipe out any large bits. That grease is flavor.
Don’t Overcook the Eggs
This is the most common mistake. If your eggs are dry and crumbly, the slider will feel heavy and unappetizing. Aim for soft, creamy curds. They should look slightly wet when you take them off the heat. Remember, they’ll keep cooking a bit from the heat of the bacon and cheese.
Toast the Buns Twice
I toast the buns first with butter, then again after assembling. This double-toast ensures the buns stay crisp even when they’re holding all the juicy fillings. If you skip the first toast, the buns can get soggy from the egg moisture.
Use Sharp Cheese
Mild cheddar can get lost among the bacon and eggs. Sharp cheddar has a tangy bite that cuts through the richness. If you’re using American cheese for meltability, mix it with sharp cheddar for the best balance.
Keep the Bacon Crisp
If your bacon is limp, the slider will feel greasy. Make sure you cook it until it’s firm and crisp. If you’re worried about it getting too dark, take it out a minute before you think it’s done. It will continue to crisp up as it cools on the paper towels.
Make-Ahead Strategy
You can cook the bacon and scramble the eggs up to a day ahead. Store them in separate airtight containers in the fridge. When you’re ready to serve, just toast the buns, assemble, and warm in the oven. It saves a lot of time on busy weekends.
Variations & Substitutions
Once you’ve nailed the basic version, here’s how you can mix it up. I’ve tried all of these, and they’re all winners.
Ham and Swiss Version
Swap the bacon for sliced ham and the cheddar for Swiss cheese. Add a little Dijon mustard on the buns for a breakfast sandwich vibe. This is great if you want a milder flavor.
Veggie Slider
Skip the bacon and ham. Add sautéed mushrooms, spinach, and bell peppers. Use avocado instead of cheese for a creamy texture. This is a lighter option that’s still satisfying.
Spicy Slider
Add jalapeños to the eggs or use pepper jack cheese. Drizzle with hot sauce or chipotle mayo. This is for those who like a kick with their breakfast.
Breakfast Sausage Version
Replace the bacon with breakfast sausage patties or crumbled sausage. Cook the sausage separately and layer it with the eggs and cheese. This is a classic combination that never fails.
Gluten-Free Option
Use gluten-free slider buns. Most brands work well, but check the texture. Some are too crumbly. I like the ones made with rice flour. Everything else is naturally gluten-free.
Dairy-Free Option
Use a dairy-free butter for brushing the buns and a vegan cheese slice. It’s not the same as the real thing, but it’s a decent substitute if you’re avoiding dairy. I usually just skip the cheese and add extra avocado for creaminess.
Serving & Storage
These sliders are best served immediately, hot and cheesy. But if you’re making a big batch for a crowd, here’s how to handle them.
How to Serve
I usually serve these on a large platter with a side of fresh fruit or a simple green salad. The sliders are rich, so a light side helps balance the meal. A side of crispy bacon egg and cheese breakfast sliders is a crowd-pleaser at any brunch.
Side Dishes
– Fresh berries or melon
– Greek yogurt with honey and granola
– Simple green salad with vinaigrette
– Hash browns or home fries
Storage Instructions
Store leftovers in an airtight container in the fridge for up to 2 days. The buns might soften a bit, but the flavors will still be good.
Reheating
The best way to reheat is in the toaster oven or a regular oven at 350°F for 5-7 minutes. This restores the crispness of the buns and melts the cheese. Avoid the microwave, as it makes the buns soggy and the bacon chewy. If you must use the microwave, do it in short bursts and check frequently.
Freezing
I don’t recommend freezing these. The eggs and buns don’t freeze well together. They can become mushy when thawed. It’s better to make them fresh.
Nutrition Information
I’m not a nutritionist, but here’s the breakdown if you’re tracking. Keep in mind that these are rich, indulgent sliders, so portion control is key.
| Nutrient | Per Slider (approx.) |
|---|---|
| Calories | 280 |
| Protein | 14g |
| Carbs | 22g |
| Fat | 16g |
| Sodium | 450mg |
These sliders are higher in calories and sodium due to the bacon and cheese, but they’re also high in protein, which helps keep you full. If you’re watching your intake, you can reduce the cheese or use turkey bacon. But honestly, these are a treat, so enjoy them guilt-free!
Final Thoughts
So that’s my go-to crispy bacon egg and cheese breakfast sliders! I’ve probably talked your ear off at this point, but when you make a recipe this often, you have a lot to say about it. These sliders have saved our weekends. They’re my answer to “what’s for brunch” when I want something special but don’t want to stress. My family is happy, my husband is happy, and I’m happy because I’m not stuck in the kitchen for hours.
Make it yours! Try different cheeses, add some veggies, or swap the bacon for sausage. The best recipes are the ones you adapt to your family’s tastes. If you make this, drop a comment and let me know what you think! I love hearing how recipes turn out in your kitchen. And if something doesn’t work, tell me that too—I’m here to help troubleshoot.
Happy cooking! And I hope your kitchen smells half as good as mine does right now.
Frequently Asked Questions
Can I use regular bread instead of slider buns?
You can, but the texture won’t be the same. Slider buns are soft and slightly sweet, which pairs perfectly with the salty bacon. If you use regular bread, I’d recommend toasting it well and maybe adding a little butter to keep it from being too dry. Hawaiian rolls or brioche are the best substitutes.
How do I keep the buns from getting soggy?
The key is to toast the buns first with butter. This creates a barrier between the bun and the moist fillings. Also, don’t overfill the sliders. If you pile too many eggs and bacon on, the bun will collapse. Keep it balanced.
Can I make these ahead of time?
Yes! You can cook the bacon and scramble the eggs up to a day ahead. Store them separately in the fridge. When you’re ready to serve, just toast the buns, assemble the sliders, and warm them in the oven for 5 minutes. This saves a lot of time on busy mornings.
What’s the best cheese to use?
I like a mix of sharp cheddar and American cheese. The cheddar adds flavor, and the American ensures a good melt. If you prefer a milder taste, use Swiss or provolone. Avoid pre-shredded cheese if you can, as it doesn’t melt as smoothly.
Can I use turkey bacon?
You can, but it’s not as crispy or flavorful as regular bacon. If you use turkey bacon, I’d recommend cooking it in the oven at 400°F for 15 minutes to get it crisp. It’s a lighter option, but the taste will be different.
How do I reheat leftovers without them getting dry?
Reheat in the oven or toaster oven at 350°F for 5-7 minutes. This restores the crispness. Avoid the microwave, as it makes the buns soggy. If you must use the microwave, do it in short bursts and add a splash of water to the plate to create steam.
Pin This Recipe!
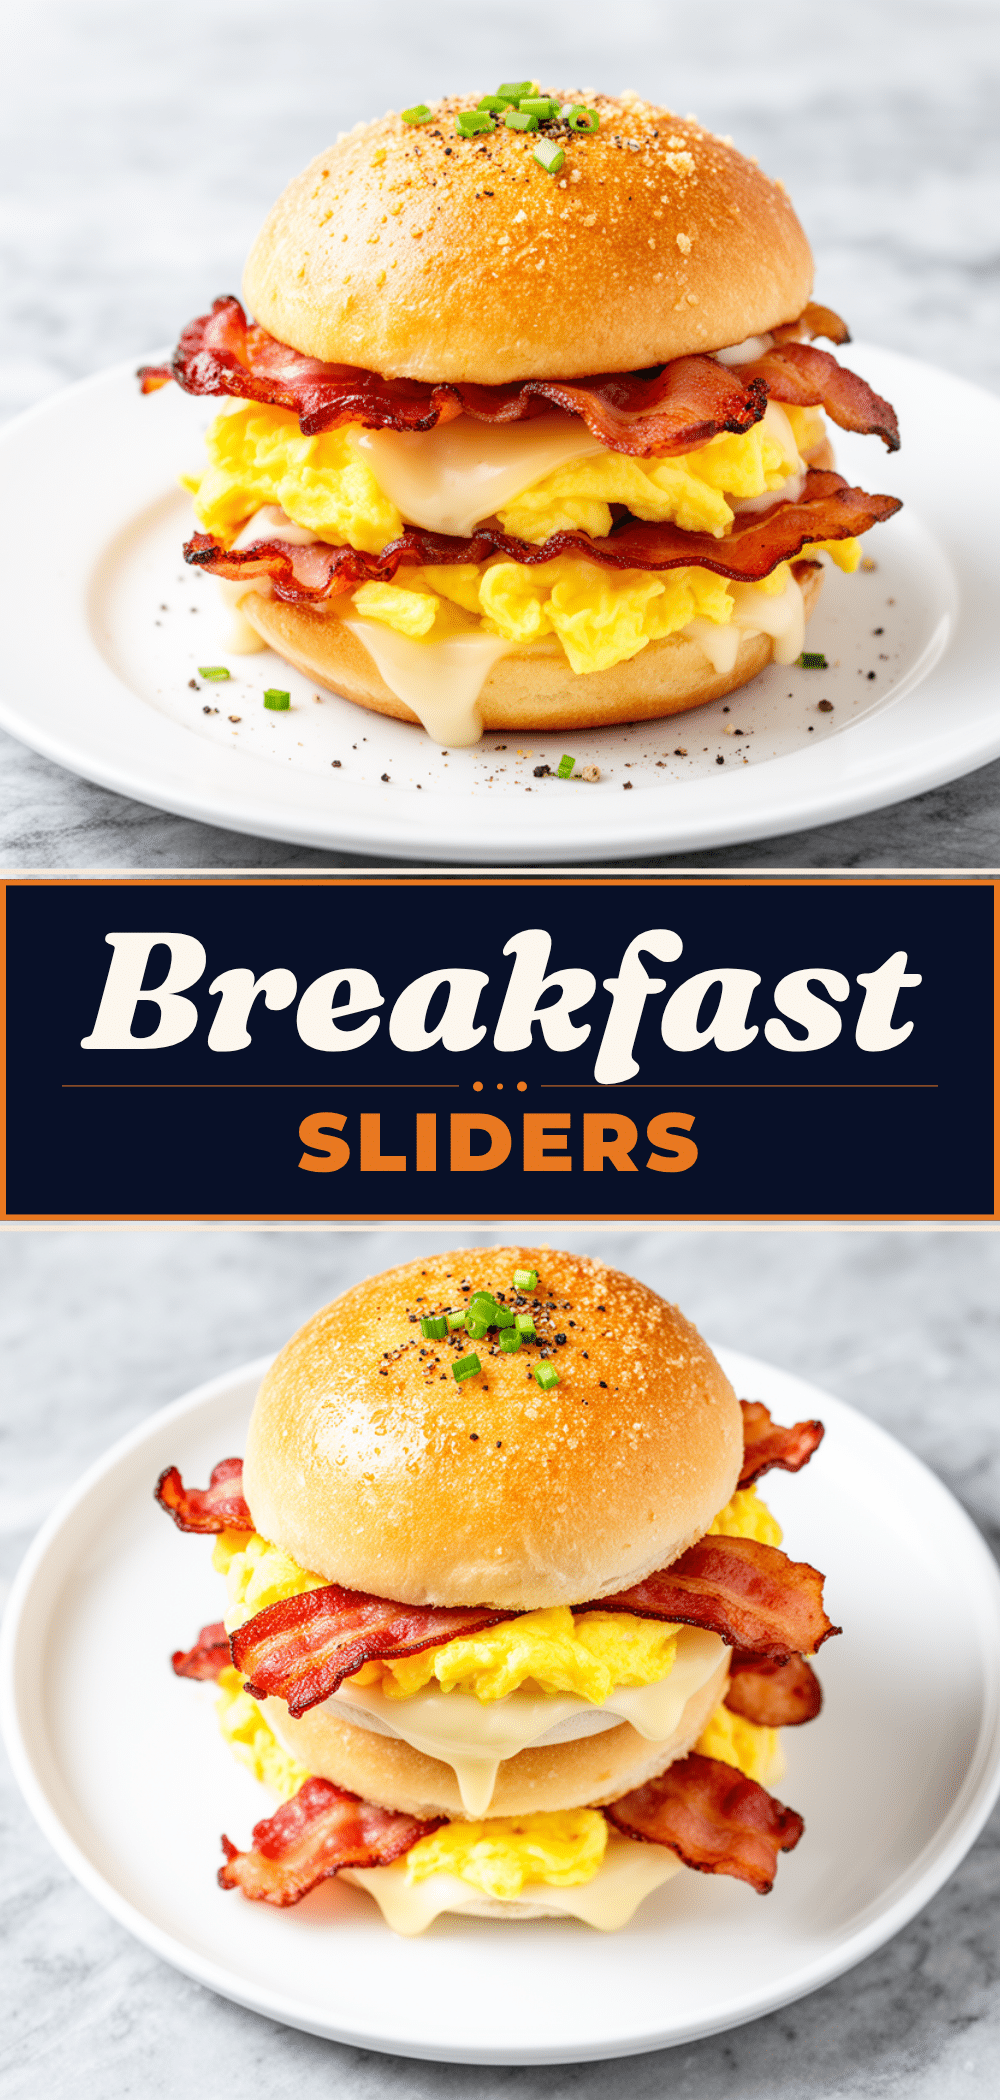
Crispy Bacon Egg and Cheese Breakfast Sliders
- Total Time: 25 minutes
- Yield: 12 servings 1x
Description
Indulgent yet easy-to-make breakfast sliders featuring crispy thick-cut bacon, creamy scrambled eggs, and melted sharp cheddar cheese on toasted Hawaiian or brioche buns. Perfect for a quick weekend brunch.
Ingredients
- 12 slider buns (Hawaiian sweet rolls or brioche)
- 1 pound thick-cut bacon
- 6–8 large eggs
- 2 tablespoons butter, melted
- 1 cup sharp cheddar cheese, shredded
- 1/2 cup American cheese, shredded (optional, for better melt)
- 2 stalks green onions, sliced
- Salt and black pepper, to taste
- Hot sauce (optional, for serving)
Instructions
- Cook the bacon in a cold large skillet over medium heat until dark golden brown and crisp, about 8-10 minutes. Transfer to a paper towel-lined plate and leave 1 tablespoon of bacon grease in the skillet.
- Slice slider buns in half horizontally. Place cut-side up on a baking sheet and brush generously with melted butter.
- Preheat oven to 375°F (190°C). Toast the buttered buns for 3-4 minutes until golden brown and crisp. Remove and set aside.
- In the same skillet with the bacon grease, whisk eggs with a pinch of salt and pepper. Pour into the warm skillet and cook over medium-low heat, stirring gently until soft curds form. Remove from heat just before fully cooked.
- Assemble sliders by layering cheese, scrambled eggs, and crispy bacon on the bun bottoms. Top with another slice of cheese and the bun tops.
- Return assembled sliders to the baking sheet and toast in the oven for 2-3 minutes until cheese is melted and buns are warm.
- Garnish with sliced green onions and hot sauce. Serve immediately.
Notes
Toast buns twice to prevent sogginess. Use sharp cheddar for better flavor balance. Do not overcook eggs; they should remain creamy. Leftovers can be stored in the fridge for up to 2 days and reheated in the oven or toaster oven.
- Prep Time: 10 minutes
- Cook Time: 15 minutes
- Category: Breakfast
- Cuisine: American
Nutrition
- Serving Size: 1 slider
- Calories: 280
- Sugar: 4
- Sodium: 450
- Fat: 16
- Saturated Fat: 7
- Carbohydrates: 22
- Fiber: 1
- Protein: 14
Keywords: breakfast sliders, bacon and egg sliders, brunch ideas, easy breakfast, weekend brunch, crispy bacon, cheesy breakfast



