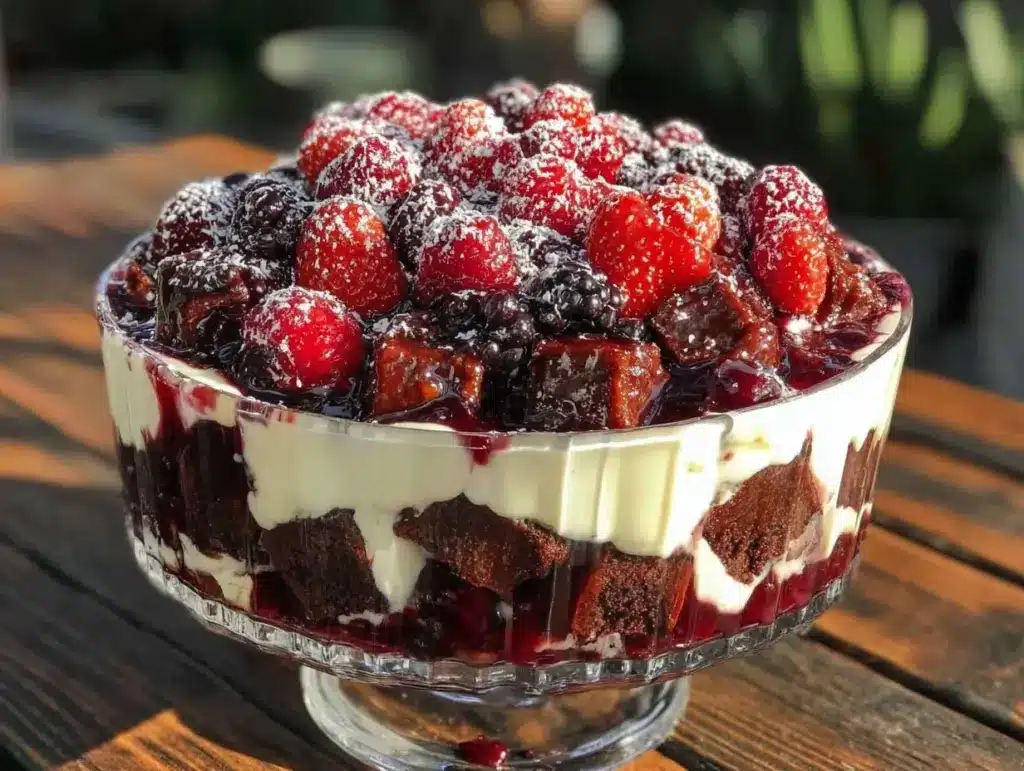
Last Labor Day, I made the mistake of thinking I could wing it. You know the type. You’re standing in front of the grill, sweating through your shirt, trying to get those labor day BBQ chicken skewers perfectly charred while the kids are running around barefoot and the dog is begging for scraps. I figured, “It’s just dessert. I’ll throw some whipped cream on some fruit. Easy.”
Wrong.
By the time dinner was done, everyone was tired, the sun was setting, and the “easy” dessert looked sad on a paper plate. My daughter looked at it, took one bite, and said, “Can we just get ice cream next time?” That stung. I wanted to end the holiday on a high note, not with a whimper of mediocre fruit.
So this year, I decided to do things differently. I wanted something that looked fancy enough to impress the in-laws but was cheap enough to make for the whole neighborhood if needed. I wanted something I could assemble in the morning while drinking my coffee, so I could actually enjoy the cookout instead of stressing in the kitchen at 5 PM.
That’s when I remembered my grandmother’s berry trifle. It’s not just fruit and cake. It’s a layered masterpiece of creamy custard, fresh berries, and soft cake that soaks up all the flavors. I’ve tested this berry trifle recipe for Labor Day cookouts about a dozen times now, tweaking the ratios until it was perfect. And let me tell you, the first time I served it? My daughter asked for the recipe before she even finished her plate. It’s become our family’s new tradition.
This berry trifle is your ticket to a stress-free holiday. It’s budget-friendly, uses ingredients you probably already have (or can grab cheaply at the store), and it tastes like you spent hours in a bakery. Here’s how to make it without breaking the bank or your back.
Why You’ll Love This Recipe
There are about ten reasons I keep making this trifle, but here are the big ones that make it a Labor Day winner.
It’s a Make-Ahead Hero — Seriously, this is the best part. You assemble it the night before or even the morning of. The flavors meld together as it chills, making it taste better on day two. I can actually sit on the porch and watch the kids play instead of hovering over the oven. My husband handles the lemon blueberry bundt cake on other holidays, but for Labor Day, I want something lighter and cooler.
Stretches for a Crowd — One trifle feeds 12-15 people easily. That’s less than $2 per serving if you shop smart. I love that I can make one big batch and have leftovers for breakfast or afternoon snacks. It’s like getting two desserts for the price of one.
Uses Seasonal (Cheap) Berries — Labor Day is peak berry season. Strawberries, blueberries, and raspberries are abundant and affordable right now. If you’re in a pinch, frozen berries work too (just thaw and drain them first). It’s a great way to use up those berries before they get expensive.
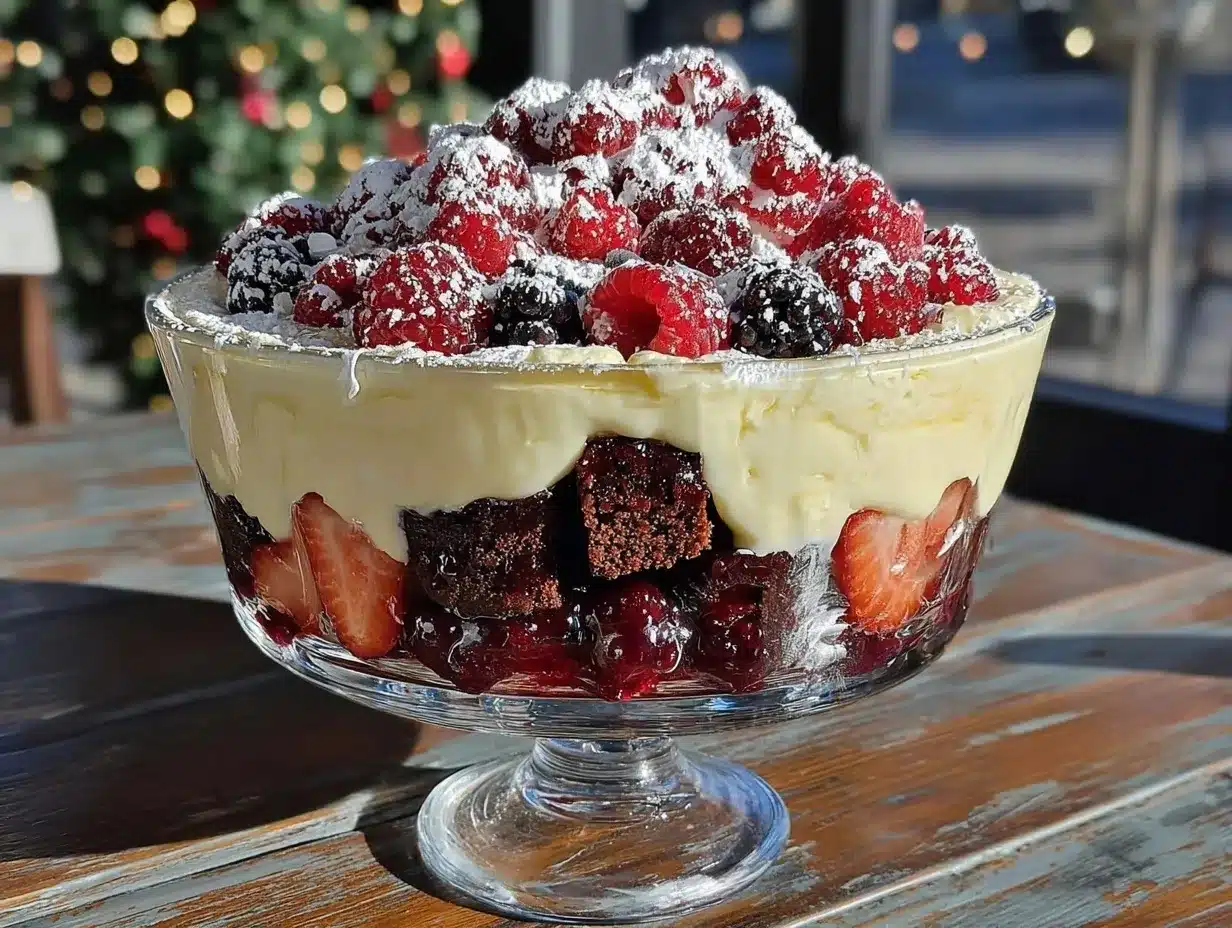
Visually Stunning — Let’s be honest, we eat with our eyes first. The layers of red, purple, and white in a clear glass bowl look incredible. It feels fancy and celebratory without any actual effort on your part. Guests will think you hired a professional.
Kid-Approved — It’s sweet, creamy, and fruity. Not too heavy like a chocolate cake, so kids don’t get a sugar crash and cranky before the fireworks. It’s the perfect end to a long day of grilling.
This is my go-to when I need a dessert that just works. No complicated techniques, no weird ingredients, just reliable, delicious food that makes everyone happy.
Ingredients You’ll Need
Here’s the best part: you probably have most of this already in your pantry. I’m particular about three ingredients here, and I’ll tell you exactly why.
For the Cake Base
Yellow or Vanilla Cake Mix (1 box / 15.25 oz) — I use a box mix. Don’t judge me! It’s cheap, it’s consistent, and it soaks up the custard beautifully. You can make from scratch if you’re feeling ambitious, but I stick with Duncan Hines or Betty Crocker for reliability. You’ll need one box for the cake layer.
Instant Pudding Mix (2 packages / 3.4 oz each) — Vanilla instant pudding mix is the secret weapon here. It thickens the custard and adds that classic trifle flavor. I always keep a few boxes in my pantry for emergencies like this.
Milk (4 cups / 1 liter) — Use whole milk for the richest flavor. If you’re watching calories, 2% works, but whole milk makes the custard luxuriously creamy. This goes into both the pudding and the custard layer.
For the Custard Layer
Heavy Cream (2 cups / 480ml) — Full-fat only. Half-and-half makes it too thin. Trust me on this. You’re going to whip this later, so it needs the fat content to hold peaks.
Confectioners’ Sugar (½ cup / 60g) — Just enough sweetness to balance the tart berries. If your berries are super sweet, you can cut this to ¼ cup.
Vanilla Extract (1 teaspoon) — Real vanilla, not the imitation stuff. It makes a huge difference in the flavor profile.
For the Fruit Layers
Mixed Berries (4-5 cups total) — I use a mix of strawberries, blueberries, and raspberries. Strawberries are the base, blueberries add bursts of flavor, and raspberries add a nice tartness. You can use all one type, but the mix looks prettiest.
Strawberry Jam (½ cup / 120g) — This is the glaze for the berries. It makes them shiny and adds a concentrated berry flavor. Apricot jam works too if you don’t have strawberry.
Simple Syrup (½ cup / 120ml) — Equal parts sugar and water, heated until dissolved. This brushes onto the cake to keep it moist. If you’re lazy, you can skip this, but the cake might be a bit dry.
For Garnish
Whipped Cream (optional) — Extra dollops on top look professional.
Whole Berries — For the final touch.
Mint Leaves — A little green pops against the red and purple. It’s not necessary, but it looks great in photos.
Equipment Needed
You don’t need fancy equipment for this. Here’s what I actually use.
Large Trifle Bowl — A glass bowl is essential so you can see the layers. I use a 6-quart bowl. If you don’t have one, you can use a large clear serving dish or even individual mason jars for a cute presentation.
Mixer — Electric hand mixer or stand mixer for whipping the cream. Doing this by hand takes forever and your arms will hurt.
Two Mixing Bowls — One for the pudding, one for the whipped cream.
Brush — A pastry brush for applying the simple syrup to the cake. Or just use the back of a spoon.
Spatula — For spreading the layers evenly.
Knife and Cutting Board — For slicing the strawberries.
How to Make It: Step-by-Step
Alright, let’s make this! I’m walking you through exactly how I do it, including the little tricks I’ve picked up.
Step 1: Bake and Cool the Cake (30 minutes active, 1 hour cooling)
Preheat your oven to 350°F (175°C). Grease a 9×13 inch baking pan. Make the cake mix according to the package directions, but use the amount of milk and oil called for. Pour it into the pan and bake for 25-30 minutes, or until a toothpick comes out clean.
Pro Tip: Let the cake cool completely in the pan. If you try to cut warm cake, it’ll crumble and make a mess. While it cools, make your simple syrup by mixing ½ cup sugar and ½ cup water in a small saucepan. Heat until dissolved, then let it cool. You can make this ahead and keep it in the fridge.
Step 2: Make the Vanilla Pudding Custard (5 minutes)
In a large bowl, whisk together 2 packages of instant vanilla pudding mix and 4 cups of cold milk. Whisk vigorously for 2 minutes until it thickens. The pudding should pull away from the sides of the bowl. Set aside.
Why this matters: This pudding layer is the glue that holds the trifle together. It’s thicker than regular custard, which helps support the fruit layers.
Step 3: Whip the Cream (5 minutes)
In a separate large bowl, combine 2 cups of cold heavy cream, ½ cup confectioners’ sugar, and 1 teaspoon vanilla extract. Beat on medium-high speed until stiff peaks form. You’ll know it’s ready when you lift the beaters and the cream stands up straight.
Watch out: Don’t overbeat it into butter! Stop as soon as you see stiff peaks.
Step 4: Slice the Berries
Wash and hull your strawberries. Slice them into thin coins or quarters, depending on size. Leave blueberries and raspberries whole. In a separate bowl, toss the strawberries with the strawberry jam. This glazes them and keeps them from getting soggy too fast.
Step 5: Assemble the Trifle (15 minutes)
Now for the fun part. Take your cooled cake and tear it into rough 1-inch pieces. Don’t try to cut perfect cubes; torn cake soaks up the syrup better.
Layer 1: Spread half of the torn cake pieces into the bottom of your trifle bowl. Brush lightly with simple syrup.
Layer 2: Spread half of the vanilla pudding custard over the cake. Smooth it out with a spatula.
Layer 3: Spread half of the mixed berries over the pudding.
Layer 4: Spread the remaining cake pieces on top.
Layer 5: Brush with more simple syrup.
Layer 6: Spread the remaining pudding custard.
Layer 7: Spread the remaining berries.
Layer 8: Top with the whipped cream. You can spread it flat or dollop it for a rustic look.
Layer 9: Garnish with a few whole berries and mint leaves.
Visual Cue: You want to see distinct layers. If it looks messy, that’s okay! It’s still going to taste amazing. But try to keep the pudding layer relatively even so it doesn’t leak out the sides.
Expert Tips & Tricks
Here’s everything I’ve learned from making this dozens of times. These tips will save you from my mistakes.
Don’t Skip the Syrup
Cake can get dry in the fridge. The simple syrup keeps it moist and adds a subtle sweetness. If you’re short on time, you can brush the cake with milk or even a little berry juice, but syrup is best.
Use Day-Old Cake
If you’re in a hurry, bake the cake the day before. Stale cake actually soaks up the syrup and pudding better than fresh cake. It’s less likely to turn into mush.
Drain Frozen Berries Well
If you use frozen berries, thaw them in a colander and let them drain for 30 minutes. Excess water will make your trifle soupy. Pat them dry with a paper towel if needed.
Chill Everything
Cold cream whips better. Make sure your bowl and beaters are cold. If your kitchen is hot, put the bowl in the fridge for 10 minutes before whipping. Same goes for the assembled trifle—it needs at least 4 hours to set, preferably overnight.
Make Individual Portions
If you’re worried about cutting a big trifle beautifully, make individual trifles in mason jars or dessert glasses. They’re easier to serve and look adorable. Plus, you can control the portions.
Common Mistake: Sauce Too Runny
If your trifle looks watery, you didn’t let the pudding set long enough, or your berries were too wet. Make sure the pudding is thick and the berries are drained. Also, don’t add too much syrup to the cake.
Common Mistake: Cake Soggy
If the cake layer is mushy, you used too much syrup or assembled it too early. Assemble no more than 12 hours before serving for the best texture.
Variations & Substitutions
Once you’ve nailed the basic version, here’s how you can mix it up. I’ve tried all of these.
Strawberry Shortcake Style
Use strawberry cake mix instead of vanilla. Use strawberry pudding mix. It doubles down on the strawberry flavor. This is my family’s favorite variation.
Chocolate Berry Trifle
Swap the vanilla pudding for chocolate pudding. Use chocolate cake. The contrast of chocolate and berries is incredible. My kids love this version.
Lemon Berry Trifle
Add a layer of lemon curd between the cake and pudding. It adds a bright, tangy flavor that cuts through the sweetness. Great for spring.
Gluten-Free Option
Use a gluten-free cake mix and make sure your pudding and berries are certified gluten-free. Everything else is naturally GF. I’ve used King Arthur GF mix and it works well.
Dairy-Free Option
Use almond milk for the pudding. Use coconut cream instead of heavy cream (chill the can overnight and whip the solid part). Use vegan confectioners’ sugar. It’s different but still tasty. My lactose-intolerant friend requests this version.
Alcohol-Infused
Brush the cake with Chambord (raspberry liqueur) or Kirsch (cherry brandy) instead of simple syrup. Perfect for adult-only cookouts. Add a splash to the whipped cream too.
Serving & Storage
How to Serve:
I usually serve this straight from the bowl at the dinner table—it looks rustic and stays cool. But here are other ways I’ve enjoyed it:
Side Dishes:
Since this is a dessert, you don’t need much else. But if you want a light meal before, try a labor day grilled chicken salad or some honey roasted carrots with fresh thyme. Something light and fresh to balance the sweetness.
Wine Pairing:
Not a wine expert, but my wine-snob friend says Moscato or a light Pinot Grigio works great with fruit desserts.
Storage Instructions:
Store in the refrigerator, covered with plastic wrap or a lid, for up to 3 days. The cake will continue to soften, which is actually nice. The berries might release some juice, but it just mixes with the pudding.
Reheating:
Don’t reheat this! It’s a cold dessert. Just serve it chilled.
Freezing:
Honestly, this doesn’t freeze well because of the dairy and fruit texture. The cream will separate, and the berries will get mushy. Make it fresh or store in the fridge for up to 3 days.
Pro tip: If you’re making this for a big party, double the recipe and make two smaller trifles. It’s easier to serve and less likely to get ruined if someone knocks one over.
Nutrition Information
I’m not a nutritionist, but here’s the breakdown if you’re tracking. Note that this is an estimate based on 12 servings.
Per Serving (approximate):
– Calories: 320
– Protein: 5g
– Carbs: 45g
– Fiber: 2g
– Sugar: 28g
– Fat: 14g
– Saturated Fat: 8g
– Cholesterol: 45mg
– Sodium: 280mg
– Calcium: 120mg
What’s Good:
– Contains fruit, so there are some vitamins and antioxidants.
– Calcium from the dairy.
– Feels like a treat but isn’t overwhelmingly heavy.
What to Know:
– Higher in sugar from the cake, pudding, and jam.
– Contains dairy and gluten.
– Moderate calories, but a small slice goes a long way.
My Take:
Look, this is a dessert with cake, pudding, and whipped cream. It’s not a diet recipe. But it’s way better than store-bought, costs less, and I know exactly what’s in it. When I want to make it lighter, I use less sugar in the syrup and more berries. But usually? I just eat a small slice and enjoy it.
Final Thoughts
So that’s my go-to berry trifle for Labor Day! I’ve probably talked your ear off at this point, but when you make a recipe this often, you have a lot to say about it.
This has saved my holidays more times than I can count. It’s my answer to “what’s for dessert” when I’m tired, don’t want takeout, and still want something that tastes really good. My kids are happy, my husband’s happy, and I’m happy because I’m not stressed about cooking.
Make it yours! Try different add-ins, swap in your favorite berries, adjust the sweetness. The best recipes are the ones you adapt to your family’s tastes.
If you make this, drop a comment and let me know what you think! I love hearing how recipes turn out in your kitchen. And if something doesn’t work, tell me that too—I’m here to help troubleshoot.
Happy cooking! And I hope your kitchen smells half as good as mine does right now.
Frequently Asked Questions
Q: Can I use a store-bought pound cake instead of box mix?
A: Yes! Pound cake is denser and holds up well. Just slice it into ½-inch thick slices instead of tearing it. It will give a more elegant look. I’ve used pound cake from the bakery section and it works great.
Q: Why did my trifle turn out soupy?
A: Usually means you used too much simple syrup, or your berries were too wet. Make sure to drain frozen berries well, and don’t over-soak the cake. Also, ensure the pudding is thick before layering. If you add too much liquid, it will pool at the bottom.
Q: Can I make this ahead for a dinner party?
A: Absolutely! This is best made the night before. The flavors meld together, and the cake softens perfectly. You can assemble it up to 24 hours in advance. Just keep it covered in the fridge.
Q: Can I use fresh whipped cream from a can?
A: You can, but homemade whipped cream tastes way better and is cheaper. Store-bought has a weird texture and aftertaste. I always whip my own. It takes 5 minutes and makes a huge difference.
Q: How long does this trifle last?
A: It lasts up to 3 days in the fridge. After that, the cake gets too soggy and the berries start to break down. It’s best eaten within 48 hours for optimal texture.
Q: Can I use other fruits like peaches or mango?
A: Yes! This recipe is very versatile. Peaches and blueberries work well. Mango and strawberries are also delicious. Just make sure the fruit is not too watery. If using peaches, toss them with a little lemon juice to prevent browning.
Q: What if I don’t have a trifle bowl?
A: No problem! Use a large clear serving dish, or individual mason jars. Individual portions are actually easier to serve and look cute. You can also use a large glass baking dish if you don’t have a bowl.
Pin This Recipe!
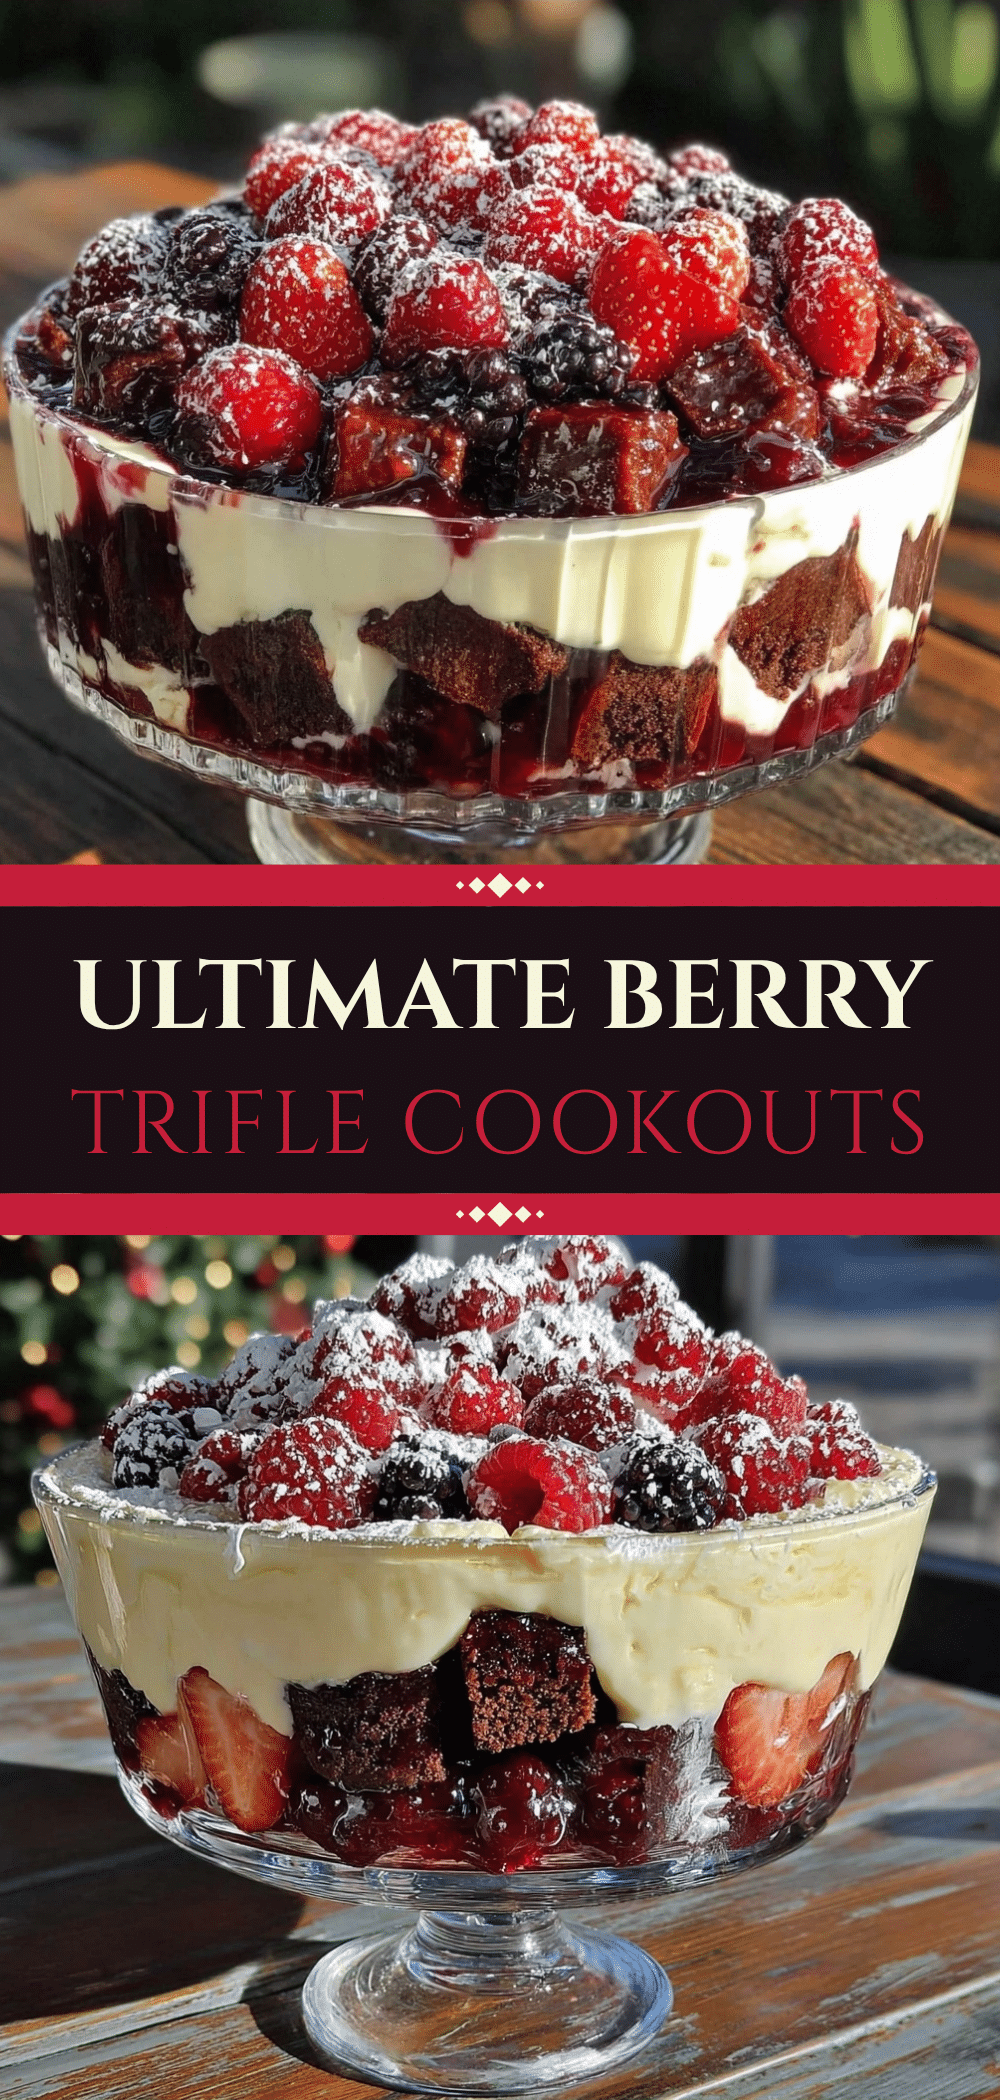
Berry Trifle Recipe: Easy Budget-Friendly Labor Day Dessert
- Total Time: 1 hour 30 minutes (plus chilling time)
- Yield: 12-15 servings 1x
Description
A make-ahead, budget-friendly berry trifle featuring layers of vanilla cake, creamy custard, fresh berries, and whipped cream. Perfect for Labor Day cookouts and feeding a crowd.
Ingredients
- 1 box (15.25 oz) Yellow or Vanilla Cake Mix
- 2 packages (3.4 oz each) Vanilla Instant Pudding Mix
- 4 cups Whole Milk
- 2 cups Heavy Cream
- ½ cup Confectioners’ Sugar
- 1 teaspoon Vanilla Extract
- 4–5 cups Mixed Berries (strawberries, blueberries, raspberries)
- ½ cup Strawberry Jam
- ½ cup Simple Syrup (½ cup sugar, ½ cup water)
- Optional: Extra whipped cream, whole berries, mint leaves for garnish
Instructions
- Preheat oven to 350°F (175°C). Grease a 9×13 inch baking pan.
- Prepare cake mix according to package directions using the specified amount of milk and oil. Pour into pan and bake for 25-30 minutes until a toothpick comes out clean.
- Let cake cool completely in the pan. While cooling, make simple syrup by heating sugar and water until dissolved, then let cool.
- In a large bowl, whisk 2 packages of instant vanilla pudding mix with 4 cups of cold milk for 2 minutes until thickened. Set aside.
- In a separate large bowl, beat 2 cups cold heavy cream, ½ cup confectioners’ sugar, and 1 teaspoon vanilla extract until stiff peaks form.
- Wash and hull strawberries, slicing them into coins or quarters. Leave blueberries and raspberries whole. Toss strawberries with strawberry jam.
- Tear cooled cake into rough 1-inch pieces.
- Layer 1: Spread half the cake pieces in the bottom of a 6-quart trifle bowl. Brush lightly with simple syrup.
- Layer 2: Spread half the vanilla pudding custard over the cake.
- Layer 3: Spread half the mixed berries over the pudding.
- Layer 4: Spread remaining cake pieces on top.
- Layer 5: Brush with more simple syrup.
- Layer 6: Spread remaining pudding custard.
- Layer 7: Spread remaining berries.
- Layer 8: Top with whipped cream.
- Layer 9: Garnish with whole berries and mint leaves.
- Chill in refrigerator for at least 4 hours or overnight before serving.
Notes
For best results, chill the bowl and beaters before whipping the cream. If using frozen berries, thaw and drain them thoroughly to prevent a soupy trifle. The trifle tastes better if made the night before. Do not freeze as the texture of the cream and fruit will suffer.
- Prep Time: 30 minutes
- Cook Time: 30 minutes
- Category: Dessert
- Cuisine: American
Nutrition
- Serving Size: 1 slice
- Calories: 320
- Sugar: 28
- Sodium: 280
- Fat: 14
- Saturated Fat: 8
- Carbohydrates: 45
- Fiber: 2
- Protein: 5
Keywords: berry trifle, labor day dessert, budget friendly dessert, make ahead dessert, easy trifle recipe, summer dessert, family friendly dessert



