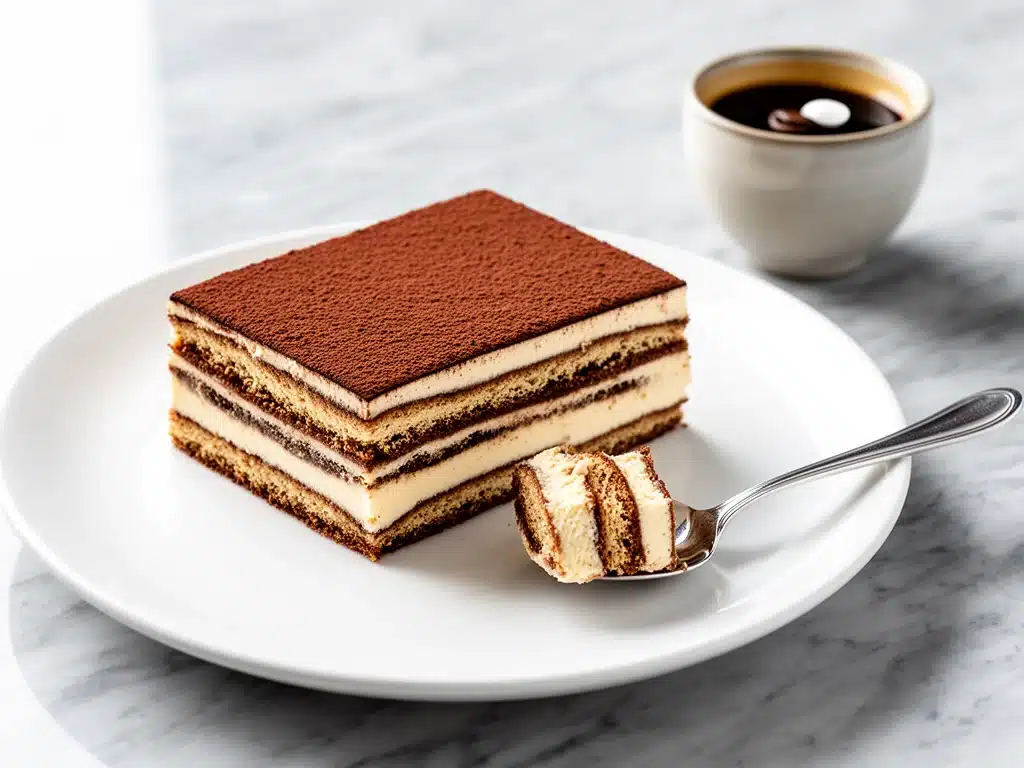
I have a confession to make. For years, I was terrified of making tiramisu from scratch. I mean, the real deal? The one with raw egg yolks, whipped cream folded into mascarpone, and layers that need to sit in the fridge for twelve hours while you obsessively check on them? Yeah. That was a special occasion only. A “I have a sous-chef and three hours of free time” kind of dessert.
Then came last winter. It was one of those brutal weeks where I worked late, came home exhausted, and still had to host a small dinner party for some friends who were visiting from out of town. I didn’t have the energy for a baked dessert, and I definitely didn’t have the patience for a complicated custard. I wanted something that tasted like I’d spent hours in the kitchen, but actually required zero heat and minimal effort.
That’s when I stumbled upon the concept of the Tiramisu Icebox Cake. I was skeptical. How could crushed ladyfingers and a simple whipped mascarpone mixture possibly replicate the complex, boozy, coffee-kissed perfection of traditional tiramisu? I thought it would be soggy. I thought it would be bland. I thought it would be a disaster.
I was wrong. It was, quite literally, better than takeout. Better than the fancy Italian restaurant down the street. It was creamy, it was rich, it had that perfect coffee kick, and the ladyfingers transformed into these soft, cake-like layers that absorbed the espresso like magic. My friends ate two slices each. Two. And they kept asking for the recipe.
This Tiramisu Icebox Cake with Espresso Mascarpone has since become my secret weapon. It’s the dessert I make when I need to impress but don’t want to stress. It’s the treat I whip up when I’m craving something sweet but don’t want to turn my oven on. And honestly? It’s become the best no-bake dessert in my rotation, hands down. If you’ve ever been intimidated by traditional tiramisu, or just want a dessert that practically makes itself, this is your new obsession.
Why You’ll Love This Tiramisu Icebox Cake
There are about a dozen reasons I keep making this, but let’s be real—you’re here because you want something delicious without the hassle. Here’s why this cake earns its spot on your dessert table:
Zero Baking Required — Seriously. No oven, no stove-top custard, no tempering eggs. You just whip, layer, and chill. If you can spread frosting, you can make this. I’ve made this while babysitting my nephew. It’s that low-stress.
It Tastes Like It Took Forever — The magic happens in the fridge. As the cake sits, the dry ladyfingers soak up the coffee and the cream. They soften into these tender, cake-like layers that mimic the texture of traditional tiramisu. It’s a texture transformation that feels like sorcery. The result is rich, complex, and deeply satisfying.
Espresso Mascarpone Magic — Most icebox cakes use just whipped cream. But I swap in mascarpone cheese for that signature tangy, rich richness you get in authentic tiramisu. By folding strong espresso into the mascarpone, you get a coffee flavor that’s bold but not bitter. It’s the kind of flavor that makes people stop mid-bite and ask, “What is in this?”
Make-Ahead Friendly — This is the ultimate party saver. You can assemble it the morning of your dinner party, or even the night before. It actually gets better as it sits. I’ve made this 24 hours ahead, and the flavors melded together so perfectly that it tasted even more cohesive than when I first assembled it. No last-minute panic.
Gluten-Free Option Available — Not everyone can have gluten, and traditional tiramisu is no exception. But with this icebox version, swapping in gluten-free ladyfingers (or even gluten-free sponge cake cut into strips) is super easy. The rest of the ingredients are naturally gluten-free, so it’s inclusive without compromising on taste. I’ve made this for my celiac sister, and she said it was indistinguishable from the real deal.
Feeds a Crowd — This recipe makes a 9×13-inch cake, which is perfect for feeding a dinner party, a holiday gathering, or just satisfying your family’s sweet tooth for a week. It slices cleanly and looks elegant on any plate.
This is my go-to when I need a dessert that feels fancy but requires zero effort. No complicated techniques, no weird ingredients, just reliable, delicious food that makes everyone happy. And the best part? It’s cheaper than ordering takeout from that expensive Italian place.
Ingredients You’ll Need
Here’s the best part: you probably have most of this already, or it’s super easy to grab on your way home. I’m particular about three ingredients here, and I’ll tell you exactly why.
For the Coffee Soak:
Strong brewed espresso (2 cups / 480ml) — This is non-negotiable. You want a bold coffee flavor. I use a strong brew from my coffee maker, but if you have an espresso machine, use that. Instant espresso powder dissolved in hot water works in a pinch, but fresh-brewed tastes brighter. Let it cool completely before using, or you’ll melt the cream.
Dark rum or Kahlúa (2 tablespoons / 30ml) — Optional, but highly recommended. The rum adds that classic tiramisu depth. If you’re making this for kids or prefer non-alcoholic, skip it or use extra coffee. I use dark rum because it pairs beautifully with the chocolate. If you’re a coffee lover, Kahlúa adds a sweet, boozy kick.
For the Espresso Mascarpone Filling:
Mascarpone cheese (16 oz / 450g) — This is the star. Don’t substitute cream cheese. Mascarpone is richer, creamier, and less tangy. It’s what gives tiramisu its signature texture. Keep it cold until you’re ready to use it. If it’s too warm, it might get grainy when you whip it.
Heavy whipping cream (2 cups / 480ml) — Full-fat only. Half-and-half won’t whip up properly. Cold cream is key for stiff peaks. I take it out of the fridge 10 minutes before whipping to make it easier to handle, but it still needs to be cold.
Confectioners’ sugar (½ cup / 60g) — Sweets the mascarpone. I sift it to avoid lumps. If you prefer less sweet, reduce to ⅓ cup, but the sugar also helps stabilize the cream slightly.
Vanilla extract (1 teaspoon / 5ml) — Pure vanilla, please. It balances the bitterness of the coffee and the richness of the cheese.
For the Assembly:
Ladyfingers (2 packages / about 40-50 cookies) — I use Savoiardi. These are the dry, finger-shaped biscuits that are traditional for tiramisu. Do not use soft sponge cake or pound cake—they won’t absorb the coffee correctly and will turn mushy. If you need gluten-free, look for GF ladyfingers at most grocery stores.
Dark chocolate (4 oz / 113g, finely grated) — For garnish. Use high-quality dark chocolate (70% cocoa or higher). I grate it with a microplane for fine shavings that melt slightly on the cake. Chocolate chips work in a pinch, but grate them yourself for better texture.
Optional: Cocoa powder (for dusting) — A light dusting of unsweetened cocoa powder adds a nice visual contrast and a hint of bitterness to balance the sweetness.
Pro Tip: I always buy my mascarpone from the Italian market section of my grocery store. It’s fresher and cheaper than the pre-packaged stuff. And for the ladyfingers, I check the expiration date—they go stale fast. Fresh ladyfingers are crisp and dry, which is exactly what you want.
Equipment Needed
You don’t need fancy equipment for this. Here’s what I actually use:
9×13-inch baking dish — This is the standard size for this recipe. It gives you enough layers to create that perfect structure. If you only have a 9×9, you’ll need to double the recipe or make a smaller cake. I use a ceramic dish because it looks nice serving, but glass or even a metal pan works fine.
Mixing bowls — Two large bowls. One for the mascarpone mixture, one for the whipped cream. I use stainless steel because they’re sturdy and easy to clean.
Electric mixer — Handheld or stand mixer. You need to whip the cream to stiff peaks, which is tedious by hand. I use a handheld mixer because it’s quick and easy to clean. If you’re strong, you can do it by hand, but it’ll take 10-15 minutes of arm work.
Whisk — For folding the whipped cream into the mascarpone. You want to be gentle here to keep the air in the cream. A silicone spatula works too.
Microplane or fine grater — For the chocolate garnish. A regular box grater works, but a microplane gives you those delicate shavings that look professional.
Measuring cups and spoons — Standard stuff. Dollar store versions work fine.
Plastic wrap — To cover the cake while it chills. This prevents it from absorbing fridge odors and keeps it moist.
Optional but nice:
Piping bag — If you want to make the layers look fancy, pipe the mascarpone instead of spreading it. It’s not necessary, but it does look impressive. I skip this when I’m in a rush.
How to Make It: Step-by-Step
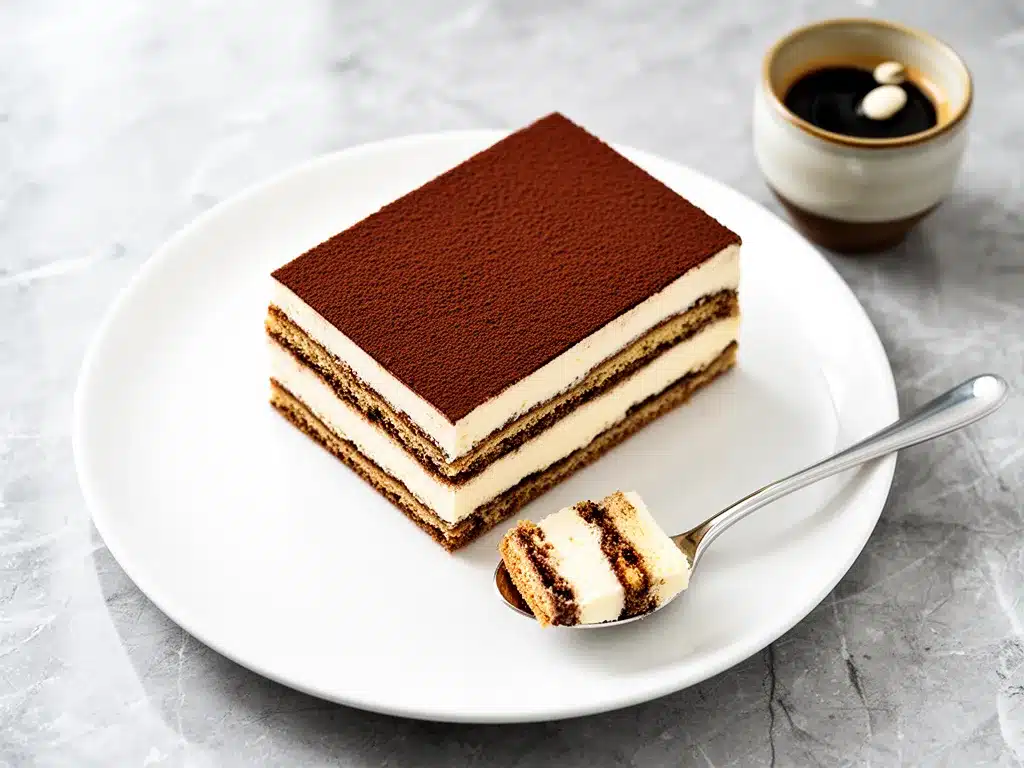
Alright, let’s make this! I’m walking you through exactly how I do it, including the little tricks I’ve picked up over the years.
Step 1: Prepare the Coffee Mixture (5 minutes)
Brew your espresso and let it cool completely to room temperature. If you’re in a rush, you can put it in the fridge for 20 minutes, but don’t use it while it’s hot. Mix in the rum or Kahlúa if you’re using it. Pour this into a shallow bowl or pie plate. You’ll be dipping your ladyfingers in this, so make sure it’s wide enough for easy dipping.
Step 2: Whip the Heavy Cream (5 minutes)
In a large mixing bowl, pour the cold heavy whipping cream. Using your electric mixer, beat on medium-high speed until stiff peaks form. This means when you lift the beaters, the cream stands up straight without drooping. Be careful not to over-whip, or it’ll turn into butter. This usually takes 2-4 minutes. Set the whipped cream aside.
Step 3: Make the Mascarpone Filling (5 minutes)
In a separate large bowl, add the mascarpone cheese, confectioners’ sugar, vanilla extract, and 1 tablespoon of the cooled espresso mixture. Beat on medium speed until smooth and creamy. The mascarpone can be thick, so don’t be afraid to scrape down the sides of the bowl. You want a smooth, spreadable consistency.
Step 4: Fold the Cream Together (3 minutes)
Here’s the critical step. Add one-third of the whipped cream to the mascarpone mixture and gently fold it in with a whisk or spatula. This lightens the mascarpone. Then, gently fold in the remaining whipped cream. Fold slowly and deliberately, cutting down through the center and folding over the top. You’re trying to keep as much air in the cream as possible. Stop folding once the mixture is uniform and no white streaks remain. It should look fluffy and light.
Step 5: Dip and Layer the Ladyfingers (10 minutes)
This is where the magic happens. Take a ladyfinger and quickly dip it into the espresso mixture. I mean quick—1-2 seconds per side. You want it soaked, not soggy. If you leave it in too long, it’ll disintegrate. Place the dipped ladyfingers in a single layer at the bottom of your 9×13 dish. They should fit snugly, but don’t force them. If you need to break a ladyfinger in half to fit, do it.
Spread half of the mascarpone cream mixture over the ladyfingers. Use an offset spatula to spread it evenly to the edges. You want a smooth, flat layer.
Step 6: Repeat the Layers (10 minutes)
Dip another layer of ladyfingers in the espresso and place them on top of the cream. Spread the remaining mascarpone cream over this layer. Dip and place a final layer of ladyfingers on top, pressing them gently into the cream. If you have any extra cream, you can spread it over the top, but traditionally, the top layer is just ladyfingers.
Step 7: Chill and Garnish (4+ hours or overnight)
Cover the dish tightly with plastic wrap. Place it in the refrigerator for at least 4 hours, but overnight is best. This gives the ladyfingers time to soften and absorb the coffee and cream, transforming into those cake-like layers we love.
Before serving, remove the plastic wrap. Grate the dark chocolate over the top of the cake. For an extra touch, dust lightly with cocoa powder using a fine-mesh sieve. Slice with a sharp knife for clean edges. I wipe the knife clean between cuts to keep the layers distinct.
Total Time: About 20 minutes active, plus 4+ hours chilling.
Built-in Troubleshooting:
- Ladyfingers too soggy? You left them in the coffee too long. Remember, 1-2 seconds per side is all you need.
- Cream too runny? Your cream or mascarpone was too warm. Make sure everything is cold before whipping.
- Cake doesn’t set? It needs more time in the fridge. If you cut it too soon, the layers will slide apart. Patience is key.
Expert Tips & Tricks
Here’s everything I’ve learned from making this dozens of times. These tips will save you from my mistakes.
Dip, Don’t Soak
This is the #1 mistake people make. Ladyfingers are porous and absorb liquid like a sponge. If you soak them, they’ll turn into mush. Dip them quickly—just enough to coat them. They’ll continue to absorb moisture from the cream as they sit. If you prefer a stronger coffee flavor, you can brush the dipped ladyfingers with a little extra espresso, but don’t drench them.
Keep Everything Cold
Temperature matters. Cold mascarpone and cold cream whip better and hold their shape. If your kitchen is hot, put your mixing bowl in the fridge for 10 minutes before whipping. If the mascarpone gets too soft while you’re working, pop the bowl back in the fridge for 15 minutes.
Don’t Skip the Resting Time
I know it’s tempting to cut into it after 1 hour. But the ladyfingers need time to soften. If you cut it too soon, you’ll get a mess. The longer it sits, the better it tastes. Overnight is ideal. The flavors meld, the texture becomes uniform, and it’s just plain better.
Use Good Chocolate
The chocolate garnish isn’t just for looks. It adds bitterness that balances the sweet cream. Use high-quality dark chocolate. If you use milk chocolate, it’ll be too sweet. I buy a bar of 70% cocoa dark chocolate and grate it myself. It melts slightly on the warm cream, creating little chocolatey pockets.
Make-Ahead Strategy
This cake is perfect for meal prep. Assemble it 24-48 hours ahead. It keeps well in the fridge for up to 3 days. In fact, it tastes even better on day 2. Just make sure it’s covered tightly so it doesn’t dry out or absorb fridge smells.
Pro Trick for Clean Slices
Use a sharp, thin-bladed knife. Dip it in hot water and wipe it dry before each cut. This helps the knife glide through the soft layers without squishing them. It’s a small step that makes a huge difference in presentation.
Variations & Substitutions
Once you’ve nailed the basic version, here’s how you can mix it up. I’ve tried all of these.
Alcohol-Free Version
Skip the rum or Kahlúa and use extra espresso. The cake will still be delicious, just less boozy. This is great for kids’ parties or if you prefer not to drink alcohol.
Decaf Option
Use decaf espresso for the soak. The mascarpone filling has a bit of espresso in it, so the coffee flavor will still be there, just milder. Perfect for evening desserts if you’re sensitive to caffeine.
Chocolate Lovers’ Version
Add a layer of chocolate pudding or Nutella between the cream and ladyfingers. Or mix 2 tablespoons of cocoa powder into the mascarpone filling for a chocolate-mascarpone swirl. I’ve done this, and it’s rich and indulgent.
Fruit Variation
While traditional tiramisu is coffee-chocolate, you can try a berry version. Use vanilla cake layers instead of ladyfingers, and a vanilla cream filling. Add fresh strawberries or raspberries between layers. It’s lighter and fresher. Not exactly tiramisu, but a delicious twist.
Dietary Modifications:
Gluten-Free
Use gluten-free ladyfingers. They’re available at most grocery stores now. The rest of the ingredients are naturally gluten-free. I’ve used GF ladyfingers from multiple brands, and they work great. Just remember to dip them quickly—they can be more fragile.
Dairy-Free
Replace mascarpone with a dairy-free cream cheese alternative (like Kite Hill or Tofutti). Use coconut cream instead of heavy whipping cream. Use dairy-free chocolate for garnish. It’s not exactly the same, but it’s still creamy and delicious. My lactose-intolerant friend requested this version, and she loved it.
Lower-Sugar
Reduce the confectioners’ sugar to ¼ cup. Use sugar-free chocolate for garnish. The espresso and mascarpone provide enough flavor that it’s still satisfying, just less sweet.
Serving & Storage
How to Serve:
I usually serve this straight from the fridge. It’s best cold, so let it sit out for 5-10 minutes before slicing to make it easier to cut. Here’s how I’ve enjoyed it:
Side Dishes:
- Simple green salad with lemon vinaigrette (cuts the richness)
- Fresh berries on the side for a pop of color and acidity
- Espresso coffee on the side for dipping or drinking
Toppings Bar:
When I have guests, I put out extra chocolate shavings, cocoa powder, and crushed hazelnuts. Everyone customizes their slice. Hazelnuts add a nice crunch and pair beautifully with coffee.
Wine Pairing:
Not a wine expert, but my wine-snob friend says a late-harvest Riesling or a sweet Moscato works great with this. The sweetness balances the bitterness of the coffee and chocolate.
Storage Instructions:
Refrigerator:
Store in an airtight container or covered tightly with plastic wrap for up to 3 days. The cake will firm up in the fridge—this is normal and desirable. If it gets too hard, let it sit at room temperature for 10 minutes before serving.
Freezing:
Honestly, this doesn’t freeze well because of the dairy. The cream can separate and become grainy when thawed. I recommend making it fresh or storing in the fridge for up to 3 days. If you must freeze, freeze the components separately (cream and mascarpone), but it’s not worth the hassle.
Pro tip: If leftovers are drying out, cover them with a damp paper towel before refrigerating. This helps keep the top layer moist.
Nutrition Information
I’m not a nutritionist, but here’s the breakdown if you’re tracking. This is a rich dessert, so portion control is key.
Per Serving (based on 12 servings):
- Calories: 380
- Protein: 6g
- Carbs: 32g
- Fiber: 1g
- Sugar: 24g
- Fat: 24g
- Saturated Fat: 14g
- Cholesterol: 65mg
- Sodium: 120mg
What’s Good:
- Decent protein from mascarpone
- Calcium from the cheese
- Antioxidants from the dark chocolate and coffee
What to Know:
- Higher in calories and fat from the cream and cheese
- Contains dairy and gluten (unless modified)
- High in sugar from the ladyfingers and sugar in the cream
My Take:
Look, this is indulgence. It’s cream, cheese, sugar, and alcohol. It’s not a diet recipe. But it’s way better than store-bought desserts, and you know exactly what’s in it. When I want to make it lighter, I use the lower-sugar version and add fresh berries to boost fiber. But usually? I just eat a small slice and enjoy it mindfully. It’s a treat, not a staple.
Final Thoughts
So that’s my go-to Tiramisu Icebox Cake! I’ve probably talked your ear off at this point, but when you make a recipe this often, you have a lot to say about it.
This has saved my dessert game more times than I can count. It’s my answer to “what’s for dessert” when I’m tired, don’t want to bake, and still want something that tastes really good. My friends are impressed, my family is happy, and I’m happy because I’m not stressed about cooking.
Make it yours! Try different liqueurs, swap in your favorite chocolate, or add a layer of fruit. The best recipes are the ones you adapt to your tastes. And if you’re looking for other no-bake treats, check out my no-bake chocolate oat cookies for a quick snack, or my soft apple cinnamon oatmeal bars for a healthier option.
If you make this, drop a comment and let me know what you think! I love hearing how recipes turn out in your kitchen. And if something doesn’t work, tell me that too—I’m here to help troubleshoot.
Happy cooking! And I hope your kitchen smells half as good as mine does right now.
Frequently Asked Questions
Can I use instant espresso instead of brewed coffee?
Yes, you can. Dissolve 2-3 tablespoons of instant espresso powder in 2 cups of hot water, then let it cool completely. It’s a convenient shortcut, but fresh-brewed coffee tastes brighter and more complex. If you use instant, make sure it’s high-quality espresso powder, not just instant coffee granules.
Why did my mascarpone filling turn grainy?
This usually happens if the mascarpone was too warm when you started mixing, or if you over-whipped the cream. Mascarpone is delicate. Keep it cold, and fold the whipped cream in gently. If it’s already grainy, try stirring in a tablespoon of cold heavy cream to smooth it out. It might not be perfect, but it’ll be better.
Can I make this ahead for a party?
Absolutely. This is actually better made ahead. Assemble it the night before your party and let it chill overnight. The flavors will meld, and the texture will be perfect. Just make sure it’s covered tightly so it doesn’t dry out. You can even make it 2 days ahead.
Do I have to use ladyfingers?
Traditionally, yes. Ladyfingers are dry and crisp, which allows them to absorb the coffee without disintegrating. If you can’t find them, you can use sponge cake cut into strips, but the texture will be different—softer and more cake-like. Or use gluten-free ladyfingers if you need to avoid gluten.
Can I freeze this cake?
I don’t recommend freezing the assembled cake. The dairy-based cream can separate and become grainy when thawed. It’s best enjoyed fresh or stored in the fridge for up to 3 days. If you must freeze, freeze the mascarpone and cream separately, but it’s not worth the effort.
What if I don’t have an electric mixer?
You can whip the cream by hand, but it’ll take 10-15 minutes of vigorous whisking. Make sure your bowl and whisk are cold. The mascarpone mixture can be stirred by hand with a spatula. It’s more work, but it’s doable. Just be prepared for a workout.
Can I use a different cheese instead of mascarpone?
You can use cream cheese, but the texture will be tangier and less rich. You’ll need to soften the cream cheese and mix it with a little heavy cream to mimic the mascarpone consistency. It’s not traditional, but it works in a pinch. For the best results, stick with mascarpone.
Pin This Recipe!
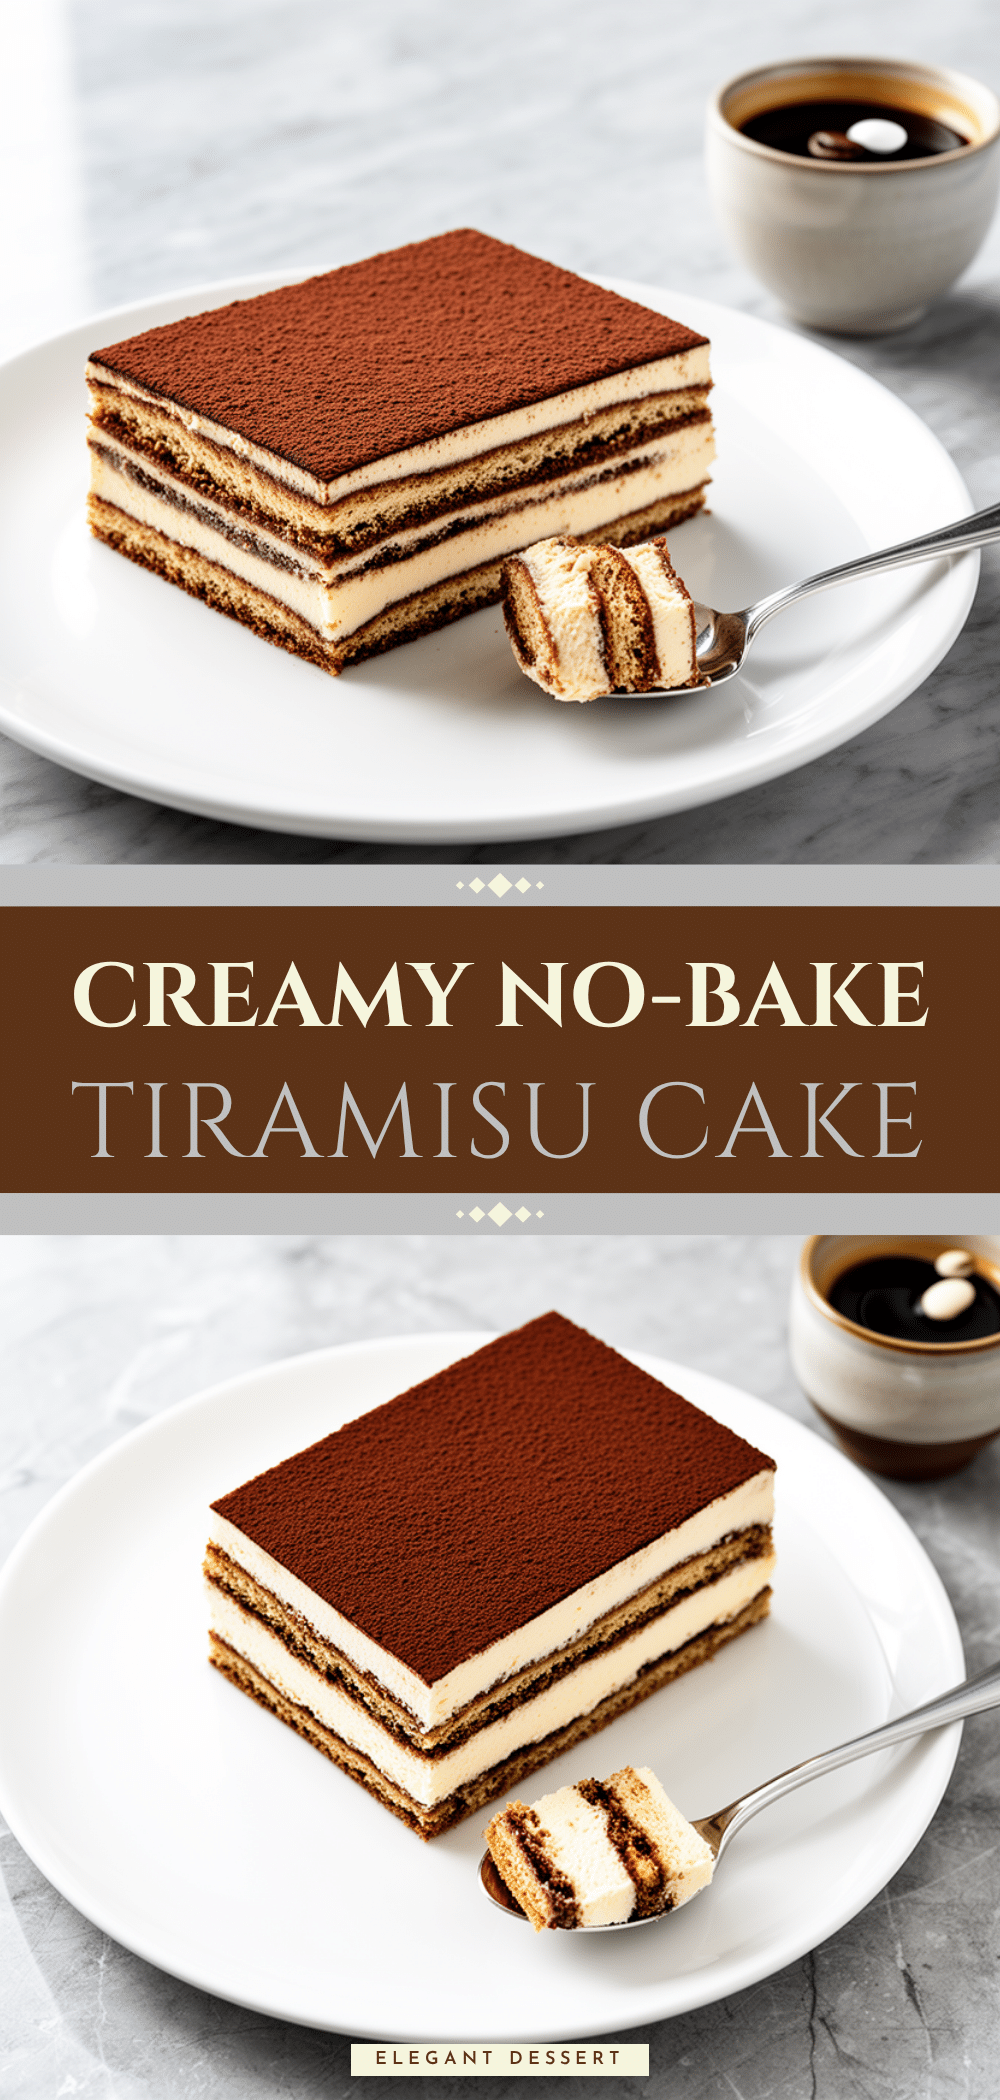
Tiramisu Icebox Cake: Best No-Bake Dessert
- Total Time: 4 hours 20 minutes
- Yield: 12 servings 1x
Description
A creamy, no-bake dessert that replicates the flavors of traditional tiramisu using crushed ladyfingers and an espresso mascarpone filling. It requires zero heat, is make-ahead friendly, and offers a gluten-free option.
Ingredients
- 2 cups (480ml) strong brewed espresso, cooled
- 2 tablespoons (30ml) dark rum or Kahlúa (optional)
- 16 oz (450g) mascarpone cheese, cold
- 2 cups (480ml) heavy whipping cream, cold
- ½ cup (60g) confectioners’ sugar, sifted
- 1 teaspoon vanilla extract
- 2 packages (40-50 cookies) ladyfingers (Savoiardi)
- 4 oz (113g) dark chocolate (70% cocoa or higher), finely grated
- Unsweetened cocoa powder, for dusting (optional)
Instructions
- Brew espresso and let it cool completely to room temperature. Mix in rum or Kahlúa if using, and pour into a shallow bowl.
- In a large mixing bowl, whip the cold heavy cream on medium-high speed until stiff peaks form. Set aside.
- In a separate large bowl, beat the mascarpone cheese, confectioners’ sugar, vanilla extract, and 1 tablespoon of the cooled espresso mixture until smooth and creamy.
- Gently fold one-third of the whipped cream into the mascarpone mixture to lighten it. Then, gently fold in the remaining whipped cream until uniform and fluffy.
- Quickly dip each ladyfinger into the espresso mixture (1-2 seconds per side) and place them in a single layer at the bottom of a 9×13-inch dish.
- Spread half of the mascarpone cream mixture over the first layer of ladyfingers.
- Repeat the dipping and layering process: add a layer of dipped ladyfingers, spread the remaining mascarpone cream, and top with a final layer of dipped ladyfingers.
- Cover the dish tightly with plastic wrap and refrigerate for at least 4 hours, preferably overnight, to allow the ladyfingers to soften.
- Before serving, grate dark chocolate over the top and dust lightly with cocoa powder if desired. Slice with a sharp knife for clean edges.
Notes
Do not soak ladyfingers; dip them quickly to avoid sogginess. Ensure all dairy ingredients are cold for best whipping results. The cake improves in flavor after sitting overnight. For clean slices, dip the knife in hot water and wipe dry between cuts.
- Prep Time: 20 minutes
- Cook Time: 0 minutes
- Category: Dessert
- Cuisine: Italian
Nutrition
- Serving Size: 1 slice
- Calories: 380
- Sugar: 24
- Sodium: 120
- Fat: 24
- Saturated Fat: 14
- Carbohydrates: 32
- Fiber: 1
- Protein: 6
Keywords: tiramisu, icebox cake, no-bake dessert, espresso mascarpone, make-ahead dessert, gluten-free option, easy dessert