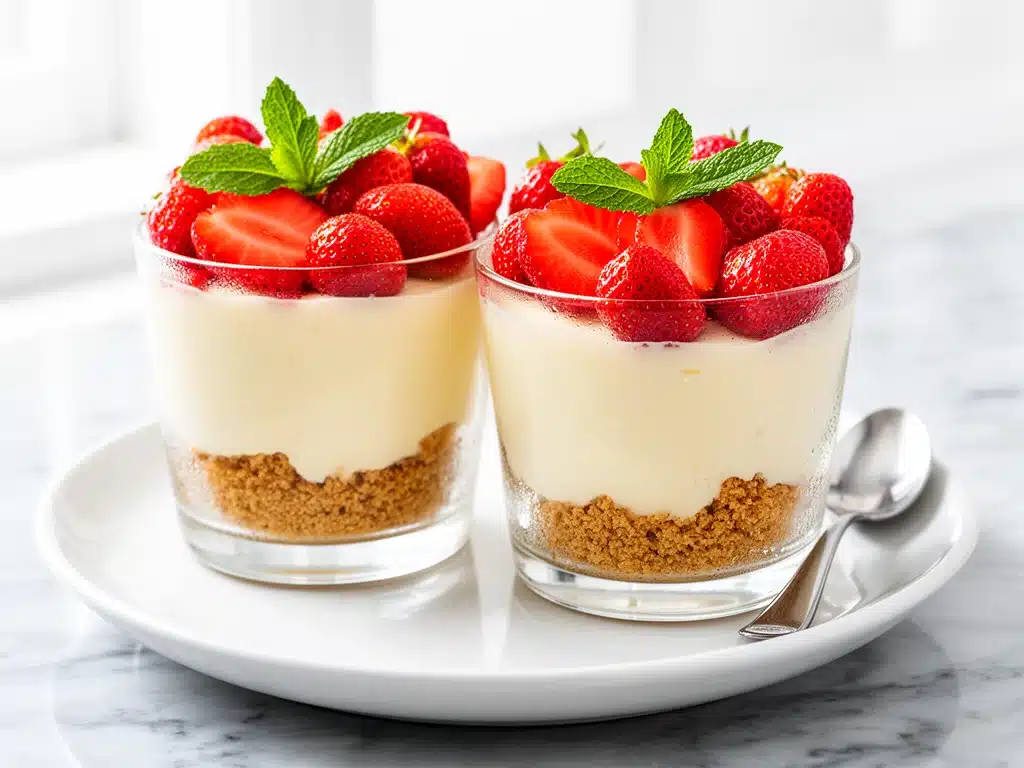
The first time I made these no-bake strawberry cheesecake cups, it was a last-minute save for a summer potluck. I’d forgotten to bring dessert (classic me), and the only ingredients I had on hand were cream cheese, some strawberries barely clinging on in the fridge, and a handful of graham crackers. I figured, why not whip something up quickly? Well, turns out, this simple combo turned into an instant hit. People were asking for the recipe before the cups were even half empty.
Since that day, these no-bake strawberry cheesecake cups have become my go-to when I want something sweet but fuss-free. They’re light, creamy, and packed with fresh strawberry flavor, yet come together with just a handful of ingredients you probably already have. Plus, no ovens required—which is a lifesaver on hot days or when you’re juggling a million things.
After testing and tweaking this recipe about a dozen times (because I take my cheesecake seriously), I finally nailed the perfect balance of tangy cream cheese and sweet strawberries, all layered on a crunchy graham cracker base. I promise, once you try these, you’ll be making them on repeat too.
Why You’ll Love This Recipe
There are lots of reasons I keep coming back to these no-bake strawberry cheesecake cups, but here are the big ones:
- Crazy Simple — If you can mix a few ingredients and crush some graham crackers, you’ve got this. I’ve made these with my kids and even on a hectic weeknight when I barely had 15 minutes.
- No Oven Needed — Seriously, no heat, no fuss. Just mix, chill, and enjoy. Perfect for summer or when you want dessert without heating up the kitchen.
- Made from Pantry Staples — Cream cheese, strawberries, graham crackers, a bit of sugar and vanilla—that’s it. You probably have all of it already, or can grab it on your next grocery run.
- Perfectly Portion-Controlled — The cups keep things neat, and you can make as many or as few as you want. Plus, leftovers are easy to store and still taste amazing.
- Fresh and Fruity — Real strawberries give this cheesecake a bright, summery vibe that’s light, not too sweet, and totally refreshing.
This recipe has saved me more than once when unexpected guests showed up or when I just wanted a little treat after dinner. It’s easy enough to whip up anytime, but impressive enough that people think you spent hours on it. Trust me, you’ll love how simple and satisfying these no-bake strawberry cheesecake cups are.
Ingredients You’ll Need
Here’s the thing: this recipe looks fancy but it’s built on a few simple ingredients. I’m picky about a couple of them, so I’ll tell you exactly why each one matters.
- Cream Cheese (8 oz / 225g, softened) — This is the star of the show. Use full-fat for the creamiest texture. I always leave it out on the counter for about 30 minutes so it’s soft enough to mix easily.
- Powdered Sugar (1 cup / 120g) — It dissolves better than granulated sugar, keeping the filling silky smooth. If you’re in a pinch, you can blend granulated sugar to make your own powdered sugar.
- Vanilla Extract (1 teaspoon) — Adds warmth and depth. Pure vanilla is worth the splurge here because it really shines through.
- Heavy Whipping Cream (1 cup / 240ml) — Whipped to soft peaks, it lightens the filling and makes it fluffy. Don’t substitute with milk or half-and-half—it won’t hold up the same.
- Fresh Strawberries (2 cups / 300g, chopped) — Use the freshest, sweetest berries you can find. They’re the fresh punch that brightens everything up. If strawberries aren’t in season, frozen (thawed and drained) can work too, but fresh is best.
- Graham Crackers (1 ½ cups / 150g, crushed) — This is your crunchy base. I like to crush mine by hand in a zip-top bag for better texture than pre-ground crumbs.
- Unsalted Butter (5 tablespoons / 70g, melted) — Holds the crust together and adds richness. Salted butter works in a pinch but cut back on any added salt.
- Lemon Juice (1 tablespoon) — Just a touch to balance sweetness and brighten the filling. Freshly squeezed is best.
Optional add-ins:
- Strawberry Jam (2 tablespoons) — Swirl some into the filling for extra fruity sweetness.
- Fresh Mint — A few leaves chopped or whole for garnish adds a nice fresh touch.
Equipment Needed
You don’t need much to make these no-bake strawberry cheesecake cups. Here’s what I use every time:
- Mixing Bowls — One large for the filling and one smaller for whipping cream. Glass or metal bowls work best because they chill faster.
- Electric Mixer — A hand mixer or stand mixer makes whipping cream and beating the cream cheese super easy. You can do it by hand, but it takes a lot longer.
- Measuring Cups and Spoons — Accuracy makes a difference, especially with powdered sugar and cream.
- Spatula — For folding the whipped cream gently into the cream cheese mixture.
- Small Cups or Jars — I use 6-ounce (180ml) glass jars or small dessert cups to layer the cheesecake. Mason jars work great too.
- Food Processor or Zip-Top Bag and Rolling Pin — To crush the graham crackers. I prefer crushing by hand because it gives more texture.
How to Make It: Step-by-Step
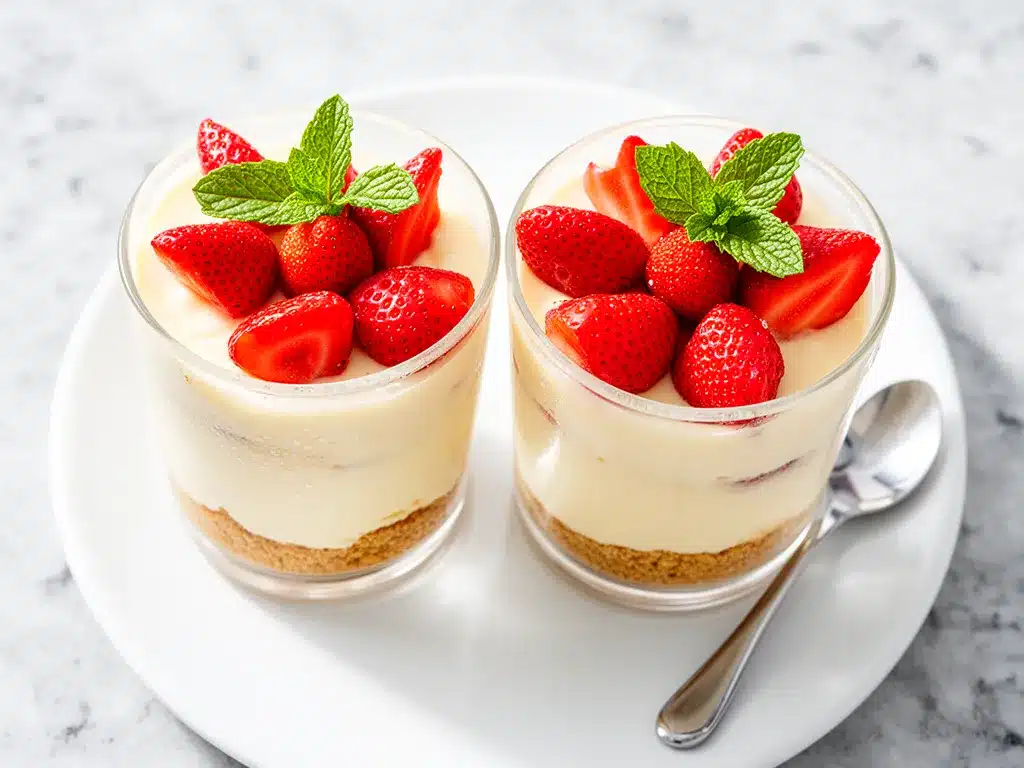
Alright, let’s get to the good stuff. This step-by-step will walk you through the easiest way to put these no-bake strawberry cheesecake cups together, including some tips I’ve picked up along the way.
Step 1: Crush the Graham Crackers and Make the Crust (5 minutes)
Place the graham crackers in a zip-top bag and crush them with a rolling pin until you have mostly fine crumbs with some small chunks for texture. Pour the crumbs into a bowl, add melted butter, and mix until the crumbs are evenly coated and hold together when pressed. Divide the mixture evenly between your cups and press down firmly to form the crust. Set these in the fridge while you make the filling—it helps them firm up.
Step 2: Whip the Cream Cheese and Sugar (5 minutes)
In a large bowl, beat the softened cream cheese with powdered sugar and vanilla extract until smooth and creamy. This usually takes about 2-3 minutes with a mixer. Scrape down the sides to avoid lumps. The mixture should be fluffy but still thick enough to hold shape.
Step 3: Whip the Heavy Cream (3-4 minutes)
In a separate chilled bowl, whip the heavy cream until you get soft peaks. That means when you lift the beaters, the cream holds a peak but the tip folds over. Don’t over-whip or it’ll turn into butter!
Step 4: Fold the Cream into the Cream Cheese (2 minutes)
Gently fold the whipped cream into the cream cheese mixture with a spatula. Use a light hand—this is what keeps the filling airy and light. Add lemon juice here to brighten the flavor.
Step 5: Layer the Cups (5 minutes)
Start with a spoonful of the cream cheese filling over the crust, then add a layer of chopped fresh strawberries. Repeat until your cups are full, finishing with strawberries on top. If you want to swirl in strawberry jam, add dollops between layers and gently swirl with a toothpick.
Step 6: Chill (At Least 2 Hours)
Cover the cups with plastic wrap or lids and refrigerate for at least 2 hours, preferably longer. This chilling time lets the filling set and the flavors meld together beautifully.
Step 7: Serve and Enjoy
Before serving, garnish with a sprig of fresh mint or an extra strawberry if you like. These cups are perfect for potlucks, picnics, or just a simple indulgence after dinner.
Expert Tips & Tricks
- Don’t Skip Softening the Cream Cheese — It makes mixing so much easier and prevents lumps. If you forgot, microwave in 10-second bursts until just soft.
- Whip Cream to Soft Peaks Only — Over-whipping can cause the filling to become grainy or separate. Stop when you see soft peaks.
- Use Fresh Strawberries — They add a natural sweetness and texture you can’t get from jam alone. But if fresh aren’t available, thawed frozen strawberries work too—just drain excess liquid.
- Press Crust Firmly — Helps it hold together when you eat these cups. A flat-bottomed glass or measuring cup works great to press crumbs evenly.
- Make Ahead — These cups actually taste better after chilling overnight. I sometimes make them the day before a party to save time.
Variations & Substitutions
Once you’ve mastered the classic no-bake strawberry cheesecake cups, here are some ways to mix things up:
- Mixed Berry Version — Swap strawberries for a mix of blueberries, raspberries, and blackberries for a colorful twist.
- Chocolate Crust — Use crushed chocolate cookies instead of graham crackers for a richer base.
- Vegan/Dairy-Free — Use coconut cream whipped in place of heavy cream and vegan cream cheese alternatives. Fresh fruit topping stays the same.
- Lemon Zest — Add a teaspoon of finely grated lemon zest to the filling for extra brightness.
- Layered Parfaits — Alternate cheesecake filling with fruit compote or strawberry jam layers for a more dramatic presentation.
Serving & Storage
These cups are best served chilled straight from the fridge. I usually keep them covered until right before serving to avoid drying out. They’re perfect for casual gatherings because you can make them ahead and just grab a cup when guests arrive.
Here are a few serving ideas:
- Pair with a refreshing drink like a watermelon mint agua fresca for a summer vibe.
- Serve alongside a light salad or finger foods like ham and cheese pinwheel roll-ups for a balanced spread.
- Top with a sprinkle of toasted nuts or coconut flakes for a little crunch.
Storage: Store leftovers in airtight containers in the fridge for up to 3 days. The crust might soften a bit, but the flavor only gets better. I don’t recommend freezing because the texture of the cream cheese filling changes when thawed.
Nutrition Information
I’m not a nutritionist, but here’s a rough breakdown per serving (based on 6 servings):
| Nutrient | Amount |
|---|---|
| Calories | 320 |
| Protein | 5g |
| Carbohydrates | 28g |
| Fiber | 1g |
| Sugar | 18g |
| Fat | 20g |
| Saturated Fat | 12g |
| Cholesterol | 65mg |
| Sodium | 220mg |
| Calcium | 90mg |
What’s good about these cups is they offer a decent dose of calcium from the cream cheese and a boost of vitamin C from fresh strawberries. Yes, they have cream and sugar, so they’re definitely a treat—but a homemade one where you control the ingredients.
Final Thoughts
So that’s my no-bake strawberry cheesecake cups recipe—simple, fresh, and totally addictive. I’ve probably talked your ear off by now, but when you find a dessert this easy and reliable, you end up with a lot to say about it.
This recipe has saved me from dessert disasters and busy nights more times than I can count. It’s my answer when I want a sweet treat that’s impressive but doesn’t require a ton of work or heat in the kitchen. Plus, it’s perfect for sharing or just sneaking a little indulgence after a long day.
Make it yours—add more fruit, swirl in jam, sprinkle some nuts, or keep it classic. And hey, if you want a quick snack to pair with it, try my no-bake chocolate oat cookies for a double dose of easy, no-fuss treats.
If you give this recipe a try, drop a comment and tell me how it went! I love hearing what tweaks you make or any questions you have. Happy no-bake cheesecake making—and I hope your kitchen smells as delicious as mine does right now.
Frequently Asked Questions
Q: Can I use frozen strawberries instead of fresh?
A: Yes, but thaw and drain them well first to avoid watery filling. The texture won’t be as firm as fresh, but the flavor is still delicious. If you use thawed berries, consider reducing or skipping the added lemon juice to avoid extra liquid.
Q: Can I substitute Greek yogurt for cream cheese?
A: I’ve tried it, and it’s not quite the same. Greek yogurt makes the filling tangier and thinner, so it won’t set as firmly. If you want a lighter option, try mixing half cream cheese and half Greek yogurt, but keep expectations in check.
Q: How long can I store these cheesecake cups?
A: Stored covered in the fridge, they keep well for up to 3 days. Beyond that, the crust starts to get soggy and the filling may lose some of its texture. Definitely best enjoyed fresh or within a couple of days.
Q: Can I make these without heavy cream?
A: Heavy cream is key for the fluffy texture. You can try substituting with whipped coconut cream for a dairy-free version, but regular milk or half-and-half won’t whip up properly and the filling will be denser.
Q: What if my filling is too runny?
A: This usually happens if the cream cheese isn’t fully softened or if the cream was over-whipped. Make sure the cream cheese is smooth before folding in whipped cream. If it’s too loose, add a little more powdered sugar or chill longer to help it set.
Q: Can I double this recipe?
A: Absolutely! Just double all ingredients and use larger containers to layer the cups. The chilling time stays about the same. This is great for parties or meal prepping desserts.
Pin This Recipe!
No-Bake Strawberry Cheesecake Cups
- Total Time: 2 hours 15 minutes
- Yield: 6 servings 1x
Description
Light, creamy no-bake strawberry cheesecake cups with a crunchy graham cracker base, perfect for a quick and fuss-free dessert.
Ingredients
- 8 oz (225g) cream cheese, softened
- 1 cup (120g) powdered sugar
- 1 teaspoon vanilla extract
- 1 cup (240ml) heavy whipping cream
- 2 cups (300g) fresh strawberries, chopped
- 1 ½ cups (150g) graham crackers, crushed
- 5 tablespoons (70g) unsalted butter, melted
- 1 tablespoon lemon juice
- Optional: 2 tablespoons strawberry jam
- Optional: fresh mint leaves for garnish
Instructions
- Crush the graham crackers in a zip-top bag with a rolling pin until mostly fine crumbs with some small chunks remain.
- Mix crushed graham crackers with melted butter until evenly coated and holds together when pressed.
- Divide the crust mixture evenly into cups and press firmly to form the crust. Refrigerate to firm up.
- In a large bowl, beat softened cream cheese with powdered sugar and vanilla extract until smooth and creamy.
- In a separate chilled bowl, whip heavy cream to soft peaks.
- Gently fold whipped cream into the cream cheese mixture, then add lemon juice and mix lightly.
- Layer the cups starting with a spoonful of cream cheese filling over the crust, then a layer of chopped strawberries. Repeat layers, finishing with strawberries on top. Optionally swirl in strawberry jam between layers.
- Cover cups and refrigerate for at least 2 hours to set and meld flavors.
- Before serving, garnish with fresh mint or extra strawberries if desired.
Notes
[‘Use full-fat cream cheese for creamiest texture.’, ‘Softening cream cheese before mixing prevents lumps.’, ‘Whip cream to soft peaks only to avoid grainy texture.’, ‘Fresh strawberries are best; thawed frozen can be used but drain well.’, ‘Press crust firmly to help it hold together.’, ‘Make ahead and chill overnight for best flavor.’, ‘Do not freeze as texture changes when thawed.’]
- Prep Time: 15 minutes
- Cook Time: 0 minutes
- Category: Dessert
- Cuisine: American
Nutrition
- Serving Size: 1 cup (approx. 6 oz
- Calories: 320
- Sugar: 18
- Sodium: 220
- Fat: 20
- Saturated Fat: 12
- Carbohydrates: 28
- Fiber: 1
- Protein: 5
Keywords: no-bake, strawberry cheesecake, cheesecake cups, easy dessert, summer dessert, no oven dessert



