
I have a confession to make. I used to be the person who just ordered the largest size of whatever iced coffee was on sale at the drive-thru. You know the type. No frills, no foam, just caffeine delivered as quickly as possible before I had to sit in my car and pretend to answer emails. But then, last winter, I was stuck at an airport in Chicago during a massive snowstorm. My flight was delayed six hours, and I wandered into a small, independent café to kill time. I ordered an iced latte, and the barista asked if I wanted the salted caramel cold foam. I said yes, mostly because I had nothing better to do with my life in that moment.
That first sip changed everything. It wasn’t just coffee. It was this pillowy, sweet-salty cloud that sat on top of the cold brew like a dessert topping, melting slowly into every sip. It was rich without being heavy, sweet without being cloying, and salty enough to make your brain do a little happy dance. I finished that coffee in slow motion, savoring every drop, and went home determined to recreate it. I failed the first time. Then the second. But by the fifth attempt, I had it. This homemade salted caramel cold foam recipe is now my non-negotiable weekend ritual, and I’m betting it’ll become yours too.
There’s something so luxurious about making your own coffee shop drink at home. It feels like a treat, but it’s actually just a few simple ingredients you probably already have. Plus, it’s way cheaper than buying it out, and you can control exactly how sweet or salty it is. If you’re an iced coffee addict like I am, this is the upgrade you didn’t know you needed. It pairs perfectly with any cold brew or strong iced coffee, turning a basic morning drink into a little moment of joy. And if you’re looking for other ways to use up that leftover caramel sauce from your fall caramel apple cheesecake bars, this is a fantastic way to use it up in a savory-sweet way.
Why You’ll Love This Recipe
Once you make this cold foam at home, you’ll never go back to the pump-syrup version from the big chains. There’s a texture difference you can’t fake. This foam is airy, stable, and actually tastes like caramel, not artificial candy. Here’s why I keep making it:
It Takes Two Minutes — Seriously. You don’t need a fancy milk frother (though one helps). A whisk and a bowl work just fine. I make this while my coffee brews, so by the time I pour the ice, the foam is ready. It’s the easiest upgrade to your morning routine.
Customizable Sweetness — Coffee shop foam is often caked with sugar. With this homemade salted caramel cold foam, you control the sugar. I use a mix of brown sugar and sea salt, so it’s balanced. If you like it sweeter, add more brown sugar. If you prefer the salt to shine, add a pinch more. It’s your foam.
Uses Simple Ingredients — You need heavy cream, milk, brown sugar, vanilla, and salt. That’s it. No weird stabilizers or preservatives. If you have ingredients for pancakes, you have ingredients for this. I keep a carton of heavy cream in the fridge specifically for this, because once you start making it, you’ll crave it.
Restaurant-Quality Texture — The trick is in the ratio of cream to milk. Too much cream, and it’s too heavy. Too much milk, and it won’t whip. I’ve tested this ratio dozens of times, and this specific blend creates that perfect stiff peak that floats beautifully on top of your drink without sinking immediately.
Budget-Friendly Luxury — A drink like this at a café costs $6 or more. Making it at home costs about $1.50 per serving. That’s a huge savings if you drink iced coffee regularly. Plus, you get to enjoy the process of making it, which is half the fun.
This recipe has completely changed my weekend mornings. I’ll put on some jazz, make my coffee, and then spend two minutes whipping up this foam. It’s a small ritual that makes the whole day feel a bit more special. It’s not just a topping; it’s a mood.
Ingredients You’ll Need
The beauty of this homemade salted caramel cold foam is how few ingredients you need. I’m particular about two things here: the fat content of the cream and the quality of the vanilla. Cheap vanilla extract won’t give you that deep, aromatic flavor that makes this foam taste like it came from a high-end café.
Heavy Cream (1/2 cup / 120ml) — This is the base. You need heavy cream with at least 35% fat content. Light cream or half-and-half won’t whip up properly. I use heavy whipping cream because it creates the stiff peaks needed to hold the foam structure. Don’t substitute this unless you want liquid milk.
Whole Milk (2 tablespoons / 30ml) — This lightens the foam slightly so it’s not too dense. I use whole milk for the best flavor and texture. If you’re lactose-intolerant, you can use oat milk, but it won’t whip as stiffly. Oat milk foam is great for lattes, but for cold foam, dairy works best.
Brown Sugar (2 tablespoons / 25g) — I use dark brown sugar for this. It has more molasses, which gives that deep, toffee-like flavor that mimics real caramel. Light brown sugar works too, but the flavor is milder. Pack it down into your measuring cup for accuracy.
Vanilla Extract (1 teaspoon / 5ml) — Use real vanilla extract, not imitation. I love using vanilla bean paste if I have it, because you get those little specks that look fancy, but extract works perfectly fine. It adds depth and rounds out the sweetness.
Sea Salt (1/4 teaspoon / 1.5g) — This is what makes it “salted” caramel. I use fine sea salt so it dissolves easily. If you use kosher salt, you might need a tiny bit more because the grains are larger. The salt cuts through the sweetness and enhances the vanilla.
Caramel Sauce (1 tablespoon / 15ml, optional) — For extra caramel flavor, I stir in a tablespoon of store-bought or homemade caramel sauce. This is my secret weapon. If you don’t have caramel sauce, just increase the brown sugar to 3 tablespoons. But the sauce adds a glossy, rich texture that’s hard to beat.
Ice Cubes (as needed) — Obviously, you need ice for your iced coffee. I like using large ice cubes because they melt slower and don’t water down the drink as quickly.
Cold Brew or Strong Iced Coffee (1-2 cups) — This is the base. I prefer cold brew because it’s less acidic and smoother, but any strong iced coffee works. If you don’t have cold brew, brew a pot of coffee strong, let it cool, and pour it over ice. I often use leftover coffee from the night before.
I usually make a double batch of foam if I’m having guests. It’s easy to scale up, and it looks impressive when you pour it over multiple glasses. I also keep a bottle of caramel sauce in the pantry for when I’m out of cream, but fresh foam is always better.
Equipment Needed
You don’t need fancy equipment for this. Here’s what I actually use.
Mixing Bowl — A medium-sized bowl, preferably stainless steel or glass. It needs to be large enough to hold the cream and allow for whisking. I use a 2-quart bowl.
Whisk — A balloon whisk works best. I have a simple one from the dollar store, and it works fine. If you have an electric hand mixer, that’s even better and takes half the time. I use my hand mixer when I’m in a hurry.
Measuring Cups and Spoons — Standard stuff. Accuracy matters here, especially with the salt. I use a set of metal measuring spoons.
Milk Frother (Optional) — If you have a handheld milk frother, you can use it to whip the foam. It’s faster than whisking, but it doesn’t get quite as stiff. I use it sometimes for a lighter foam.
Glasses — Tall glasses are best for showing off the layers. I like pint glasses or large mugs. The foam looks beautiful floating on top.
Strainer (Optional) — If you’re using caramel sauce that has chunks, you might want to strain it. But usually, it’s smooth enough to stir directly into the cream.
I don’t use any special tools for this. Keep it simple. The easier the equipment, the more likely you are to actually make it.
How to Make It: Step-by-Step

Alright, let’s make this! I’m walking you through exactly how I do it, including the little tricks I’ve picked up.
Step 1: Chill Your Bowl (Optional but Helpful)
If you have time, put your mixing bowl in the fridge for 10 minutes before you start. Cold cream whips faster and holds its shape better. I don’t always do this, but it helps if your kitchen is warm. If you’re in a hurry, skip it. It still works.
Step 2: Combine Wet Ingredients
Pour the heavy cream and whole milk into your chilled bowl. Add the brown sugar, vanilla extract, sea salt, and caramel sauce (if using). If you’re using caramel sauce, make sure it’s at room temperature so it mixes in easily. Cold caramel can clump up.
Step 3: Whisk Until Stiff Peaks Form
Using a whisk or electric mixer, beat the mixture on medium-high speed. Watch it closely. After about 2-3 minutes, you’ll start to see peaks form. Keep going until the foam is thick and holds its shape when you lift the whisk. This is called “stiff peaks.” If you stop too early, the foam will be too thin and will sink into the coffee. If you overbeat it, it might start to turn into butter (don’t ask me how I know). Aim for a texture like thick whipped cream.
Step 4: Prepare Your Coffee
While the foam is whipping, prepare your iced coffee. Fill a glass with ice cubes. Pour your cold brew or strong iced coffee over the ice, leaving about an inch of space at the top. The coffee should be cold and strong enough to stand up to the rich foam.
Step 5: Pour the Foam
Gently spoon the cold foam over the back of a spoon and onto the coffee. This helps it float on top rather than mixing in immediately. You want distinct layers. If you just pour it in, it’ll mix with the coffee and you won’t get that beautiful gradient look. Spoon it slowly and carefully.
Step 6: Garnish and Serve
Add a tiny pinch of flaky sea salt on top for garnish. This looks fancy and adds a final burst of saltiness. Serve immediately with a straw so you can sip the foam and coffee together. The best part is stirring it in as you go, creating a creamy, caramel-swirl effect in every sip.
Total time: About 5 minutes (2 minutes active prep, 3 minutes for coffee).
Troubleshooting: If your foam is too thin, add a tablespoon more heavy cream and whip again. If it’s too thick, add a teaspoon of milk. If it separates, your cream might have been too warm. Next time, chill the bowl.
Expert Tips & Tricks
Here’s everything I’ve learned from making this dozens of times. These tips will save you from my mistakes.
Cold Cream is Key
The colder the cream, the better the foam. I keep my heavy cream in the back of the fridge, where it’s coldest. If your cream is lukewarm, it won’t whip up. This is the #1 reason people fail at cold foam. Make sure your ingredients are cold.
Don’t Overbeat
It’s easy to overbeat cream. Once it reaches stiff peaks, stop. If you keep beating, the fat molecules will clump together and you’ll get butter. It’s a delicate balance. Watch the texture closely.
Use High-Quality Vanilla
I can’t stress this enough. Bad vanilla makes the foam taste chemical. Good vanilla makes it taste like a café drink. I use Nielsen-Massey or McCormick Pure Extract. It’s worth the extra dollar.
Adjust Salt to Taste
Salt levels vary by brand. Taste your foam before pouring it over the coffee. If it’s too sweet, add a pinch more salt. If it’s too salty, add a tiny bit more sugar. Balance is everything.
Make It Ahead
You can make the foam up to 2 hours ahead and store it in the fridge in an airtight container. It will hold its shape well. Just give it a gentle stir before using it to refresh the texture.
Use a Spoon for Pouring
Pouring the foam over the back of a spoon helps it float. If you pour it directly from the bowl, it might mix with the coffee. This is a small trick that makes a big difference in presentation.
Try Different Syrups
Once you master the basic salted caramel, try adding hazelnut syrup or vanilla syrup to the foam. It’s a fun way to experiment. I’ve made hazelnut cold foam before, and it’s delicious.
Variations & Substitutions
Once you’ve nailed the basic version, here’s how you can mix it up. I’ve tried all of these.
Vanilla Cold Foam
Skip the caramel sauce and brown sugar. Just use cream, milk, vanilla, and a pinch of salt. It’s lighter and more neutral, letting the coffee shine. Great for people who don’t like sweet toppings.
Hazelnut Cold Foam
Add 1 tablespoon of hazelnut syrup to the cream mixture. It’s nutty and rich, perfect for fall. I make this when I’m craving something cozy.
Strawberry Cold Foam
Blend 1/4 cup fresh strawberries with a teaspoon of sugar, then fold into the cream. It’s pink and pretty, and tastes like summer. I use this for brunch parties.
Coconut Cold Foam
Use coconut cream instead of heavy cream, and coconut milk instead of dairy milk. Add a teaspoon of coconut extract. It’s dairy-free and tastes like a piña colada in coffee form.
Gluten-Free
This recipe is naturally gluten-free. Just make sure your caramel sauce is gluten-free (some contain barley malt). Most major brands are safe.
Lower-Calorie Version
Use light cream and skim milk. It won’t whip as stiffly, but it’s lighter. I use this when I’m watching my calories. It’s not as rich, but still tasty.
Chocolate Cold Foam
Add 1 tablespoon of cocoa powder to the cream mixture. It’s like a mocha foam. Great for chocolate lovers.
Serving & Storage
How to Serve:
I usually serve this immediately after making it. The foam is best when it’s fresh and airy. I pour it over cold brew or iced coffee, garnish with sea salt, and hand it to my guests. It’s a great way to impress people without much effort.
Side Dishes:
This goes well with anything sweet. I pair it with caramel pecan sticky buns for a decadent brunch. It also works with lemon bars for a contrast of flavors. And if you’re in the mood for something hearty, it pairs surprisingly well with creamy cajun sausage pasta if you’re having a savory-sweet brunch.
Storage:
Store leftover foam in an airtight container in the fridge for up to 2 days. It will lose some of its airiness, but it’s still usable. Whisk it again before using. Don’t freeze it; the texture will be ruined.
Reheating:
You don’t reheat cold foam. It’s meant to be cold. If you want a warm version, make a hot whipped cream topping instead. But for this recipe, keep it cold.
Nutrition Information
I’m not a nutritionist, but here’s the breakdown if you’re tracking. This is per serving (1/4 cup of foam).
| Nutrient | Amount |
|---|---|
| Calories | 120 |
| Protein | 1g |
| Carbs | 8g |
| Fiber | 0g |
| Sugar | 7g |
| Fat | 10g |
| Sodium | 100mg |
What’s Good: It’s a small treat, so the calories are manageable. The fat content is from the cream, which is satisfying.
What to Know: It’s high in sugar if you use caramel sauce. You can reduce the sugar by half for a lower-calorie version. It contains dairy.
My Take: This is a treat, not a health food. Enjoy it in moderation. But honestly, it’s worth the calories. It makes your coffee feel like a dessert.
Final Thoughts
So that’s my homemade salted caramel cold foam! I’ve probably talked your ear off at this point, but when you make a recipe this often, you have a lot to say about it.
This has saved my weekend mornings more times than I can count. It’s my answer to “what’s for breakfast” when I want something fancy but don’t want to cook. My kids are happy, my husband’s happy, and I’m happy because I’m not stressed about cooking. It’s simple, delicious, and feels like a little luxury.
Make it yours! Try different syrups, adjust the sweetness, or add extra salt. The best recipes are the ones you adapt to your family’s tastes. If you make this, drop a comment and let me know what you think! I love hearing how recipes turn out in your kitchen. And if something doesn’t work, tell me that too—I’m here to help troubleshoot.
Happy brewing! And I hope your kitchen smells half as good as mine does right now.
Frequently Asked Questions
Q: Can I use skim milk instead of whole milk?
A: You can, but the foam won’t be as thick or stable. Skim milk has less fat, which means it won’t whip up as well. I recommend using whole milk for the best texture. If you must use skim, add a bit more heavy cream to compensate.
Q: Why did my foam turn out watery?
A: Usually means your cream wasn’t cold enough, or you didn’t whip it long enough. Make sure your cream is chilled, and whip until stiff peaks form. If it’s still watery, try adding a tablespoon more heavy cream and whipping again.
Q: Can I make this ahead of time?
A: Yes, you can make the foam up to 2 hours ahead and store it in the fridge. It will hold its shape well. Just give it a gentle stir before using it to refresh the texture. Don’t make it more than 2 hours ahead, or it will start to break down.
Q: Can I use oat milk for this?
A: Oat milk foam is great for lattes, but it doesn’t whip as stiffly as dairy cream. You can try using oat cream (a specific type of oat milk designed for whipping), but regular oat milk won’t work well for cold foam. Stick to dairy for the best results.
Q: How do I store leftover caramel sauce?
A: Store it in an airtight container in the fridge for up to 2 weeks. It will thicken when cold, so warm it slightly before using. You can also freeze it for up to 3 months.
Q: Can I double this recipe?
A: Absolutely! Double everything and use a larger bowl. The whipping time will be slightly longer. I double this recipe when I’m having guests, and it works perfectly.
Q: What kind of coffee works best with this?
A: Cold brew is best because it’s smooth and less acidic. But any strong iced coffee works. If you use regular brewed coffee, let it cool completely before pouring over ice. Weak coffee will be overpowered by the rich foam.
Pin This Recipe!
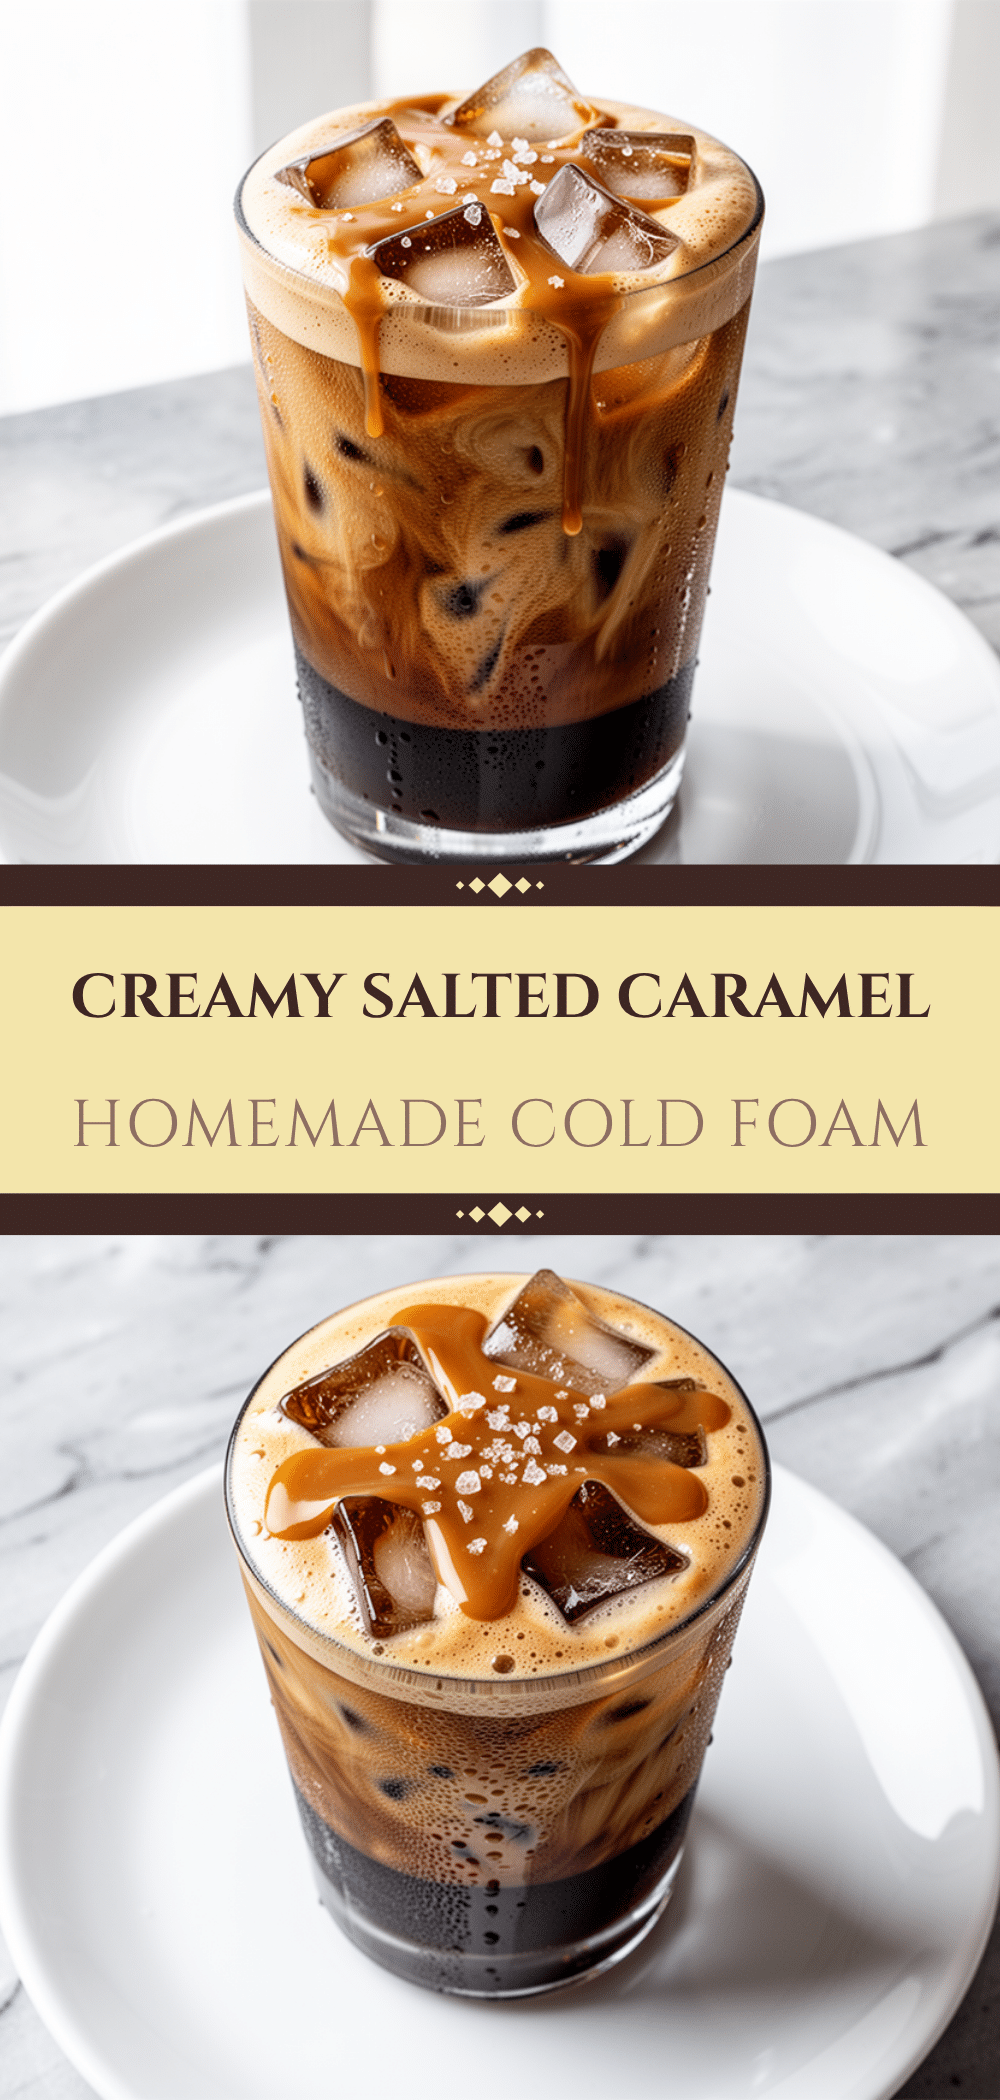

Homemade Salted Caramel Cold Foam: Best Iced Coffee Topping
- Total Time: 5 minutes
- Yield: 1 serving 1x
Description
A luxurious, airy salted caramel cold foam topping for iced coffee that is easy to make at home with simple ingredients like heavy cream, brown sugar, and vanilla.
Ingredients
- 1/2 cup heavy cream (at least 35% fat)
- 2 tablespoons whole milk
- 2 tablespoons dark brown sugar
- 1 teaspoon vanilla extract
- 1/4 teaspoon fine sea salt
- 1 tablespoon caramel sauce (optional)
- Ice cubes
- 1–2 cups cold brew or strong iced coffee
Instructions
- Chill a mixing bowl in the fridge for 10 minutes (optional but helpful).
- Pour heavy cream and whole milk into the chilled bowl.
- Add brown sugar, vanilla extract, sea salt, and caramel sauce (if using).
- Whisk or beat the mixture on medium-high speed for 2-3 minutes until stiff peaks form.
- Fill a glass with ice cubes and pour cold brew or iced coffee over the ice.
- Gently spoon the cold foam over the back of a spoon onto the coffee to create distinct layers.
- Garnish with a tiny pinch of flaky sea salt and serve immediately.
Notes
Ensure cream is very cold for best whipping results. Do not overbeat or the cream may turn to butter. The foam can be made up to 2 hours ahead and stored in the fridge. Use high-quality vanilla extract for better flavor.
- Prep Time: 2 minutes
- Cook Time: 0 minutes
- Category: Beverage
- Cuisine: American
Nutrition
- Serving Size: 1/4 cup of foam per
- Calories: 120
- Sugar: 7
- Sodium: 100
- Fat: 10
- Saturated Fat: 6
- Carbohydrates: 8
- Protein: 1
Keywords: salted caramel cold foam, iced coffee topping, homemade coffee shop drink, cold foam recipe, iced coffee upgrade



