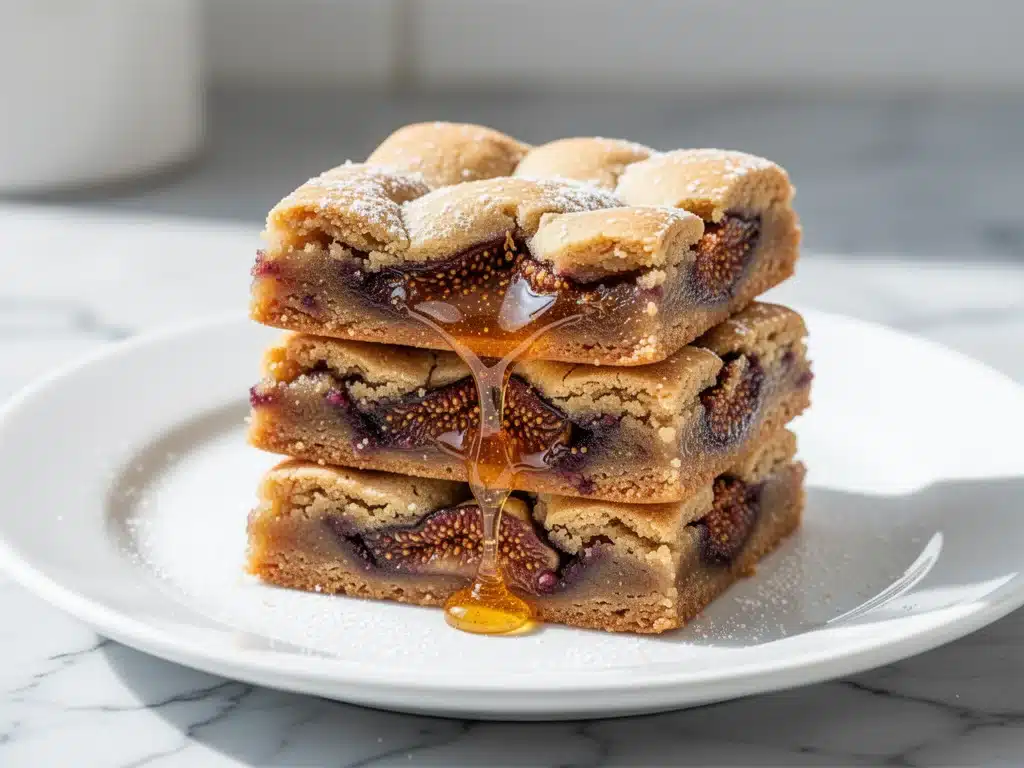
I have a confession to make. For the better part of my adult life, I bought fig bars from a rectangular tin at the grocery store. You know the ones—they’re the ones with the wax paper squares and the slightly confusing expiration date. They were my go-to lunchbox treat for my kids, my quick afternoon snack when I was hiding in the pantry, and my “I don’t want to bake anything” dessert when I was exhausted.
But here’s the thing: they were never quite right. The crust was too dry, like eating cardboard that had been left out in the sun. And the filling? It was usually too sweet, too runny, or tasted like it had been heated in a microwave for too long. It lacked that deep, earthy, complex flavor that real figs have. It lacked soul.
Last month, I decided to stop compromising. I wanted a fig bar that had a genuine chew—like a cookie, not a cracker. I wanted a filling that tasted like honey and fruit, not high-fructose corn syrup. I wanted something that felt homemade, rustic, and genuinely impressive when I pulled them out of the oven for guests. So, I spent three weekends testing dough ratios, filling consistencies, and baking temperatures. I burned more figs than I care to admit (seriously, they go from “perfect” to “charcoal” faster than you can say “honey”).
But finally, I cracked it. These chewy homemade fig bars with honey filling are the real deal. The dough is tender but sturdy enough to hold that luscious, sticky fruit filling without falling apart. They have that perfect balance of sweet and tart, with a hint of warmth from cinnamon and cloves that makes them feel like autumn in a bite. They are the kind of treat that makes people ask for the recipe immediately, only to be surprised when you tell them it’s actually easy to make.
If you’ve been looking for a dessert that feels special but doesn’t require a degree in pastry arts, this is it. It’s better than the store-bought version, easier than a full-layer cake, and honestly? It’s going to become a staple in your kitchen rotation. Trust me on this one.
Why You’ll Love This Chewy Fig Bar Recipe
There are a lot of cookie recipes out there. Chocolate chip, snickerdoodle, oatmeal raisin—the classics. But fig bars? They’re a hidden gem. Once you make these, I promise you’ll never go back to the tin. Here’s why this specific recipe works so well:
- Actually Chewy Texture — Most homemade fig bar recipes end up crumbly. This dough uses a specific ratio of butter and sugar that creates a tender, chewy cookie base that holds up to the moist filling. It’s the difference between a dry shortbread and a soft-baked cookie.
- Deep, Complex Flavor — By using dried figs and honey instead of just jam, you get a rich, fruity flavor that isn’t one-dimensional. The honey adds a floral note that pairs perfectly with the earthiness of the figs. It’s sophisticated but comforting.
- Makes Amazing Leftovers — These bars actually get better after a day or two. The flavors meld together, and the dough softens slightly, becoming even more chewy. I make a batch on Sunday, and they’re gone by Wednesday. Sometimes I deliberately make extra for Monday lunch.
- Impressive but Simple — They look like something you’d buy at a high-end bakery. The lattice top is elegant, and the golden-brown edges are irresistible. But the technique is straightforward. If you can roll out dough and spread a filling, you can make these. I’ve walked my teenage daughter through it while we watched TV.
- Perfect for Gifting — Because they travel well and stay fresh for days, these are my go-to hostess gifts. I pack them in a nice tin with a ribbon, and people are always so impressed. It’s a cheap way to make a big impression.
This is my answer to “what dessert should I make that’s not just another cookie?” It’s unique, it’s delicious, and it’s reliable. No complicated techniques, no weird ingredients you can’t find, just good, honest baking that makes everyone happy.
Ingredients You’ll Need for Chewy Fig Bars
Here’s the best part: you probably have most of the dry ingredients already. This isn’t a recipe that requires a trip to a specialty store. It’s pantry-friendly, with just a few key items that make all the difference.
For the Chewy Dough
All-purpose flour (2 ½ cups / 315g) — The foundation. Don’t try to substitute with whole wheat here; you want that tender, chewy texture that only all-purpose flour provides. Sift it if it’s clumpy, but otherwise, just spoon and level.
Baking powder (1 teaspoon) — Gives the dough a tiny lift so it’s not dense. Make sure it’s fresh! Old baking powder makes cookies flat and tough. I check the date on mine before every bake.
Salt (½ teaspoon) — Crucial. It balances the sweetness and brings out the flavor of the figs. Don’t skip it.
Unsalted butter (½ cup / 115g, softened) — This is for flavor and texture. Softened means it should yield to gentle pressure but not be melted. If you’re in a rush, you can grate cold butter into the flour, but softened is easier for beginners.
Granulated sugar (¾ cup / 150g) — White sugar gives that classic chewy cookie texture. Brown sugar can be used for a chewier, more molasses-forward bar, but I prefer the clean sweetness of white sugar here to let the figs shine.
Egg (1 large) — Binds everything together. Room temperature is best, but cold works if you’re in a hurry.
Vanilla extract (1 teaspoon) — Pure vanilla, please. I know it’s expensive, but it makes a huge difference in baked goods. The cheap imitation stuff tastes artificial.
For the Honey Fig Filling
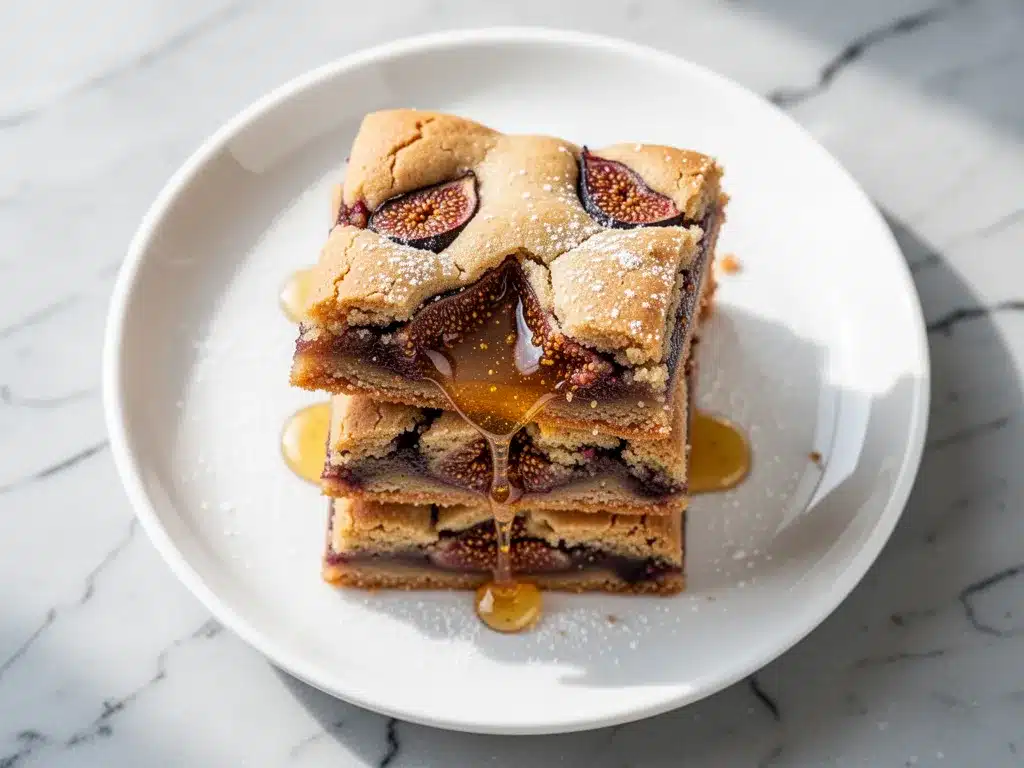
Dried figs (1 cup / 100g, chopped) — This is the star. Look for soft, plump figs. If they’re rock hard, soak them in warm water for 10 minutes first. I buy mine in bulk from the natural foods section.
Honey (¼ cup / 85g) — Adds sweetness and stickiness. Use a mild honey like clover or orange blossom. Avoid strong buckwheat honey unless you like that bold flavor.
Orange juice (2 tablespoons) — Brightens the flavor and helps cook the figs. Fresh squeezed is best, but bottled works fine.
Cinnamon (½ teaspoon) — Adds warmth. It’s a classic pairing with figs.
Clove (¼ teaspoon) — Just a pinch. It adds depth. Don’t overdo it, or it’ll taste like Christmas cookies.
Water (2-3 tablespoons) — Helps create the right consistency for the filling. You want it spreadable, not runny.
Optional Toppings
Powdered sugar — For dusting at the end. It looks pretty and adds a touch of sweetness. I use it sparingly.
Lemon zest — If you want a brighter flavor, add a teaspoon to the filling. It cuts through the richness.
Equipment Needed
You don’t need fancy equipment for this. Here’s what I actually use:
9×13 inch baking pan — I use a metal pan. Glass pans take longer to bake and can result in uneven bottoms. If you only have glass, reduce the oven temperature by 25 degrees.
Rolling pin — Standard wooden or marble rolling pin works fine. I prefer marble because it stays cool, which helps keep the dough from getting too soft.
Medium saucepan — For cooking the fig filling. Non-stick is easiest for cleanup.
Fork — For docking the dough (poking holes) and creating the lattice pattern.
Pastry brush — Optional, but nice for brushing the top with egg wash or honey before baking.
Cheese grater or food processor — If you’re chopping figs by hand, a grater works surprisingly well to get them small. A food processor makes it instant.
How to Make It: Step-by-Step
Alright, let’s make this! I’m walking you through exactly how I do it, including the little tricks I’ve picked up over the years.
Step 1: Prep Your Dough (10 minutes)
In a medium bowl, whisk together the flour, baking powder, and salt. Set this aside. In a larger bowl, cream the softened butter and granulated sugar together until light and fluffy. This takes about 2-3 minutes with a hand mixer. If you’re doing it by hand, it’ll take 5 minutes and you’ll need good arms. Add the egg and vanilla, and mix until combined.
Gradually add the dry ingredients to the wet ingredients, mixing on low speed until just combined. Do not overmix! Once the dough comes together into a ball, divide it in half. Flatten each half into a disk, wrap in plastic wrap, and refrigerate for at least 30 minutes. This step is crucial—it firms up the butter so the dough is easier to roll out and prevents shrinking in the oven.
Step 2: Make the Honey Fig Filling (15 minutes)
While the dough chills, make the filling. Chop the dried figs into small pieces. If they’re large, you might want to chop them twice. In a small saucepan, combine the chopped figs, honey, orange juice, cinnamon, and clove. Add 2 tablespoons of water.
Heat over medium-low heat, stirring frequently. Let it simmer for about 5-7 minutes, until the figs are soft and the mixture has thickened into a jam-like consistency. If it looks too dry, add another tablespoon of water. If it’s too runny, cook for a minute longer. Remove from heat and let it cool slightly. It should be warm but not hot when you use it.
Step 3: Roll Out the Bottom Crust (5 minutes)
Preheat your oven to 350°F (175°C). Lightly grease your 9×13 inch baking pan. Take one disk of dough out of the fridge. On a lightly floured surface, roll it out into a rectangle that fits your pan. You want it to be about ⅛ inch thick. Carefully transfer the dough to the pan, pressing it gently into the corners. Trim any excess dough hanging over the edges. Dock the bottom with a fork—poke holes all over the surface. This prevents air bubbles from forming.
Step 4: Add the Filling (5 minutes)
Spread the cooled fig filling evenly over the bottom crust. Don’t go too close to the edges—leave about a ½ inch border so the top crust can seal properly. If the filling is too thick, you can thin it with a little more orange juice. Spread it like you’re frosting a cake, but gently.
Step 5: Top with the Second Crust (10 minutes)
Roll out the second disk of dough. You have two options here: either lay it flat on top and cut slits for steam to escape, or cut it into strips to create a lattice top. I prefer the lattice—it looks fancier and is fun to make. If you do the lattice, brush the edges of the bottom crust with a little water to help the top stick. Lay the strips across the top, weaving them over and under. Press the edges down firmly to seal.
Prick the top crust with a fork in a few places to let steam escape. If you want a shiny, golden top, brush it with a little beaten egg or honey. I usually just leave it naked—it’s simpler and still turns out beautiful.
Step 6: Bake and Cool (30 minutes)
Bake in the preheated oven for 25-30 minutes, or until the top is golden brown. The edges should look set, and the filling might bubble up slightly in the center. That’s normal. Let the bars cool completely in the pan on a wire rack. This is the hardest part—waiting for them to cool. But if you cut them while warm, they’ll fall apart. Patience pays off.
Expert Tips & Tricks for Perfect Fig Bars
Here’s everything I’ve learned from making these dozens of times. These tips will save you from my mistakes.
Chill the Dough
This is non-negotiable. Warm dough is sticky and impossible to roll out evenly. If you skip the chill, your bars will shrink and stick to the pan. I usually prep the dough in the morning and bake in the evening.
Don’t Overfill
It’s tempting to load them up with filling, but too much filling will leak out and burn. Stick to the ½ inch border. It’s better to have a perfect bar than a messy one.
Use Soft Figs
If your dried figs are tough, they won’t cook down properly. Soak them in hot water for 10 minutes before chopping. This ensures a smooth, jammy filling.
Let Them Cool Completely
I know it’s tempting to dig in, but warm fig bars are a mess. The filling is liquid, and the dough is soft. Wait until they’re room temperature. They’ll set up nicely.
Store Properly
Store in an airtight container at room temperature for up to 5 days. If your kitchen is humid, add a piece of bread to the container to absorb moisture. The bars stay soft and chewy.
Variations & Substitutions
Once you’ve nailed the basic version, here’s how you can mix it up. I’ve tried all of these.
Almond Fig Bars
Add ½ cup chopped almonds to the filling. It adds crunch and pairs beautifully with the figs. My favorite variation.
Chocolate Fig Bars
Drizzle melted dark chocolate over the cooled bars. It’s decadent and makes them feel like a fancy dessert.
Gluten-Free
Use a 1:1 gluten-free flour blend. The texture might be slightly more crumbly, but it still works. I’ve used Bob’s Red Mill with good results.
Vegan
Replace butter with vegan butter (like Miyoko’s) and egg with a flax egg (1 tablespoon ground flaxseed mixed with 3 tablespoons water). The filling is already vegan.
Maple Glaze
Instead of powdered sugar, mix ½ cup powdered sugar with 1 tablespoon maple syrup and 1 teaspoon milk. Drizzle over the cooled bars. It adds a nice fall flavor.
Serving & Storage
How to Serve:
I serve these plain, dusted lightly with powdered sugar. They’re perfect with a cup of coffee or tea. For a special occasion, serve with a dollop of whipped cream or a scoop of vanilla ice cream. The warm bar and cold ice cream are a match made in heaven.
Side Dishes:
These are a dessert, so they don’t really need sides. But if you’re having a tea party, serve with lemon lavender shortbread cookies for a nice variety of textures.
Storage:
Store in an airtight container at room temperature for up to 5 days. They freeze well too! Wrap individual bars in plastic wrap and freeze for up to 3 months. Thaw at room temperature.
Reheating:
If you want them warm, microwave for 10-15 seconds. Don’t overdo it, or the filling will get runny.
Nutrition Information
I’m not a nutritionist, but here’s the breakdown if you’re tracking. This is a treat, so enjoy it in moderation!
Per Serving (based on 12 bars):
- Calories: 180
- Protein: 2g
- Carbs: 32g
- Fiber: 2g
- Sugar: 18g
- Fat: 5g
- Saturated Fat: 3g
- Cholesterol: 15mg
- Sodium: 120mg
What’s Good:
– Fiber from the figs
– Natural sugars from honey and fruit
– No artificial preservatives
What to Know:
– Higher in sugar due to figs and honey
– Contains gluten and dairy (unless modified)
My Take:
Look, these are cookies. They have butter, sugar, and figs. They’re not a health food. But they’re better than candy bars, and they feel more wholesome. When I make them, I try to use high-quality figs and honey, which makes a big difference in taste and nutrition.
Final Thoughts
So that’s my go-to chewy fig bar recipe! I’ve probably talked your ear off at this point, but when you make a recipe this often, you have a lot to say about it. These bars have saved me from boring grocery store snacks and have become a regular feature at my family gatherings. They’re my answer to “what dessert should I bring?” when I want to impress without spending hours in the kitchen.
Make it yours! Try different extracts, add nuts, or change the glaze. The best recipes are the ones you adapt to your family’s tastes. And if you make these, I hope they turn out as chewy and delicious as mine did.
If you make this, drop a comment and let me know what you think! I love hearing how recipes turn out in your kitchen. And if something doesn’t work, tell me that too—I’m here to help troubleshoot.
Happy baking! And I hope your kitchen smells half as good as mine does right now.
Frequently Asked Questions
Can I use fig jam instead of dried figs?
You can, but the texture will be different. Jam is smoother and wetter, so your bars might be soggy. If you use jam, reduce the amount of liquid in the filling and cook it down longer to thicken it. I prefer dried figs because they give a more authentic, chewy texture.
Why did my fig bars fall apart when I cut them?
This usually happens if they weren’t cooled completely. The filling needs to set, and the dough needs to firm up. If you cut them warm, they’ll crumble. Also, make sure you sealed the edges well so the filling doesn’t leak out and make the bottom soggy.
Can I make these ahead of time?
Yes! In fact, they taste better the next day. You can make the dough and filling up to 2 days ahead. Store the dough in the fridge and the filling in the fridge. Assemble and bake when you’re ready. They also freeze well before baking—just thaw and bake as directed.
What’s the best type of dried figs to use?
I like Calimyrna figs—they’re sweet and soft. Black mission figs are also good but a bit stronger in flavor. Avoid figs that are rock hard or have visible crystals (sugar bloom), as they’ll be tough to cook down.
Can I double this recipe?
Absolutely! Double everything and use two 9×13 pans, or a single 9×13 and a smaller pan. The cooking time might vary slightly, so keep an eye on them. I often double this recipe for holidays because they disappear so fast.
How do I store leftover fig bars?
Store in an airtight container at room temperature for up to 5 days. If your kitchen is hot or humid, store them in the fridge. They’ll last up to a week there, but they might firm up slightly. Bring them to room temperature before eating for the best texture.
Can I use a food processor for the dough?
Yes! Pulse the flour, sugar, and salt together. Add the cold butter and pulse until it looks like coarse crumbs. Add the egg and vanilla, and pulse until the dough comes together. Be careful not to overmix, or the dough will be tough.
Pin This Recipe!
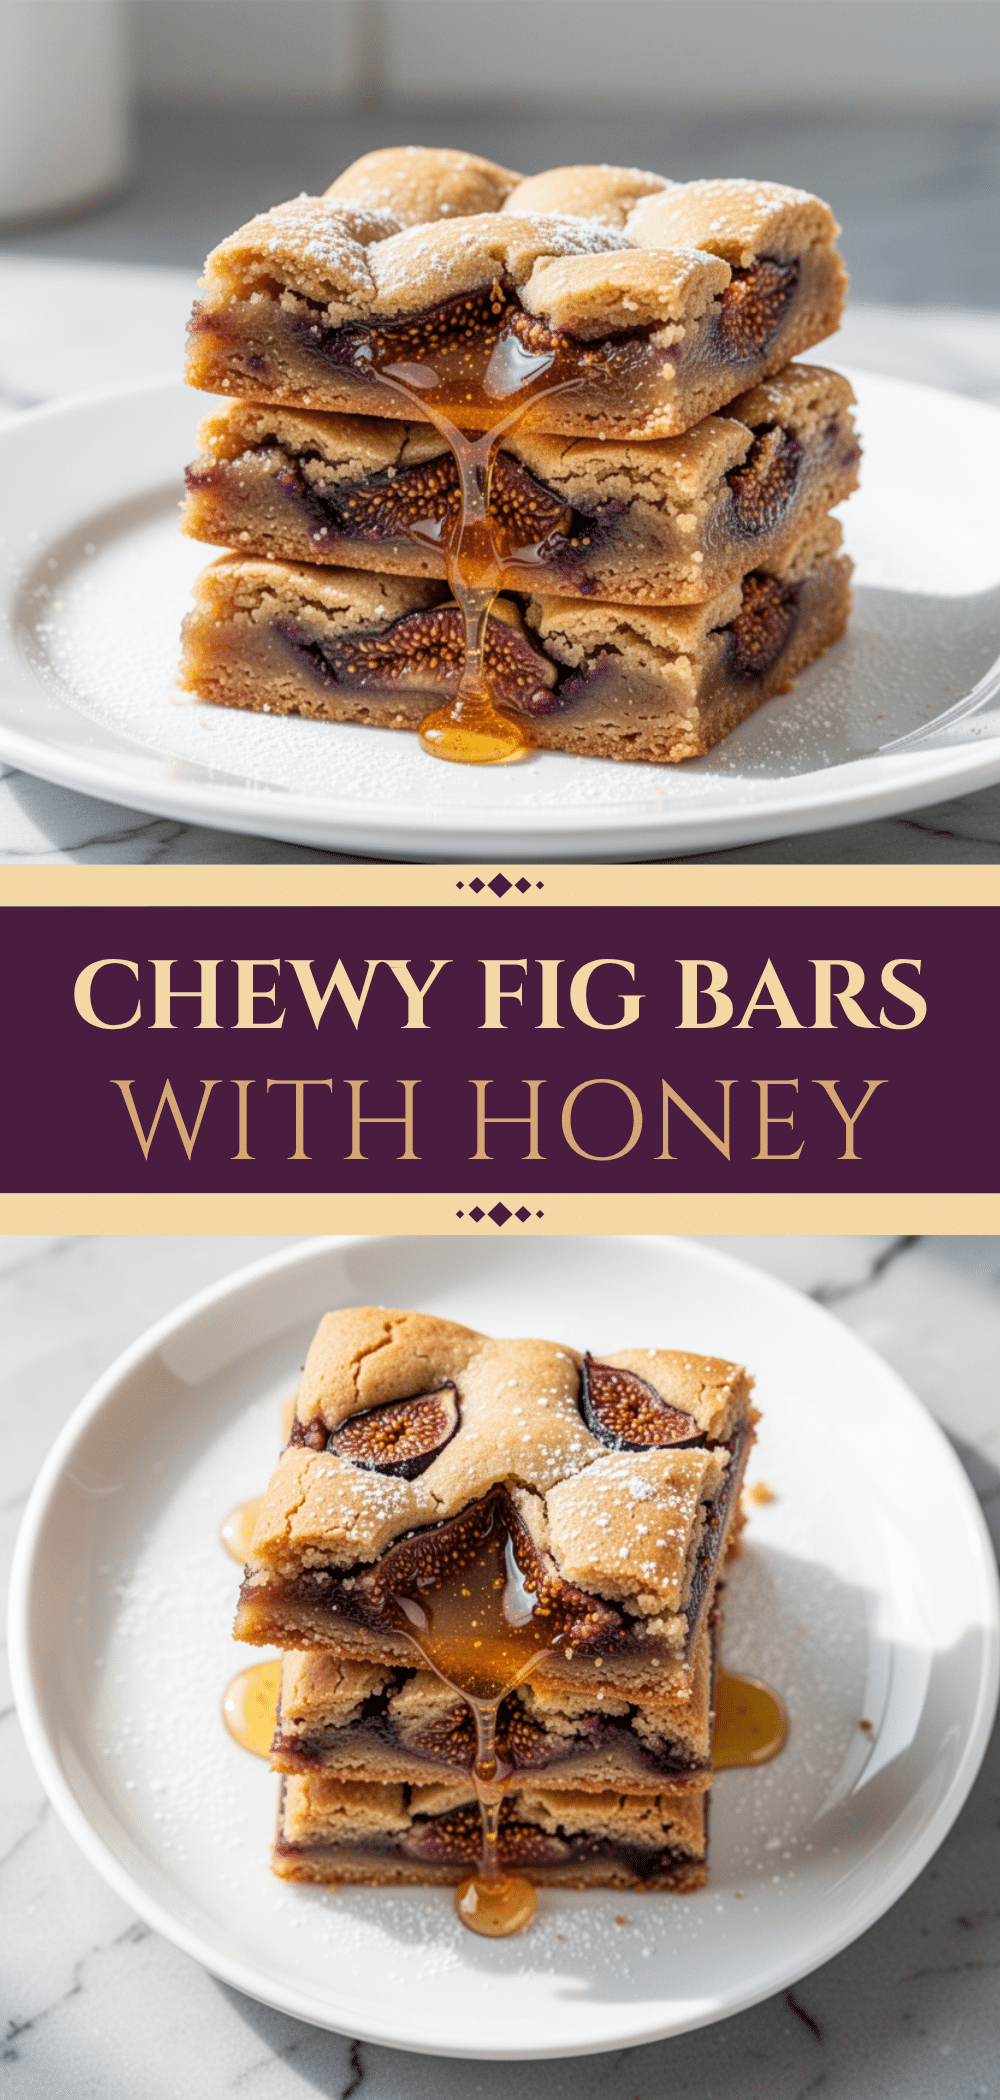
Chewy Homemade Fig Bars: Easy Honey Recipe
- Total Time: 65 minutes
- Yield: 12 servings 1x
Description
These chewy homemade fig bars feature a tender, buttery dough and a rich, sticky honey-fig filling. They are easier to make than store-bought versions and offer a sophisticated, rustic dessert perfect for gifting or family gatherings.
Ingredients
- 2 ½ cups all-purpose flour
- 1 teaspoon baking powder
- ½ teaspoon salt
- ½ cup unsalted butter, softened
- ¾ cup granulated sugar
- 1 large egg
- 1 teaspoon vanilla extract
- 1 cup dried figs, chopped
- ¼ cup honey
- 2 tablespoons orange juice
- ½ teaspoon cinnamon
- ¼ teaspoon clove
- 2–3 tablespoons water
- Powdered sugar (optional, for dusting)
- Lemon zest (optional)
Instructions
- In a medium bowl, whisk together flour, baking powder, and salt. Set aside.
- In a larger bowl, cream softened butter and granulated sugar until light and fluffy (2-3 minutes).
- Add egg and vanilla extract; mix until combined.
- Gradually add dry ingredients to wet ingredients, mixing on low speed until just combined. Do not overmix.
- Divide dough in half, flatten into disks, wrap in plastic, and refrigerate for at least 30 minutes.
- While dough chills, chop dried figs. In a medium saucepan, combine figs, honey, orange juice, cinnamon, clove, and 2 tablespoons water.
- Heat over medium-low heat, stirring frequently, for 5-7 minutes until figs are soft and mixture thickens. Remove from heat and let cool slightly.
- Preheat oven to 350°F (175°C). Grease a 9×13 inch baking pan.
- Roll out one dough disk into a rectangle (⅛ inch thick) and press into the pan. Trim excess and dock with a fork.
- Spread the cooled fig filling evenly over the crust, leaving a ½ inch border.
- Roll out the second dough disk. Cut into strips for a lattice top or lay flat with slits. Place on top, seal edges, and prick with a fork.
- Bake for 25-30 minutes until golden brown.
- Cool completely in the pan on a wire rack before cutting.
Notes
Chill the dough thoroughly to prevent shrinking and sticking. Ensure fig bars cool completely before cutting to allow the filling to set. Store in an airtight container at room temperature for up to 5 days. For vegan version, use vegan butter and a flax egg. For gluten-free, use a 1:1 gluten-free flour blend.
- Prep Time: 35 minutes
- Cook Time: 30 minutes
- Category: Dessert
- Cuisine: American
Nutrition
- Serving Size: 1 bar
- Calories: 180
- Sugar: 18
- Sodium: 120
- Fat: 5
- Saturated Fat: 3
- Carbohydrates: 32
- Fiber: 2
- Protein: 2
Keywords: fig bars, honey fig bars, homemade cookies, dessert recipe, easy baking, fig filling, chewy cookies



