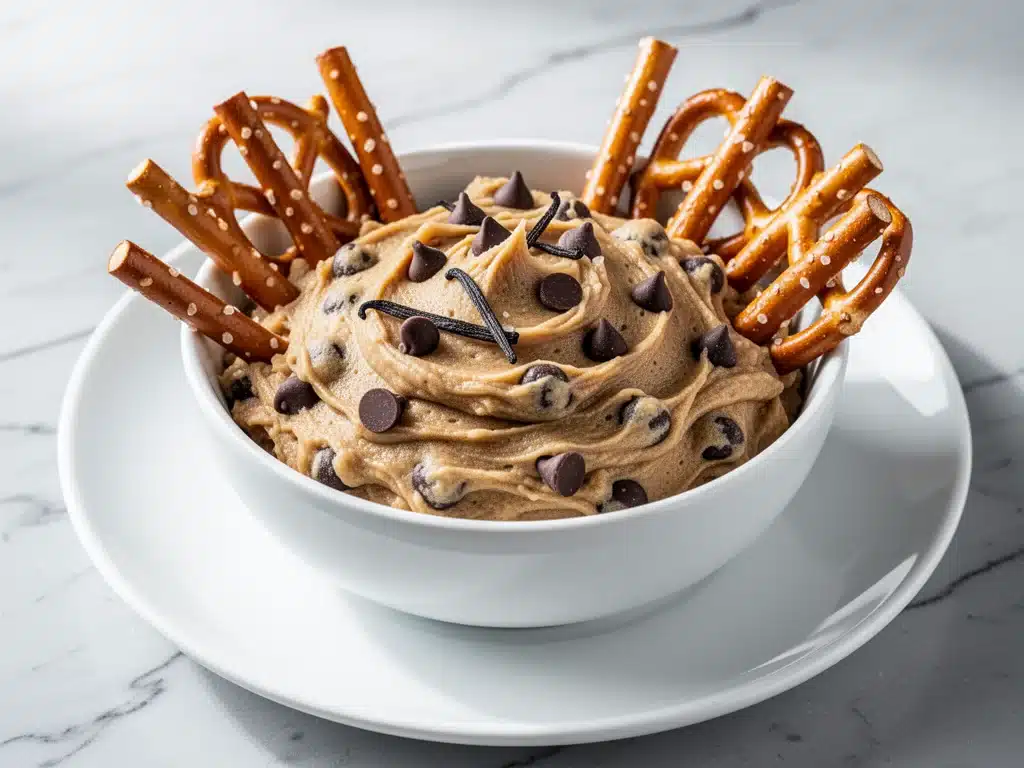
I’ll be honest with you. Last Sunday, I was staring at my television, trying to look like I cared about the game, when my phone buzzed. It was a text from my friend Sarah: “I’m bringing dessert. Surprise.” Twenty minutes later, she walked in with a bowl of something that looked suspiciously like raw cookie dough. I raised an eyebrow. “You’re bringing *raw* dough to a football party?” She just smiled and said, “Wait for it.”
She didn’t just bring raw dough. She brought Chocolate Chip Cookie Dough Dip. And let me tell you, it was a game-changer. I dipped a graham cracker into it, took one bite, and suddenly the score on the TV didn’t matter anymore. It was sweet, creamy, salty, and tasted exactly like the best part of a chocolate chip cookie, but way easier to eat without getting chocolate all over your fingers during the big play.
Since that Sunday, I’ve been obsessed. I’ve made this dip at least six times for different gatherings—from Super Bowl watch parties to casual Tuesday hangouts. And every single time, it disappears before the second half ends. People ask me for the recipe like I’ve discovered gold. But here’s the secret: it’s not complicated. It’s not baked. It doesn’t require an oven or a mixer if you don’t want to use one.
It’s just five ingredients, a little bit of creativity, and a whole lot of flavor. If you’re looking for a snack that’s better than chips and salsa but still easy enough to eat while cheering for your team, this is it. This Chocolate Chip Cookie Dough Dip is the ultimate crowd-pleaser, and I’m going to walk you through exactly how to make it, why it works, and how to customize it so it fits your specific party needs.
Why You’ll Love This Chocolate Chip Cookie Dough Dip
There are a hundred reasons to make this dip, but honestly, there are three that keep me coming back to the kitchen every game day. It’s not just about the taste (though that’s huge). It’s about how it fits into your life.
Zero Baking Required — Seriously. If you have a bowl and a spoon, you can make this. No preheating the oven, no waiting for cooling racks, no dirty baking sheets. I made this last minute while the main course was roasting, and it took five minutes. Five minutes. That’s less time than it takes to watch a commercial break.
Safety First (Edible Raw Dough) — I know what you’re thinking. “Raw flour? Raw eggs? Are you crazy?” No. This recipe uses heat-treated flour and no eggs, so it’s completely safe to eat. You get the nostalgic taste of eating dough straight from the jar without the salmonella risk. My kids love dipping strawberries into it, and I love that I don’t have to worry about them getting sick. It’s the best of both worlds.
Customizable to Any Theme — This isn’t just chocolate chip. You can swap the chips for M&Ms, add white chocolate, or even swirl in peanut butter. I’ve made a peanut butter version for my husband’s favorite team’s colors, and a white chocolate version for Christmas parties. It’s a blank canvas for your creativity. And the best part? It’s rich enough to feel indulgent but light enough that people keep coming back for more.
This dip has become my go-to when I want to impress without the stress. It’s my answer to “what’s for dessert?” when I’m tired, don’t want to bake, and still want something that tastes homemade. My friends are happy, my family is happy, and I’m happy because I’m not stressed about cooking.
Ingredients You’ll Need
Here’s the best part: you probably have most of these ingredients already. I’m particular about three things here, and I’ll tell you exactly why they matter. This isn’t a complicated list, but getting the details right makes all the difference.
Softened Cream Cheese (8 ounces / 225g) — This is the base. It needs to be full-fat block cream cheese, not the spreadable kind in a tub. The tub stuff has too much water and air, which makes the dip runny. Let it sit on the counter for 30 minutes before you start. If it’s cold, it won’t mix smoothly, and you’ll end up with lumps. I’ve ruined batches by rushing this step. Don’t make my mistake.
Butter (½ cup / 115g, softened) — Use unsalted butter so you can control the salt. If you only have salted butter, reduce the added salt in the recipe by half. Softened means it should yield to gentle pressure but not be melted. Melted butter changes the texture entirely, making it greasy instead of creamy.
Heat-Treated Flour (½ cup / 60g) — This is the magic ingredient. Regular flour has bacteria, so we have to treat it first. You can microwave it for 1-2 minutes or bake it at 350°F (175°C) for 5 minutes. Let it cool completely before using. I usually heat a big batch on Sunday so it’s ready all week. This step is non-negotiable for safety.
Vanilla Extract (1 teaspoon) — Use real vanilla, not imitation. It sounds fancy, but it makes a huge difference in flavor. I use pure vanilla bean paste sometimes for a speckled look and extra depth, but regular extract works fine.
Sea Salt (½ teaspoon) — Salt is the flavor enhancer. It balances the sweetness of the sugar. Don’t skip it. I use flaky sea salt for garnish, but table salt works in the mix.
Chocolate Chips (1 cup / 170g) — Semi-sweet is my favorite because it cuts the sweetness. Milk chocolate makes it sweeter, and dark chocolate makes it more intense. I like a mix of both. Save some extra for sprinkling on top later.
Optional Add-ins — I’ve tried adding a tablespoon of peanut butter into the mix for a salted caramel vibe. It’s amazing. You can also add crushed pretzels for crunch, or white chocolate chips for a sweeter version. Get creative!
Equipment Needed
You don’t need fancy equipment for this. Here’s what I actually use.
Large Mixing Bowl — I use a 4-quart stainless steel bowl. It needs to be big enough to fold in the chocolate chips without spilling. A glass bowl works too, but I like steel for durability.
Electric Hand Mixer or Stand Mixer — You can use a whisk, but it takes forever. A hand mixer is perfect for this. I use my KitchenAid stand mixer on low speed. If you don’t have a mixer, a strong arm and a wooden spoon will work, but you’ll need to be patient.
Spatula — A rubber spatula is essential for scraping the sides of the bowl and folding in the chips. I have a set from IKEA that’s cheap and works great.
Serving Bowl — Use whatever you like. I often serve it in a small crock or a clear glass bowl so people can see the layers. A rustic wooden bowl looks nice too, especially for game day.
Dipper Options — Graham crackers are classic. Pretzel rods add a salty crunch. Strawberries are fresh and light. Apple slices work too. Have a variety on a platter for visual appeal.
How to Make It: Step-by-Step
Alright, let’s make this! I’m walking you through exactly how I do it, including the little tricks I’ve picked up over time.
Step 1: Heat Treat Your Flour (5 minutes)
If you haven’t done this yet, do it first. Spread your flour on a microwave-safe plate. Microwave on high for 1-2 minutes, stirring every 30 seconds. It should reach 160°F (70°C) to kill any bacteria. Let it cool completely. If it’s warm when you add it to the cream cheese, it will melt the butter and ruin the texture. I usually do this the day before.
Step 2: Cream the Butter and Cream Cheese (3 minutes)
In your large bowl, add the softened butter and cream cheese. Beat on medium-high speed until smooth and creamy. This should take about 2-3 minutes. Scrape down the sides of the bowl with your spatula. If there are lumps, keep beating. You want a completely smooth base. This step is crucial for the final texture.
Step 3: Add Sugar and Vanilla (2 minutes)
Add the powdered sugar and vanilla extract. Beat on low speed until combined, then increase to medium speed. Beat for another minute until fluffy. Scrape the sides again. The mixture should look light and airy. If it’s too thick, you can add a splash of milk, but usually, it’s perfect as is.
Step 4: Fold in the Flour and Chips (2 minutes)
Now, gently fold in the cooled heat-treated flour using your spatula. Do this by hand. You want to incorporate it without overmixing. Once the flour is distributed, add the chocolate chips. Fold them in gently. Don’t chop them up. You want distinct chunks of dough in every bite.
Step 5: Chill and Serve (30 minutes)
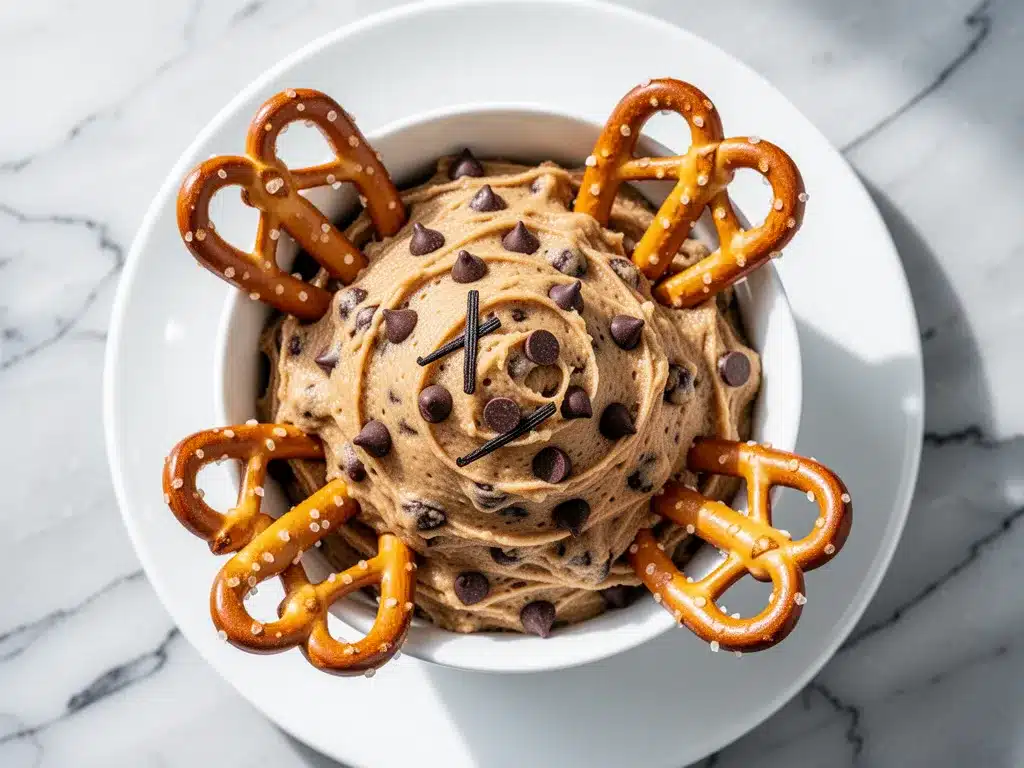
Cover the bowl with plastic wrap and refrigerate for at least 30 minutes. This firms up the dip and makes it easier to scoop. Before serving, give it a quick stir. Spoon it into your serving bowl. Sprinkle extra chocolate chips on top for presentation. Add your dippers to the side.
Total Time: About 15 minutes active, plus 30 minutes chilling.
Expert Tips & Tricks
Here’s everything I’ve learned from making this dozens of times. These tips will save you from my mistakes.
Don’t Skip the Chilling
This dip is soft right after mixing. Chilling it firms up the butter and cream cheese, making it scoopable and more like actual cookie dough texture. If you serve it immediately, it’s more like a thick frosting. Chill it for 30 minutes minimum.
Use Room Temperature Ingredients
I can’t stress this enough. Cold cream cheese and cold butter will create lumps that are impossible to fix without overmixing. Take them out of the fridge at least 30 minutes before you start. If you forget, you can soften them in the microwave for 10-second bursts, but be careful not to melt them.
Fold, Don’t Beat
When adding the flour and chips, use a spatula and fold gently. If you use the mixer at this stage, you’ll break up the chocolate chips and overwork the flour, which can make the dough tough. Gentle folding keeps it light and chunky.
Save Extra Chips
I always save a quarter cup of chocolate chips to sprinkle on top of the finished dip. It looks professional and invites people to dig in. It’s a small detail that makes a big visual impact.
Make Ahead Strategy
This dip actually tastes better the next day. The flavors meld together, and the texture firms up. I often make it the night before a party. It keeps in the fridge for up to 3 days.
Variations & Substitutions
Once you’ve nailed the basic version, here’s how you can mix it up. I’ve tried all of these.
Peanut Butter Cookie Dough
Add 2 tablespoons of creamy peanut butter to the cream cheese mixture. Use chocolate chips or peanut butter chips. This is a hit with my husband. It’s salty and sweet, perfect for game day.
White Chocolate Chip
Swap semi-sweet chips for white chocolate chips. It’s sweeter and milder. Great for kids or people who don’t like dark chocolate.
M&M’s Version
Use M&Ms instead of chips. The candy shell adds a nice crunch. I use red and white M&Ms for holidays, or team colors for game day. It’s fun and festive.
Gluten-Free
Use gluten-free flour for the heat treatment step. Everything else is naturally gluten-free. I’ve used Bob’s Red Mill gluten-free flour, and it works perfectly.
Vegan
Use vegan cream cheese and vegan butter. Use vegan chocolate chips. The texture might be slightly softer, but it’s still delicious. I’ve made this for my vegan friend, and she loved it.
Serving & Storage
How to Serve:
I usually serve this straight from the fridge in a nice bowl with graham crackers, pretzel rods, and apple slices on the side. It looks rustic and stays cold. But here are other ways I’ve enjoyed it:
Side Dishes:
– Fresh fruit platter (strawberries, bananas, apples)
– Pretzel crisps or pretzel rods
– Graham crackers
– Shortbread cookies
Storage Instructions:
Store in an airtight container in the fridge for up to 3 days. The dip will firm up in the fridge. Let it sit at room temperature for 10 minutes before serving if it’s too hard. It does not freeze well because the cream cheese texture changes. Make it fresh or store in the fridge.
Pro tip: If leftovers are drying out, stir in a teaspoon of milk when reheating. Brings back that creamy texture.
Nutrition Information
I’m not a nutritionist, but here’s the breakdown if you’re tracking.
Per Serving (based on 10 servings):
- Calories: 220
- Protein: 3g
- Carbs: 25g
- Fiber: 1g
- Sugar: 20g
- Fat: 14g
- Saturated Fat: 8g
- Cholesterol: 35mg
- Sodium: 120mg
What’s Good:
– Decent protein from cream cheese
– Easy to customize for dietary needs
– More filling than it looks
What to Know:
– Higher in calories from cream cheese and butter
– Contains dairy
– Moderate sugar (use sugar substitute if needed)
My Take:
Look, this is a treat. It’s sweet and rich. It’s not a diet recipe. But it’s way better than store-bought dip, costs less, and I know exactly what’s in it. When I want to make it lighter, I use reduced-fat cream cheese and less sugar. But usually? I just eat a reasonable portion and enjoy it.
Final Thoughts
So that’s my go-to Chocolate Chip Cookie Dough Dip! I’ve probably talked your ear off at this point, but when you make a recipe this often, you have a lot to say about it.
This has saved game day desserts more times than I can count. It’s my answer to “what’s for dessert?” when I’m tired, don’t want to bake, and still want something that tastes really good. My kids are happy, my friends are happy, and I’m happy because I’m not stressed about cooking.
Make it yours! Try different add-ins, swap in your favorite chips, adjust the sweetness. The best recipes are the ones you adapt to your family’s tastes.
If you make this, drop a comment and let me know what you think! I love hearing how recipes turn out in your kitchen. And if something doesn’t work, tell me that too—I’m here to help troubleshoot.
Happy snacking! And I hope your kitchen smells half as good as mine does right now.
Frequently Asked Questions
Can I use raw flour in this recipe?
No, you should not use raw flour. Raw flour can contain harmful bacteria like E. coli. Always heat-treat your flour before using it in no-bake recipes. You can microwave it for 1-2 minutes or bake it at 350°F for 5 minutes. Let it cool completely before using.
Why is my dip too runny?
This usually happens if the cream cheese or butter was too warm or melted. Make sure they are softened but not liquid. Also, make sure you chilled the dip for at least 30 minutes. If it’s still runny, you can add a little more powdered sugar or chill it longer.
Can I make this ahead for a party?
Yes! This dip actually tastes better the next day. You can make it up to 2 days ahead. Store it in an airtight container in the fridge. Let it sit at room temperature for 10 minutes before serving to soften slightly.
Can I freeze this dip?
Honestly, this doesn’t freeze well because of the dairy. The cream cheese texture changes when thawed, becoming grainy. Make it fresh or store in the fridge for up to 3 days.
Can I use a food processor?
You can, but be careful not to overmix. A food processor can easily turn the dip into a paste. Use the pulse function and stop as soon as the ingredients are combined. Hand mixing is safer for texture.
What dippers go best with this dip?
Graham crackers are classic. Pretzel rods add a salty crunch. Strawberries are fresh and light. Apple slices work too. Have a variety on a platter for visual appeal. I also like shortbread cookies.
Can I make this gluten-free?
Absolutely! Just use gluten-free flour for the heat treatment step. Everything else is naturally gluten-free. I’ve used Bob’s Red Mill gluten-free flour, and it works perfectly.
Pin This Recipe!


Chocolate Chip Cookie Dough Dip
- Total Time: 45 minutes
- Yield: 10 servings 1x
Description
A safe, no-bake edible cookie dough dip made with heat-treated flour and cream cheese. It’s creamy, sweet, and perfect for game day snacking with graham crackers or fruit.
Ingredients
- 8 ounces (225g) full-fat block cream cheese, softened
- ½ cup (115g) unsalted butter, softened
- ½ cup (60g) heat-treated flour
- 1 teaspoon vanilla extract
- ½ teaspoon sea salt
- 1 cup (170g) semi-sweet chocolate chips
- Powdered sugar (amount implied by instructions, typically 1-2 cups based on texture)
Instructions
- Heat treat the flour by microwaving on high for 1-2 minutes (stirring every 30 seconds) until it reaches 160°F (70°C). Let it cool completely.
- In a large mixing bowl, beat the softened butter and cream cheese on medium-high speed until smooth and creamy, about 2-3 minutes. Scrape down the sides.
- Add powdered sugar and vanilla extract. Beat on low until combined, then increase to medium speed and beat for another minute until fluffy. Scrape sides again.
- Gently fold in the cooled heat-treated flour using a spatula until incorporated.
- Fold in the chocolate chips gently, ensuring they remain in distinct chunks.
- Cover the bowl with plastic wrap and refrigerate for at least 30 minutes to firm up.
- Before serving, give the dip a quick stir, spoon into a serving bowl, and sprinkle with extra chocolate chips if desired.
Notes
Ensure cream cheese and butter are softened but not melted to avoid a runny dip. Heat-treating the flour is essential for safety to kill bacteria. The dip can be made ahead and stored in the fridge for up to 3 days. It does not freeze well due to the dairy content.
- Prep Time: 15 minutes
- Cook Time: 0 minutes
- Category: Dessert
- Cuisine: American
Nutrition
- Serving Size: Approximately 1/10th
- Calories: 220
- Sugar: 20
- Sodium: 120
- Fat: 14
- Saturated Fat: 8
- Carbohydrates: 25
- Fiber: 1
- Protein: 3
Keywords: cookie dough dip, edible cookie dough, game day snack, no bake dessert, chocolate chip dip, easy appetizer