I still remember the first time I made this Dutch Apple Pie with Buttery Crumb Topping. I was twenty-two, living in a tiny apartment with a oven that ran way too hot, and I was trying to impress a date who happened to be a pastry chef. Yeah, I was nervous. I wanted to show him I wasn’t just a microwave dinner kind of girl. I decided to make a pie from scratch. I followed some fancy recipe that called for a flaky, buttery bottom crust and a lattice top. I spent three hours rolling dough, sweating over a hot stove, and praying the crust wouldn’t shrink into a sad little puck.
It didn’t. The bottom was soggy. The top was uneven. And the filling? Too tart, not enough sweetness. He was polite, but I could tell he was missing something. I ate the whole thing myself, staring at the empty plate, feeling like a total failure.
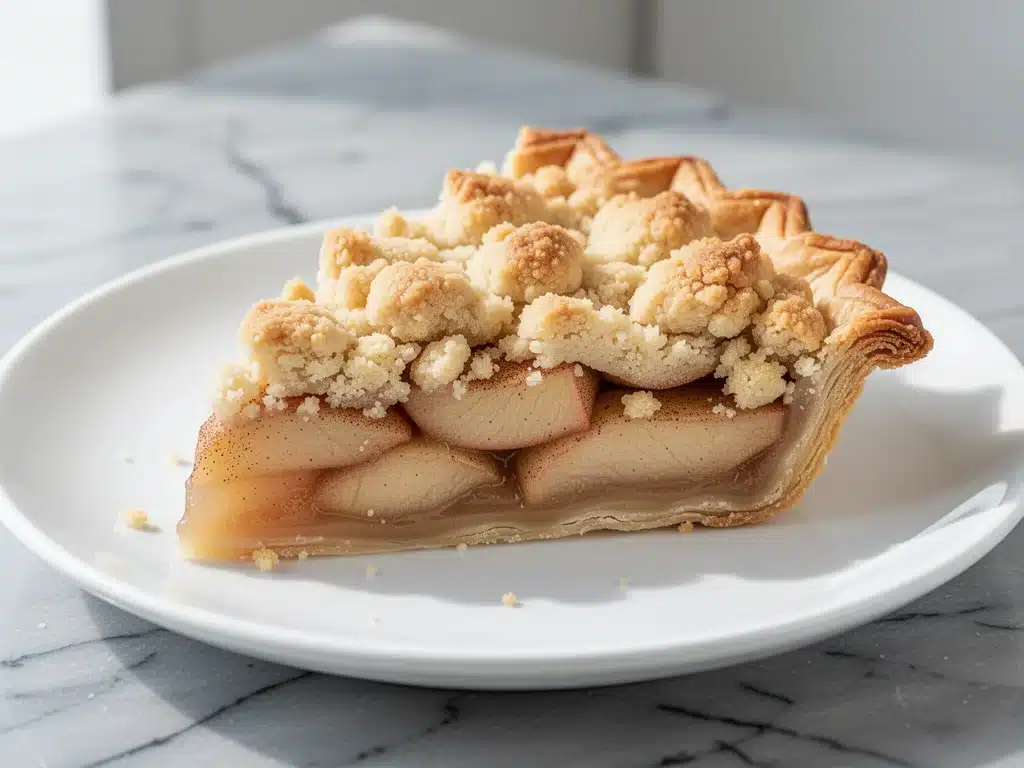
Then, a few months later, I was at a small bakery in Vermont. I ordered a slice of “Dutch Apple Pie.” It didn’t have a bottom crust. It was just tender, spiced apples piled high under a thick, crunchy, buttery streusel topping. The texture contrast was insane. The crunch of the crumb against the soft, warm apple. It was simple. It was honest. And it was better than any perfect lattice pie I’d ever made.
That was the moment I stopped trying to be fancy and started cooking for flavor. This Dutch Apple Pie with Buttery Crumb Topping is my answer to that old failure. It’s easier. It’s more forgiving. And honestly? It tastes better. I’ve made this pie at least fifty times since that Vermont trip—sometimes for holiday dinners, sometimes for random Tuesday snacks when I need comfort. It’s the kind of dessert that smells like heaven while it bakes and disappears from the counter in twenty minutes flat.
If you’re looking for a dessert that feels homemade but doesn’t require a degree in pastry science, this is it. It’s got that classic cinnamon-apple flavor we all crave, but the crumb topping makes it feel like a cross between a pie and a crumble. It’s rustic, it’s delicious, and it’s going to become your new favorite way to eat apples.
Why You’ll Love This Recipe
There are a hundred ways to make apple dessert, but this specific version hits a sweet spot that keeps me coming back. Here’s why this Dutch Apple Pie with Buttery Crumb Topping has taken over my kitchen routine:
- Zero Pie Crust Stress — Seriously, the best part? No rolling pin required. If you’ve ever fought with dough that keeps tearing or shrinking, you know the joy of skipping the crust entirely. This recipe focuses on the filling and the topping, which is where the real magic happens.
- Texture Heaven — I’m obsessed with contrast. You get the soft, jammy, warm apples on the bottom, and then that thick, sandy, buttery crumb on top. It’s like eating a cookie and a pie in one bite. The crunch lasts, too—it doesn’t get soggy even if you let it sit for an hour.
- Super Fast Prep — Because you’re not making a crust, you’re chopping and tossing. I can have this pie prepped and in the oven in under 15 minutes. That’s faster than ordering pizza. It’s my go-to when guests show up unannounced (which, let’s be honest, happens more often than I’d like to admit).
- Uses Any Apple — I’m not picky here. I’ve made this with Granny Smiths, Honeycrisps, Galas, and even a mix of whatever is on sale at the grocery store. It works with all of them. The spices and sugar balance out whatever tartness or sweetness the apple brings.
- Leftovers Taste Better — I know, I know, fresh-baked pie is best. But this pie? It actually improves overnight. The crumb topping soaks up a little moisture from the apples, becoming almost like a caramelized crunch. I deliberately make extra for breakfast. Seriously. It’s amazing with a little whipped cream or just eaten cold out of the fridge.
This isn’t just a pie. It’s a mood. It’s comfort food that doesn’t require a lot of effort but delivers a lot of satisfaction. My family fights over the bottom layer (the apple-heavy part) and the top layer (the crumb-heavy part). It’s the perfect compromise dessert.
Ingredients You’ll Need
Here’s the good news: you probably have most of this stuff in your pantry already. This isn’t a recipe that requires a special trip to a specialty store. It’s simple, honest ingredients that do the heavy lifting.
For the Apple Filling
Apples (6-7 medium, about 3 lbs / 1.4 kg) — I recommend a mix. I like 3 Granny Smiths for tartness and structure, and 3 Honeycrisps or Fuji for sweetness. Peel them, core them, and slice them about ¼ inch thick. Don’t make them too thin or they’ll turn into applesauce. Don’t make them too thick or they won’t cook through. Uniform slices are key.
Granulated Sugar (½ cup / 100g) — This balances the tartness of the apples. If you’re using sweeter apples like Gala, you can reduce this to ⅓ cup. If you’re using very tart Green Apples, stick with ½ cup.
Ground Cinnamon (1 tablespoon) — Don’t skimp. Cinnamon is the soul of this pie. If it’s old and dusty, buy new. Fresh cinnamon makes a huge difference in flavor intensity.
Nutmeg (½ teaspoon) — Just a pinch. It adds that warm, cozy background note. Freshly grated is best, but pre-ground works fine.
Vanilla Extract (1 teaspoon) — Real vanilla, please. The cheap imitation stuff can taste chemical. It enhances the apple flavor without overpowering it.
Lemon Juice (1 tablespoon) — This prevents the apples from browning and adds a little brightness that cuts through the sweetness. Squeeze half a lemon and you’re good.
Cornstarch (2 tablespoons) — This thickens the juices that the apples release while baking. Without it, you’ll have a soupy pie. Mix it with a tablespoon of cold water to make a slurry before adding it to the apples.
For the Buttery Crumb Topping
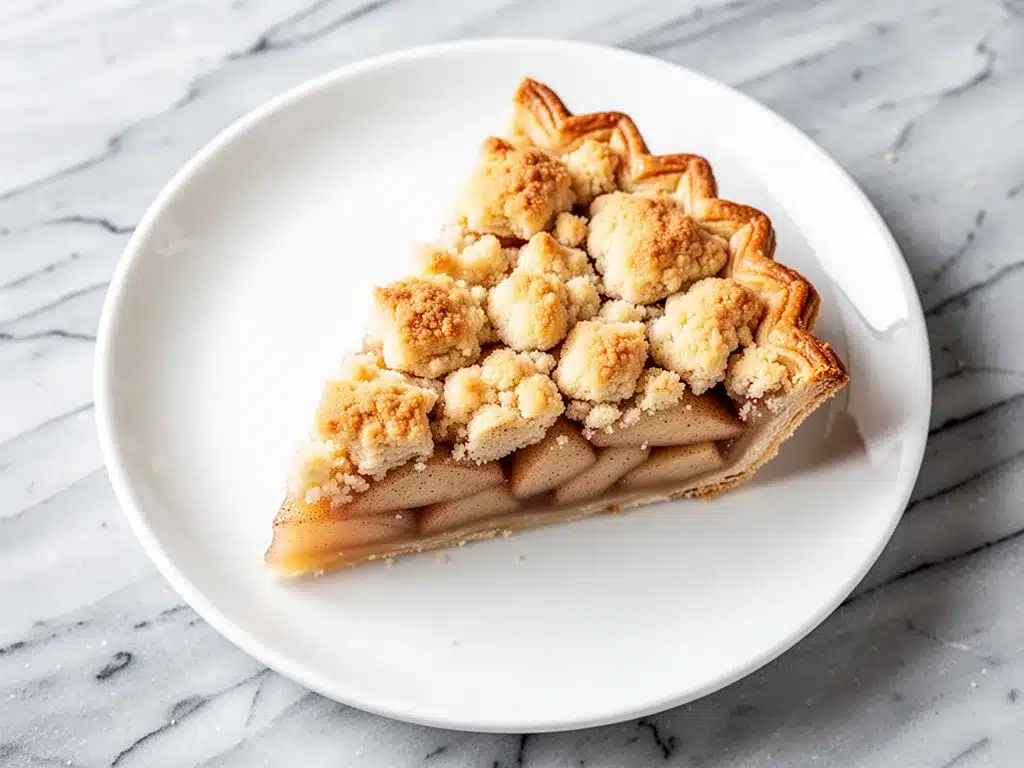
All-Purpose Flour (1 cup / 125g) — This is the base of the crumb. Don’t try to use whole wheat here; it’ll make the topping too dense and bitter.
Brown Sugar (½ cup / 100g, packed) — This gives the crumb its caramel-like flavor and chewiness. Light or dark brown sugar both work, but dark has a deeper molasses note.
Unsalted Butter (½ cup / 113g, cold and cubed) — This is crucial. Cold butter creates those distinct, crunchy crumb clusters. If you use melted butter, you’ll just get a cakey topping. Cut the butter into small cubes before you start.
Chopped Pecans or Walnuts (½ cup / 60g, optional) — I love adding nuts for extra crunch and richness. Pecans feel more traditional for apple pie, but walnuts work too. Chop them roughly.
Pinch of Salt — Always add a pinch of salt to sweet batters. It makes the flavors pop.
Equipment Needed
You don’t need fancy gadgets for this. Here’s what I actually use in my kitchen:
9-Inch Pie Dish — I prefer glass or ceramic. It distributes heat evenly. Metal pans can sometimes burn the bottom. If you don’t have a pie dish, a deep-dish baking pan or even a large casserole dish works.
Large Mixing Bowl — For tossing the apples with sugar and spices. Something wide so you can get all the apples coated.
Small Bowl — For mixing the cornstarch slurry.
Fork or Pastry Blender — To cut the butter into the flour for the crumb topping. A fork works perfectly fine. I use a fork because it’s faster and easier to clean.
Peeler and Knife — For prepping the apples. A Y-peeler is easiest, but a paring knife works too.
How to Make It: Step-by-Step
Alright, let’s get baking. This is straightforward, but there are a few tricks to make sure that crumb topping stays crunchy and the apples stay tender.
Step 1: Prep Your Oven and Pan (5 minutes)
Preheat your oven to 375°F (190°C). Make sure the rack is in the center position. Lightly grease your 9-inch pie dish with butter or non-stick spray. This helps the bottom crust (if you use one, though this recipe is crustless) and makes cleanup easier.
Step 2: Mix the Apple Filling (10 minutes)
Peel, core, and slice your apples. Toss them in a large bowl with the granulated sugar, cinnamon, nutmeg, vanilla, and lemon juice. Make sure every slice is coated. Sprinkle the cornstarch slurry over the apples and toss again. The mixture will look wet and glossy—that’s good. Let it sit for 10 minutes while you make the topping. This draws out some of the juices, which helps thicken the pie later.
Step 3: Make the Crumb Topping (5 minutes)
In a separate bowl, combine the flour, brown sugar, salt, and chopped nuts (if using). Add the cold, cubed butter. Use a fork or your fingers to work the butter into the flour mixture. You’re looking for coarse crumbs with some pea-sized chunks. Don’t overmix it into a paste. The chunks are what make it crunchy. If the butter gets too warm, pop the bowl in the fridge for 5 minutes.
Step 4: Assemble the Pie (2 minutes)
Pour the apple mixture into the prepared pie dish. Spread it out evenly. Take the crumb topping and sprinkle it generously over the apples. You want a thick layer—don’t be shy. Press it down slightly so it adheres to the apples, but don’t pack it tight. You want air pockets for it to bake up fluffy and crisp.
Step 5: Bake (45-55 minutes)
Place the pie in the oven. Bake for 45-55 minutes. The pie is done when the crumb topping is golden brown and the filling is bubbling up through the crumbs. If the top starts getting too dark after 30 minutes, loosely tent it with aluminum foil. This prevents burning while the apples finish cooking.
Step 6: Cool (30 minutes)
This is the hardest part. Let the pie cool for at least 30 minutes before slicing. The filling is liquid hot when it comes out of the oven. If you cut it immediately, it’ll be soupy. Cooling allows the cornstarch to set and the juices to thicken into a delicious sauce.
Expert Tips & Tricks
Here’s everything I’ve learned from making this dozens of times. These tips will save you from my mistakes.
Keep the Butter Cold
I can’t stress this enough. If your butter is soft, you’ll lose the crumb texture. Cube it straight from the fridge. If your kitchen is hot, chill the flour mixture for 10 minutes before adding the butter. Cold butter = crunchy crumb. Warm butter = cakey topping.
Don’t Skip the Resting Time
I know you want to eat it now. But wait 30 minutes. The structure of the pie depends on the starch setting. If you cut it too soon, you’ll get a mess. If you wait, you get perfect slices.
Use a Baking Sheet
Place your pie dish on a baking sheet before putting it in the oven. Apple juice bubbles up and can burn onto the bottom of your oven. The sheet catches the mess and makes cleanup a breeze.
Add a Little Tapioca
If you’re using very juicy apples, swap half the cornstarch for instant tapioca. It handles high moisture better and gives a clearer, glossier sauce. But cornstarch works 95% of the time.
Variations & Substitutions
Once you’ve nailed the basic version, here’s how you can mix it up. I’ve tried all of these.
Maple Pecan Version
Replace the brown sugar with maple sugar or add 2 tablespoons of pure maple syrup to the crumb topping. Add extra pecans. It tastes like a Thanksgiving dessert.
Cheddar Cheese Twist
Sprinkle ½ cup of sharp cheddar cheese over the apples before adding the crumb topping. The salty cheese against the sweet apple and cinnamon is a classic Midwest combination. It’s savory and sweet in the best way.
Caramel Drizzle
After baking, drizzle warm caramel sauce over the slices. Or, stir 2 tablespoons of caramel into the apple filling before baking for a deeper flavor.
Gluten-Free
Use a 1:1 gluten-free flour blend for the crumb topping. It works perfectly. Make sure your cornstarch is certified GF if you’re sensitive.
Dairy-Free
Use cold vegan butter sticks (like Miyoko’s or Earth Balance) in the crumb topping. It behaves just like dairy butter. The result is almost identical.
Serving & Storage
How to Serve:
I serve this warm, right out of the oven or slightly cooled. It’s amazing with a scoop of vanilla ice cream or a dollop of whipped cream. The cold cream against the hot pie is the ultimate texture experience. I also like it with a slice of sharp cheddar cheese on the side, if you want to get fancy.
Storage:
Store leftovers at room temperature, covered with foil or plastic wrap, for up to 2 days. After that, move it to the fridge. The crumb topping will soften slightly in the fridge, but the flavor stays good.
Reheating:
To reheat, warm slices in the microwave for 30-60 seconds, or in a 350°F oven for 10 minutes. The oven is better if you want to restore some crunch to the topping.
Freezing:
You can freeze this pie! Bake it, let it cool completely, then wrap it tightly in plastic and foil. It freezes well for up to 3 months. Thaw overnight in the fridge and reheat in the oven. The texture might be slightly softer, but it’s still delicious.
Nutrition Information
I’m not a nutritionist, but here’s the breakdown if you’re tracking. This is a treat, so enjoy it!
Per Serving (based on 8 slices):
- Calories: 320
- Protein: 3g
- Carbs: 52g
- Fiber: 4g
- Sugar: 32g
- Fat: 12g
- Saturated Fat: 6g
- Sodium: 150mg
It’s rich in carbs from the fruit and sugar, and has a good amount of fiber from the apples. The fat comes from the butter and nuts. It’s not a diet food, but it’s a honest, whole-food dessert. Much better than a processed candy bar.
Final Thoughts
So that’s my Dutch Apple Pie with Buttery Crumb Topping! I’m probably biased because I made it after a bad pie experience, but I truly believe this is the best way to eat apples in the fall. It’s easier than pie, more substantial than crumble, and infinitely more delicious than store-bought.
Make it for your family, your neighbors, or just for yourself on a quiet Sunday. It’s the kind of recipe that makes your house smell like a bakery. If you make it, drop a comment and let me know how it turns out. I love hearing about your kitchen adventures. And if you’re looking for other easy desserts, check out my Cinnamon Roll Apple Cobbler or my Banana Cream Pudding. They’re all crowd-pleasers!
Happy baking! I hope your kitchen smells amazing.
Frequently Asked Questions
Can I use frozen apples?
You can, but thaw them first and drain the excess liquid. Frozen apples release a lot of water, so you might need to add an extra tablespoon of cornstarch. Fresh apples are best for texture, but frozen works in a pinch.
Why did my crumb topping get soggy?
This usually happens if the topping was too wet (butter was too warm) or if the pie wasn’t baked long enough. Make sure the filling is bubbling when you take it out. Also, let it cool completely before slicing. The moisture needs time to set.
Can I make this ahead of time?
Yes! You can assemble the pie the night before. Cover it and refrigerate. When you’re ready to bake, take it out and let it sit at room temperature for 20 minutes while the oven preheats. You might need to add 5-10 minutes to the bake time since it’s starting cold.
What’s the difference between Dutch Apple Pie and regular Apple Pie?
Regular apple pie usually has a top and bottom crust, often with a lattice top. Dutch Apple Pie typically has no bottom crust (or a shortbread-like base) and is topped with a thick, buttery crumb streusel. It’s more like a crumble than a traditional pie.
Can I use other nuts?
Absolutely. Pecans are traditional, but walnuts, hazelnuts, or even almonds work great. Just make sure they’re chopped to a similar size so they distribute evenly.
Why is my filling too runny?
You might not have used enough thickener, or the apples were very juicy. Next time, add an extra tablespoon of cornstarch. Also, make sure you’re cooling the pie for at least 30 minutes. The sauce thickens as it cools.
Can I double this recipe?
Yes, but you’ll need a 9×13 inch baking dish. Increase the bake time by 10-15 minutes. Check for doneness by looking for bubbling juices and a golden top.
Pin This Recipe!
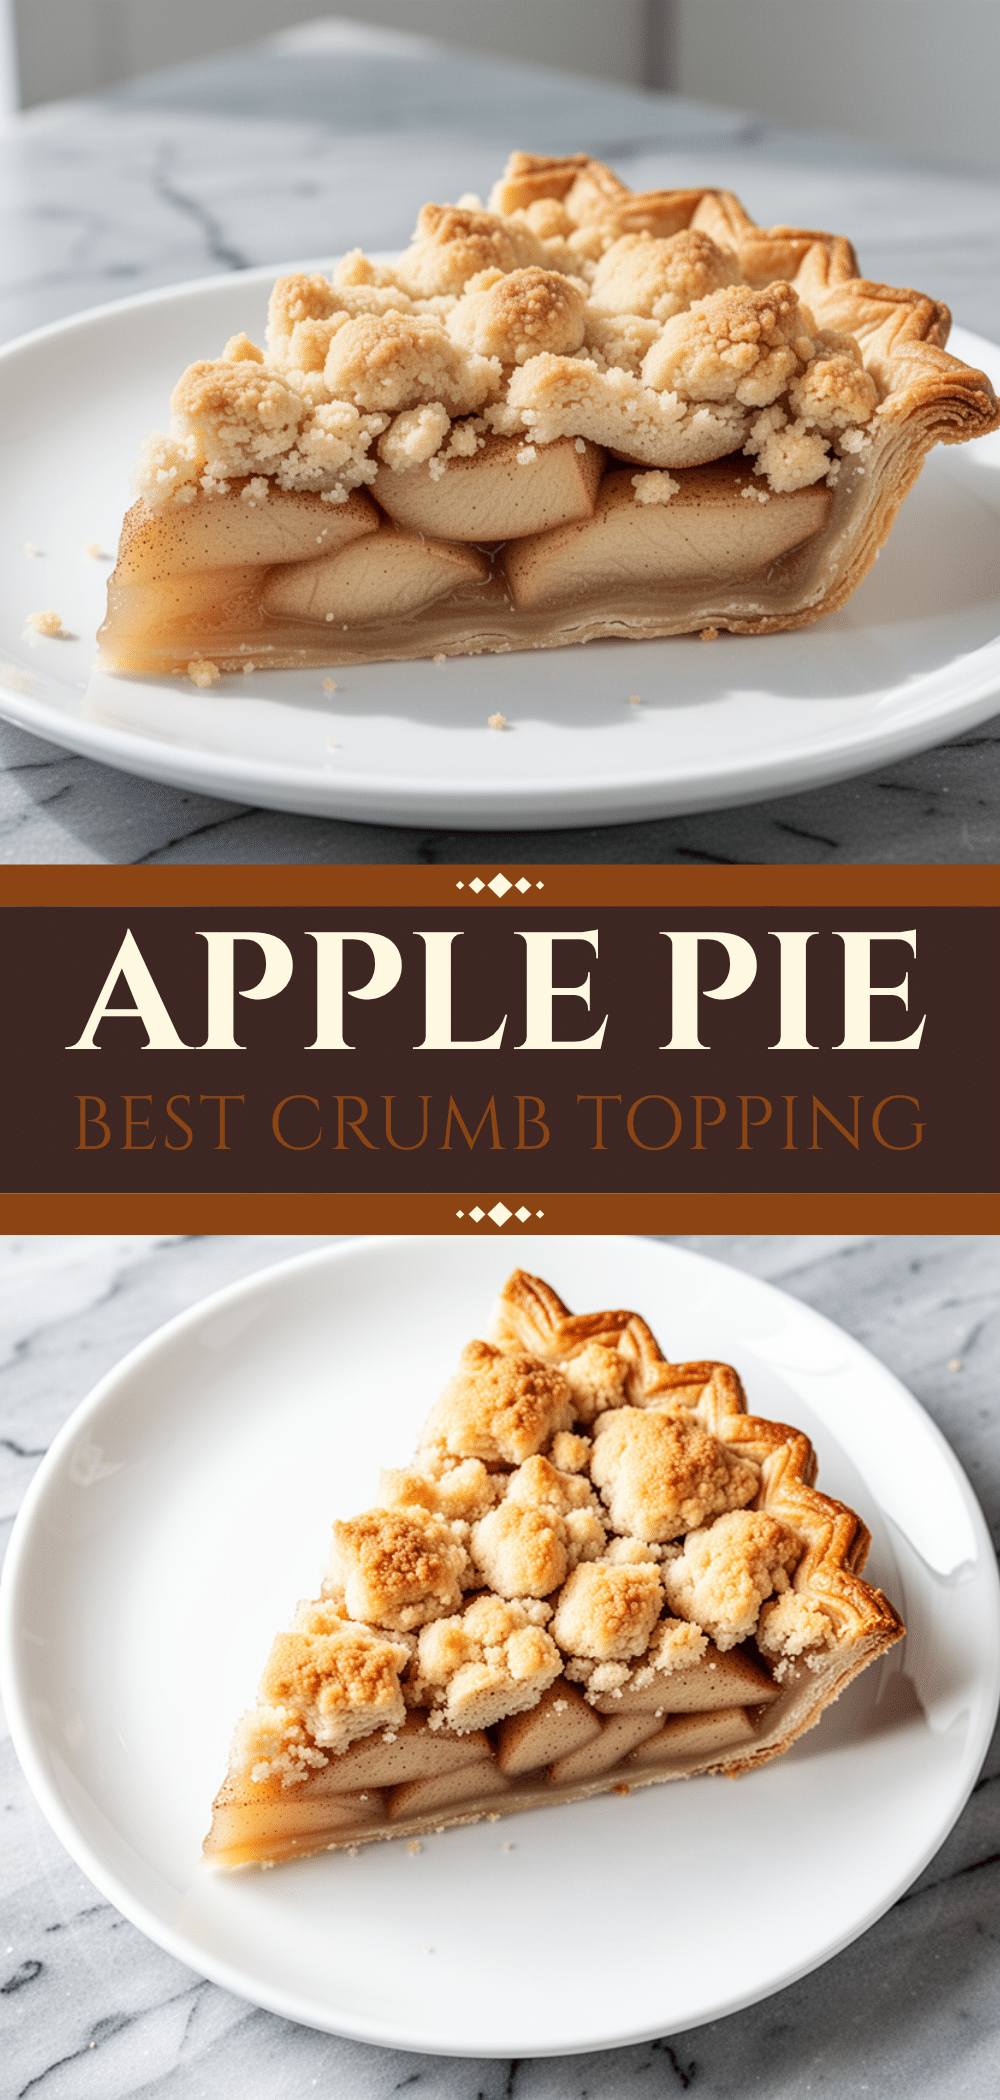
Dutch Apple Pie with Buttery Crumb Topping
- Total Time: 1 hour 10 minutes
- Yield: 8 servings 1x
Description
A rustic, crustless apple pie featuring tender spiced apples topped with a thick, crunchy, buttery streusel. This forgiving dessert offers the best of both pie and crumble without the stress of rolling dough.
Ingredients
- 6–7 medium apples (about 3 lbs / 1.4 kg), peeled, cored, and sliced ¼ inch thick (mix of Granny Smith and Honeycrisp/Fuji recommended)
- ½ cup granulated sugar (100g)
- 1 tablespoon ground cinnamon
- ½ teaspoon nutmeg
- 1 teaspoon vanilla extract
- 1 tablespoon lemon juice
- 2 tablespoons cornstarch mixed with 1 tablespoon cold water (slurry)
- 1 cup all-purpose flour (125g)
- ½ cup packed brown sugar (100g)
- ½ cup unsalted butter, cold and cubed (113g)
- ½ cup chopped pecans or walnuts (optional, 60g)
- Pinch of salt
Instructions
- Preheat oven to 375°F (190°C) with the rack in the center position. Lightly grease a 9-inch pie dish.
- In a large bowl, toss sliced apples with granulated sugar, cinnamon, nutmeg, vanilla, and lemon juice until evenly coated.
- Add the cornstarch slurry to the apples and toss again to coat. Let the mixture sit for 10 minutes to draw out juices.
- In a separate bowl, combine flour, brown sugar, salt, and chopped nuts (if using).
- Add the cold, cubed butter to the flour mixture. Use a fork or pastry blender to cut the butter in until the mixture resembles coarse crumbs with pea-sized chunks.
- Pour the apple mixture into the prepared pie dish and spread evenly.
- Sprinkle the crumb topping generously over the apples. Press down slightly to adhere, but do not pack tight.
- Bake for 45-55 minutes until the topping is golden brown and the filling is bubbling. Tent with foil if the top browns too quickly.
- Cool the pie for at least 30 minutes before slicing to allow the filling to set.
Notes
[‘Keep butter cold to ensure a crunchy crumb topping; warm butter results in a cakey texture.’, ‘Let the pie cool completely for at least 30 minutes to allow the cornstarch to set and prevent a soupy filling.’, ‘Place the pie dish on a baking sheet to catch any bubbling juices and simplify cleanup.’, ‘For gluten-free, use a 1:1 gluten-free flour blend.’, ‘For dairy-free, use cold vegan butter sticks.’]
- Prep Time: 15 minutes
- Cook Time: 45-55 minutes
- Category: Dessert
- Cuisine: American
Nutrition
- Serving Size: 1 slice
- Calories: 320
- Sugar: 32
- Sodium: 150
- Fat: 12
- Saturated Fat: 6
- Carbohydrates: 52
- Fiber: 4
- Protein: 3
Keywords: Dutch Apple Pie, crumb topping, apple dessert, easy pie, no crust pie, fall baking, comfort food