I still remember the exact moment I realized I didn’t need a fancy bakery to get the best cookies in town. It was a rainy Tuesday, and I was staring at a tub of store-bought cookie dough in the freezer. My kids were begging for something sweet, but honestly? I was too tired to bake from scratch. I popped the tray in, set the timer, and waited.
When they came out, they were… fine. Okay. But they lacked that depth of flavor I crave. They tasted like sugar and flour, nothing more. That night, I made a decision: I was done settling for mediocre treats. I wanted cookies that were crispy on the edges, chewy in the center, and tasted like nutty, caramelized heaven. I wanted cookies that my kids would actually ask for, not just tolerate.
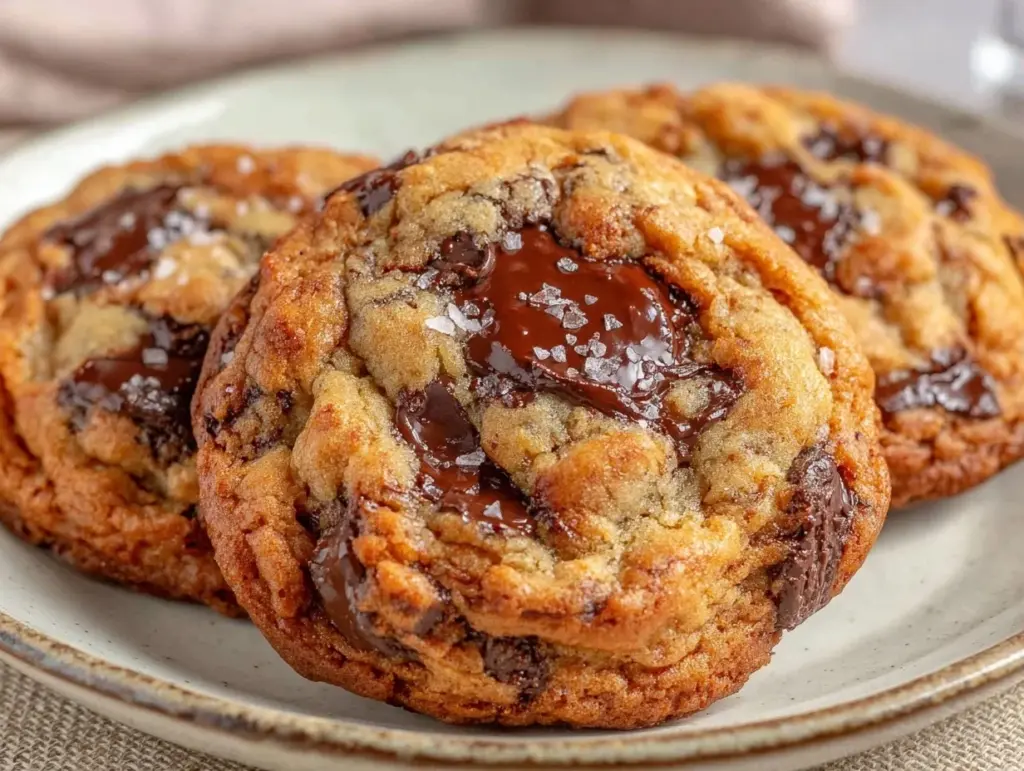
So, I went to work. I tested maybe twelve different batches over the next month. Some were too cakey. Some were flat pancakes. But then, I stumbled onto the magic of chewy brown butter chocolate chip cookies. It’s not just about the chocolate chips (though, yes, plenty of those). It’s about browning the butter first. That nutty, golden-brown aroma changes everything. It adds a complexity that makes even the simplest ingredients taste expensive.
Here’s the best part? This isn’t a complicated, twenty-ingredient recipe that requires special equipment or an hour of prep. It’s a 5-ingredient budget family favorite that uses pantry staples you probably already have. I’ve made this chewy brown butter chocolate chip cookies recipe so many times that it’s now a staple in our house. It’s cheap, it’s easy, and it’s absolutely delicious. If you’re looking for a dessert that won’t break the bank but will definitely break the internet (or at least your waistline), this is it.
Why You’ll Love This Recipe
Let’s be real for a second. Baking can be intimidating. But this recipe strips away all the fuss. I’ve made these cookies for everything from casual Tuesday snacks to holiday gifts, and they never fail to impress. Here’s why these cookies have earned a permanent spot in my weekly rotation:
- Stupid Simple Ingredients — Seriously, you only need five main ingredients. Flour, sugar, butter, chocolate chips, and eggs. I know, it sounds too easy to be true, but that’s the beauty of it. You don’t need to run to the store for exotic spices or obscure flours.
- Restaurant-Quality Flavor — Browning the butter takes maybe five minutes, but it adds a nutty, toasty flavor that tastes like it came from a high-end bakery. My kids think I’m a genius when I serve these. (I’m not a genius. I just browned the butter.)
- Perfect Texture — I’m obsessed with the texture of these cookies. Crispy, lacy edges that shatter when you bite them, followed by a soft, chewy, gooey center. It’s the best of both worlds. No dry cookies here.
- Budget-Friendly — This recipe feeds a family of four with plenty left over for lunchbox treats or afternoon snacks. And compared to buying a dozen cookies at the bakery, this costs a fraction of the price.
- Kid-Approved — My pickiest eater, who usually turns his nose up at anything “homemade,” asks for these weekly. They’re sweet, familiar, and comforting. Plus, they’re great for letting kids help out in the kitchen. Messy? Yes. Fun? Absolutely.
These cookies are my go-to when I need to sweeten up a day without spending a fortune or hours in the kitchen. They’re reliable, delicious, and always a hit.
Ingredients You’ll Need
Here’s the good news: you probably have most of this already in your pantry. I’m particular about a few things here, but mostly, this is about keeping it simple and affordable.
For the Dough:
Unsalted Butter (1 cup / 226g) — This is where the magic happens. We’re going to brown it. I use unsalted because it gives you more control over the final saltiness. If you only have salted, just reduce the added salt in the recipe. I buy the big blocks of butter to save money—it lasts longer and is cheaper per ounce.
All-Purpose Flour (2 ¼ cups / 280g) — Standard, everyday flour works perfectly here. No need for cake flour or bread flour. Just make sure your flour is sifted or spooned into the cup and leveled off so you don’t pack it too tight. I use Gold Medal because it’s reliable and budget-friendly.
Granulated Sugar (½ cup / 100g) — This helps create those crispy edges. Don’t skip it or try to reduce it too much, or you’ll lose that crunch. I buy sugar in bulk bags to save even more.
Brown Sugar (1 cup / 220g, packed) — This is the key to the chewiness. It adds moisture and a hint of caramel flavor. Dark brown sugar is great, but light brown works too. Just make sure it’s packed tightly when you measure it. If your brown sugar has hardened into a rock, microwave it with a damp paper towel for 10 seconds to soften it up.
Eggs (2 large) — Room temperature eggs incorporate better into the dough, but I’ve made these with cold eggs too, and they still turned out fine. Just beat them lightly before adding.
Vanilla Extract (1 teaspoon) — Pure vanilla extract makes a huge difference in flavor. I don’t recommend imitation vanilla for cookies—it tastes artificial. But you don’t need the super expensive stuff either. A mid-range pure vanilla works perfectly.
Baking Soda (1 teaspoon) — This helps the cookies spread and brown. Make sure it’s not expired. If your baking soda is old, it won’t work, and your cookies will be dense. (I learned this the hard way. Do not make my mistake.)
Salt (½ teaspoon) — Just a pinch to balance the sweetness. Since we’re browning the butter, the salt helps bring out those nutty flavors.
Chocolate Chips (2 cups / 340g) — This is where you can get creative with your budget. I use semi-sweet chocolate chips because they’re not too sweet and have a great melt. I’ve also used a mix of semi-sweet and milk chocolate chips for a sweeter treat. You can even chop up a chocolate bar if you want larger chunks. Pro tip: Buy chocolate chips in bulk bins if your store has them—it’s usually cheaper per ounce.
Equipment Needed
You don’t need fancy equipment for this. Here’s what I actually use:
Saucepan — A light-colored stainless steel or enamel saucepan is best so you can see the butter changing color. I use a small saucepan, about 2-quart size. Dark pans can make it harder to see the browning, so you might burn it if you’re not careful.
Mixing Bowls — One large bowl for the wet ingredients and one medium bowl for the dry ingredients. I use glass bowls because they’re easy to clean and I can see what’s going on.
Whisk — For mixing the butter and sugars, and later for the dry ingredients. A balloon whisk is nice, but a regular spoon works too if you’re lazy.
Spatula — A silicone spatula is perfect for folding in the chocolate chips. It scrapes the bowl clean so you don’t waste any dough.
Cooling Rack — To cool the cookies after baking. If you don’t have one, just leave them on the baking sheet for a few minutes, then move them to a plate. They’ll cool eventually.
Baking Sheets — Two standard half-sheet pans. I line them with parchment paper or silicone baking mats. Parchment paper is cheaper and easier to replace if it gets greasy. Silicone mats are great if you bake a lot, but they’re an upfront investment.
Cooling Rack — Essential for letting the cookies cool properly so they don’t get soggy from steam. I have a cheap wire rack from the dollar store that works just fine.
How to Make It: Step-by-Step
Alright, let’s make these chewy brown butter chocolate chip cookies! I’m walking you through exactly how I do it, including the little tricks I’ve picked up along the way.
Step 1: Brown the Butter (5-8 minutes)
Start by melting the butter in your saucepan over medium heat. Stir it constantly with a wooden spoon or silicone spatula. At first, it will just be melting. Then, it will start to foam and bubble. Keep stirring! You’re listening for a sizzling sound and smelling for a nutty, toasted aroma. The butter will turn a golden-brown color. Be careful not to let it burn—it should look like melted peanut butter, not chocolate. Once it’s browned, immediately pour it into a heatproof bowl and let it cool for 10-15 minutes. You don’t want hot butter when you mix it with the eggs, or you’ll scramble them.
Step 2: Mix the Wet Ingredients (2 minutes)
Once the butter has cooled slightly, add the granulated sugar and brown sugar to the bowl. Whisk them together vigorously for about a minute. This step is crucial—it helps dissolve the sugar slightly and incorporates air, which contributes to the chewy texture. Add the eggs and vanilla extract, and whisk again until the mixture is smooth and glossy. It should look like a thick, caramel-colored paste.
Step 3: Combine Dry and Wet (1 minute)
In a separate medium bowl, whisk together the flour, baking soda, and salt. Then, gradually add the dry ingredients to the wet mixture. Stir with a spatula or wooden spoon until just combined. Do not overmix! As soon as there are no more streaks of flour, stop. Overmixing develops gluten, which makes cookies tough instead of tender.
Step 4: Fold in the Chocolate Chips (1 minute)
Add the chocolate chips to the dough. Fold them in gently until they’re evenly distributed. If you’re using chopped chocolate bars, make sure you get pieces of all sizes for variety.
Step 5: Chill the Dough (Optional but Recommended)
Here’s a secret: chilling the dough makes a huge difference. If you have time, cover the bowl and refrigerate the dough for at least 30 minutes, or up to 24 hours. Chilling solidifies the fat, which prevents the cookies from spreading too much and creates a thicker, chewier cookie. If you’re in a hurry, you can skip this step, but the cookies will be thinner and crispier. I usually chill them if I’m planning ahead, but sometimes I’m too impatient and bake them right away. Both ways are delicious, but chilled dough yields better texture.
Step 6: Scoop and Bake (12-14 minutes)
Preheat your oven to 350°F (175°C). Line your baking sheets with parchment paper. Scoop the dough into balls, about 2 tablespoons each. I use a small cookie scoop for consistency, but a spoon works too. Place the dough balls on the baking sheet, spacing them about 2 inches apart. They will spread, so give them room.
Bake for 12-14 minutes. You want the edges to be golden brown and the centers to still look slightly soft and underbaked. They will continue to cook on the hot baking sheet after you take them out. If you bake them until they look firm in the oven, they’ll be dry and crumbly. Trust me, pull them when they look just barely done.
Step 7: Cool and Serve
Let the cookies cool on the baking sheet for 5 minutes. This allows them to set. Then, transfer them to a cooling rack to cool completely. Or, if you can’t wait (like me), eat one warm. They’re amazing fresh out of the oven, even if they’re a bit soft.
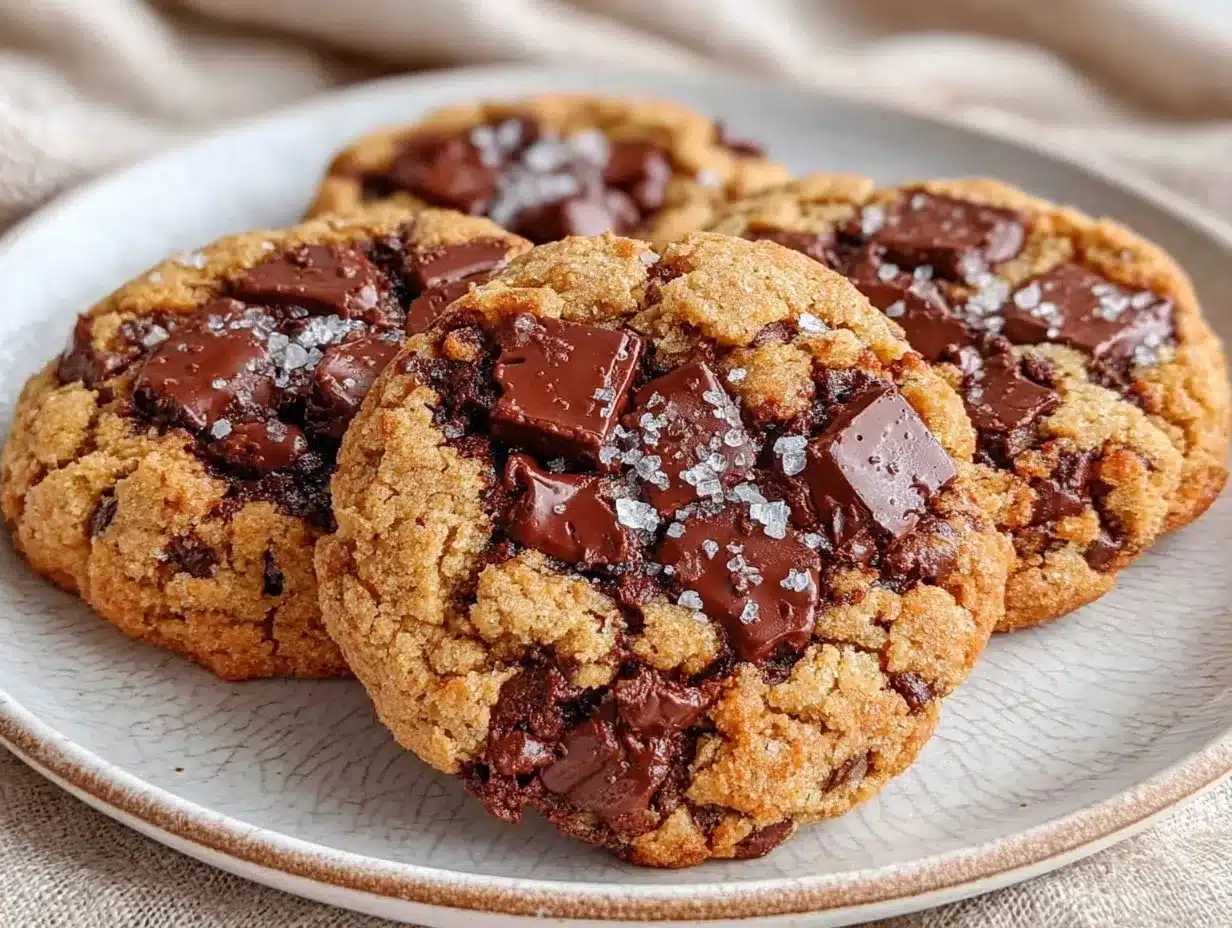
For the final touch, sprinkle a tiny pinch of flaky sea salt on top of each cookie while they’re still warm. It adds a savory contrast to the sweet chocolate that elevates the whole experience. I use Maldon sea salt because it’s pretty and dissolves slowly, but any flaky salt works.
Expert Tips & Tricks
Here’s everything I’ve learned from making these cookies dozens of times. These tips will save you from my mistakes.
Don’t Burn the Butter — Browning butter is a balancing act. Once it starts foaming, it can go from golden to burnt in seconds. Keep a close eye on it and keep stirring. If it smells like it’s burning, it’s too late. Start over. It’s only a cup of butter, so it’s not a huge loss.
Measure Flour Correctly — The biggest mistake people make is packing flour into the measuring cup. This adds too much flour, leading to dry, dense cookies. Spoon the flour into the cup and level it off with a knife. Do not scoop directly from the bag.
Use Room Temperature Eggs — While I said cold eggs work, room temperature eggs blend more evenly into the butter and sugar mixture. If you forget to take them out, just place them in a bowl of warm water for 5-10 minutes.
Don’t Overbake — I cannot stress this enough. Pull the cookies when the edges are set but the centers look soft. They will firm up as they cool. Overbaked cookies are dry and sad. Underbaked cookies are chewy and delicious.
Double the Batch — This recipe doubles easily. I often make two batches at once because my kids eat them so fast. Just make sure you have enough baking sheets, or bake in two rounds. The baking time and temperature stay the same.
Store Properly — Store cookies in an airtight container at room temperature for up to 5 days. If they start to get soft, add a slice of bread to the container. The bread will absorb moisture from the air and keep the cookies chewy. I do this all the time.
Variations & Substitutions
Once you’ve nailed the basic version, here’s how you can mix it up. I’ve tried all of these, and they’re all winners.
White Chocolate Macadamia — Swap the chocolate chips for white chocolate chips and add 1 cup of chopped macadamia nuts. It’s a tropical twist that’s surprisingly good. I’ve made this for holiday gifts, and people love it.
Peanut Butter Chip — Use peanut butter chips instead of chocolate. If you’re a peanut butter lover, this is a must-try. You can also swirl a tablespoon of peanut butter into the dough before baking for extra flavor.
Double Chocolate — Add ¼ cup of cocoa powder to the dry ingredients and use semi-sweet chocolate chips. It’s rich, fudgy, and intense. Perfect for chocolate addicts.
Gluten-Free — Use a 1:1 gluten-free flour blend. Most blends work well in cookies. Make sure the blend includes xanthan gum, or add ½ teaspoon yourself. The texture might be slightly different, but it’s still delicious.
Dairy-Free — Substitute the butter with a dairy-free butter alternative that works well for baking. Coconut oil can work too, but it will add a coconut flavor. I haven’t tested this extensively, but I know some people use Miyoko’s or Earth Balance for baking.
Vegan — This is harder because of the butter and eggs, but you can try using vegan butter and a flax egg (1 tablespoon ground flaxseed mixed with 3 tablespoons water per egg). The texture will be different, but it’s worth a try if you need to accommodate dietary restrictions.
Serving & Storage
These cookies are best enjoyed fresh, but they store well if you need to make them ahead.
How to Serve: — I usually serve these warm, straight from the cooling rack. They pair perfectly with a cold glass of milk. I also like to serve them with a scoop of vanilla ice cream or a dollop of whipped cream for a dessert treat. If you’re having a party, arrange them on a platter with some fruit for a colorful display.
Storage: — Store in an airtight container at room temperature for up to 5 days. If you live in a humid climate, they might get soft faster, so keep an eye on them. If they do get soft, you can crisp them up in the oven for 2-3 minutes at 350°F.
Freezing: — You can freeze the dough balls! Scoop the dough onto a baking sheet and freeze until solid. Then transfer the dough balls to a freezer bag. They’ll keep for up to 3 months. Bake from frozen, adding 1-2 minutes to the baking time. This is perfect for having homemade cookies ready to go anytime.
Reheating: — If you’ve made a batch and they’re a few days old, you can refresh them in the microwave for 10-15 seconds. They’ll be soft and warm again. Or, bake them fresh from the freezer for a hot, fresh cookie any time of day.
Nutrition Information
I’m not a nutritionist, but here’s the breakdown if you’re tracking. Keep in mind that these are estimates and can vary based on the specific ingredients you use.
Per Cookie (makes about 24 cookies):
- Calories: 180
- Fat: 9g
- Saturated Fat: 5g
- Cholesterol: 30mg
- Sodium: 120mg
- Carbs: 24g
- Fiber: 1g
- Sugar: 16g
- Protein: 2g
These cookies are a treat, so enjoy them in moderation. They’re not exactly health food, but they’re made with simple ingredients, and you know exactly what’s going into them. That’s better than most store-bought options.
Final Thoughts
So there you have it—my recipe for chewy brown butter chocolate chip cookies. I’ve talked your ear off, I know, but when you make a recipe this often, you have a lot to say about it. These cookies have saved my sanity on busy weeknights, impressed guests at casual gatherings, and satisfied my family’s sweet tooth without breaking the bank.
They’re simple, they’re affordable, and they taste incredible. I hope you try them and they become a favorite in your house too. Make them your own! Try different chocolate chips, add nuts, or adjust the salt. The best recipes are the ones you adapt to your family’s tastes.
If you make these, I’d love to hear how they turn out! Drop a comment below and let me know what you think. And if you’re looking for more easy, budget-friendly recipes, check out my creamy macaroni and cheese or my ultra-fudgy one-bowl brownies. They’re all family favorites that are easy to make and delicious to eat.
Happy baking! And I hope your kitchen smells half as good as mine does right now.
Frequently Asked Questions
Can I use salted butter instead of unsalted?
Yes, you can, but you’ll need to reduce the added salt in the recipe. Since salted butter already has salt in it, I recommend using ¼ teaspoon of salt instead of ½ teaspoon. Taste the butter if you can—it will tell you how salty it is. But honestly, unsalted butter gives you more control, so I prefer it.
Why are my cookies flat?
Flat cookies usually mean one of three things: the butter was too warm when you mixed it, you didn’t chill the dough, or you measured the flour incorrectly (too little flour). Make sure your butter is cooled but still soft, not melted. Also, chill the dough for at least 30 minutes. And remember to spoon and level your flour.
Can I freeze the cookie dough?
Absolutely! This is one of the best things about this recipe. Scoop the dough into balls, freeze them on a baking sheet until solid, then transfer to a freezer bag. They’ll keep for up to 3 months. Bake from frozen, adding 1-2 minutes to the baking time. It’s perfect for having fresh cookies ready to go anytime.
Can I use milk chocolate chips instead of semi-sweet?
Yes, you can! Milk chocolate chips are sweeter and melt differently, so the cookies will be sweeter and softer. I prefer semi-sweet because it balances the sweetness of the brown sugar, but milk chocolate is great if you have kids who prefer sweeter treats. You can also use a mix of both.
How do I store leftover cookies?
Store them in an airtight container at room temperature for up to 5 days. If they get soft, add a slice of bread to the container to absorb excess moisture. You can also freeze them for up to 3 months. Just thaw them at room temperature or warm them in the microwave for a few seconds.
Can I add nuts to this recipe?
Of course! Chopped walnuts or pecans are classic additions. I usually add 1 cup of chopped nuts along with the chocolate chips. It adds a nice crunch and flavor. Just make sure the nuts are finely chopped so they distribute evenly throughout the dough.
Pin This Recipe!

Chewy Brown Butter Chocolate Chip Cookies
- Total Time: 29 minutes
- Yield: 24 cookies 1x
Description
A budget-friendly, 5-ingredient family favorite featuring crispy edges, a chewy center, and deep nutty flavor from browned butter.
Ingredients
- 1 cup (226g) unsalted butter
- 2 ¼ cups (280g) all-purpose flour
- ½ cup (100g) granulated sugar
- 1 cup (220g) packed brown sugar
- 2 large eggs
- 1 teaspoon vanilla extract
- 1 teaspoon baking soda
- ½ teaspoon salt
- 2 cups (340g) chocolate chips
Instructions
- Melt butter in a saucepan over medium heat, stirring constantly until it foams, turns golden-brown, and smells nutty (5-8 minutes). Pour into a heatproof bowl and cool for 10-15 minutes.
- In a large bowl, whisk the cooled brown butter, granulated sugar, and brown sugar vigorously for about 1 minute until glossy. Add eggs and vanilla extract, whisking until smooth.
- In a separate medium bowl, whisk together flour, baking soda, and salt. Gradually add dry ingredients to the wet mixture, stirring with a spatula until just combined.
- Fold in chocolate chips until evenly distributed.
- Cover and refrigerate dough for at least 30 minutes (optional but recommended for thicker cookies).
- Preheat oven to 350°F (175°C). Line baking sheets with parchment paper. Scoop dough into 2-tablespoon balls, spacing them 2 inches apart.
- Bake for 12-14 minutes until edges are golden brown but centers look slightly soft.
- Let cookies cool on the baking sheet for 5 minutes, then transfer to a cooling rack. Sprinkle with flaky sea salt while warm if desired.
Notes
Do not burn the butter; it goes from golden to burnt quickly. Measure flour by spooning it into the cup and leveling it off, do not scoop directly from the bag. Room temperature eggs blend better. Do not overbake; cookies will firm up as they cool. Store in an airtight container with a slice of bread to maintain chewiness.
- Prep Time: 15 minutes
- Cook Time: 14 minutes
- Category: Dessert
- Cuisine: American
Nutrition
- Serving Size: 1 cookie
- Calories: 180
- Sugar: 16
- Sodium: 120
- Fat: 9
- Saturated Fat: 5
- Carbohydrates: 24
- Fiber: 1
- Protein: 2
Keywords: brown butter cookies, chocolate chip cookies, chewy cookies, budget baking, family favorite, easy dessert, 5 ingredient cookies