I remember the first time I made this banana cream pudding. It was a Tuesday in late July, the kind where the humidity is so thick you can practically wear it. My kids had just come in from soccer practice, sweaty and hangry, and I was staring into the fridge hoping for a miracle. There was no miracle. Just a few bruised bananas, a box of vanilla wafers that had been sitting in the pantry for three months, and some heavy cream I needed to use before it spoiled.
I threw it together in about ten minutes, mostly because I wanted them to stop complaining. I layered the wafers, sliced the bananas, poured the pudding over it, and put it in the fridge while I tried to salvage dinner with whatever else was lurking in the back of the cupboard. When I finally served it, I expected polite nods. Instead, my youngest asked if I could make it “every single day.”
That was three years ago. Now, this banana cream pudding with vanilla wafer crumble is my go-to when I need to impress guests without spending hours in the kitchen, or when I need to use up bananas that are turning brown faster than I can eat them. It’s cheaper than ordering dessert, easier than baking a cake, and honestly? It tastes better than most of the bakery versions I’ve tried.
I’ve tested this recipe probably two dozen times. I’ve tried using instant pudding mix vs. scratch, different types of cream, even swapping in coconut milk for dairy-free versions. The version I’m sharing with you today is the sweet spot. It’s creamy, it’s rich, but it’s simple enough that you can make it on a whim. Plus, it’s one of those desserts that gets better the longer it sits in the fridge, making it the ultimate make-ahead treat for busy weeknights or impromptu gatherings.
If you’ve ever tried making a complex dessert like lemon blueberry bundt cake and ended up stressed and with a messy kitchen, this is your reset button. Five ingredients. One bowl. Zero stress. Let’s get into why this budget-friendly dessert is about to become your new favorite.
Why You’ll Love This Banana Cream Pudding
There are a lot of banana pudding recipes out there, but this one sticks with me because it solves the biggest problem parents face: getting dessert on the table without breaking the bank or the schedule. Here’s why this specific version has earned a permanent spot in our weekly rotation.
- Stupidly Simple Ingredients — Seriously, you only need five things. Bananas, vanilla wafers, pudding mix, milk, and whipped cream. I keep these stocked because they’re pantry staples. If I can make banana pudding icebox cake with these same basics, you know how versatile they are.
- Budget-Friendly — We’re talking about $5-$7 to feed a crowd. That’s less than what I spend on gas. Using a box mix isn’t cheating; it’s smart cooking. The texture is consistent, and it saves me from trying to temper eggs or make a custard from scratch when I’m tired.
- Make-Ahead Magic — This isn’t a “serve immediately” dessert. It needs time to set. I love making this the night before a dinner party because it means zero stress on the day of. In fact, it tastes even better the next day as the wafers soften into a cake-like layer.
- Kid-Approved (Even the Picky Ones) — My kids usually turn their noses up at “fancy” desserts, but they can’t resist this. It’s sweet, creamy, and familiar. It’s like eating a dessert sandwich but in a bowl. It’s also a great way to get them to eat bananas without complaining about the texture.
- Customizable — Want to add chocolate chips? Go for it. Want to use coconut cream instead of dairy? Works fine. I’ve even added a layer of caramel sauce when I wanted to feel fancy. But honestly? The classic version is perfect.
This recipe is my answer to “what’s for dessert?” when I don’t want to bake, don’t want to spend a fortune, and definitely don’t want to deal with a mountain of dishes. It’s reliable, it’s delicious, and it makes everyone happy. That’s a win in my book.
Ingredients You’ll Need
Here’s the best part: you probably have most of this already in your kitchen. I’m not asking you to go out and buy exotic ingredients. This is budget cooking at its finest. Let’s break down what you need and why I pick what I pick.
For the Pudding Layer
Vanilla Instant Pudding Mix (2 boxes / 5.1 oz each) — I always use the Jell-O brand or a store-brand equivalent. Don’t try to make this from scratch unless you have time to spare. The box mix gives that classic, nostalgic flavor that makes people close their eyes and smile. Two boxes are needed to get the right thickness for a family-sized dish.
Whole Milk (4 cups / 960ml) — Use cold whole milk. The fat content helps the pudding set properly and adds richness. Skim milk will work in a pinch, but the texture will be thinner and less luxurious. I buy the gallon jugs on sale to keep costs down.
Heavy Whipping Cream (2 cups / 480ml) — This is what makes it “cream” pudding. You’ll whip this separately. If you’re watching your budget, look for cream in the dairy aisle near the milk, not the specialty section. It’s much cheaper. You can also use cool whip if you’re in a huge rush, but fresh whipped cream tastes better.
Vanilla Extract (1 teaspoon) — Optional, but I add it to the whipped cream to boost the vanilla flavor. If you’re using high-quality extract, a little goes a long way. If you’re using the cheap stuff, maybe skip it.
For the Assembly
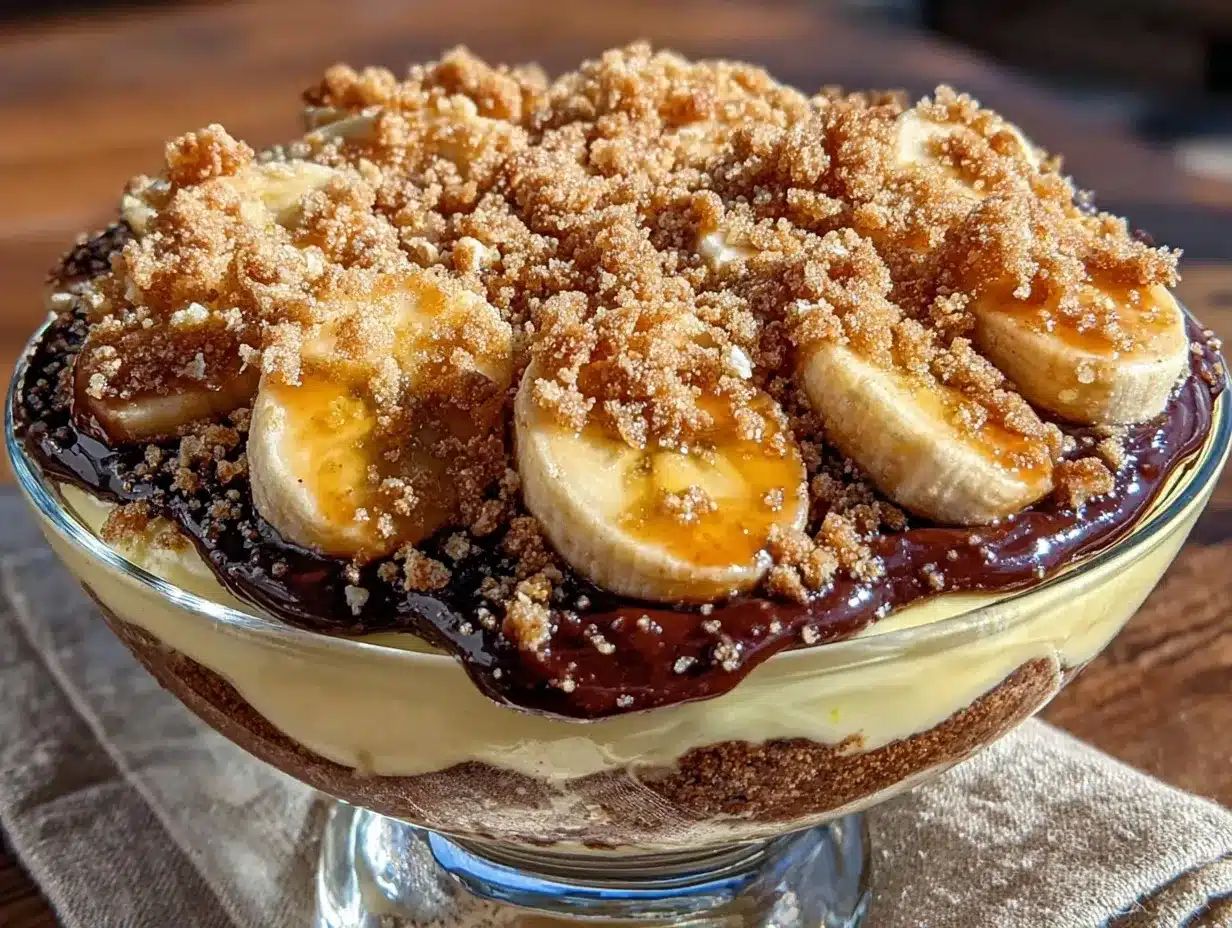
Vanilla Wafers (1 large box / about 30-40 cookies) — Nilla Wafers are the gold standard here. They hold up well and have the perfect sweet crunch. Don’t substitute with ginger snaps or shortbread unless you want a different flavor profile. You want that classic vanilla cookie taste.
Ripe Bananas (4-5 medium) — This is the most important ingredient. You want bananas that are yellow with some brown spots. They’re sweetest and easiest to mash slightly if you want a smoother texture. If they’re too green, they’ll be tart and hard. If they’re too brown (black), they’ll turn the pudding mushy. Aim for that “perfectly ripe” stage.
Lemon Juice (1 tablespoon) — This is a pro tip. Toss your banana slices in lemon juice before layering. It prevents them from turning brown and adds a tiny bit of brightness that cuts through the sweetness. It’s subtle, but it makes a difference.
Optional Add-ins
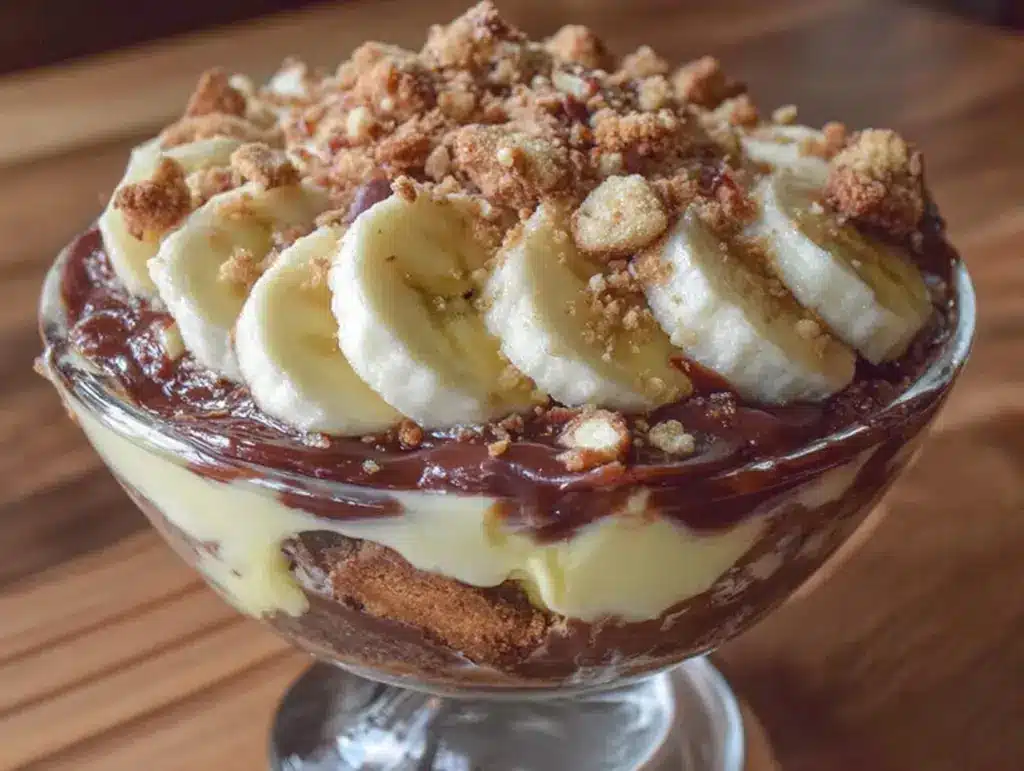
Whipped Cream Topping — I usually save some of the whipped cream for the top, along with a few extra vanilla wafers crushed up for that “crumble” effect. It looks pretty and adds texture.
Chocolate Chips — Some people like a layer of semi-sweet chocolate chips between the pudding and the bananas. I don’t always do it, but it’s a nice variation if you’re in the mood.
Equipment Needed
You don’t need fancy gadgets for this. Here’s what I actually use in my kitchen.
9×13 Inch Baking Dish — Glass or ceramic works best. I use a Pyrex dish because I can see the layers and it goes straight from fridge to table. A metal pan works too, but it doesn’t look as nice when serving.
Mixing Bowls — Two medium bowls. One for the pudding, one for the whipped cream. I have a set of stainless steel bowls that nest together, which saves drawer space.
Electric Mixer or Whisk — For the whipped cream, an electric mixer is nice but not required. A whisk works fine if you have strong arms. I use my hand mixer because it’s faster and less tiring.
Knife and Cutting Board — For slicing the bananas. A serrated knife works best for bananas because it doesn’t crush them as much.
Spatula — For folding the whipped cream into the pudding. A silicone spatula is best because it scrapes the bowl clean.
Serving Spoons — I like to serve this family-style, so a nice serving spoon is handy. Or just use regular spoons if you’re being casual.
How to Make It: Step-by-Step
Alright, let’s make this! I’m walking you through exactly how I do it, including the little tricks I’ve picked up over the years.
Step 1: Prep Your Bananas
Peel the bananas and slice them into ¼-inch rounds. Toss them in a bowl with the lemon juice. This prevents browning and adds a little tang. Set them aside. I usually do this first because it takes a minute, and I like to have everything prepped before I start mixing.
Step 2: Make the Pudding
In a medium bowl, whisk together the instant pudding mix and cold milk. Whisk for about 2 minutes, or until it starts to thicken. Don’t skip this step—proper whisking ensures there are no lumps. The pudding should be thick enough to hold its shape but still pourable. If it’s too thick, add a splash more milk. If it’s too thin, let it sit for a few minutes to set up.
Step 3: Whip the Cream
In a separate large bowl, whip the heavy cream until stiff peaks form. This means when you lift the beater, the cream stands up straight. Don’t over-whip it, or it’ll turn into butter. I like to add the vanilla extract here if I’m using it. Set this aside.
Step 4: Fold the Cream Into the Pudding
This is the key step. Gently fold the whipped cream into the pudding mixture. Use a spatula and fold slowly, scraping the bottom of the bowl. You want to keep as much air in the cream as possible. This makes the pudding light and fluffy instead of dense and heavy. It should look like a smooth, pale yellow mousse.
Step 5: Layer It Up
Start with a layer of vanilla wafers on the bottom of your 9×13 dish. Don’t be shy with the wafers; they’re the base. Then, add a layer of banana slices. Next, pour a layer of the pudding mixture over the bananas. Repeat the layers: wafers, bananas, pudding. Finish with a final layer of pudding on top.
Pro tip: Make sure the pudding covers the bananas completely. This prevents them from oxidizing and turning brown. It also ensures every bite has that creamy texture.
Step 6: Add the Crumble
Crush a few vanilla wafers in your hands or with a rolling pin and sprinkle them over the top. This adds a nice crunch and makes it look like a professional dessert. You can also dollop extra whipped cream on top if you want to be fancy.
Step 7: Chill
Cover the dish with plastic wrap or a lid and refrigerate for at least 4 hours, preferably overnight. This gives the wafers time to soften and absorb the pudding, creating that cake-like texture that makes this recipe so special. If you’re impatient, you can eat it after 2 hours, but the texture won’t be quite as good.
Expert Tips & Tricks
Here’s everything I’ve learned from making this dozens of times. These tips will save you from my mistakes.
- Use Cold Milk — Instant pudding sets better with cold milk. If your milk is warm, the pudding might not thicken properly. Keep it in the fridge until the last minute.
- Don’t Skip the Lemon Juice — It’s not just for color. It adds a subtle flavor contrast that balances the sweetness. It’s a small step that makes a big difference.
- Fold, Don’t Stir — When combining the cream and pudding, gentle folding preserves the air. Stirring vigorously will deflate the cream and make the pudding dense.
- Layer Generously — Don’t be stingy with the bananas or wafers. This is a dessert, not a salad. You want every bite to have all the components.
- Make It Ahead — This dessert tastes better the next day. The flavors meld together, and the wafers soften perfectly. Plan accordingly.
Common Mistakes:
- Soggy Wafers — If you let it sit for more than 3 days, the wafers can get too soggy. Eat it within 2-3 days for best texture.
- Brown Bananas — If you don’t use the lemon juice or cover the bananas with pudding, they’ll turn brown. Not bad, just not pretty.
- Over-Whipping Cream — Keep an eye on the cream. Once it forms stiff peaks, stop. Over-whipped cream is grainy and hard to fold.
Variations & Substitutions
Once you’ve nailed the basic version, here’s how you can mix it up. I’ve tried all of these.
Chocolate Banana Pudding — Use chocolate instant pudding mix instead of vanilla. It’s rich and decadent. My kids love this version, especially when I add chocolate chips to the layers.
Dairy-Free Version — Use coconut milk (full-fat) instead of dairy milk, and coconut whipped cream instead of dairy cream. Use dairy-free vanilla wafers if needed. It’s surprisingly good and just as creamy.
Lighter Version — Use 2% milk instead of whole milk, and light whipped topping instead of heavy cream. It’s less rich but still satisfies the sweet tooth.
Mini Cups — Make individual servings in mason jars or small cups. This is great for parties because everyone gets their own portion, and it looks cute. Just adjust the layering accordingly.
Add-Ins — Crushed Oreos, caramel sauce, peanut butter drizzle, or toasted coconut flakes. Get creative! I once added a layer of crushed graham crackers for a s’mores vibe, and it was delicious.
Serving & Storage
How to Serve:
I usually serve this straight from the fridge. It’s cold and refreshing, perfect for warm weather. I like to garnish each serving with a fresh banana slice and a few crushed wafers. It looks pretty and adds a bit of texture.
Side Dishes:
This dessert pairs well with almost anything. I often serve it after a simple meal like grilled chicken breast with roasted veggies. The sweetness balances out the savory dinner. It’s also great with a glass of cold milk or a cup of coffee.
Storage Instructions:
Refrigerator: Store in an airtight container or covered with plastic wrap for up to 3 days. The wafers will continue to soften, which some people prefer. After 3 days, the texture starts to break down.
Freezing: I don’t recommend freezing this dessert. The bananas and cream don’t freeze well, and the texture becomes watery and mushy when thawed. It’s best eaten fresh or chilled.
Meal Prep: This is perfect for meal prep. Make it on Sunday, and you have dessert ready for the week. Just make sure to keep it covered to prevent it from absorbing fridge odors.
Pro Tip: If you’re making this for a crowd, double the recipe. Use two 9×13 dishes or one large dish. It’s easy to scale up, and everyone will ask for seconds.
Nutrition Information
I’m not a nutritionist, but here’s the breakdown if you’re tracking. Keep in mind, this is a dessert, so it’s not exactly a health food.
| Nutrient | Per Serving (approx. 1 cup) |
|---|---|
| Calories | 350 |
| Fat | 18g |
| Carbs | 45g |
| Sugar | 28g |
| Protein | 6g |
| Fiber | 2g |
What’s Good: It has some protein from the milk and cream, and bananas add potassium and fiber. It’s also relatively quick to make, so you’re not spending hours in the kitchen.
What to Know: It’s high in sugar and fat due to the cream and pudding mix. If you’re watching your intake, stick to one serving. Use the lighter version if you’re trying to cut back. But honestly? It’s a treat. Enjoy it.
Final Thoughts
So that’s my go-to banana cream pudding! I’ve probably talked your ear off at this point, but when you make a recipe this often, you have a lot to say about it. This dessert has saved me more times than I can count. It’s my answer to “what’s for dessert?” when I’m tired, don’t want to bake, and still want something that tastes really good. My kids are happy, my husband’s happy, and I’m happy because I’m not stressed about cooking.
Make it yours! Try different add-ins, swap in your favorite cookies, or adjust the sweetness to your liking. The best recipes are the ones you adapt to your family’s tastes. If you make this, drop a comment and let me know what you think! I love hearing how recipes turn out in your kitchen. And if something doesn’t work, tell me that too—I’m here to help troubleshoot.
Happy cooking! And I hope your kitchen smells half as good as mine does right now.
Frequently Asked Questions
Can I use homemade pudding instead of instant mix?
You can, but it takes longer and requires more effort. Instant pudding is convenient and consistent. If you want to make it from scratch, you’ll need to cook milk, sugar, cornstarch, and eggs on the stove, then chill it. It’s delicious, but for a quick weeknight dessert, the mix is the way to go. I’ve tried both, and I stick with the mix for speed.
Why did my pudding turn out watery?
This usually happens if the milk wasn’t cold enough or if you didn’t whisk it long enough. Instant pudding needs cold milk to activate the thickeners. Also, make sure you’re using the correct amount of milk for the box size. If it’s still watery, you can add a little more pudding mix or chill it longer to set.
Can I make this ahead for a party?
Absolutely. In fact, it’s better if you make it ahead. I usually make it the night before a dinner party. It needs at least 4 hours to set, so planning ahead is key. Just keep it covered in the fridge until you’re ready to serve.
Will the bananas turn brown?
They can, but the lemon juice helps prevent it. Also, making sure the pudding layer covers the bananas completely helps. If they do turn brown, it’s not a safety issue, just a visual one. The flavor is still good. I’ve served it to guests who didn’t even notice.
Can I use whipped topping instead of whipped cream?
Yes, Cool Whip or similar products work fine. They’re easier and don’t require whipping. However, the texture is slightly different and less rich. If you’re in a huge rush, it’s a good substitute. But fresh whipped cream tastes better.
How long does this last in the fridge?
It lasts up to 3 days in the fridge. After that, the wafers get too soggy and the bananas start to break down. I recommend eating it within 2 days for the best texture. If you have leftovers, freeze them? No, don’t freeze it. It doesn’t hold up well.
Can I double this recipe?
Yes, double everything. Use a larger dish or two smaller ones. The cooking and chilling times stay the same. I do this when I’m feeding a crowd or meal-prepping for the week. Just make sure your dish is big enough to hold all the layers.
Pin This Recipe!
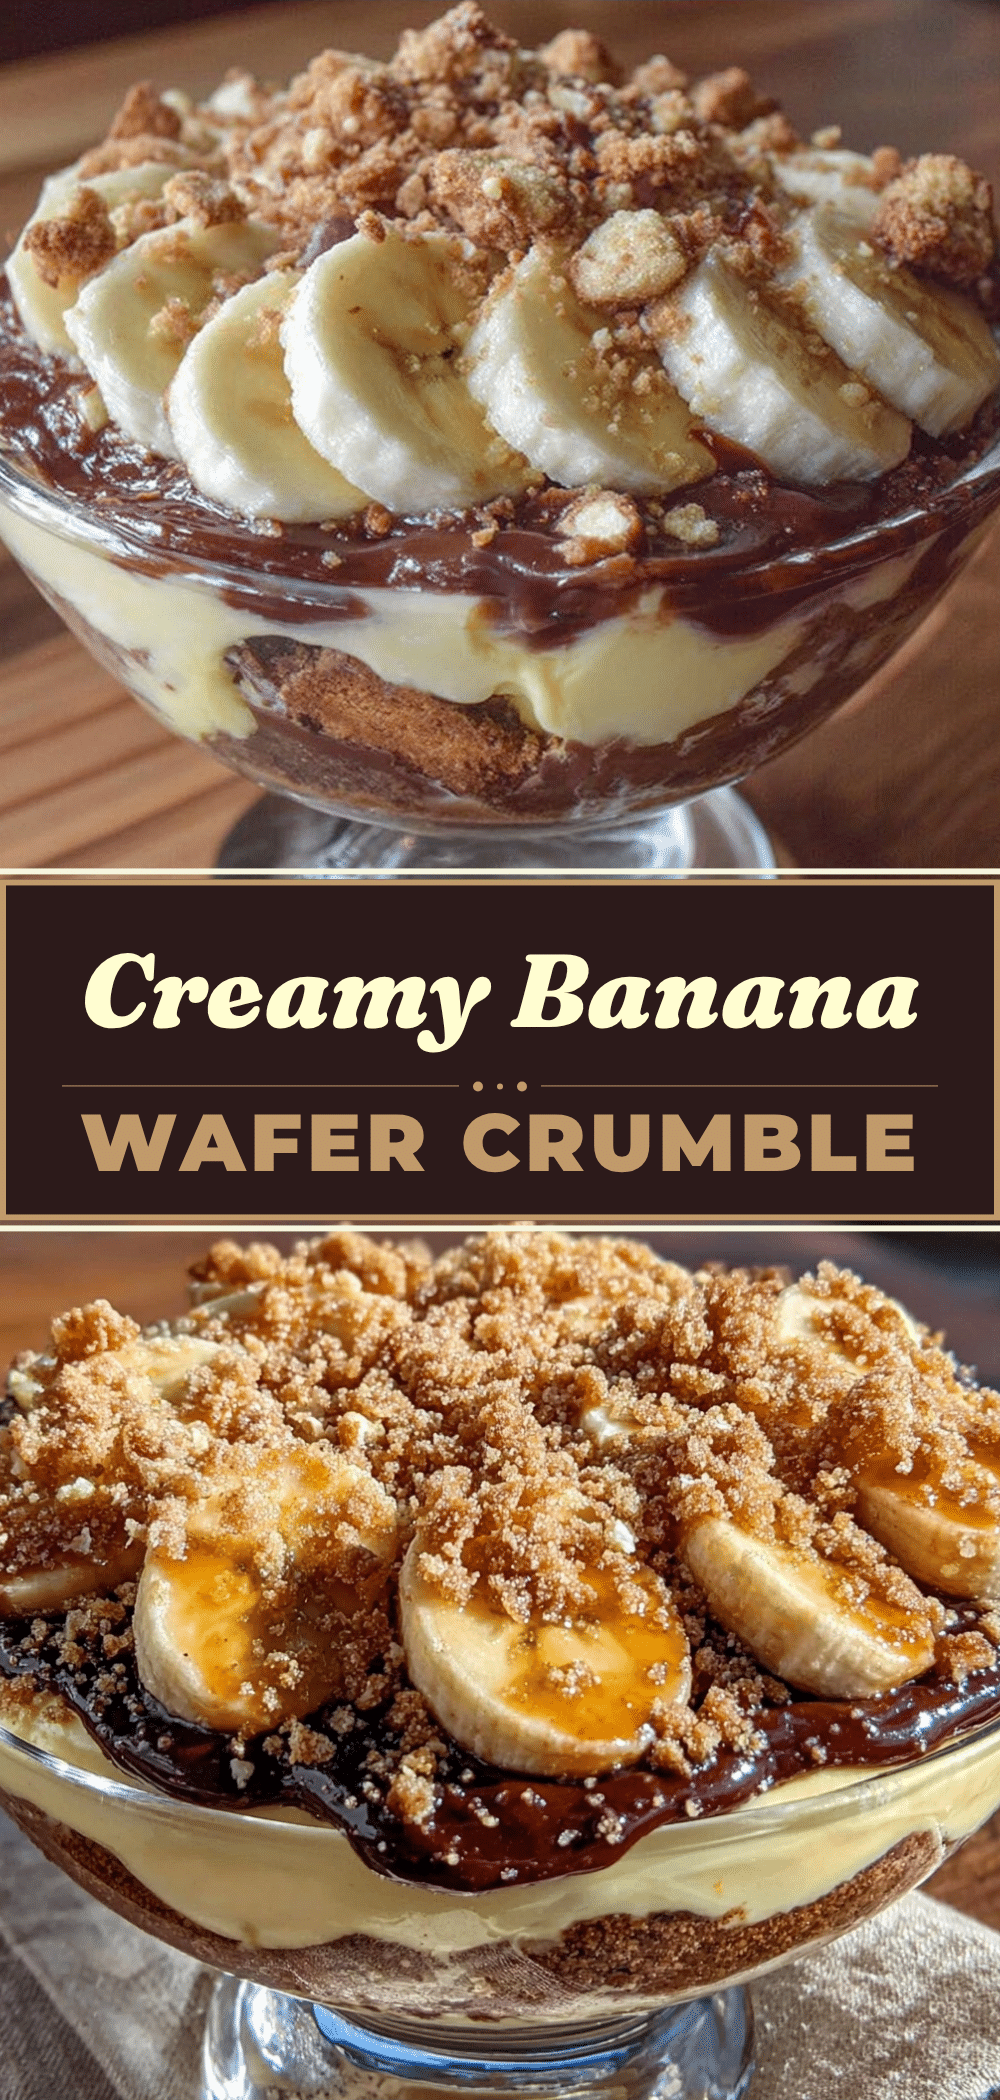
Banana Cream Pudding: 5-Ingredient Budget Dessert
- Total Time: 4 hours 10 minutes
- Yield: 8 servings 1x
Description
A simple, budget-friendly banana cream pudding made with just five ingredients. This make-ahead dessert features layers of vanilla wafers, ripe bananas, and a light, fluffy pudding mixture that tastes better the next day.
Ingredients
- 2 boxes (5.1 oz each) vanilla instant pudding mix
- 4 cups cold whole milk
- 2 cups heavy whipping cream
- 1 teaspoon vanilla extract
- 1 large box vanilla wafers (about 30–40 cookies)
- 4–5 medium ripe bananas
- 1 tablespoon lemon juice
Instructions
- Peel and slice bananas into ¼-inch rounds. Toss slices with lemon juice to prevent browning and set aside.
- In a medium bowl, whisk together the instant pudding mix and cold milk for about 2 minutes until thickened.
- In a separate large bowl, whip the heavy cream until stiff peaks form. Add vanilla extract if using.
- Gently fold the whipped cream into the pudding mixture using a spatula until smooth and airy.
- Layer vanilla wafers, banana slices, and pudding mixture in a 9×13 inch baking dish, starting and ending with pudding.
- Ensure the top layer of pudding completely covers the bananas.
- Crush remaining vanilla wafers and sprinkle over the top for a crumble effect.
- Cover and refrigerate for at least 4 hours, preferably overnight, before serving.
Notes
Use cold milk for best thickening results. Do not over-whip the cream. The dessert tastes best after chilling overnight. Store in the refrigerator for up to 3 days; do not freeze.
- Prep Time: 10 minutes
- Cook Time: 0 minutes
- Category: Dessert
- Cuisine: American
Nutrition
- Serving Size: 1 cup
- Calories: 350
- Sugar: 28
- Sodium: 350
- Fat: 18
- Saturated Fat: 11
- Carbohydrates: 45
- Fiber: 2
- Protein: 6
Keywords: banana pudding, budget dessert, easy dessert, make-ahead dessert, vanilla wafers, 5 ingredient recipe, family friendly dessert