
I still remember the Tuesday night I almost gave up on cooking. It was raining, my husband had just walked through the door looking exhausted, and the kids were already arguing over who got the bigger plate. I looked at the clock—6:45 PM—and then at the sink, which was piled with dishes from lunch. My brain was completely fried. I didn’t want to chop a dozen vegetables. I didn’t want to clean three pots. I just wanted something warm, filling, and cheap that didn’t taste like cardboard.
So I did what I do best: I raided the pantry. I pulled out a bag of rice, a couple of chicken thighs, and a lonely bag of onions that had been hiding in the veggie drawer for a week. I threw it all into one large skillet, added some broth and spices, and walked away for 25 minutes. When I came back, the kitchen smelled like heaven, the rice was perfectly fluffy, and the chicken was falling-apart tender. The onions had turned into this deep, jammy sweetness that coated every grain.
That one-pan dinner saved our week. But here’s the thing—it didn’t just save that one night. It became our new normal. This one pan chicken rice with caramelized onions has been on our table at least twice a month for the last year. It’s the kind of meal that feels like a hug. It’s budget-friendly, it’s incredibly forgiving (perfect for when you’re tired), and it uses ingredients you probably already have. If you’re looking for a simple rice bowl recipe that requires zero special skills, this is it. It’s my go-to answer for “what’s for dinner?” when the budget is tight and energy is lower.
Why You’ll Love This One Pan Chicken Rice
There are a million chicken and rice recipes out there, but this specific version sticks around for a few solid reasons. It’s not complicated, it’s not pretentious, and it delivers major flavor with minimal effort. Here’s why it’s earned a permanent spot in our weekly rotation:
- Actually One Pan — Seriously. One skillet. One pot (if you measure rice separately, which I do sometimes, but you can do it all in one if you’re brave). No rinsing three different dishes while the food gets cold. I love a low-cleanup meal almost as much as I love the food itself.
- Pennies Per Serving — We feed four people for about $12-15, depending on what sale prices are. Chicken thighs are cheap. Rice is dirt cheap. Onions are pennies. Compared to ordering takeout or buying pre-made meals, this stretches our grocery budget so far. It’s the kind of meal that lets you put money aside for other things.
- Flavor That Develops While You Wait — The magic happens in the simmer. As the rice cooks, it absorbs the chicken juices and the onion flavor. By the time it’s done, the rice isn’t just plain white rice; it’s savory, slightly sweet, and deeply flavorful. You don’t need a fancy sauce or expensive spices.
- Kid-Approved (Even Picky Eaters) — My kids are not gourmet critics. They like soft textures and mild flavors. This dish has tender chicken, soft rice, and sweet onions. No weird chunks, no spicy heat. If they don’t like it (which rarely happens), I can easily serve it without the onions for the pickiest one. It’s versatile enough for the whole family.
- Great for Leftovers — This tastes even better the next day. The flavors meld together overnight. I often pack this for lunch at work. It reheats beautifully in the microwave, and it doesn’t get soggy like some pasta dishes do. It’s my standard meal-prep lunch because it’s reliable.
This is my comfort food shortcut. It’s the meal I make when I want to feel like a good cook without actually having to do much cooking. It’s reliable, it’s cheap, and it’s delicious.
Ingredients You’ll Need
The best part about this one pan chicken rice with caramelized onions is that the ingredient list is short. You don’t need a trip to the store for anything exotic. Here’s what I grab from my pantry and fridge:
For the Base
Chicken thighs (1.5 lbs / 680g) — Boneless, skinless thighs are my choice here. They stay juicy even if you overcook them slightly. Breast meat can get dry and stringy in this dish. Thighs have more fat, which means more flavor. If you must use breasts, cut them into smaller pieces so they cook faster.
Yellow onions (2 large, sliced) — Don’t skip the quantity. Two large onions are needed to get that proper caramelization. I use yellow onions because they’re sweetest when cooked down. White onions are sharper and don’t caramelize as nicely. Red onions work but turn a weird purple color that isn’t pretty in the rice.
Long-grain white rice (1.5 cups / 300g) — I use Jasmine or Basmati. Jasmine gives a nicer aroma, but any long-grain white rice works. Do not use brown rice here; the cooking times and liquid ratios are totally different, and this recipe is designed for white rice. Do not use instant rice unless you want mush.
Chicken broth (2.5 cups / 600ml) — Low-sodium is best so you can control the saltiness. If you only have regular sodium, reduce the added salt in the recipe. Vegetable broth works if you want a lighter version, but chicken broth has more depth.
For the Flavor

Butter (2 tablespoons) — I use salted butter. If you’re using unsalted butter, you’ll need to add a pinch more salt later. Butter adds that rich, savory mouthfeel that oil just can’t quite match.
Garlic (3 cloves, minced) — Fresh garlic is non-negotiable. Jarred garlic has a chemical taste that ruins the sweetness of the onions. Three cloves is the sweet spot—enough flavor without being overpowering.
Dried thyme (1 teaspoon) — Thyme and chicken are best friends. It adds an earthy, herbal note. If you don’t have thyme, dried oregano works, but thyme is the traditional choice here.
Garlic powder (½ teaspoon) — This adds a layer of savory depth that fresh garlic alone doesn’t provide. It’s a pantry staple for a reason.
Salt and black pepper — To taste. I start with 1 teaspoon of salt and ½ teaspoon of pepper, but always taste at the end.
Optional: Paprika (½ teaspoon) — Adds a tiny bit of color and warmth. Smoked paprika is amazing if you want a slightly smoky flavor, but regular paprika is fine.
Shopping Tips
- Buy the family pack of chicken thighs — They freeze well. I portion them into 1-pound bags and freeze them. This way, I always have chicken ready for this recipe.
- Onion storage — Keep onions in a cool, dark place. If they’re sprouting, they’re still fine to use, just peel off the sprouts.
- Rice — Buy rice in bulk. It lasts forever in an airtight container and is much cheaper per pound.
Equipment Needed
You don’t need fancy gadgets for this. Here’s what I actually use in my kitchen:
Large skillet or Dutch oven — A 12-inch skillet works perfectly. I use a cast-iron skillet because it holds heat well, which helps with the caramelization. If you don’t have a skillet big enough to hold all the rice and chicken in one layer, use a Dutch oven. Just make sure it has a tight-fitting lid.
Lid for the skillet — This is crucial. You need to trap the steam to cook the rice. If your skillet doesn’t have a lid, you can use foil, but it’s not as secure. A glass lid lets you peek without losing steam.
Sharp knife — For slicing the onions. A dull knife will make you cry more—learned this the hard way with cheap knives.
Wooden spoon or spatula — For stirring. Silicone works too. Don’t use metal on non-stick if that’s what you have.
Measuring cups and spoons — Standard stuff. Dollar store versions work fine.
Colander — For rinsing the rice. If you skip rinsing, the rice can be gummy. I always rinse.
How to Make It: Step-by-Step
Alright, let’s make this! I’m walking you through exactly how I do it, including the little tricks I’ve picked up over the years. This process is straightforward, but timing matters.
Step 1: Prep Your Ingredients (5 minutes)
Slice your onions into thin half-moons. Mince your garlic. Pat your chicken thighs dry with paper towels—this helps them brown better. Measure out your rice, broth, and spices. Having everything ready before you turn on the heat makes the cooking process smooth and stress-free.
Step 2: Caramelize the Onions (10-12 minutes)
Heat the butter in your large skillet over medium heat. Once the butter is melted and foaming, add the sliced onions. Spread them out in an even layer. Let them cook undisturbed for 2-3 minutes to get some color. Then stir and cook for another 8-10 minutes. You’re looking for soft, golden-brown, sweet onions. They should look like jam. Don’t rush this step. If they burn, you’ll have bitter onions. If they’re too pale, the flavor won’t be deep enough. This is the most important step for taste.
Step 3: Sear the Chicken (5 minutes)
Push the onions to the sides of the pan (or just make a little space in the middle). Season the chicken thighs with salt and pepper. Place them skin-side down (if skin-on) or just flat in the pan. Cook for 3-4 minutes per side until they have a nice golden crust. You don’t need to cook them all the way through yet—they’ll finish cooking in the rice. Remove the chicken to a plate and set aside.
Step 4: Toast the Rice (2 minutes)
In the same pan, with the chicken fat and onion bits, add the rinsed rice. Stir the rice around for 1-2 minutes. You want the grains to get coated in the fat and turn slightly translucent at the edges. This toasting step adds a nutty flavor and helps keep the rice grains separate.
Step 5: Simmer (20 minutes)
Pour in the chicken broth. Scrape the bottom of the pan with your spoon to release all the flavorful brown bits (that’s called deglazing, and it’s pure flavor gold). Add the garlic, thyme, garlic powder, and paprika. Stir well. Return the chicken thighs to the pan, nestling them into the rice. The rice should be submerged in the liquid. Bring to a boil, then immediately reduce the heat to low. Cover with the lid.
Let it simmer for 18-20 minutes. Do not lift the lid. I know it’s tempting, but every time you lift it, you let steam out, and the rice won’t cook evenly. Set a timer and walk away.
Step 6: Rest and Serve (5 minutes)
After 20 minutes, turn off the heat. Keep the lid on and let it sit for 5 minutes. This allows the rice to finish steaming and absorb any remaining liquid. Then, remove the lid. Fluff the rice with a fork. The chicken should be tender and easily pulled apart with a fork. Serve hot, topped with extra fresh parsley or green onions if you have them.
Total Time: About 40 minutes (10 minutes active, 30 minutes mostly hands-off)
Expert Tips & Tricks
Here’s everything I’ve learned from making this dozens of times. These tips will save you from my mistakes.
Rinse Your Rice
This is the #1 tip. Rinse the rice under cold water until the water runs clear. This removes excess starch. If you skip this, your rice will be gummy and clumpy. I keep a colander by the sink so I don’t forget.
Don’t Crowd the Pan
If you’re cooking for a crowd and doubling the recipe, use two pans or a larger Dutch oven. Crowding the pan steams the chicken instead of searing it, and the rice won’t cook evenly. It’s better to cook in batches than to have a mushy mess.
Low and Slow for Onions
Caramelizing onions takes time. If you crank the heat to 10 minutes, they’ll burn. Keep the heat at medium-low and be patient. The sweetness they develop is worth the wait.
Check the Liquid
After 20 minutes, check the rice. If it’s still hard and there’s still liquid, put the lid back on and cook for 5 more minutes. If the rice is done but there’s still liquid, remove the lid and cook for 2 minutes to let it evaporate. You want the rice tender and the liquid gone.
Rest the Chicken
Letting the chicken rest in the pan (off heat) helps it stay juicy. If you take it out immediately, the juices run out and it dries up.
Variations & Substitutions
Once you’ve nailed the basic version, here’s how you can mix it up. I’ve tried all of these, and they work well.
Vegetable-Loaded
Add 1 cup of frozen peas or diced carrots when you add the broth. They’ll steam right in with the rice. This adds color and nutrition without much effort. My kids love the sweetness of the carrots.
Curry Style
Swap the thyme for 1 tablespoon of curry powder. Add a splash of coconut milk instead of half the broth. This turns it into a creamy, fragrant curry rice. It’s a totally different vibe but uses the same base.
Lemon Herb
Add the zest of one lemon and 2 tablespoons of lemon juice at the end. Fresh dill or parsley is amazing here. It brightens up the rich, savory flavors. Great for spring.
Mushroom Lover’s
Sauté 8oz of sliced mushrooms with the onions. They add an earthy, meaty texture. This makes the dish feel more substantial and fancy.
Dietary Modifications:
- Gluten-Free — This recipe is naturally gluten-free. Just make sure your broth is certified gluten-free (some broths have hidden gluten).
- Dairy-Free — Swap the butter for olive oil or coconut oil. The flavor changes slightly, but it still works. Coconut oil adds a nice richness.
- Low-Carb — Use cauliflower rice instead of regular rice. Note: Cauliflower rice cooks much faster (5-7 minutes), so adjust the liquid and time accordingly. It’s not the same texture, but it’s a good alternative.
Serving & Storage
How to Serve:
I usually serve this straight from the skillet at the dinner table. It looks rustic and stays warm. But here are other ways I’ve enjoyed it:
- With a side of steamed broccoli or green beans.
- With a simple green salad and balsamic vinaigrette.
- With a dollop of sour cream or Greek yogurt on top for extra creaminess.
Storage Instructions:
Refrigerator: Store in an airtight container for up to 4 days. The rice will firm up in the fridge, which is normal. I actually prefer it cold or room temperature for lunch.
Reheating: Add a splash of water or broth to the rice when reheating. This helps loosen it up and makes it creamy again. Microwave in 30-second intervals, stirring in between. Or reheat in a skillet over low heat with a lid on.
Freezing: Yes, this freezes well! Portion it into individual containers. It’ll last for 3 months. Thaw in the fridge overnight and reheat as usual. This is my go-to for busy weeknights when I don’t want to cook.
Meal Prep Tip:
I often make this on Sunday and portion it out for lunches during the week. It reheats beautifully and doesn’t lose its flavor. Just remember to add a splash of liquid when reheating.
Nutrition Information
I’m not a nutritionist, but here’s the breakdown if you’re tracking. This is per serving (based on 6 servings):
- Calories: 380
- Protein: 22g
- Carbs: 45g
- Fiber: 2g
- Fat: 10g
- Sodium: 450mg (varies by broth)
It’s a balanced meal with good protein from the chicken and carbs from the rice. It’s not a diet food, but it’s not heavy either. The onions add some fiber and antioxidants. If you’re watching sodium, use low-sodium broth and reduce the added salt.
Final Thoughts
So that’s my go-to one pan chicken rice with caramelized onions! I’ve probably talked your ear off at this point, but when you make a recipe this often, you have a lot to say about it. This has saved weeknight dinners more times than I can count. It’s my answer to “what’s for dinner” when I’m tired, don’t want takeout, and still want something that tastes really good. My kids are happy, my husband’s happy, and I’m happy because I’m not stressed about cooking.
Make it yours! Try different add-ins, swap in your favorite vegetables, or adjust the spices. The best recipes are the ones you adapt to your family’s tastes. If you make this, drop a comment and let me know what you think! I love hearing how recipes turn out in your kitchen. And if something doesn’t work, tell me that too—I’m here to help troubleshoot.
Happy cooking! And I hope your kitchen smells half as good as mine does right now.
Frequently Asked Questions
Can I use chicken breast instead of thighs?
You can, but thighs are better for this recipe. They stay juicy and don’t dry out as easily. If you use breast, cut them into smaller, uniform pieces so they cook evenly with the rice. Be careful not to overcook them, or they’ll get stringy.
Why is my rice mushy?
This usually happens if you didn’t rinse the rice enough, or if you used too much liquid. Make sure you rinse until the water is clear. Also, check your liquid ratio. If you’re using a different type of rice, the absorption rate might be different. Start with 2.5 cups of liquid for 1.5 cups of rice, and adjust if needed.
Can I make this in a slow cooker?
Yes! Sear the chicken and caramelize the onions in a pan first, then transfer everything to the slow cooker. Add the rice and broth. Cook on low for 2-3 hours or high for 1.5-2 hours. The texture might be slightly different, but it’s still delicious and easy.
How do I reheat leftovers without it getting dry?
Add a splash of water or broth to the rice when reheating. This helps loosen it up and makes it creamy again. Microwave in 30-second intervals, stirring in between. Or reheat in a skillet over low heat with a lid on.
Can I double this recipe?
Absolutely! Double everything and use your biggest pot. The cooking times stay roughly the same. I do this when I’m meal-prepping or feeding a crowd. Just make sure your skillet is big enough for the rice—you might need to use a Dutch oven or cook in batches.
What kind of rice should I use?
Long-grain white rice like Jasmine or Basmati is best. They stay separate and fluffy. Avoid short-grain or sushi rice, which are stickier and might turn mushy in this dish. Do not use brown rice unless you adjust the liquid and cooking time significantly.
Can I freeze this meal?
Yes, this freezes very well. Portion it into individual containers or freezer bags. It’ll last for 3 months. Thaw in the fridge overnight and reheat as usual. This is my go-to for busy weeknights when I don’t want to cook.
Pin This Recipe!
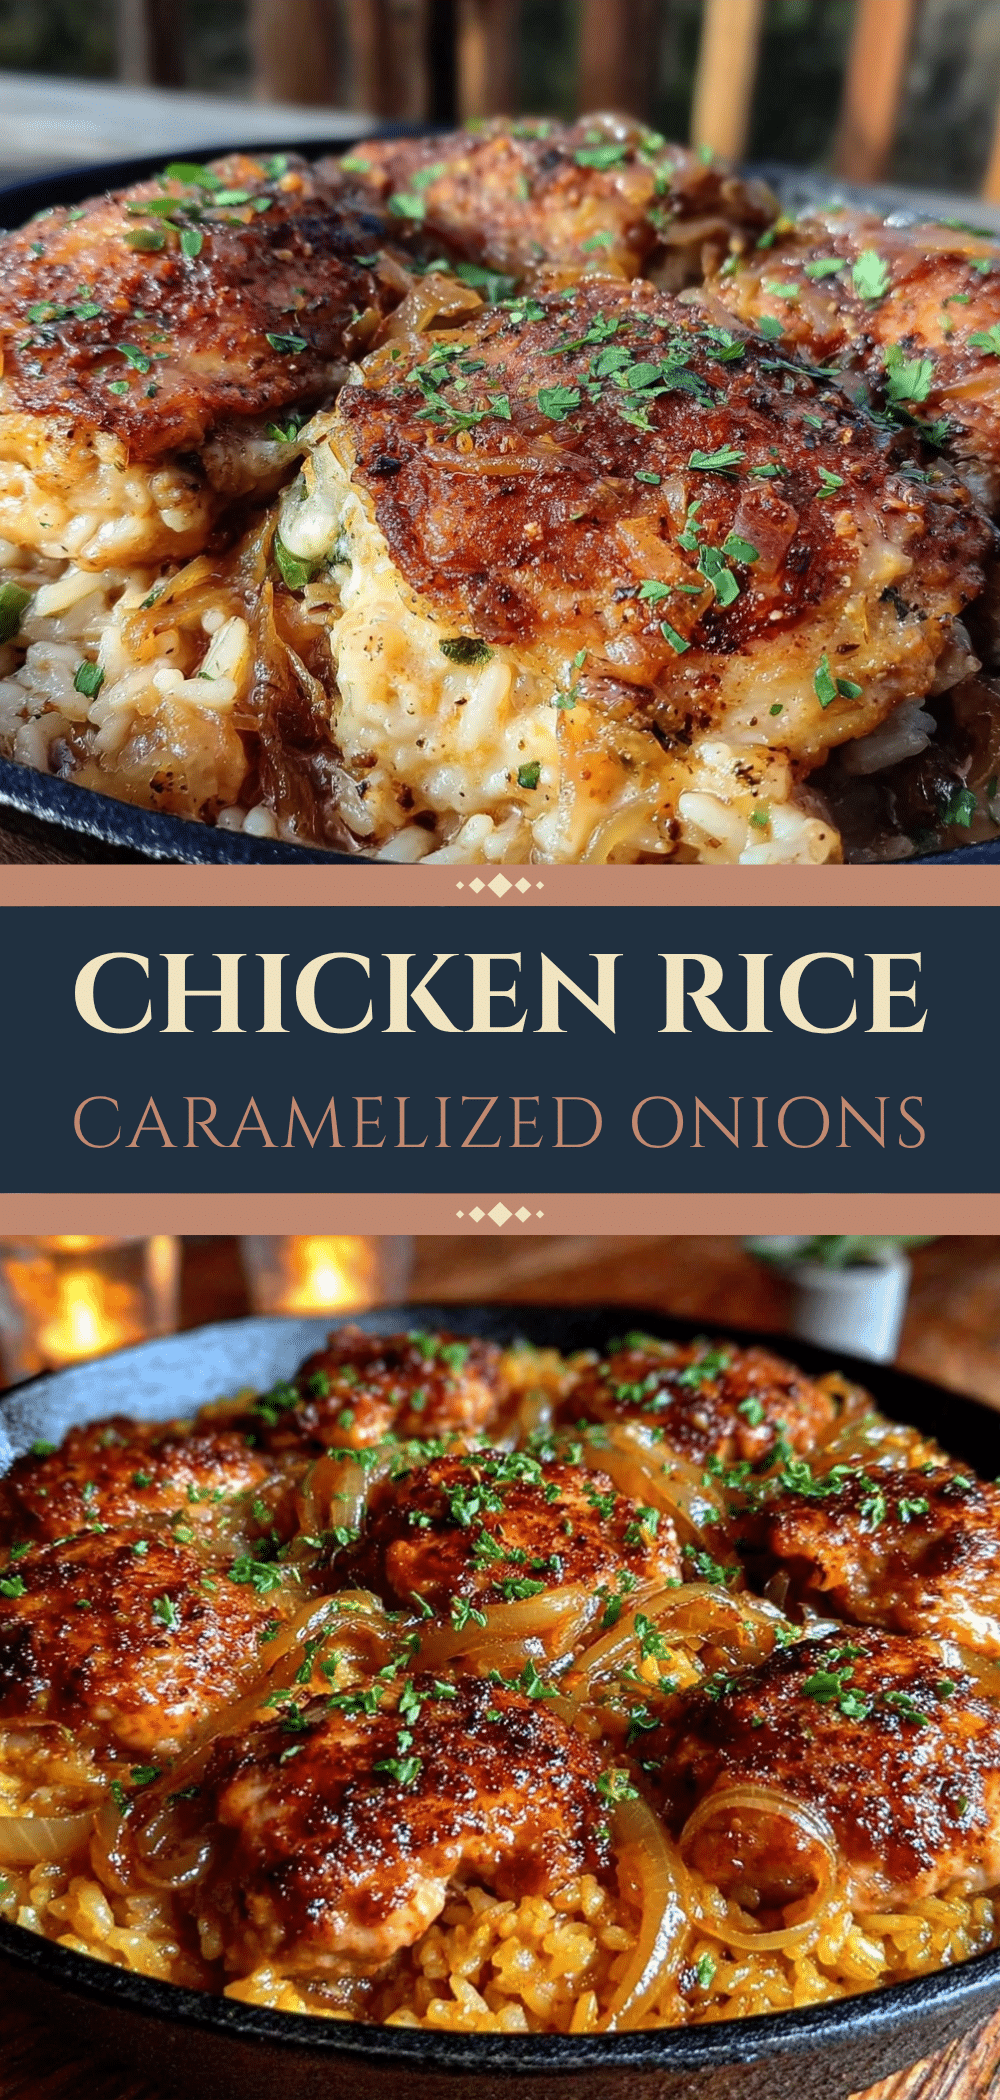

One Pan Chicken Rice with Caramelized Onions
- Total Time: 40 minutes
- Yield: 6 servings 1x
Description
A budget-friendly, one-pan dinner featuring tender chicken thighs, fluffy long-grain rice, and sweet caramelized onions. This forgiving recipe is perfect for busy weeknights and requires minimal cleanup.
Ingredients
- 1.5 lbs boneless, skinless chicken thighs
- 2 large yellow onions, sliced into half-moons
- 1.5 cups long-grain white rice (Jasmine or Basmati)
- 2.5 cups low-sodium chicken broth
- 2 tablespoons butter (salted)
- 3 cloves garlic, minced
- 1 teaspoon dried thyme
- 0.5 teaspoon garlic powder
- 1 teaspoon salt (or to taste)
- 0.5 teaspoon black pepper (or to taste)
- 0.5 teaspoon paprika (optional)
Instructions
- Slice onions and mince garlic. Pat chicken thighs dry with paper towels.
- Heat butter in a large skillet over medium heat. Add onions and cook undisturbed for 2-3 minutes, then stir and cook for 8-10 minutes until soft, golden-brown, and jammy.
- Push onions to the sides. Season chicken with salt and pepper. Sear chicken in the pan for 3-4 minutes per side until golden. Remove chicken to a plate.
- Add rinsed rice to the pan with the onion bits and chicken fat. Stir for 1-2 minutes until grains are coated and slightly translucent.
- Pour in chicken broth, scraping the bottom of the pan. Add garlic, thyme, garlic powder, and paprika. Stir well.
- Return chicken to the pan, nestling it into the rice. Ensure rice is submerged in liquid.
- Bring to a boil, then reduce heat to low. Cover with a tight-fitting lid and simmer for 18-20 minutes without lifting the lid.
- Turn off heat and let rest, covered, for 5 minutes.
- Remove lid, fluff rice with a fork, and serve hot.
Notes
Rinse rice until water runs clear to prevent gumminess. Do not lift the lid during simmering to ensure even cooking. If using unsalted butter, add a pinch more salt. For dairy-free, swap butter for olive or coconut oil. For low-carb, substitute cauliflower rice and adjust cooking time.
- Prep Time: 10 minutes
- Cook Time: 30 minutes
- Category: Main Course
- Cuisine: American
Nutrition
- Serving Size: 1 serving (approx. 1
- Calories: 380
- Sugar: 4
- Sodium: 450
- Fat: 10
- Saturated Fat: 4
- Carbohydrates: 45
- Fiber: 2
- Protein: 22
Keywords: one pan chicken rice, budget meal, easy dinner, chicken thighs, caramelized onions, weeknight dinner, meal prep



