Last Tuesday, I was standing in my kitchen at 6:45 PM, staring into the refrigerator with that specific kind of dread that only comes after a long day at work. The kids were already complaining about hunger, my husband was asking if we were ordering pizza (again), and I had exactly zero energy to chop, sauté, or fuss over individual components. I wanted dinner. I wanted it fast. I wanted it to taste like something I cared about, not just fuel.
Then I remembered the can of black beans I’d bought for a soup that never happened and the bag of tortillas slowly drying out in the pantry. I didn’t want to make individual enchiladas—rolling them all out felt like too much work for a Tuesday. So I threw everything into a baking dish. Layers of sauce, beans, cheese, tortillas. I popped it in the oven, grabbed a glass of wine, and let the house fill with the smell of cumin and melting cheese.
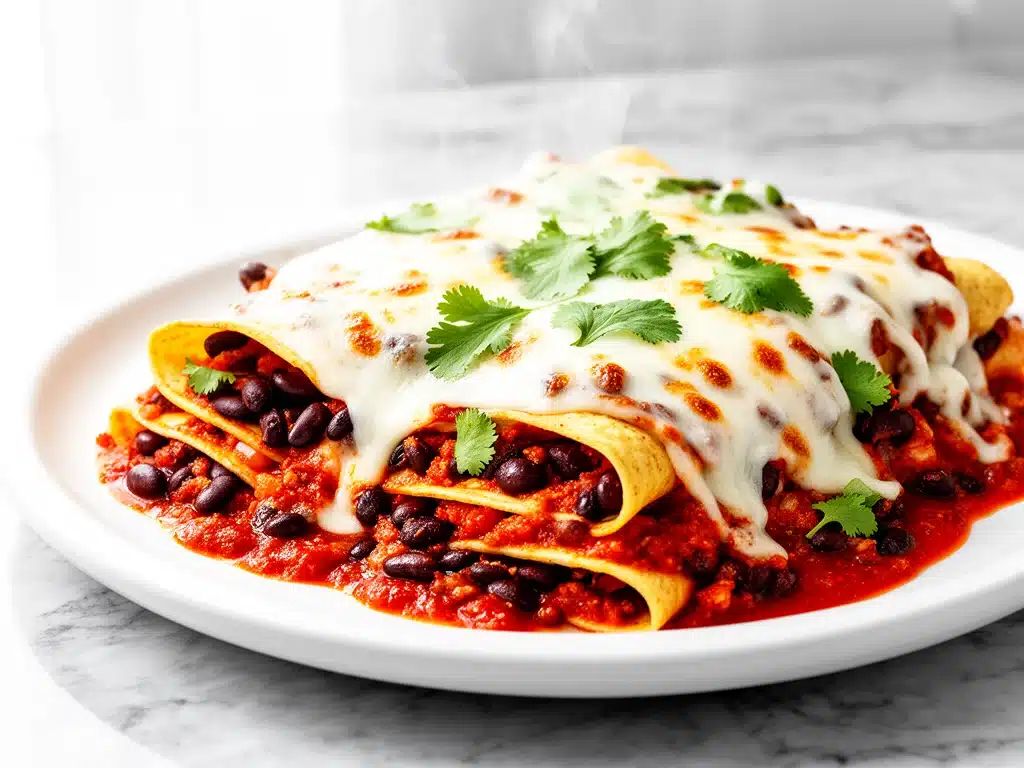
When I pulled it out, bubbling and golden, my kids didn’t even ask if it was pizza. They just dug in. That was the moment I realized I didn’t need fancy techniques or hours of prep time. I just needed this Vegetarian Black Bean Enchilada Bake. It’s become my secret weapon for busy weeknights, my go-to when I need comfort food without the cleanup hassle, and honestly, one of the best things I’ve ever cooked in a panic.
What started as a lazy night survival tactic has turned into a weekly staple. It’s hearty enough to satisfy big appetites, cheap enough to make on a budget, and flexible enough to use up whatever veggies are lingering in your crisper drawer. If you’re tired of the same old weeknight rotation, this bake is going to change your life. Well, maybe not your whole life, but definitely your dinner routine.
Why You’ll Love This Vegetarian Black Bean Enchilada Bake
I’ve made this Vegetarian Black Bean Enchilada Bake at least a dozen times since that Tuesday night, and it never gets old. Here’s why it’s officially earned a spot in your regular meal plan:
- Zero Rolling Required — Let’s be real: rolling enchiladas is tedious. This bake layers everything instead, so you skip the frustration and get to the eating part faster. It’s easier than making chicken ranch wraps because you don’t even need to handle individual wrappers.
- One Pan (Plus a Baking Dish) — Cleanup is minimal. You’re basically just washing a skillet and a casserole dish. That’s it. No scrubbing pans, no complicated tools.
- Pantry Friendly — You likely have most of these ingredients already. Canned beans, tortillas, jarred sauce, cheese. It’s the definition of a low-effort, high-reward dinner.
- Kid-Approved — My picky eater son (who usually refuses anything with “beans” in the name) eats this without complaint. The melted cheese and soft tortillas make it approachable, even for the most skeptical small humans.
- Makes Amazing Leftovers — This actually tastes better the next day. The flavors meld together overnight, and it reheats beautifully in the microwave or oven. I deliberately make extra for lunch on Wednesday.
- Budget Smart — Feeds 4-6 people for under $15. That’s cheaper than takeout and way healthier. Plus, it stretches further than you’d think.
This is my answer to “what’s for dinner” when I’m tired but still want something that tastes homemade. No stress, no weird ingredients, just reliable, delicious food that makes everyone happy.
Ingredients You’ll Need
Here’s the best part: you probably have most of this already. This Vegetarian Black Bean Enchilada Bake relies on simple, accessible ingredients that come together to create something way more complex than the sum of its parts.
For the Base:
Black beans (2 cans, 15 oz each / about 425g each) — Rinsed and drained. Canned is perfect here—it saves time and they hold their shape well. If you’re using dried beans, you’ll need to cook them first, but honestly, why would you? Canned is your friend.
Flour tortillas (8-10 large / about 25cm diameter) — I use flour, not corn, because they’re softer and easier to layer without tearing. Corn tortillas can work but they’re more fragile and have a stronger flavor that might overpower the dish. Look for soft, pliable ones.
Enchilada sauce (2 cups / 480ml) — I prefer a medium heat sauce for balance, but mild works if you’re serving kids. You can make your own, but jarred sauce is convenient and consistent. I buy the 26oz jars so I have extras.
Shredded Mexican blend cheese (3 cups / about 340g) — Pre-shredded is fine here because we’re melting it in a bake, not using it fresh on a salad. The anti-caking agents don’t matter as much when you’re baking. I use a mix of cheddar and Monterey Jack for flavor and meltability.
For the Flavor:
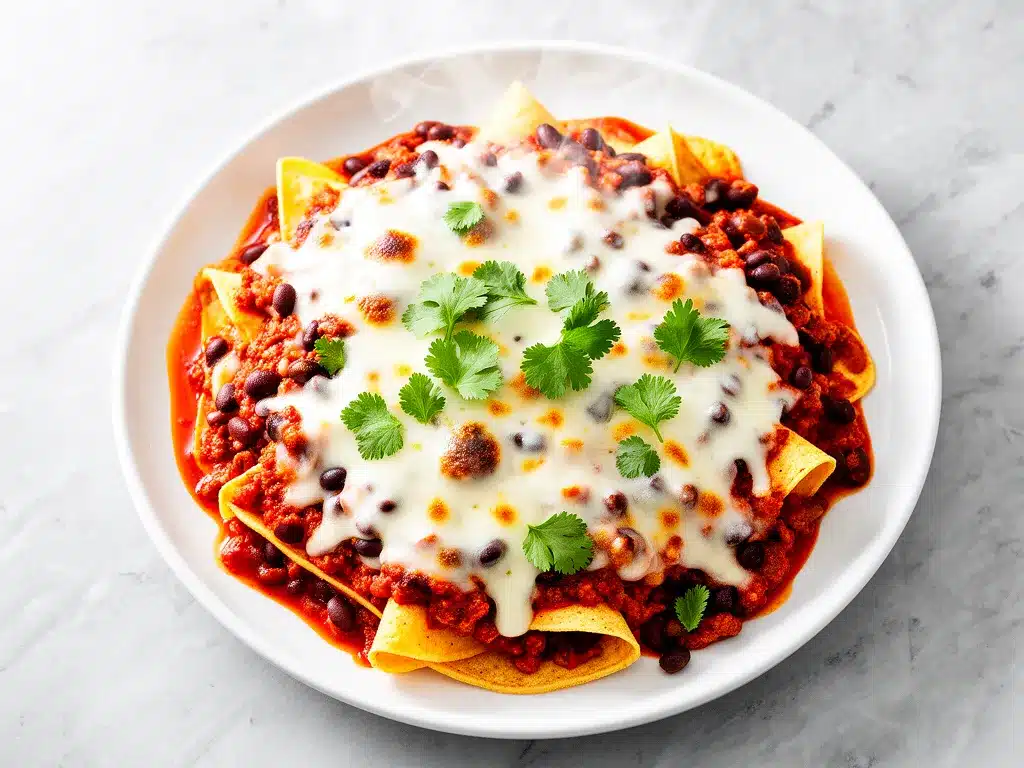
Yellow onion (1 medium, diced / about 200g) — Sweet onions work too, but yellow gives better depth. White onions are too sharp for this. Dice it small so it cooks evenly.
Garlic (4 cloves, minced / about 2 tablespoons) — Fresh only. Jarred garlic has a weird metallic taste that really shows up in baked dishes. Mincing takes 2 minutes. Trust me.
Cumin (1 teaspoon) — Ground cumin is essential for that authentic Mexican flavor. Don’t skip it. It’s the backbone of the dish.
Chili powder (1 teaspoon) — Adds warmth and depth. Not just heat—flavor. Use a good quality blend.
Salt and black pepper — To taste. I use about ½ teaspoon salt and ¼ teaspoon pepper for the bean mixture.
Optional Add-ins:
Corn kernels (1 cup, thawed if frozen) — Adds sweetness and texture. I throw this in whenever I have it. Frozen corn works great.
Diced bell peppers (1 medium, any color) — Adds crunch and color. Red or orange peppers are sweeter, green are more bitter. Use what you like.
Jalapeños (1, sliced) — For extra heat. Fresh or pickled. I usually add pickled jalapeños for a tangy kick.
Black olives (½ cup, sliced) — Optional, but adds a nice briny contrast. I skip these sometimes, but my husband loves them.
Fresh cilantro (¼ cup, chopped) — For garnish. Adds freshness and brightness. Don’t cook it in; add it at the end.
Shopping Tips:
- Beans — I always buy organic black beans if possible. The quality is better, and they’re cheaper per ounce than name brands.
- Tortillas — Buy the largest size you can find. Smaller tortillas mean more layers and more work.
- Cheese — If you’re feeling fancy, buy blocks and shred them yourself. It melts better. But pre-shredded is totally fine for this bake.
Equipment Needed
You don’t need fancy equipment for this. Here’s what I actually use:
9×13 inch baking dish — I use a ceramic one because it retains heat well. Glass works too. Just make sure it’s deep enough to hold all the layers without spilling.
Large skillet — 12-inch works best for sautéing the onions and garlic. Stainless steel or cast iron is ideal, but non-stick works fine.
Measuring cups and spoons — Standard stuff. Dollar store versions work fine.
Wooden spoon — For stirring the bean mixture. Silicone works too.
Colander — For rinsing the beans. Or just rinse them in the can under running water if you’re being lazy.
Sharp knife — For chopping onions, peppers, and jalapeños. Dull knives make you cry more—learned this the hard way.
Cutting board — Any size works. I use plastic for easier cleanup.
That’s basically it. No special tools required. If you have a baking dish and a skillet, you’re good to go.
How to Make It: Step-by-Step
Alright, let’s make this! I’m walking you through exactly how I do it, including the little tricks I’ve picked up over time.
Step 1: Prep Your Ingredients (5 minutes)
Before you start cooking, rinse and drain your black beans. Dice your onion, mince your garlic, and shred your cheese if you haven’t already. Measure out your spices. I know it seems fussy, but it makes the actual cooking way less stressful. Once you start cooking, things move fast.
Step 2: Sauté the Aromatics (3-4 minutes)
Heat 1 tablespoon of olive oil in a large skillet over medium heat. Add the diced onion and cook for 2-3 minutes until it starts to soften and smell sweet. Add the minced garlic, cumin, and chili powder. Cook for 1 minute, stirring constantly. The garlic should smell amazing but not brown—browned garlic tastes bitter. This step builds the flavor base for the entire dish.
Step 3: Mix the Bean Filling (2 minutes)
Add the rinsed black beans, corn (if using), and diced bell peppers (if using) to the skillet. Stir well to combine with the onion mixture. Season with salt and black pepper. Let it cook for 1-2 minutes just to heat through. You don’t need to cook the beans—they’re already cooked. You just want the flavors to meld.
Step 4: Layer the Bake (5 minutes)
Preheat your oven to 375°F (190°C). Spread about ½ cup of enchilada sauce on the bottom of your 9×13 baking dish. This prevents the tortillas from sticking.
Now, start layering. Place 3-4 tortillas on the bottom, overlapping slightly to cover the dish. Spread half of the bean mixture over the tortillas. Sprinkle with 1 cup of cheese. Repeat the layers: tortillas, remaining bean mixture, remaining cheese. Top with the remaining tortillas, ensuring they’re covered by the sauce and cheese.
Pour the remaining enchilada sauce over the top layer. Make sure all the tortillas are soaked in sauce—they’ll cook in that liquid. Sprinkle the remaining cheese on top.
Step 5: Bake (25-30 minutes)
Place the dish in the preheated oven. Bake for 25-30 minutes, or until the cheese is melted and bubbly and the edges are slightly golden. If the top is browning too fast, cover it loosely with foil for the last 10 minutes.
The bake is done when the tortillas are tender and the sauce is bubbling around the edges. You’ll know it’s ready when you see that nice golden crust forming on top.
Step 6: Rest and Serve (5 minutes)
Remove from the oven and let it rest for 5 minutes before cutting. This helps the layers set so it doesn’t fall apart when you serve it. Garnish with fresh cilantro, sliced jalapeños, or a dollop of sour cream if you’re feeling fancy.
Total Time: About 40 minutes (15 minutes active, 25 minutes baking)
Built-in Troubleshooting:
- Tortillas are still crunchy? They need more sauce. Add a splash more enchilada sauce or a little water/broth and bake for 5 more minutes.
- Top is burning? Cover with foil. It happens if your oven runs hot.
- Too dry? Add more sauce. The tortillas absorb a lot of liquid.
Expert Tips & Tricks
Here’s everything I’ve learned from making this dozens of times. These tips will save you from my mistakes.
Don’t Skimp on Sauce
The tortillas need to be fully coated in sauce to cook properly. If they’re dry, they’ll stay tough. I always err on the side of too much sauce. You can always drain excess if needed, but you can’t add more later.
Layer Evenly
Make sure your layers are even so it cooks uniformly. If one corner has more tortillas, it’ll be denser and take longer to cook. Spread the bean mixture evenly too.
Use Fresh Spices
Old cumin and chili powder lose their flavor. If your spices are from last year, buy new ones. It makes a huge difference in the final taste. I keep mine in a dark cupboard to preserve freshness.
Rest Before Cutting
This is crucial. If you cut it immediately, it’ll fall apart. Letting it rest allows the layers to set. It’s worth the 5-minute wait.
Make-Ahead Strategy
You can assemble this bake up to 24 hours ahead. Cover and refrigerate. When you’re ready to cook, just add 10 minutes to the baking time since it’s starting cold. This is perfect for meal prep or dinner parties.
Pro Trick for Extra Flavor
Toast the spices in the skillet for 30 seconds before adding the beans. This releases more oils and flavor. It’s a small step that makes a big difference.
Variations & Substitutions
Once you’ve nailed the basic version, here’s how you can mix it up. I’ve tried all of these.
Chicken Version
Add 2 cups diced cooked chicken (rotisserie works great) to the bean mixture. My husband prefers this version—it makes it more filling. You can also use shredded turkey or leftover roast beef.
Veggie-Loaded
Toss in 2 cups fresh spinach, 1 cup halved cherry tomatoes, or 1 cup diced zucchini. The spinach wilts right in. This is how I get my kids to eat vegetables—hide them in the layers.
Spicy Kick
Add 1 diced jalapeño to the skillet, use hot enchilada sauce, and top with sliced pickled jalapeños. For extra heat, add a pinch of cayenne pepper to the bean mixture.
Lighter Version
Use reduced-fat cheese and low-sodium enchilada sauce. It’s not as rich, but still good. I make this when I’m trying to be “healthy,” though I don’t feel guilty about the full-fat version.
Mushroom Lover’s
Sauté 8oz sliced mushrooms with the onions. Cook until golden brown. Adds earthiness and makes it feel fancier. Mushrooms pair beautifully with cumin and black beans.
Dietary Modifications:
- Gluten-Free — Use corn tortillas instead of flour. Make sure your enchilada sauce is certified gluten-free. Everything else is naturally gluten-free.
- Dairy-Free — Replace cheese with dairy-free shreds (Violife or Daiya work well) and skip sour cream. It’s different but still tasty. My lactose-intolerant friend requests this version.
- Vegan — Use corn tortillas, vegan cheese, and vegetable broth instead of any dairy. Add nutritional yeast for extra “cheesy” flavor.
Serving & Storage
How to Serve:
I usually serve this straight from the baking dish at the dinner table—it looks rustic and stays warm. But here are other ways I’ve enjoyed it:
Side Dishes:
– Simple green salad with lime vinaigrette
– Mexican rice (if you want a full meal)
– Roasted sweet potato wedges
– A bowl of chips and guacamole on the side
Toppings Bar:
When I have guests, I put out: sour cream, fresh cilantro, sliced jalapeños, diced avocado, and hot sauce. Everyone customizes their bowl. It’s fun and interactive.
Wine Pairing:
Not a wine expert, but my wine-snob friend says a crisp Sauvignon Blanc or a light Pinot Grigio works great with this. For beer, a Mexican lager like Modelo is perfect.
Storage Instructions:
Refrigerator:
Store in an airtight container or cover the baking dish tightly with plastic wrap for up to 4 days. The flavors actually get better after a day.
Reheating:
Best method: Cover with foil and bake at 350°F (175°C) for 15-20 minutes until heated through.
Microwave method: Heat individual portions in the microwave for 2-3 minutes, stirring halfway. Add a splash of water if it looks dry.
Never works: Trying to reheat it in the toaster oven without covering. It dries out instantly. Ask me how I know.
Freezing:
Yes, this freezes well! Assemble the bake but don’t bake it. Cover tightly with plastic wrap and foil. Freeze for up to 3 months. Thaw in the fridge overnight, then bake as directed, adding 10-15 minutes to the cooking time. You can also freeze individual portions after baking for quick lunches.
Meal Prep:
Make this on Sunday, portion it out for lunch throughout the week. It reheats beautifully and tastes great cold too (yes, really). I pack it in bento boxes for work.
Nutrition Information
I’m not a nutritionist, but here’s the breakdown if you’re tracking.
Per Serving (based on 6 servings):
- Calories: 380
- Protein: 18g
- Carbs: 52g
- Fiber: 12g
- Sugar: 4g
- Fat: 12g
- Saturated Fat: 5g
- Cholesterol: 25mg
- Sodium: 680mg
- Calcium: 200mg
What’s Good:
– High in fiber from black beans
– Good protein source
– Rich in calcium from cheese
– Can add vegetables to boost nutrition further
What to Know:
– Higher in calories from cheese and tortillas
– Contains dairy and gluten
– Moderate sodium (use low-sodium beans and sauce to reduce)
My Take:
“Look, this is comfort food with cheese and tortillas. It’s not a diet recipe. But it’s way better than takeout, costs less, and I know exactly what’s in it. When I want to make it lighter, I use less cheese and load up on vegetables. But usually? I just eat a reasonable portion and enjoy it.”
Final Thoughts
So that’s my go-to Vegetarian Black Bean Enchilada Bake! I’ve probably talked your ear off at this point, but when you make a recipe this often, you have a lot to say about it.
This has saved weeknight dinners more times than I can count. It’s my answer to “what’s for dinner” when I’m tired, don’t want takeout, and still want something that tastes really good. My kids are happy, my husband’s happy, and I’m happy because I’m not stressed about cooking.
Make it yours! Try different add-ins, swap in your favorite vegetables, adjust the spice level. The best recipes are the ones you adapt to your family’s tastes. If you’re looking for other easy weeknight ideas, check out my watermelon mint agua fresca to pair with it, or these apple cinnamon oatmeal bars for a sweet treat.
If you make this, drop a comment and let me know what you think! I love hearing how recipes turn out in your kitchen. And if something doesn’t work, tell me that too—I’m here to help troubleshoot.
Happy cooking! And I hope your kitchen smells half as good as mine does right now.
Frequently Asked Questions
Can I use corn tortillas instead of flour?
You can, but they’re more fragile and have a stronger flavor. If you use corn, warm them up first to make them pliable, and be careful not to over-layer. They’ll also absorb more sauce, so you might need extra. I prefer flour for this bake because they’re softer and easier to handle, but corn works if you’re going gluten-free.
My bake turned out watery—what happened?
Usually means you used too much sauce or didn’t let it rest long enough. The tortillas release moisture as they cook. Let it rest for 5-10 minutes before cutting. If it’s still watery, bake it uncovered for 5 more minutes to let excess liquid evaporate. Also, make sure you’re draining your canned beans well.
Can I make this ahead for a dinner party?
Absolutely. Assemble it up to 24 hours ahead and refrigerate. When you’re ready to serve, just pop it in the oven. Add 10-15 minutes to the baking time since it’s starting cold. This is perfect for reducing stress during parties. I do this all the time.
Can I freeze this bake?
Yes! It freezes beautifully. Assemble but don’t bake, then freeze. Thaw in the fridge overnight and bake as directed. You can also freeze individual portions after baking. It reheats well in the microwave or oven. Just add a splash of water if it looks dry.
Why did my tortillas stay crunchy?
They didn’t absorb enough sauce. Make sure all tortillas are fully coated and covered by sauce. If they’re still crunchy after baking, add a little more sauce or water and bake for 5 more minutes. The tortillas need that liquid to soften.
Can I use leftover cooked beans?
Yes! Just rinse them well to remove any excess starch. Canned beans are convenient, but leftover cooked beans work fine. Just make sure they’re drained and not too wet. Freshly cooked beans might be softer, so handle them gently when layering.
How do I reheat leftovers without it drying out?
Add a splash of water or broth to a skillet, add your leftover bake, and heat gently over low heat, covering the pan. The extra liquid brings back the moisture. Microwave also works if you add a splash of water and cover with a damp paper towel. Never reheat it uncovered in the microwave—it dries out fast.
Pin This Recipe!
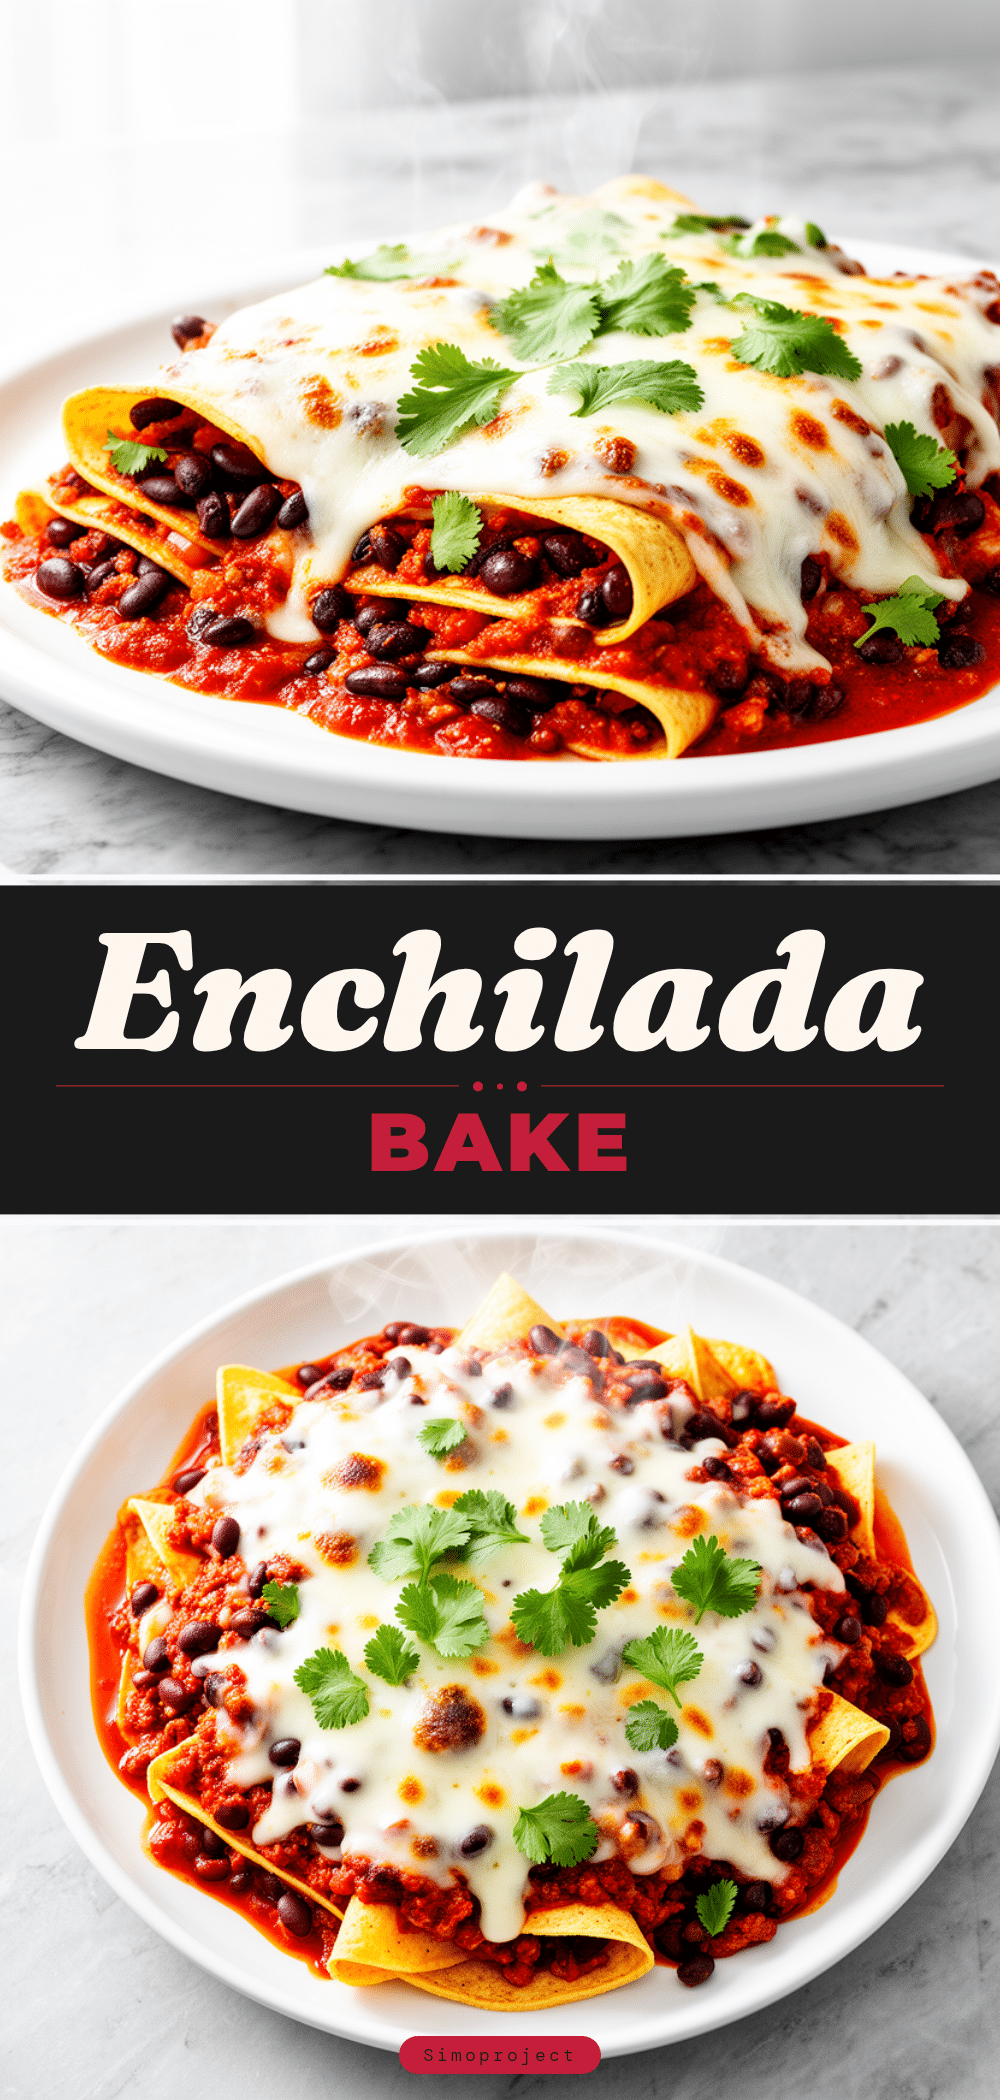
Vegetarian Black Bean Enchilada Bake
- Total Time: 40 minutes
- Yield: 6 servings 1x
Description
A quick, easy, and kid-approved weeknight dinner that layers black beans, cheese, and tortillas in a baking dish for a comforting, low-effort meal.
Ingredients
- 2 cans (15 oz each) black beans, rinsed and drained
- 8–10 large flour tortillas
- 2 cups enchilada sauce (medium heat)
- 3 cups shredded Mexican blend cheese
- 1 medium yellow onion, diced
- 4 cloves garlic, minced
- 1 teaspoon ground cumin
- 1 teaspoon chili powder
- 1 tablespoon olive oil
- Salt and black pepper to taste
- Optional: 1 cup corn kernels, 1 diced bell pepper, 1 sliced jalapeño, ½ cup sliced black olives, ¼ cup fresh cilantro
Instructions
- Preheat oven to 375°F (190°C).
- Heat olive oil in a large skillet over medium heat. Add diced onion and cook for 2-3 minutes until softened.
- Add minced garlic, cumin, and chili powder; cook for 1 minute until fragrant.
- Stir in rinsed black beans, corn (if using), and bell peppers (if using). Season with salt and pepper; cook for 1-2 minutes to heat through.
- Spread ½ cup of enchilada sauce on the bottom of a 9×13 inch baking dish.
- Layer 3-4 tortillas on the bottom, followed by half the bean mixture and 1 cup of cheese.
- Repeat layers: tortillas, remaining bean mixture, remaining cheese.
- Top with remaining tortillas, pour remaining enchilada sauce over the top, and sprinkle with remaining cheese.
- Bake for 25-30 minutes until cheese is melted and bubbly and edges are golden.
- Let rest for 5 minutes before cutting and serving.
Notes
Ensure tortillas are fully coated in sauce to prevent crunchiness. Let the bake rest for 5 minutes before cutting to allow layers to set. Can be assembled up to 24 hours ahead and refrigerated before baking.
- Prep Time: 15 minutes
- Cook Time: 25 minutes
- Category: Main Course
- Cuisine: Mexican
Nutrition
- Serving Size: 1 slice
- Calories: 380
- Sugar: 4
- Sodium: 680
- Fat: 12
- Saturated Fat: 5
- Carbohydrates: 52
- Fiber: 12
- Protein: 18
Keywords: vegetarian, black bean, enchilada bake, weeknight dinner, easy recipe, one pan, family friendly, meal prep