Last Tuesday, I was standing in my kitchen at 6:30 PM, staring into the open fridge with that specific kind of panic only a hungry parent can feel. The takeout menu was open on my phone, the delivery fee was astronomical, and my kids were already debating whether pizza or tacos were “better” (spoiler alert: they were both wrong because neither was what I wanted to cook). I didn’t have time to order, and I definitely didn’t have time to chop a mountain of vegetables for a complex stir-fry.
That’s when I saw them: a bag of colorful bell peppers sitting next to some leftover rotisserie chicken and a half-empty bag of bacon bits. It was a random combination, but my brain clicked into gear. I had ranch seasoning, I had cream cheese, and I had cheese. I threw together what I thought would be a mediocre dinner, just to get food on the table. Thirty minutes later, my husband walked in, took one bite, and said, “Why haven’t we been making these all along?”
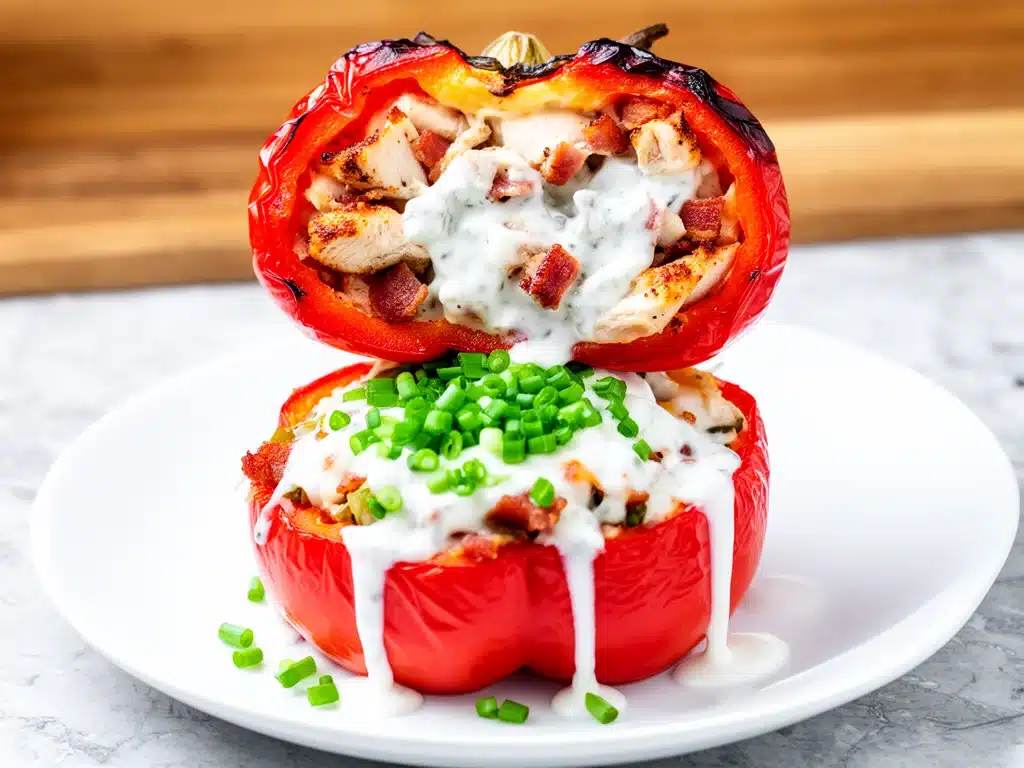
That was the moment I discovered that baked chicken bacon ranch stuffed peppers aren’t just a quick fix—they’re a flavor bomb that beats almost any restaurant version. I’ve made this recipe at least twelve times since that chaotic Tuesday, tweaking the cheese ratios and testing different pepper varieties until I landed on the perfect combination. It’s creamy, it’s savory, it’s got that smoky bacon crunch, and it’s ready before you can even pick up your phone to order delivery.
What makes this dish so special is how it takes the beloved flavors of a classic ranch dip and transforms them into a hearty, baked meal. The peppers become tender and slightly sweet, holding a filling that’s rich from the cream cheese and sharp from the cheddar. It’s comfort food without the guilt of a heavy appetizer plate. Plus, it’s incredibly forgiving. If you don’t have chicken, use turkey. If you’re out of bacon, skip it (though I doubt you will be). This is the kind of recipe that saves your weeknight routine and makes everyone at the table happy.
Why You’ll Love This Recipe
I’m not exaggerating when I say this has completely changed our dinner rotation. There are plenty of reasons to add baked chicken bacon ranch stuffed peppers to your menu, but here are the big ones that keep me coming back to the stove.
It’s Better Than Takeout (And Cheaper) — Seriously. A comparable order from a restaurant would run you $30 or more with tax and tip. This recipe costs about $12 to feed four people, and the flavor is fresher because you control the ingredients. No mystery meats or stale vegetables here.
Lightning Fast Prep — If you have leftover rotisserie chicken or even canned chicken, you’re looking at 10 minutes of active prep time. The rest is just baking. I’ve made this on nights when I got home from work exhausted, and it still felt like a gourmet meal. It’s the ultimate lazy-night, high-reward dinner.
Perfectly Portioned — One pepper per person means no fighting over the last piece at the bottom of the pan. It’s a complete meal in one vessel. The veggies, the protein, the starch (if you count the pepper body), and the cheese are all in one bite. It’s visually appealing and satisfying.
Kid-Approved — My kids usually have a million rules about what they’ll eat, but they devour these. The ranch flavor masks any “green” tastes, and the bacon bits are a universal hit. I’ve served these to picky eaters who claim they “don’t like vegetables,” and they went back for seconds.
Meal Prep Friendly — I often make a double batch on Sunday. The filling holds up well in the fridge, and you can assemble them later in the week. It’s also great for lunch—the flavors actually meld and get better after sitting for a day.
This is my go-to when I need dinner to just work. No complicated techniques, no weird ingredients you have to drive to three stores to find, just reliable, delicious food that makes everyone happy.
Ingredients You’ll Need
Here’s the best part: you probably have most of this already. This isn’t a recipe that requires a specialty trip to a gourmet market. It’s built on pantry staples and easy-to-find fresh items.
For the Peppers
Large Bell Peppers (4 large, any color) — I love using a mix of red and yellow for sweetness, but green peppers add a nice bitter contrast. You want peppers that stand up straight and have flat bottoms so they don’t tip over in the baking dish. Look for firm, shiny peppers without soft spots.
For the Filling
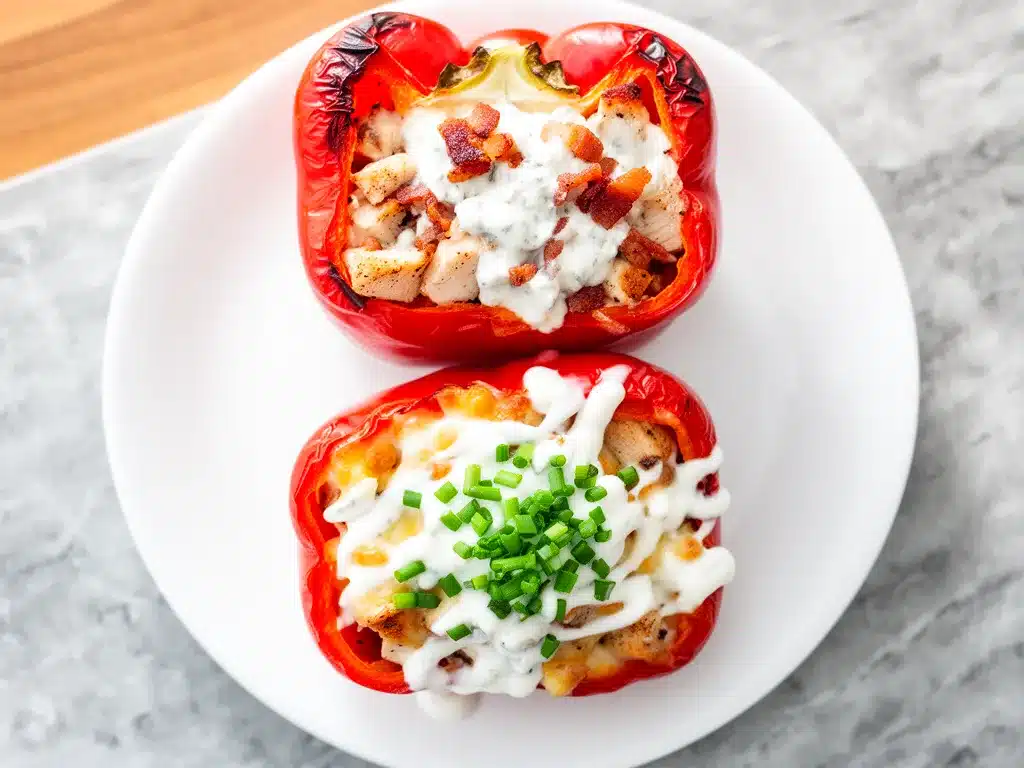
Cooked Chicken (2 cups, shredded or diced) — Rotisserie chicken is my absolute favorite here because it saves time and adds flavor. If you’re cooking from scratch, poach two chicken breasts and shred them. You can also use canned chicken, though it’s less juicy. Just make sure it’s drained well.
Cream Cheese (8 oz, softened) — This is the secret to the creamy texture. It binds the filling together and adds that rich, tangy base. Make sure it’s softened to room temperature so it mixes smoothly with the other ingredients. Lumpy cream cheese means lumpy filling.
Shredded Cheddar Cheese (1 ½ cups) — Sharp cheddar gives the best flavor. I mix half sharp cheddar with half Monterey Jack for a meltier texture. Avoid pre-shredded cheese if you can help it—the anti-caking agents prevent it from melting as smoothly.
Ranch Seasoning (2 tablespoons dry mix) — This is the flavor driver. I use a standard packet (like Hidden Valley or a store brand). Don’t skip this! It’s what gives the dish its iconic ranch taste. If you’re watching sodium, look for a low-sodium version, but the flavor profile will be slightly different.
Bacon Bits (½ cup) — I use real crumbled bacon for the best smoky flavor. If you’re in a hurry, the shelf-stable bacon bits work fine, but nothing beats the crunch of actual cooked bacon. Chop it up small so you get a piece in every bite.
Sour Cream (¼ cup) — Adds tang and moisture. Greek yogurt works as a lighter substitute, but the texture will be slightly thicker.
Garlic (2 cloves, minced) — Fresh garlic is non-negotiable. Jarred garlic has a metallic aftertaste that clashes with the ranch. Mince it fine so it distributes evenly.
Green Onions (2 stalks, sliced) — For a fresh, oniony kick and a pop of color. You can use dried onion flakes if you’re out, but fresh is better.
For the Topping
Extra Cheddar Cheese (½ cup, shredded) — For that golden, bubbly top layer.
Crushed Ritz Crackers or Breadcrumbs (¼ cup, optional) — I love adding a crunchy topping. Crushed Ritz crackers add a buttery crunch that’s amazing. Panko breadcrumbs work too if you want a lighter crunch.
Equipment Needed
You don’t need fancy equipment for this. Here’s what I actually use.
9×13 Inch Baking Dish — I use a ceramic dish because it heats evenly. A glass dish works too, but keep an eye on the cheese so it doesn’t burn.
Medium Mixing Bowl — For combining the filling. A large bowl is fine if you’re doubling the recipe.
Sharp Knife and Cutting Board — For prepping the peppers and bacon. A serrated knife makes cutting peppers much easier and safer.
Measuring Cups and Spoons — Standard stuff. Dollar store versions work fine.
Box Grater — For grating your own cheese. It melts so much better than pre-shredded.
Optional: Food Processor — If you’re using crackers for the topping, a quick pulse in the food processor saves time. Otherwise, put them in a bag and smash them with a rolling pin.
How to Make It: Step-by-Step
Alright, let’s make this! I’m walking you through exactly how I do it, including the little tricks I’ve picked up to ensure your peppers don’t fall apart and your filling stays creamy.
Step 1: Prep the Oven and Peppers (5 minutes)
Preheat your oven to 375°F (190°C). While the oven heats, wash your bell peppers thoroughly. Using a sharp knife, carefully cut off the top of each pepper (about 1 inch down). Remove the seeds and white membrane from the inside. You want a clean hollow space. Pro tip: If your peppers are wobbly and won’t stand up, slice a tiny sliver off the bottom so they sit flat. This prevents them from tipping over while baking.
Step 2: Par-Bake the Peppers (10-12 minutes)
This is the step most people skip, but I don’t recommend it. Place your hollowed peppers upright in the baking dish. Pour about ¼ cup of water into the bottom of the dish (not inside the peppers). This creates steam and helps the peppers soften without drying out. Bake them for 10-12 minutes until they are just starting to soften but are still firm. This ensures they don’t turn into mush when you add the filling and bake again.
Step 3: Make the Filling (5 minutes)
While the peppers bake, make the filling. In a mixing bowl, combine the softened cream cheese, sour cream, ranch seasoning, minced garlic, and shredded cheddar. Mix until smooth. Fold in the shredded chicken and bacon bits. Taste it! If you want more ranch flavor, add a little more seasoning. If you want more crunch, add more bacon. Adjust to your liking.
Step 4: Stuff the Peppers (2 minutes)
Remove the par-baked peppers from the oven. Carefully spoon the chicken mixture into each pepper, packing it in gently. Don’t overstuff them to the brim, as the filling will expand slightly. Leave about ¼ inch of space at the top. Sprinkle the extra shredded cheese over the top of each pepper.
Step 5: Final Bake (15-20 minutes)
Return the dish to the oven. Bake for 15-20 minutes, or until the cheese is melted, bubbly, and lightly golden. The peppers should be tender when pierced with a fork. If you added the cracker topping, add it in the last 5 minutes so it doesn’t burn.
Step 6: Garnish and Serve
Remove from the oven and let them rest for 5 minutes. This helps the filling set slightly so it doesn’t slide out when you cut into them. Sprinkle with sliced green onions and serve immediately.
Expert Tips & Tricks
Here’s everything I’ve learned from making these dozens of times. These tips will save you from my mistakes.
Don’t Skip the Par-Bake
Raw peppers can stay crunchy even after the full bake time, while the filling might overcook. Par-baking ensures the pepper is tender and ready to hold the filling. It’s a small extra step that makes a huge difference in texture.
Softened Cream Cheese is Key
If your cream cheese is cold and stiff, you’ll end up with chunks in your filling. Cut it into small cubes and let it sit on the counter for 30 minutes, or microwave it in 10-second bursts until it’s pliable. It should be easy to whisk.
Drain Your Chicken Well
If you’re using rotisserie chicken, make sure it’s not wet. Excess moisture can make the filling runny. Pat it dry with paper towels if needed. You want a creamy, cohesive filling, not a soup.
Choose the Right Peppers
Look for peppers that are roughly the same size so they bake evenly. Red and yellow peppers are sweeter and softer, making them easier to eat. Green peppers are firmer and slightly bitter, which balances the rich filling. I usually buy a mix.
Customize the Crunch
I love the buttery crunch of crushed Ritz crackers, but you can also use panko breadcrumbs tossed with a little melted butter, or even crushed tortilla chips for a Mexican twist. The crunch adds a necessary textural contrast to the soft peppers and creamy filling.
Variations & Substitutions
Once you’ve nailed the basic version, here’s how you can mix it up. I’ve tried all of these.
Turkey Version
Swap chicken for shredded turkey. It’s great for using up leftover holiday turkey. The flavor is very similar, just slightly leaner.
Spicy Ranch
Add ½ teaspoon of cayenne pepper or a diced jalapeño to the filling. Top with pepper jack cheese instead of cheddar. This is perfect if you like a kick.
BBQ Chicken Style
Swap the ranch seasoning for BBQ sauce (about ¼ cup mixed with 1 tablespoon mayo). Use smoked gouda cheese. It’s a totally different vibe but equally delicious.
Vegetarian Option
Skip the chicken and bacon. Add 1 cup of sautéed mushrooms and spinach to the filling. Use a vegetarian bacon alternative if you want that smoky flavor. It’s surprisingly hearty.
Gluten-Free
Ensure your ranch seasoning and bacon bits are certified gluten-free (some processed meats contain wheat fillers). Use gluten-free breadcrumbs or crackers for the topping. Everything else is naturally gluten-free.
Serving & Storage
How to serve these to get the most out of them.
How to Serve
I usually serve these straight from the baking dish at the dinner table—it looks rustic and stays warm. Pair them with a simple green salad with balsamic vinaigrette to cut through the richness. A glass of watermelon mint agua fresca is a refreshing contrast to the creamy peppers, especially on warm evenings.
Side Dishes
– Garlic bread (obviously)
– Roasted asparagus or broccoli
– A light cucumber salad
– Cornbread (if you’re going for a Southern vibe)
Toppings Bar
When I have guests, I put out: extra ranch dressing, chopped chives, crispy bacon bits, and hot sauce. Everyone customizes their bowl.
Storage Instructions
Store leftovers in an airtight container in the refrigerator for up to 4 days. The peppers will soften further in the fridge, which some people prefer. Reheat in the microwave for 1-2 minutes, or in the oven at 350°F for 10-15 minutes to crisp up the cheese.
Freezing
These don’t freeze well after baking because the peppers can become mushy and the cheese may separate. You can freeze the uncooked stuffed peppers, but the texture of the peppers might change slightly upon thawing and baking. I recommend making them fresh for the best results.
Nutrition Information
I’m not a nutritionist, but here’s the breakdown if you’re tracking. Please note that these are estimates and can vary based on specific brands and portion sizes.
Per Serving (based on 1 stuffed pepper):
- Calories: 380
- Protein: 28g
- Carbs: 12g
- Fiber: 2g
- Sugar: 6g
- Fat: 24g
- Saturated Fat: 10g
- Cholesterol: 85mg
- Sodium: 650mg
What’s Good:
High in protein from the chicken and cheese. The bell peppers provide vitamins A and C. It’s a balanced meal with veggies and protein.
What to Know:
Higher in calories and fat due to the cream cheese and cheddar. Sodium can be high depending on the ranch seasoning and bacon. Use low-sodium ranch and bacon to reduce salt content.
My Take:
Look, this is comfort food. It’s creamy, cheesy, and savory. It’s not a diet recipe, but it’s way better than takeout and gives you control over the ingredients. When I want to make it lighter, I use light cream cheese and Greek yogurt. But usually? I just enjoy a reasonable portion and appreciate the flavor.
Final Thoughts
So that’s my go-to baked chicken bacon ranch stuffed peppers! I’ve probably talked your ear off at this point, but when you make a recipe this often, you have a lot to say about it.
This has saved weeknight dinners more times than I can count. It’s my answer to “what’s for dinner” when I’m tired, don’t want takeout, and still want something that tastes really good. My kids are happy, my husband’s happy, and I’m happy because I’m not stressed about cooking.
Make it yours! Try different peppers, swap in your favorite cheese, or add some jalapeños for heat. The best recipes are the ones you adapt to your family’s tastes. If you make this, drop a comment and let me know what you think! I love hearing how recipes turn out in your kitchen. And if something doesn’t work, tell me that too—I’m here to help troubleshoot.
Happy cooking! And I hope your kitchen smells half as good as mine does right now.
Frequently Asked Questions
Can I use raw chicken instead of cooked?
You can, but it changes the method. You’d need to cook the chicken first (bake or boil it) before mixing it into the filling. If you put raw chicken chunks inside the pepper, they might not cook evenly in the time it takes for the pepper to soften. Pre-cooked is much easier and ensures food safety.
Why did my peppers fall over in the baking dish?
This happens if the bottoms aren’t flat. Slice a tiny sliver off the bottom of each pepper to create a flat base. Or, you can nestle them against each other in the dish for support. Another trick is to cut a small square of pepper off the bottom and use it as a “foot” to prop it up.
Can I make this ahead of time?
Yes! You can assemble the stuffed peppers up to 24 hours in advance. Store them in the fridge covered with plastic wrap. When you’re ready to eat, just pop them in the oven. You might need to add 5-10 minutes to the bake time since they’re starting cold.
What if I don’t have ranch seasoning?
You can make your own ranch seasoning blend! Mix 1 tablespoon dried parsley, 1 teaspoon dried dill, 1 teaspoon garlic powder, 1 teaspoon onion powder, 1 teaspoon salt, and ½ teaspoon black pepper. It’s not exactly the same as the packet, but it’s close. Or, just use 2 tablespoons of dry Italian seasoning for a different flavor profile.
Can I freeze the filling?
The filling can be frozen, but the texture of the cream cheese and sour cream might change slightly upon thawing. It’s best used in dishes like dips or sauces after freezing. For stuffed peppers, I recommend making the filling fresh for the best creamy texture.
Are these good for meal prep?
Absolutely. They hold up well in the fridge for 3-4 days. They’re great for lunch because they’re portable (if you can manage to eat them without the filling sliding out!). I often pack them in a container with a fork, and they reheat nicely in the microwave.
Can I use mini peppers instead of large ones?
Yes! Mini sweet peppers are adorable for appetizers. You’ll need about 12-16 mini peppers for this recipe. Reduce the bake time to 10-12 minutes total after filling, as they cook much faster. They’re perfect for parties or as a side dish.
Pin This Recipe!
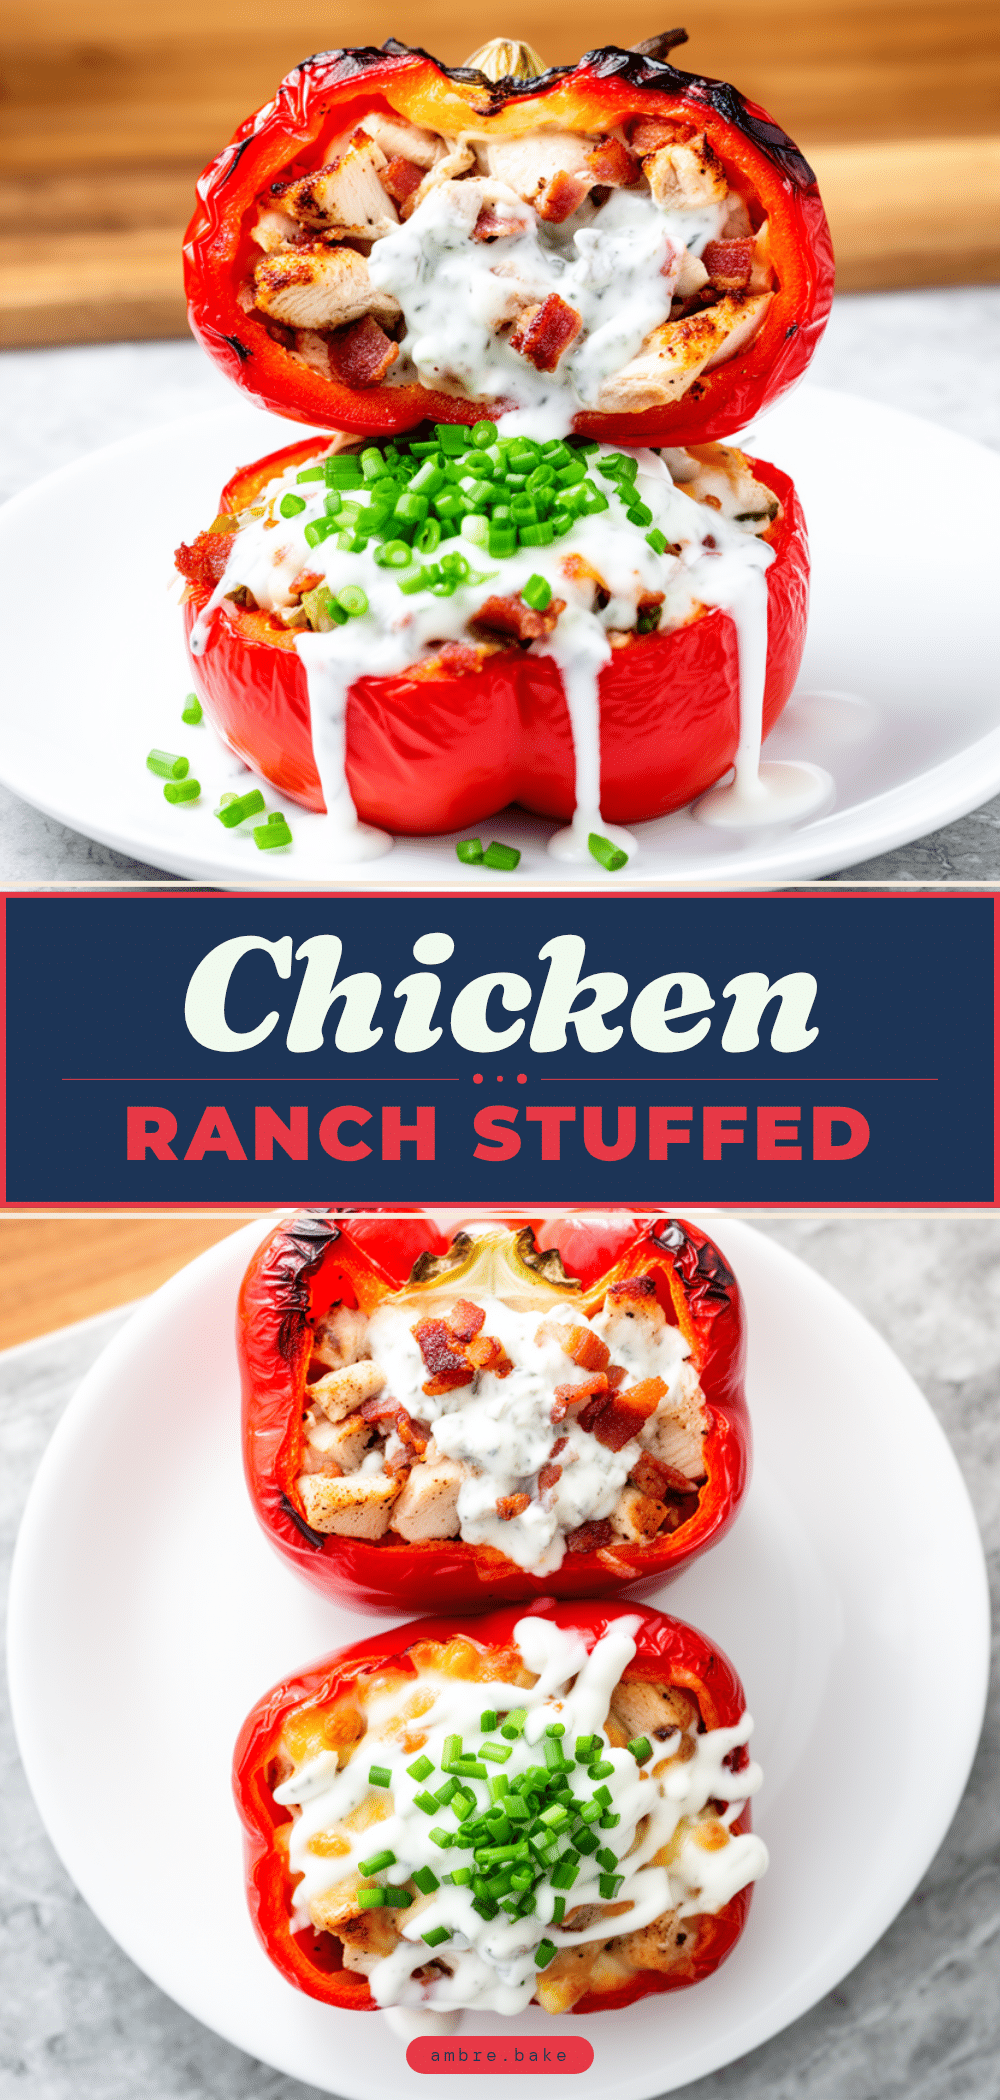
Baked Chicken Bacon Ranch Stuffed Peppers: Easy Copycat
- Total Time: 40 minutes
- Yield: 4 servings 1x
Description
A quick and creamy weeknight dinner featuring bell peppers stuffed with a savory mixture of rotisserie chicken, cream cheese, cheddar, and ranch seasoning, topped with crispy bacon and baked to perfection.
Ingredients
- 4 large bell peppers (any color)
- 2 cups cooked chicken, shredded or diced
- 8 oz cream cheese, softened
- 1 ½ cups shredded cheddar cheese
- 2 tablespoons dry ranch seasoning mix
- ½ cup bacon bits (crumbled)
- ¼ cup sour cream
- 2 cloves garlic, minced
- 2 stalks green onions, sliced
- ½ cup extra shredded cheddar cheese (for topping)
- ¼ cup crushed Ritz crackers or breadcrumbs (optional)
- ¼ cup water (for baking dish)
Instructions
- Preheat oven to 375°F (190°C).
- Wash bell peppers and cut off the tops (about 1 inch down). Remove seeds and white membrane to create a hollow space. If peppers are wobbly, slice a tiny sliver off the bottom to create a flat base.
- Place hollowed peppers upright in a 9×13 inch baking dish. Pour ¼ cup water into the bottom of the dish.
- Par-bake peppers for 10-12 minutes until just starting to soften but still firm. Remove from oven.
- In a medium mixing bowl, combine softened cream cheese, sour cream, ranch seasoning, minced garlic, and 1 ½ cups shredded cheddar. Mix until smooth.
- Fold in shredded chicken and bacon bits.
- Spoon the filling into each par-baked pepper, packing gently. Leave about ¼ inch of space at the top.
- Sprinkle extra ½ cup shredded cheddar cheese over the top of each pepper.
- Return to oven and bake for 15-20 minutes until cheese is melted, bubbly, and lightly golden, and peppers are tender.
- If using cracker topping, add in the last 5 minutes of baking.
- Remove from oven and let rest for 5 minutes before garnishing with green onions and serving.
Notes
Ensure cream cheese is softened to room temperature for a smooth filling. Par-baking the peppers prevents them from becoming mushy. For a lighter version, substitute Greek yogurt for sour cream and use light cream cheese. Leftovers can be stored in the refrigerator for up to 4 days.
- Prep Time: 10 minutes
- Cook Time: 30 minutes
- Category: Main Course
- Cuisine: American
Nutrition
- Serving Size: 1 stuffed pepper
- Calories: 380
- Sugar: 6
- Sodium: 650
- Fat: 24
- Saturated Fat: 10
- Carbohydrates: 12
- Fiber: 2
- Protein: 28
Keywords: stuffed peppers, chicken recipe, ranch chicken, bacon dinner, weeknight meals, copycat recipe, easy dinner, comfort food