I still remember the exact moment I decided to take dessert making into my own hands. It was a Tuesday evening, and I had promised my neighborhood book club that I’d bring something “fancy” to our monthly meeting. The problem? I had zero hours in my body left by 5 PM. My brain was mush, my energy was at zero, and the thought of standing over a hot oven for two hours while trying to keep up with a conversation about plot twists sounded like torture.
I stared into my fridge. There was a block of cream cheese, a bag of brownie mix, and a bottle of caramel sauce I’d bought on a whim three weeks prior. I also had some graham crackers. It wasn’t much, but it was enough to spark an idea. Why not combine everything? A brownie base, a creamy cheesecake layer, and a drizzle of salted caramel? I whipped it together in about fifteen minutes, popped it in the fridge, and waited.
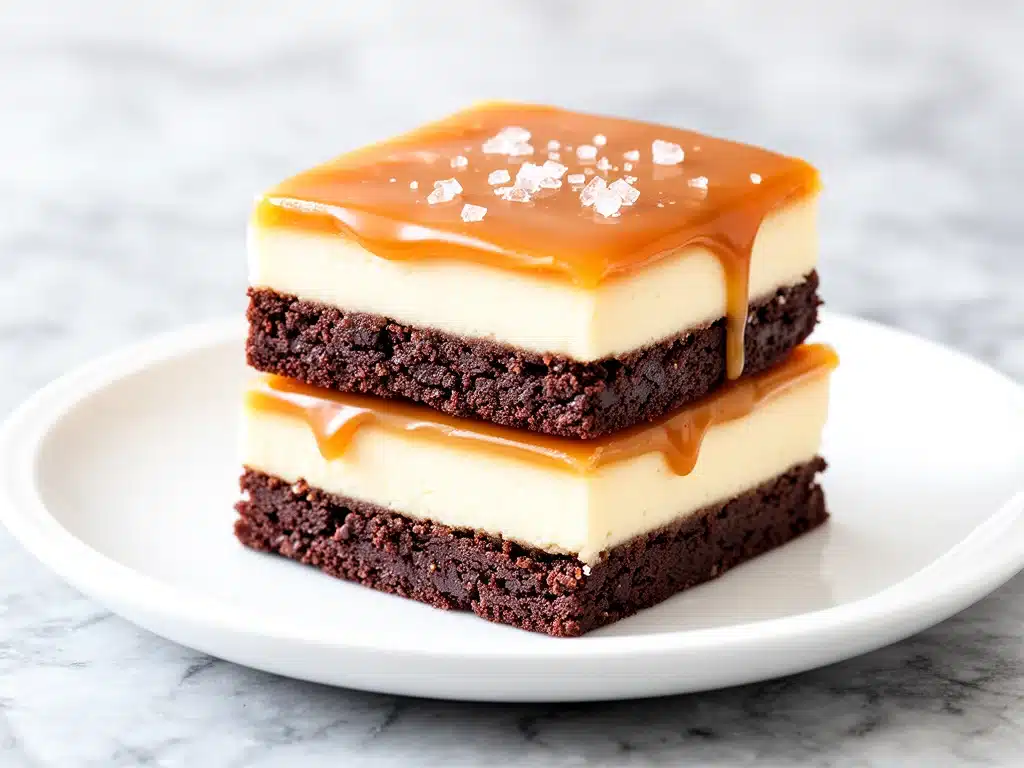
When I brought them to the book club, I expected polite nods. Instead, I got questions. “Is this homemade?” “How did you get the layers so clean?” “Do you have the recipe?” It turned out that this Salted Caramel Brownie Cheesecake Bars recipe didn’t just save my social life that night—it started a tradition. Now, these bars are my go-to for everything from birthday parties to last-minute dinner party gifts. They’re rich, they’re indulgent, and best of all? They require zero baking.
I’ve made these bars probably thirty times since that Tuesday. I’ve tweaked the thickness of the layers, experimented with different chocolate chips, and even tried using homemade caramel (which takes way too long for a weeknight). The version I’m sharing with you today is the perfect balance of ease and elegance. It’s the kind of dessert that looks like you spent hours in a professional kitchen but actually comes together before your morning coffee cools down.
If you’re tired of complicated recipes that leave you with a sink full of dirty dishes and a disappointed palate, this is the one. It’s sticky, it’s sweet, it’s salty, and it’s absolutely addictive. Let’s get into why this no-bake dessert is about to become your new obsession.
Why You’ll Love This No-Bake Dessert
There are about a million reasons I keep making these Salted Caramel Brownie Cheesecake Bars on repeat, but here are the big ones that really sell me on them.
- Zero Baking Required — Seriously. No preheating the oven, no worrying about cracks in your cheesecake, no timing issues. You just mix, press, and chill. This is perfect for summer when you don’t want to heat up the kitchen, or for anyone who, like me, finds baking intimidating.
- Meal Prep Friendly — I love making these on Sunday afternoon. They taste even better the next day because the flavors have time to meld together. I can grab one for a midweek treat or pack them for a picnic without worrying about them melting in the car.
- Looks Fancy, Costs Little — These bars look like something you’d buy at a high-end bakery for $5 a piece. But the ingredients are basic pantry staples. Graham crackers, butter, cream cheese, chocolate chips, and caramel sauce. You’re saving money while looking like a pro.
- Perfect for Any Occasion — I’ve served these to my picky nephew, my wine-snob aunt, and my kids’ teachers. Everyone loves them. They’re sweet but not cloying thanks to the salted caramel, and the texture contrast between the chewy brownie base and the smooth cheesecake layer is just addictive.
- Make-Ahead Magic — Because they need to chill, these bars are the ultimate stress-free dessert for hosting. Make them two days ahead, keep them in the fridge, and pull them out just before guests arrive. They’ll look pristine and taste incredible.
This is my answer to “what should I bring?” when I don’t have time to shop or cook. It’s reliable, it’s delicious, and it always gets compliments. If you’re looking for a dessert that delivers big flavor with minimal effort, look no further.
Ingredients You’ll Need
Here’s the best part: you probably have most of this already. The beauty of a no-bake bar is that it relies on simple, high-quality ingredients rather than complex techniques. I’m particular about a few things here, and I’ll tell you exactly why.
For the Brownie Base
Dark chocolate chips (1 cup / 170g) — I use semi-sweet or dark chocolate chips (60% cocoa works great). Avoid the cheap baking chips that melt into grease. Good chocolate makes a huge difference in flavor. I like Guittard or Ghirardelli.
Unsalted butter (½ cup / 113g) — This binds the base. Make sure it’s softened so it mixes easily. If you’re in a rush, microwave it in 10-second bursts, but don’t melt it completely.
Granulated sugar (½ cup / 100g) — Adds sweetness and helps create that chewy brownie texture. You can use brown sugar for a deeper, molasses-like flavor, but white sugar keeps it classic.
All-purpose flour (¼ cup / 30g) — Just a little bit to hold everything together. Don’t skip this, or your bars will fall apart.
Egg (1 large) — This cooks slightly from the residual heat and binds the base. If you’re strictly no-cook, you can skip the egg and use an extra tablespoon of butter, but the texture will be more crumbly.
Salt (¼ teaspoon) — Enhances the chocolate flavor. Essential.
For the Cheesecake Layer
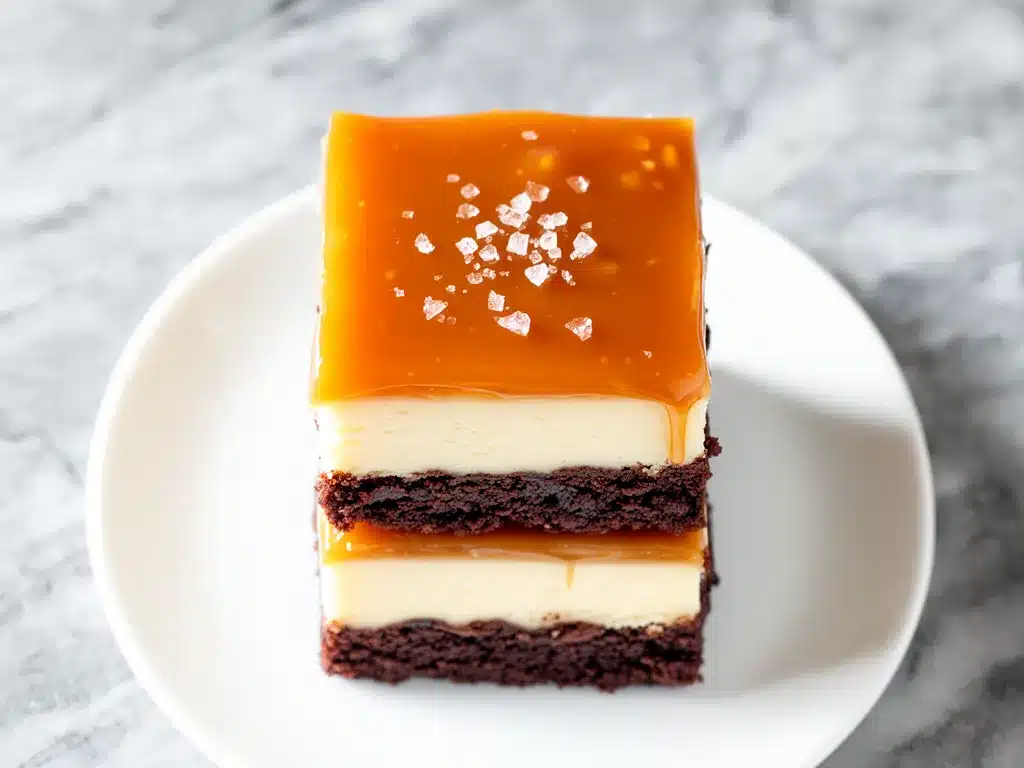
Cream cheese (8 oz / 225g) — Full-fat is non-negotiable here. Light cream cheese won’t set properly and will taste watery. Let it come to room temperature before mixing, or you’ll get lumps.
Powdered sugar (1 cup / 120g) — Also known as confectioners’ sugar. It dissolves instantly, giving you a smooth texture. Granulated sugar won’t melt in a no-bake recipe.
Vanilla extract (1 teaspoon) — Pure vanilla, please. Artificial stuff can taste harsh in a simple dessert.
Heavy cream (½ cup / 120ml) — Whipped to stiff peaks. This lightens up the cheesecake and gives it that airy, mousse-like texture. Don’t use milk; it won’t whip.
For the Topping
Caramel sauce (½ cup / 120ml) — I use store-bought for convenience, but homemade is nicer if you have time. Look for a thick, pourable caramel. Salted caramel is best for the sweet-salty contrast.
Sea salt flakes — For sprinkling on top. Regular table salt is too sharp. Flaky salt adds a beautiful crunch and visual appeal.
Optional: Chocolate drizzle — Melted dark chocolate chips for an extra layer of decadence.
Equipment Needed
You don’t need fancy gadgets for this. Here’s what I actually use.
9×9 inch baking pan — Or an 8×8 pan if you want thicker bars. Line it with parchment paper for easy removal. This is crucial. Without it, you’ll be digging out your bars with a knife.
Mixing bowls — Two medium bowls. One for the brownie base, one for the cheesecake layer.
Hand mixer or stand mixer — For whipping the cream cheese and heavy cream. Doing this by hand is possible but tiring. I use my KitchenAid, but a handheld works fine.
Whisk — For mixing the base ingredients.
Spatula — For folding in the whipped cream and smoothing the layers.
Parchment paper — Non-negotiable. Line the pan with an overhang so you can lift the whole block out once it’s set.
How to Make It: Step-by-Step
Alright, let’s make these Salted Caramel Brownie Cheesecake Bars! I’m walking you through exactly how I do it, including the little tricks I’ve picked up.
Step 1: Prep Your Pan
Line a 9×9 inch baking pan with parchment paper, leaving an overhang on two sides. This creates “handles” so you can lift the bars out later. Spray the parchment lightly with non-stick spray if you want extra insurance.
Step 2: Make the Brownie Base
In a medium bowl, mix the melted butter, sugar, egg, and salt until smooth. Add the flour and mix until just combined. Fold in the chocolate chips. The mixture will look thick and doughy. Press it firmly into the bottom of your prepared pan. Use the back of a spoon or your fingers to make it even. This is your foundation, so pack it down tight.
Step 3: Chill the Base
Place the pan in the freezer for 10 minutes. This helps the base set quickly so it doesn’t mix with the cheesecake layer later. While it’s freezing, move on to the next step.
Step 4: Make the Cheesecake Layer
In a large bowl, beat the softened cream cheese and powdered sugar until smooth and creamy. Add the vanilla and mix well. In a separate cold bowl, whip the heavy cream until stiff peaks form. This takes about 2-3 minutes with a mixer. Gently fold the whipped cream into the cream cheese mixture. Be careful not to overmix, or you’ll deflate the air you just whipped in. The mixture should be light and fluffy.
Step 5: Assemble the Layers
Take the pan out of the freezer. Spoon the cheesecake mixture over the brownie base. Use a spatula to smooth it out evenly, going all the way to the edges. Try to keep the edges clean for a nice presentation.
Step 6: Add the Topping
Drizzle the caramel sauce over the cheesecake layer. Use a knife or skewer to swirl it in slightly for a marbled effect, or leave it as big dollops for a rustic look. Sprinkle with sea salt flakes. If you’re doing a chocolate drizzle, melt a few chocolate chips in the microwave and drizzle them on top in a zigzag pattern.
Step 7: Chill and Set
Place the pan in the refrigerator for at least 4 hours, or preferably overnight. This is the most important step. The bars need time to firm up so they cut cleanly. If you cut them too soon, they’ll be a mess.
Step 8: Cut and Serve
Lift the entire block out of the pan using the parchment handles. Place it on a cutting board. Use a sharp knife to cut into squares. Wipe the knife clean between cuts for neat edges. Serve chilled.
Expert Tips & Tricks
Here’s everything I’ve learned from making these dozens of times. These tips will save you from my mistakes.
Room Temperature Cream Cheese — This is the #1 mistake people make. If your cream cheese is cold, you’ll get lumps in your cheesecake layer. Take it out of the fridge 30 minutes before you start. If you forget, cut it into cubes and microwave in 5-second bursts until soft.
Cold Bowl for Cream — Whip your heavy cream in a cold bowl. It whips faster and holds its shape better. I keep my bowls in the fridge or even freeze them for 10 minutes before whipping.
Don’t Skip the Chill Time — I know it’s tempting to dig in immediately. But these bars need time to set. If you rush it, you’ll get a gooey mess. Plan ahead.
Sharp Knife for Cutting — Use a sharp chef’s knife. Dull knives will smash the layers. Dip the knife in hot water and wipe it dry between cuts for perfectly clean slices.
Storage is Key — Keep these in the fridge. They’ll last up to 5 days in an airtight container. They actually taste better on day 2 as the flavors meld.
Variations & Substitutions
Once you’ve nailed the basic version, here’s how you can mix it up. I’ve tried all of these.
Chocolate Chip Cheesecake — Fold ½ cup of mini chocolate chips into the cheesecake layer. Adds bursts of chocolate in every bite.
Oreo Version — Crush Oreo cookies and mix them into the brownie base. Use Oreos as the topping instead of caramel. This is a kid favorite.
Strawberry Swirl — Swap caramel for strawberry sauce or jam. Swirl it in for a pretty pink marbled effect. Pairs well with the chocolate.
Gluten-Free — Use gluten-free chocolate chips and flour. The rest is naturally gluten-free. I’ve used Bob’s Red Mill gluten-free flour with great results.
Dairy-Free — Use vegan cream cheese and coconut cream instead of heavy cream. Use dairy-free chocolate chips. It’s not quite the same, but it works.
Less Sweet — Reduce the powdered sugar to ¾ cup and use dark caramel sauce. Good for those who find traditional desserts too sweet.
Serving & Storage
How to Serve: I usually serve these straight from the fridge. They’re best when cold and firm. Pair them with a cup of coffee or a glass of cold milk.
Side Dishes: These bars are rich, so they don’t need much else. But if you want to serve them at a party, they go well with fresh berries or a simple green salad to balance the sweetness. For drinks, a watermelon mint agua fresca is a refreshing contrast to the rich dessert.
Storage Instructions: Store in an airtight container in the fridge for up to 5 days. They can also be frozen for up to 3 months. Wrap individual bars in plastic wrap and freeze in a freezer bag. Thaw in the fridge overnight.
Pro Tip: If you’re taking them to a potluck, keep them in the pan with the lid on. They’re sturdy enough to travel well.
Nutrition Information
I’m not a nutritionist, but here’s the breakdown if you’re tracking. Please note that these are estimates and can vary based on ingredients used.
Per Serving (1 bar out of 16):
| Nutrient | Amount |
|---|---|
| Calories | 280 |
| Fat | 18g |
| Saturated Fat | 11g |
| Cholesterol | 50mg |
| Sodium | 150mg |
| Carbohydrates | 28g |
| Fiber | 1g |
| Sugar | 22g |
| Protein | 4g |
Look, this is a dessert. It’s meant to be indulgent. But it’s also easier to control portions than a whole cake. One or two bars is plenty. If you’re watching sugar, consider reducing the powdered sugar or using a sugar substitute.
Final Thoughts
So that’s my go-to Salted Caramel Brownie Cheesecake Bars recipe! I’ve probably talked your ear off at this point, but when you make a recipe this often, you have a lot to say about it.
This has saved me more times than I can count. It’s my answer to “what should I bring?” when I’m tired, don’t want to bake, and still want something that looks impressive. My family is happy, my friends are happy, and I’m happy because I’m not stressed about cooking.
Make it yours! Try different toppings, swap in your favorite chocolate, or adjust the caramel. The best recipes are the ones you adapt to your tastes.
If you make this, drop a comment and let me know what you think! I love hearing how recipes turn out in your kitchen. And if something doesn’t work, tell me that too—I’m here to help troubleshoot.
Happy baking! Well, no-baking. And I hope your kitchen smells half as good as mine does right now.
Frequently Asked Questions
Can I use homemade caramel?
Absolutely! Homemade caramel tastes amazing. Just let it cool to room temperature before drizzling it on, or it might melt the cheesecake layer. Store-bought is fine if you’re in a rush.
Why did my cheesecake layer separate?
This usually happens if the cream cheese wasn’t fully softened or if you overmixed the whipped cream. Make sure your cream cheese is smooth before adding the whipped cream, and fold gently to keep the air in.
Can I freeze these bars?
Yes! They freeze beautifully. Wrap individual bars in plastic wrap and place them in a freezer-safe bag. They’ll last up to 3 months. Thaw in the fridge overnight before serving.
Can I use a different pan size?
You can use an 8×8 pan for thicker bars, or a 9×13 pan for thinner bars. Adjust the chilling time accordingly—larger pans might need less time, smaller pans might need more.
What if I don’t have heavy cream?
You can use whipped topping (like Cool Whip) instead, but it won’t be as rich. Or, you can skip the whipped cream and just beat the cream cheese and powdered sugar until smooth, but the texture will be denser.
How long do these last in the fridge?
They last up to 5 days in an airtight container. After that, they might start to dry out or lose their texture. Best eaten within the first 3 days.
Can I make these ahead of time?
Yes, they are perfect for make-ahead desserts. Make them 1-2 days in advance. They’ll taste even better as the flavors meld together. Just keep them covered in the fridge.
Pin This Recipe!
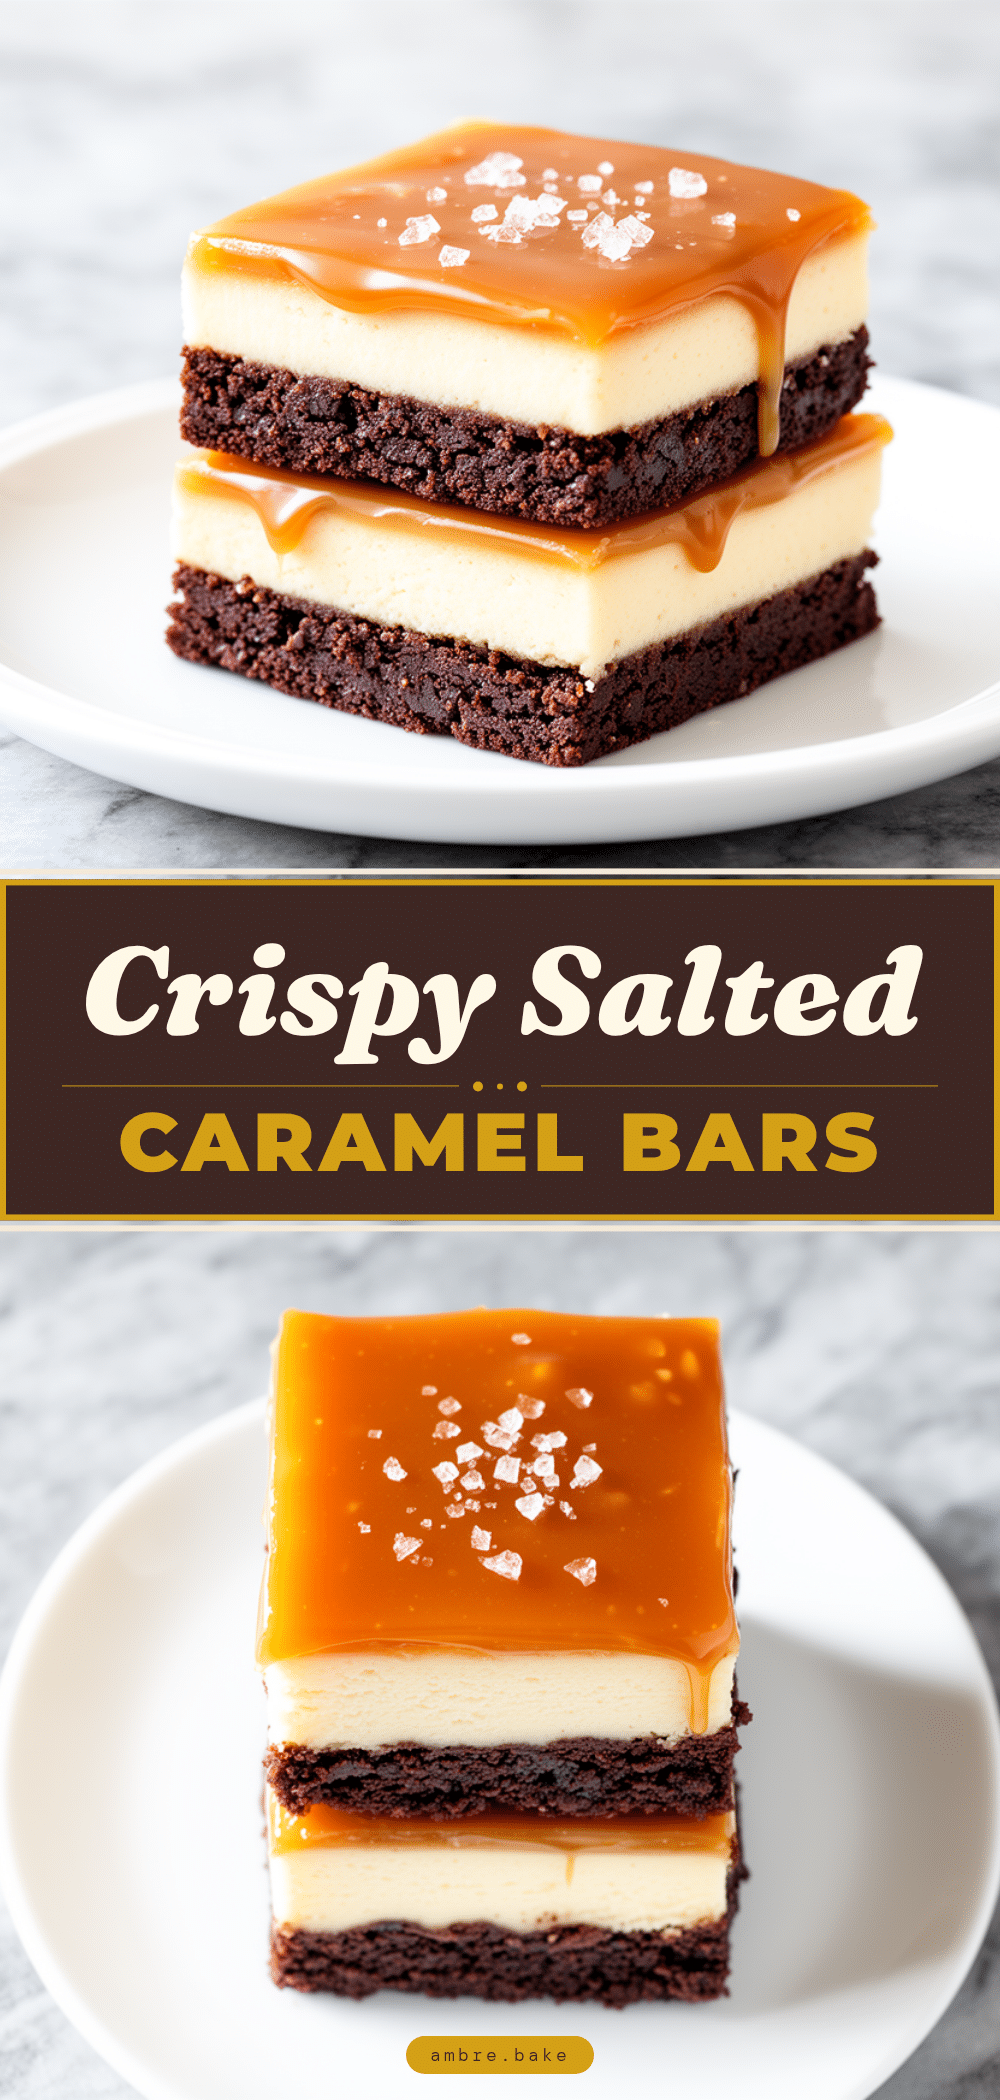
Salted Caramel Brownie Cheesecake Bars: Easy No-Bake Recipe
- Total Time: 4 hours 15 minutes
- Yield: 16 servings 1x
Description
These no-bake Salted Caramel Brownie Cheesecake Bars combine a chewy brownie base, a creamy cheesecake layer, and a drizzle of salted caramel. They are rich, indulgent, and perfect for make-ahead entertaining.
Ingredients
- 1 cup (170g) dark chocolate chips (semi-sweet or dark)
- 1/2 cup (113g) unsalted butter, softened
- 1/2 cup (100g) granulated sugar
- 1/4 cup (30g) all-purpose flour
- 1 large egg
- 1/4 teaspoon salt
- 8 oz (225g) cream cheese, full-fat and room temperature
- 1 cup (120g) powdered sugar
- 1 teaspoon vanilla extract
- 1/2 cup (120ml) heavy cream, whipped to stiff peaks
- 1/2 cup (120ml) caramel sauce
- Sea salt flakes, for sprinkling
- Optional: Melted dark chocolate chips for drizzle
Instructions
- Line a 9×9 inch baking pan with parchment paper, leaving an overhang on two sides for handles. Lightly spray with non-stick spray.
- In a medium bowl, mix melted butter, sugar, egg, and salt until smooth. Add flour and mix until just combined. Fold in chocolate chips.
- Press the brownie mixture firmly into the bottom of the prepared pan to create an even base.
- Place the pan in the freezer for 10 minutes to set the base.
- In a large bowl, beat softened cream cheese and powdered sugar until smooth. Add vanilla and mix well.
- In a separate cold bowl, whip heavy cream until stiff peaks form (about 2-3 minutes).
- Gently fold the whipped cream into the cream cheese mixture until light and fluffy.
- Remove the pan from the freezer. Spoon the cheesecake mixture over the brownie base and smooth evenly with a spatula.
- Drizzle caramel sauce over the top. Swirl with a knife for a marbled effect or leave as dollops. Sprinkle with sea salt flakes.
- Refrigerate for at least 4 hours, or preferably overnight, until firm.
- Lift the bars out of the pan using the parchment handles. Cut into squares with a sharp knife, wiping the knife between cuts.
- Serve chilled.
Notes
Ensure cream cheese is at room temperature to avoid lumps. Use a cold bowl for whipping heavy cream for better volume. Do not skip the chilling time as the bars need to set to cut cleanly. Store in an airtight container in the fridge for up to 5 days or freeze for up to 3 months.
- Prep Time: 15 minutes
- Cook Time: 0 minutes
- Category: Dessert
- Cuisine: American
Nutrition
- Serving Size: 1 bar
- Calories: 280
- Sugar: 22
- Sodium: 150
- Fat: 18
- Saturated Fat: 11
- Carbohydrates: 28
- Fiber: 1
- Protein: 4
Keywords: no-bake dessert, salted caramel, brownie cheesecake, easy bars, make-ahead dessert, party dessert