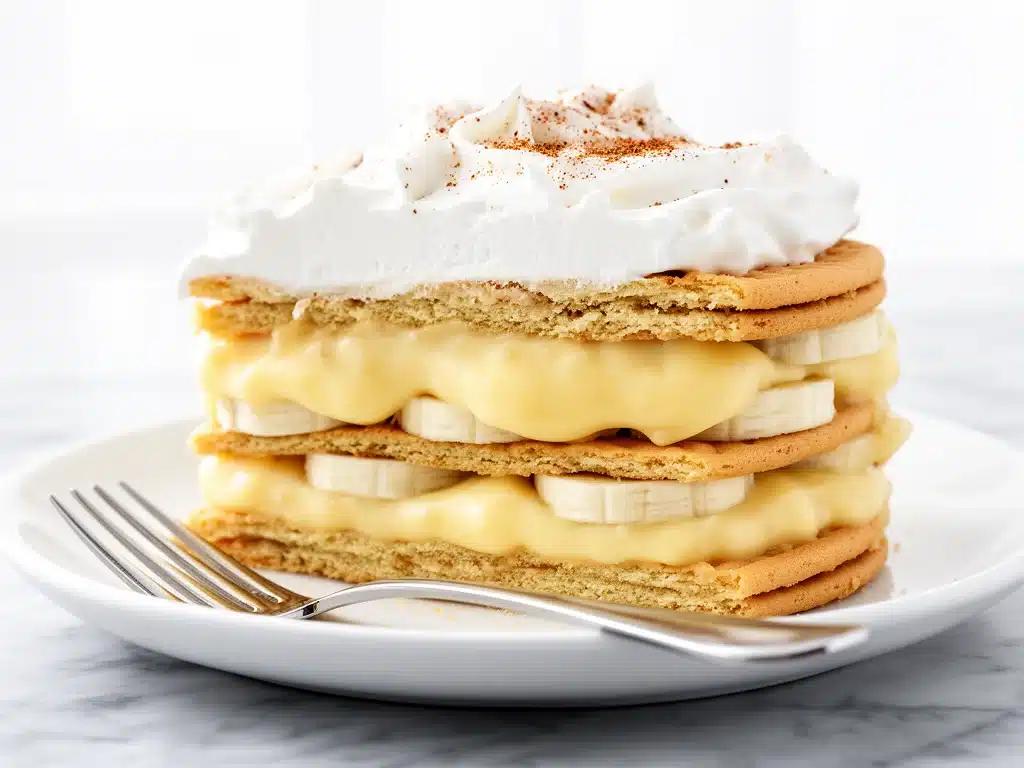
One summer evening a few years ago, I found myself scrambling to bring a dessert to a family picnic. The usual fruit salad or brownies felt too predictable, and honestly, I was short on time and ingredients. Then I remembered a simple recipe my mom used to make—something about layers of bananas, creamy pudding, and cookies that magically soften overnight. I threw together what I thought would be a just-okay icebox cake, expecting polite bites and maybe a slice or two to go uneaten.
Fast forward to the picnic, and this creamy banana pudding icebox cake got devoured faster than I could believe. My niece asked for the recipe, my husband kept sneaking extra slices, and even the dessert skeptics went back for seconds. That’s when I realized this isn’t just any dessert—it’s a family favorite you’ll want to make again and again. After testing it multiple times (okay, more like ten), I finally perfected the balance of creamy, sweet, and just the right amount of banana goodness.
This creamy banana pudding icebox cake recipe is easy to throw together, doesn’t require baking, and tastes like a slice of summertime heaven. Whether you’re making it for a weeknight treat or a weekend gathering, it’s guaranteed to make everyone smile—and maybe fight over the last piece.
Why You’ll Love This Recipe
This recipe has turned into my go-to dessert for family gatherings and casual dinners alike. There are a handful of reasons I keep coming back to it:
- Super Simple Assembly — No oven required, no fancy piping skills. If you can layer and whisk pudding, you’re golden. I’ve made this with my kids helping, and it’s a breeze.
- Make-Ahead Friendly — Prepare it a day in advance and let the flavors meld overnight in the fridge. It’s perfect for busy days when you want dessert ready and waiting.
- Family Favorite — From toddlers to grandparents, everyone loves this creamy banana pudding icebox cake. It’s the dessert that sparks happy “remind me to make this again” conversations.
- Versatile and Customizable — You can easily swap out cookies or add extras like whipped cream or toasted nuts for a personal touch. I’ve even added a drizzle of caramel for a grown-up twist.
- Budget-Friendly — Uses pantry staples and simple ingredients without breaking the bank. Feeding a crowd? This recipe stretches nicely.
This dessert isn’t just creamy and delicious; it’s the kind of nostalgic comfort food that feels like a warm hug after a long day. Trust me, once you make it, your whole family will crave it too.
Ingredients You’ll Need
Here’s the best part: most of these ingredients are probably already hanging out in your kitchen. I’m pretty picky about a few key things here, and I’ll tell you why.
- Bananas (4 large, ripe but firm / about 500g) — Not too mushy or green. You want sweet bananas that hold their shape but aren’t rock hard.
- Instant vanilla pudding mix (2 packets, about 3.4 oz each / 192g total) — I use instant for convenience, and it sets perfectly without needing to bake.
- Milk (3 cups / 720ml) — Whole milk gives the pudding a richer texture, but 2% works fine too.
- Whipped topping (1 tub, about 8 oz / 227g) — Cool Whip or any store-bought whipped topping works well. You can make your own whipped cream, but this speeds things up.
- Nilla wafers (1 box, about 11 oz / 312g) — Classic choice for absorbing pudding and adding that perfect soft crunch. Graham crackers or vanilla cookies can be fun alternatives.
- Vanilla extract (1 teaspoon / 5ml) — Just a splash to boost flavor. Don’t skip it!
- Optional Toppings: Chopped toasted pecans, caramel sauce, or shaved chocolate — Great for making it extra special.
Pro tip: If you want to get fancy, swap out the instant pudding for homemade vanilla pudding—check out my soft apple cinnamon oatmeal bars recipe for a hint on making your own custards at home.
Equipment Needed
You don’t need any fancy gadgets to make this creamy banana pudding icebox cake. Here’s what I use:
- 9×13-inch baking dish — Glass or plastic, just something with enough room for layers. I like glass so I can see the layers coming together.
- Mixing bowls — One for pudding, another for folding in the whipped topping.
- Whisk — For mixing pudding. A fork will work in a pinch, but a whisk is easier.
- Rubber spatula — For folding and spreading the layers smoothly.
- Measuring cups and spoons — Pretty standard but critical for pudding consistency.
- Knife and cutting board — For slicing bananas evenly.
If you don’t have a baking dish, any similar sized container with straight sides will do—just make sure it’s big enough for at least three layers of cookies and bananas.
How to Make It: Step-by-Step
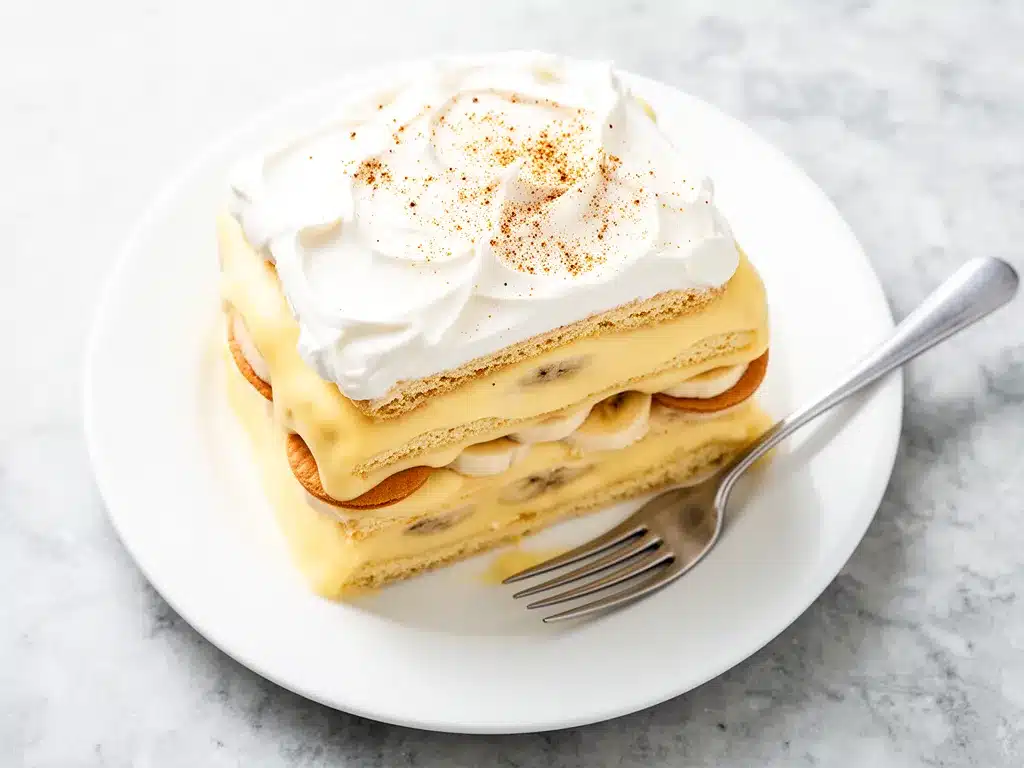
Alright, let’s get to the fun part. I’m walking you through exactly how I make this creamy banana pudding icebox cake, including the little tricks that make it come out perfect every time.
Step 1: Make the Pudding (10 minutes)
In a large bowl, whisk together the instant vanilla pudding mix and cold milk until it thickens, about 2 minutes. It will start looking glossy and smooth—don’t skip the full two minutes for best texture. Then gently fold in the whipped topping and vanilla extract until fully combined and creamy. This mixture is the heart of the cake’s creamy goodness.
Step 2: Prepare the Bananas (5 minutes)
Peel and slice your bananas into ¼-inch thick rounds. Try to keep the slices uniform so the layers stay neat. A sharp knife helps here—no mashed banana mess.
Step 3: Layer the Icebox Cake (10 minutes)
Start by spreading a thin layer of pudding mixture on the bottom of your baking dish. Then place a single layer of Nilla wafers over the pudding, covering the surface. Add a layer of banana slices over the cookies, making sure they’re evenly spaced. Spread about a third of the pudding mixture over the bananas, smoothing it out gently with your spatula. Repeat this layering process two more times—cookies, bananas, pudding—ending with a final layer of pudding on top.
Step 4: Chill and Set (At least 4 hours, preferably overnight)
Cover the dish tightly with plastic wrap and pop it in the fridge. This chilling time is crucial—it lets the cookies soften and the flavors meld into a luscious, creamy cake. I usually make this the night before to have it ready for lunch or dinner.
Step 5: Garnish and Serve
Before serving, garnish with extra Nilla wafers, a sprinkle of toasted pecans, or a drizzle of caramel sauce if you’re feeling fancy. Slice into squares and watch everyone’s faces light up.
Expert Tips & Tricks
- Use firm but ripe bananas — Too green and they won’t be sweet enough; too brown and they get mushy and overpower the texture.
- Don’t skip chilling — Even if you’re impatient, at least 4 hours is a must. The texture won’t be the same straight out of assembly.
- Layer carefully — Make sure the cookies don’t overlap too much or the layers get uneven. A neat stack means prettier slices.
- Try homemade whipped cream — For an extra rich version, swap the store-bought whipped topping for freshly whipped cream. I do this for special occasions.
- Keep cookies crunchy — If you want to keep some crunch, add a layer of cookies just before serving, but be warned—the classic soft texture is what makes it so crave-worthy.
- Make it your own — I love adding a sprinkle of cinnamon with the bananas for a warm, cozy twist.
Variations & Substitutions
Once you’ve nailed the classic creamy banana pudding icebox cake, here are some fun ways to switch it up:
- Chocolate Banana — Add a layer of chocolate pudding or sprinkle mini chocolate chips between layers for a mocha-inspired treat.
- Strawberry Banana — Swap half the bananas for sliced strawberries for a fresh, fruity flavor combo.
- Gluten-Free — Use gluten-free vanilla wafers or substitute with gluten-free graham crackers. The texture stays just as dreamy.
- Dairy-Free — Try coconut milk pudding and dairy-free whipped topping. It’s a bit different but surprisingly good.
- Adult Version — Add a splash of bourbon or rum to the pudding mix for a boozy kick that adults will appreciate.
Serving & Storage
This creamy banana pudding icebox cake is best served chilled right from the fridge. I usually slice it into generous squares and serve it with a fork because it’s rich and creamy.
For sides, a simple cup of coffee or iced tea pairs wonderfully. If you want to keep the summery vibe going, try pairing it with a refreshing watermelon mint agua fresca for a light, bright contrast.
Store leftovers covered tightly in the fridge for up to 4 days. The pudding will thicken and the bananas will soften even more, so it’s perfect leftover fuel. When reheating, just eat cold or let it sit at room temperature for 10 minutes to take the chill off—microwaving is a no-go here; it ruins the texture.
Freezing isn’t recommended because the bananas get mushy and the pudding texture changes. Make it fresh or enjoy leftovers within a few days.
Nutrition Information
| Nutrient | Per Serving (1/12th) |
|---|---|
| Calories | 280 |
| Protein | 3g |
| Carbohydrates | 40g |
| Fiber | 1g |
| Sugar | 24g |
| Fat | 12g |
| Saturated Fat | 7g |
| Cholesterol | 35mg |
| Sodium | 180mg |
| Calcium | 100mg |
I’m no nutritionist, but this dessert is definitely a treat with its creamy pudding and whipped topping. It’s got a decent amount of calcium from the milk and pudding, but it’s higher in sugar and fat—perfect for special occasions or when you want a sweet family favorite that everyone will crave.
Final Thoughts
So that’s my creamy banana pudding icebox cake recipe—the dessert that’s saved more last-minute gatherings and weeknight treats than I can count. I’ve probably told you too much at this point, but when you make something this often, you get a lot of thoughts.
This recipe is all about simplicity, comfort, and that dreamy creamy texture that makes people go back for seconds. It’s one of those family favorites that feels both nostalgic and fresh at the same time. Plus, it’s so easy to customize that you can make it your own—add a little crunch, swap in your favorite fruit, or even jazz it up with a drizzle of caramel.
If you decide to try this, please drop a comment and tell me how it goes! I love hearing about your kitchen wins (and your funny fails too). Cooking is all about experimenting and having fun, and I’m here to help if you get stuck.
Happy cooking, and may your kitchen smell half as amazing as mine does right now!
Frequently Asked Questions
Q: Can I use fresh homemade pudding instead of instant?
A: Absolutely! Homemade pudding adds a rich, authentic flavor. Just make sure it’s thick enough before folding in the whipped topping. I love the creaminess it brings, but instant is great when you’re short on time.
Q: My bananas turned brown before serving. What can I do?
A: Bananas do brown quickly once sliced. To slow this down, toss the slices in a little lemon juice before layering. If they brown a bit, it doesn’t affect taste much, but for best presentation, lemon juice helps.
Q: Can I make this cake without whipped topping?
A: You can use homemade whipped cream instead, which tastes amazing but takes more time. Just whip heavy cream with a little sugar until soft peaks form and fold it into the pudding.
Q: How long can I store leftovers? Will the cookies get soggy?
A: Store leftovers in the fridge for up to 4 days. The cookies will soften—that’s part of the charm—but if you prefer crunch, add a fresh layer of cookies on top before serving.
Q: Can I freeze the icebox cake?
A: I don’t recommend freezing because the bananas get mushy and the pudding texture changes. It’s best enjoyed fresh or refrigerated for a few days.
Q: What can I use instead of Nilla wafers?
A: Graham crackers or vanilla-flavored cookies work well too. Just make sure they’re sturdy enough to hold up when softened by the pudding.
Q: Can I make this vegan or dairy-free?
A: Yes! Use coconut milk pudding and a dairy-free whipped topping. Bananas and cookies are usually vegan, but check your cookies’ ingredients to be sure.
Pin This Recipe!
Creamy Banana Pudding Icebox Cake Recipe Easy Family Favorite
- Total Time: 4 hours 15 minutes
- Yield: 12 servings 1x
Description
An easy no-bake dessert featuring layers of bananas, creamy vanilla pudding, and Nilla wafers that soften overnight into a luscious icebox cake. Perfect for family gatherings and make-ahead treats.
Ingredients
- 4 large ripe but firm bananas (about 500g / 1.1 lbs)
- 2 packets instant vanilla pudding mix (3.4 oz each / 192g total)
- 3 cups milk (720ml) – whole milk preferred
- 1 tub whipped topping (8 oz / 227g) – store-bought like Cool Whip
- 1 box Nilla wafers (11 oz / 312g)
- 1 teaspoon vanilla extract (5ml)
- Optional toppings: chopped toasted pecans, caramel sauce, shaved chocolate
Instructions
- In a large bowl, whisk together the instant vanilla pudding mix and cold milk until thickened, about 2 minutes.
- Gently fold in the whipped topping and vanilla extract until fully combined and creamy.
- Peel and slice bananas into 1/4-inch thick rounds, keeping slices uniform.
- Spread a thin layer of pudding mixture on the bottom of a 9×13-inch baking dish.
- Place a single layer of Nilla wafers over the pudding, covering the surface.
- Add a layer of banana slices evenly over the cookies.
- Spread about one-third of the pudding mixture over the bananas, smoothing gently.
- Repeat layering two more times: cookies, bananas, pudding, ending with a final pudding layer on top.
- Cover the dish tightly with plastic wrap and refrigerate for at least 4 hours, preferably overnight.
- Before serving, garnish with extra Nilla wafers, toasted pecans, or caramel sauce if desired.
- Slice into squares and serve chilled.
Notes
Use firm but ripe bananas to avoid mushiness. Chill at least 4 hours for best texture. For crunchier cookies, add a fresh layer just before serving. Homemade whipped cream can replace store-bought topping for richer flavor. Lemon juice can prevent banana browning.
- Prep Time: 15 minutes
- Cook Time: 0 minutes
- Category: Dessert
- Cuisine: American
Nutrition
- Serving Size: 1 slice (1/12th of c
- Calories: 280
- Sugar: 24
- Sodium: 180
- Fat: 12
- Saturated Fat: 7
- Carbohydrates: 40
- Fiber: 1
- Protein: 3
Keywords: banana pudding, icebox cake, no bake dessert, family favorite, easy dessert, layered pudding cake



