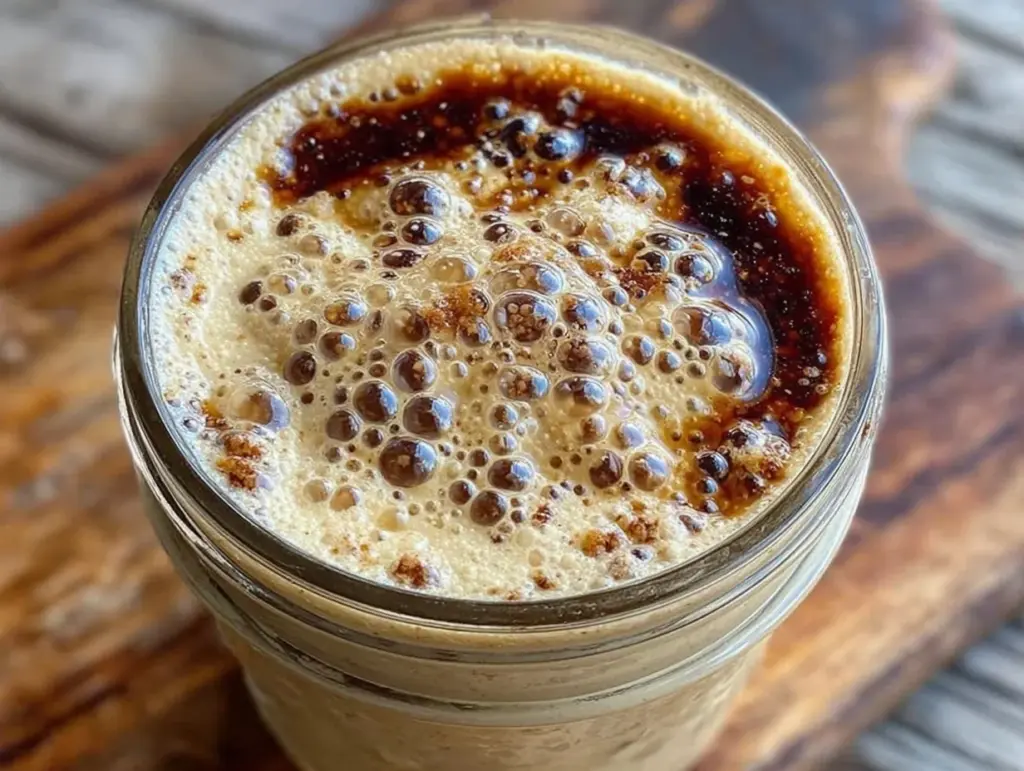
Let me tell you a little secret: I almost gave up on sourdough three times before I got it right. Not because the science was too hard, but because I was trying to do it the “fancy” way. You know the kind—buying expensive organic flour, using glass jars that cost more than my lunch, and following rigid schedules that didn’t account for the fact that I work two jobs and live in a drafty apartment.
I was spending $15 a week on bread I didn’t even like. Then I looked at my pantry, found a bag of all-purpose flour I’d been hoarding for emergencies (which, apparently, had become the emergency), and decided to try the cheapest, dumbest method possible. No fancy thermometers. No organic spelt. Just flour, water, and patience.
That was two years ago. Today, that same jar of bubbly, tangy beginner friendly sourdough starter is the heart of my kitchen. It feeds me. It makes my bread taste like something I actually want to eat. And the best part? It cost me less than a single latte to start.
If you’re staring at a bag of flour wondering if you can really keep a living culture alive without going broke or going insane, you’re in the right place. This isn’t about perfection. It’s about practicality. It’s about building a budget one-person meal foundation that pays for itself in loaves. Let’s get your starter bubbling.
Why You’ll Love This Budget Sourdough Starter
I’m not going to lie to you—starting a sourdough starter is a commitment. It’s a pet that eats flour instead of kibble. But once it’s going, it’s the most cost-effective kitchen tool you’ll ever own. Here’s why I keep mine alive, even when I’m busy or broke:
- It Pays for Itself — A loaf of good sourdough at the bakery is $6-8. My flour and water cost pennies per feeding. Once my starter is active, I’m saving at least $20 a week on bread alone. That’s a grocery budget win.
- Zero Waste Cooking — I’m a one-person household. I don’t want to make a giant loaf and watch it go stale. With a starter, I make small, single-serving loaves or discard crackers when I don’t need bread. Nothing goes to trash.
- It’s Actually Simple — You don’t need a degree in microbiology. You just need to mix flour and water twice a day. If you can make oatmeal, you can do this. Seriously.
- It’s Versatile — This beginner friendly sourdough starter isn’t just for bread. I use the discard for cranberry pecan focaccia, pancakes, and yes, even some fall muffins when I need a quick breakfast.
- It’s Cheap as Chips — The only ingredients are flour and water. Both are staples I already buy. I’m not hunting for exotic grains or expensive yeast packets. Just the basics.
This is my go-to method when I want to save money but still eat fresh, healthy food. No fancy equipment needed. Just a jar, some flour, and a little love.
Ingredients You’ll Need
Here’s the best part: you probably have everything you need already. I’m not asking you to go to three different stores for specialized items. This budget one-person meal approach relies on the cheapest, most accessible ingredients in your pantry.
The Essentials
All-Purpose Flour (1 cup / 120g) — I know, I know. People say “use bread flour” or “use organic unbleached.” I say: use what’s on sale. All-purpose works fine for a starter. It has enough protein to build structure. I buy the store brand in the 5-pound bag. It’s the cheapest option per ounce.
Filtered Water (1 cup / 240ml) — Chlorine can kill the wild yeast, so filtered is best. If you don’t have a filter, let your tap water sit out for 24 hours before using it. The chlorine will evaporate. Don’t buy expensive bottled water for this. It’s a waste of money.
Whole Wheat Flour (optional, 2 tablespoons) — I add a little bit because it has more nutrients and wild yeast spores. It helps the starter kick off faster. But if you’re on a tight budget, skip it. All-purpose is fine.
The Equipment (What You Actually Need)
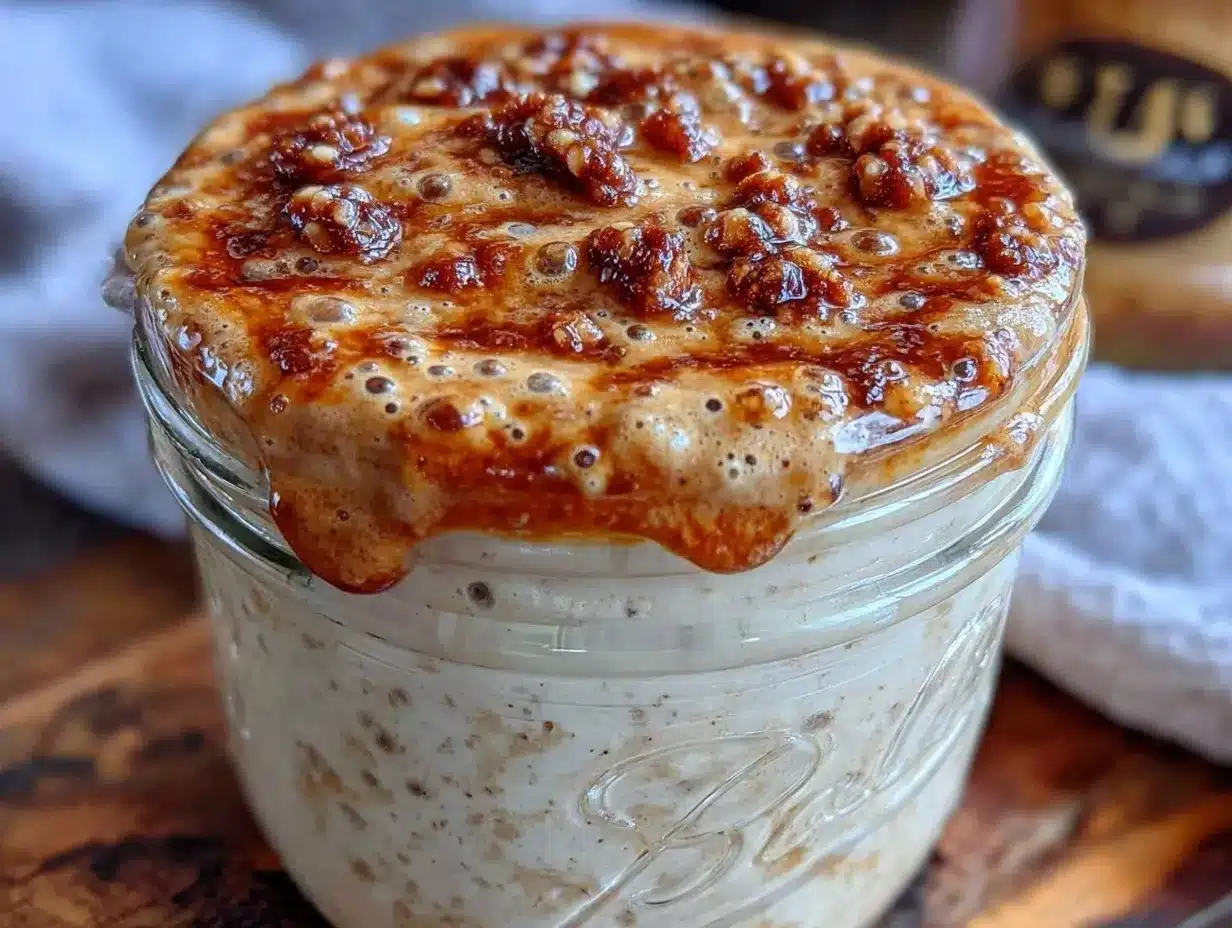
A Glass Jar — I use a clean, empty pasta sauce jar. Wash it well. No soap residue! Plastic works too, but glass is easier to clean and doesn’t hold odors. You don’t need a fancy “starter keeper” jar. A mason jar from the dollar store is perfect.
A Rubber Band — This is your secret weapon. Wrap it around the jar at the current flour level. When you feed it, the starter rises. When it doubles, it’s time to feed again. It’s visual, simple, and free.
A Spoon — Any spoon. Wooden, plastic, metal. Just make sure it’s clean.
A Scale (Optional but Helpful) — I use a cheap digital kitchen scale. It makes measuring faster and more accurate than cups. But if you don’t have one, use measuring cups. It’ll still work.
How to Make It: Step-by-Step
Alright, let’s make this! I’m walking you through exactly how I do it, including the little tricks I’ve picked up so you don’t have to guess. This process takes about 5 minutes a day once it’s established, but the first week is all about building the culture.
Day 1: The First Mix
Step 1: Combine Flour and Water
In your clean jar, mix 1/4 cup (30g) of all-purpose flour with 1/4 cup (60ml) of water. Stir it until there are no dry lumps. It should look like thick paste, like peanut butter. If it’s too dry, add a teaspoon of water. If it’s too runny, add a pinch of flour. The texture matters less than the ratio, but consistency helps.
Step 2: Cover and Rest
Loosely cover the jar with a lid or a coffee filter secured with a rubber band. You want air to get in (yeast needs oxygen) but not bugs or dust. Don’t screw the lid on tight—it can build up gas and pop off. Place it in a warm spot in your kitchen. My fridge top is usually perfect. Let it sit for 24 hours.
Day 2: The First Feed
Step 3: Discard and Feed
You’ll probably see nothing yet. That’s normal. Don’t panic. Scoop out half of the mixture (about 1/4 cup) and throw it away or save it for pancakes (more on that later). To the remaining half, add 1/4 cup flour and 1/4 cup water. Stir well. Replace the loose cover. Let it sit for another 24 hours.
Why Discard? — If you didn’t discard, you’d end up with a gallon of starter in a week. Discarding keeps the volume manageable and the yeast happy. It’s not waste—it’s food for other recipes!
Day 3: The Bubbles Appear
Step 4: Watch for Life
Today, you should see some bubbles. Maybe not a lot, but some. The starter might smell a bit sour or like vinegar. That’s good! It means bacteria are working. Discard half again, and feed with 1/4 cup flour and 1/4 cup water. Stir, cover, and wait.
Day 4-5: The Routine Sets In
Step 5: Consistency is Key
By now, your starter should be bubbling more vigorously. It might smell like ripe fruit or yogurt. Stick to the routine: discard half, feed half flour/half water. Do this every 24 hours. If your kitchen is very cold, it might take longer. Be patient.
Day 6-7: The Float Test
Step 6: Is It Ready?
Your starter is ready to bake with when it doubles in size within 4-6 hours of feeding. To test it, drop a teaspoon of starter into a glass of water. If it floats, it’s full of gas and ready to leaven bread. If it sinks, keep feeding it for another day or two.
Pro Tip: — Once it floats, you can bake! But for your first loaf, I recommend using a “discarded” starter (fed but not risen) to be safe. Save the active, risen starter for your next bake.
Expert Tips & Tricks
Here’s everything I’ve learned from making this dozens of times. These tips will save you from my mistakes and keep your starter alive without breaking the bank.
- Temperature Matters — Yeast loves warmth. If your kitchen is cold (below 70°F/21°C), your starter will move slower. Put the jar in the oven with just the light on, or near a radiator. Cold = slow fermentation. Slow = more time waiting. I don’t have time to wait, so I keep it warm.
- Don’t Overfeed — You don’t need to feed it every 12 hours unless you’re baking daily. Once it’s established, you can feed it once a day, or even put it in the fridge and feed it once a week if you’re not baking. For a beginner friendly sourdough starter, daily feeding helps it build strength quickly.
- Use the Discard — Don’t just throw it away! I use it for overnight oats (add a spoonful for tang), or make quick crackers. It saves money and reduces waste.
- Smell Test — A healthy starter smells sour, tangy, or like yogurt. If it smells like acetone (nail polish remover), it’s starving. Feed it immediately. If it smells like rotten eggs, something is wrong—maybe throw it out and start over.
- Water Quality — If you have hard water, let it sit out to dechlorinate. Chlorine kills yeast. I use filtered water from a pitcher I already have. No extra cost.
Variations & Substitutions
Once you’ve nailed the basic version, here’s how you can mix it up without spending more money.
Flour Swaps
Whole Wheat Starter — Substitute all-purpose flour with whole wheat flour. It has more nutrients and wild yeast, so it might activate faster. It also has a stronger, nuttier flavor. I use this for my pumpkin bread pudding sometimes.
Rye Starter — Rye flour is great for sourdough because it’s high in enzymes. But it’s more expensive. I only use it if it’s on sale. It makes a darker, denser bread.
Storage Options
Refrigerator Storage — Once your starter is active, you can keep it in the fridge. Feed it once a week. Take it out 24 hours before you want to bake, feed it, and let it come to room temperature. This is perfect for one-person households who don’t bake every day.
Drying for Storage — You can dry your starter on a baking sheet and store it in a ziplock bag. When you want to use it, rehydrate it with water and flour. It’s a great way to save it if you’re moving or traveling. But honestly? The fridge method is easier.
Serving & Storage
How to Store Your Starter
Keep it in a glass jar with a loose lid. If you’re baking daily, leave it on the counter. If you’re baking weekly, put it in the fridge. Label the jar with the date you started it. I use a piece of masking tape and a marker. Cheap and effective.
How to Feed It
Always discard half before feeding. Add equal parts flour and water by weight (1:1:1 ratio). For example, if you have 50g of starter, discard 25g, then add 25g flour and 25g water. Stir well. Mark the level with a rubber band.
Signs It’s Ready to Bake
It should double in size, be bubbly, and pass the float test. The smell should be pleasantly sour, not foul. If it’s not ready, keep feeding it. Don’t rush it.
Nutrition Information
I’m not a nutritionist, but here’s the breakdown for a typical feeding (per 100g of starter).
- Calories: 90
- Protein: 3g
- Carbs: 18g
- Fiber: 1g
- Fat: 0g
It’s basically just carbs and a little protein. The magic isn’t in the nutrition—it’s in the fermentation. The bacteria break down some of the gluten and phytates, making it easier to digest for some people. That’s why sourdough feels lighter than commercial bread.
Final Thoughts
So that’s my beginner friendly sourdough starter! I know it sounds like a lot of work, but once it’s going, it’s on autopilot. It’s saved me so much money on bread, and it’s given me a sense of accomplishment that I didn’t expect. There’s something satisfying about feeding a living thing and watching it grow.
If you make this, drop a comment and let me know how it goes! I love hearing about other people’s starter journeys. And if something doesn’t work, tell me that too—I’m here to help troubleshoot. Did it smell weird? Did it not rise? We’ll figure it out.
Happy baking! And I hope your kitchen smells half as good as mine does right now.
Frequently Asked Questions
Q: Can I use bread flour instead of all-purpose?
A: Yes! Bread flour has more protein, which can make a stronger starter. But all-purpose works just fine for beginners. I stick with all-purpose because it’s cheaper and I already have it. If you have bread flour on hand, go for it.
Q: My starter smells like vinegar. Is that bad?
A: Not necessarily! Vinegar smell means the lactic acid bacteria are active. It’s a sign of a healthy, mature starter. If it smells like acetone (nail polish), it’s starving. Feed it immediately. If it smells like rotten eggs, throw it out.
Q: Can I keep my starter in the fridge?
A: Absolutely. Once it’s active (usually after 7-10 days), you can store it in the fridge. Feed it once a week. Take it out 24 hours before baking, feed it, and let it come to room temperature. This is perfect for one-person households.
Q: What do I do with the discard?
A: Don’t waste it! Use it for pancakes, waffles, crackers, or muffins. I even use it in my focaccia recipes. It adds a nice tangy flavor and reduces waste.
Q: How long does it take to get a starter active?
A: Usually 5-7 days, but it can take up to 14 days depending on your environment. Be patient. Some starters are slow starters. Just keep feeding it daily, and it will get there.
Q: Can I use tap water?
A: If your tap water is chlorinated, it can kill the yeast. Let the water sit out for 24 hours to let the chlorine evaporate, or use filtered water. If you have well water, it’s usually fine.
Q: Why is my starter not rising?
A: It might be too cold. Yeast needs warmth to activate. Try putting the jar in a warmer spot in your kitchen. Or, it might just need more time. Keep feeding it, and it will start rising.
Pin This Recipe!


Beginner Friendly Sourdough Starter: Budget One-Person Meal
- Total Time: 7 days
- Yield: 1 jar of starter 1x
Description
A simple, cost-effective method for creating a sourdough starter using just flour and water. This guide helps beginners build a living culture for baking without expensive equipment or ingredients.
Ingredients
- 1 cup (120g) All-Purpose Flour
- 1 cup (240ml) Filtered Water
- 2 tablespoons Whole Wheat Flour (optional)
Instructions
- Day 1: In a clean glass jar, mix 1/4 cup (30g) all-purpose flour with 1/4 cup (60ml) water until smooth. Cover loosely and let sit for 24 hours in a warm spot.
- Day 2: Discard half of the mixture. Add 1/4 cup flour and 1/4 cup water to the remaining half. Stir well, cover loosely, and let sit for 24 hours.
- Day 3: Discard half of the mixture. Feed with 1/4 cup flour and 1/4 cup water. Stir, cover, and wait. Bubbles should begin to appear.
- Day 4-5: Continue the routine of discarding half and feeding with equal parts flour and water every 24 hours. The starter should become more bubbly.
- Day 6-7: Test readiness by dropping a teaspoon of starter into a glass of water. If it floats, it is ready to bake. If it sinks, continue feeding for another day or two.
Notes
Use filtered water or let tap water sit out for 24 hours to remove chlorine. Keep the jar in a warm spot (above 70°F/21°C) for faster fermentation. Store in the fridge once active and feed weekly. Use discard for pancakes, crackers, or muffins.
- Prep Time: 5 minutes
- Cook Time: 0 minutes
- Category: Baking
- Cuisine: American
Nutrition
- Serving Size: Per 100g of starter
- Calories: 90
- Carbohydrates: 18
- Fiber: 1
- Protein: 3
Keywords: sourdough starter, beginner sourdough, budget baking, one person meal, zero waste cooking, homemade bread, fermentation



