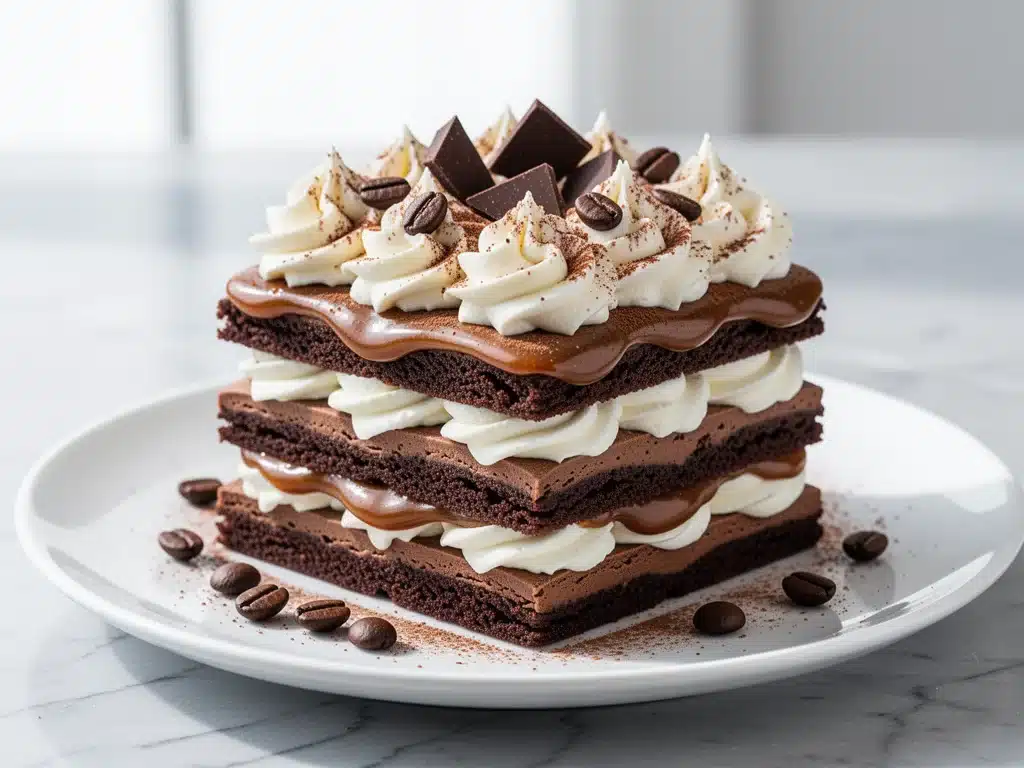
Last November, I was staring at a half-empty pantry, feeling that specific brand of Sunday night dread. I needed a dessert that looked impressive enough for a last-minute dinner party but required absolutely zero active effort because my oven was currently occupied by a roast chicken. I found myself digging through the back of my cupboard, pulling out boxes of vanilla wafers and a jar of caramel sauce I’d bought on a whim three months prior. I had no idea what I was making, but I had coffee, cream, and a desperate need for something sweet.
I threw together what I thought would be a mediocre, messy no-bake treat. I layered the cookies, drizzled the toffee sauce, whipped up some mascarpone, and shoved it in the fridge. Twenty-four hours later, I pulled it out expecting a soggy disaster. Instead, I got something that tasted like a high-end coffee shop dessert had a baby with a childhood memory. The cookies had softened into something like cake, the toffee had permeated every layer, and the mascarpone whipped into a cloud that cut through the richness perfectly.
I’ve made this coffee toffee icebox cake at least six times since that night. It’s become my secret weapon for holidays, potlucks, and just because I want something sweet without turning my kitchen into a flour bomb. It’s genuinely one of the easiest desserts I’ve ever mastered, relying on just six core ingredients and patience. If you’ve ever struggled with complex baking techniques or just want a dessert that tastes like you spent hours on it (but actually took 10 minutes of prep), this is it. It’s rich, it’s creamy, and it’s going to disappear from your counter faster than you can say “seconds.”
Why You’ll Love This Recipe
There are about ten reasons I keep making this coffee toffee icebox cake, but here are the big ones that keep it in my regular rotation.
Stupid Simple — Seriously, if you can open a jar and spread cream, you can make this. I’ve walked my teenage son through it over FaceTime while I was at work. There’s no baking, no tempering chocolate, no soufflés. Just layering. If you can boil water, you can make this cake.
Make-Ahead Magic — This is the ultimate stress-reliever. You assemble it the night before (or even two days before) and let the fridge do all the heavy lifting. I love this for holiday hosting because it means my oven is free for the actual meal. It actually gets better the longer it sits, allowing the flavors to meld and the cookies to soften properly.
Texture Contrast — Some no-bake desserts can be one-note mushy. This one isn’t. You get the slight chew of the softened cookies, the sticky sweetness of the toffee, and the light, airy fluff of the whipped mascarpone. It’s a mouthfeel party in every bite.
Pantry-Friendly — You probably have most of this already. Vanilla wafers (or any crisp cookie), caramel sauce, heavy cream, mascarpone, and instant coffee. I keep these items stocked specifically so I can throw this together on a whim when guests call and say they’re “on their way.”
Crowd-Pleaser — I’ve served this to people who hate coffee and people who are obsessed with it. Everyone loves it. The coffee flavor is subtle and aromatic, not bitter, and the toffee hits that sweet tooth hard. It feels indulgent and fancy, like something you’d order at a bistro, but it costs a fraction of the price.
Budget-Smart — Feeds 8-10 people for under $15. That’s less than one dinner for two at a mid-range restaurant. It’s high-impact, low-cost comfort food.
This is my go-to when I need dessert to just work. No complicated techniques, no weird ingredients, just reliable, delicious food that makes everyone happy. It’s the kind of recipe that makes you look like a hero in the kitchen without actually doing any hero work.
Ingredients You’ll Need
Here’s the best part: the ingredient list is incredibly short. This isn’t a recipe where you need to run to three different stores. Most of these are staples or easy finds. I’m particular about three things here, and I’ll tell you exactly why they matter.
For the Base
Vanilla Wafers (1 package, approx. 25-30 cookies) — I use Nabisco or a store-brand equivalent. You need sturdy, crisp cookies that can handle moisture without turning to soup immediately. Do not use vanilla pudding cookies or soft cookies; they’ll disintegrate. You want that classic vanilla wafer crunch that softens over time.
Strong Brewed Coffee (1 cup / 240ml, cooled) — This is non-negotiable for flavor depth. Use a dark roast. If you don’t have coffee on hand, instant espresso powder dissolved in hot water works great. I use a strong drip coffee because it’s easy, but a French press gives a richer body. Let it cool completely before using, or it will melt your cream.
For the Sweetness
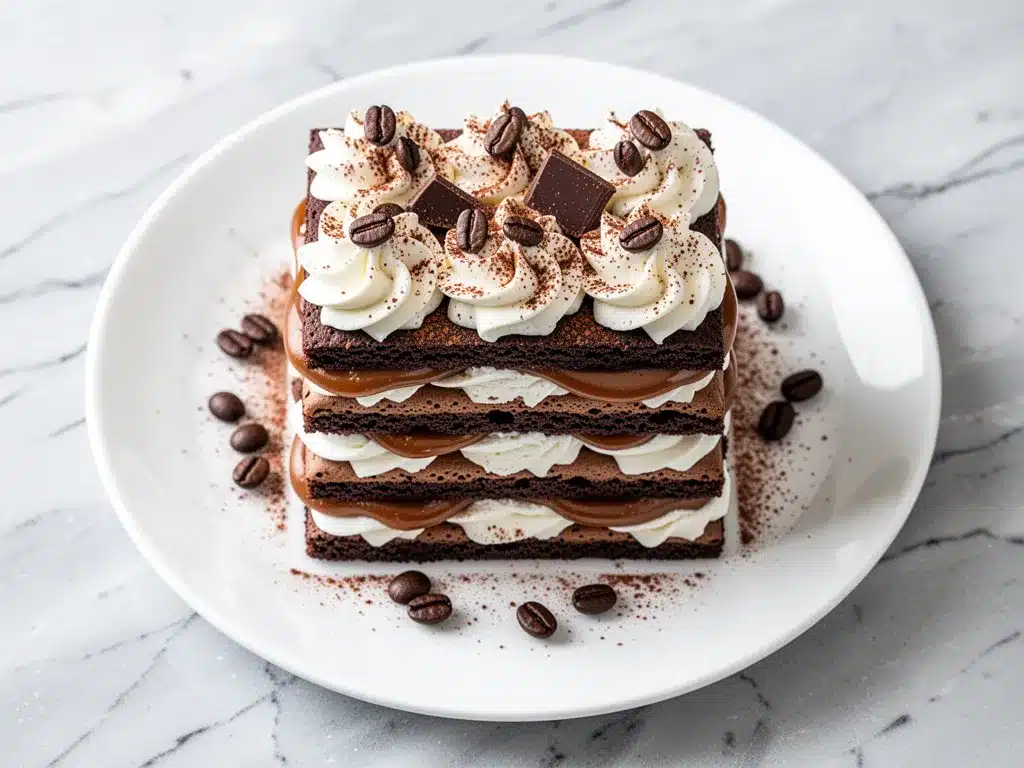
Caramel Sauce (1 jar, approx. 14-18 oz) — Buy the pourable caramel topping, not the thick ice cream topping. I love Smucker’s or store-brand caramel sauce. It needs to be thin enough to drizzle easily but thick enough to cling. If you’re feeling fancy, you can make your own, but honestly, the jarred stuff works perfectly here and saves time.
For the Whipped Mascarpone
Mascarpone Cheese (8 oz / 225g, cold) — This is the star. Mascarpone is an Italian cream cheese with a higher fat content than regular cream cheese, which makes it incredibly rich and stable when whipped. Do not substitute with regular cream cheese unless you’re desperate; the texture will be different. Make sure it’s cold—warm mascarpone won’t whip up properly.
Heavy Whipping Cream (1 cup / 240ml, cold) — Full fat only. Half-and-half won’t hold peaks. You need this to whip into stiff peaks to create that cloud-like texture. Cold cream whips faster and better. Keep it in the fridge until the second you use it.
Powdered Sugar (2 tablespoons) — Just a little bit to sweeten the mascarpone and help stabilize the whip. It’s not super sweet, which is good because the caramel is already very sweet.
Vanilla Extract (1 teaspoon) — Pure vanilla, not imitation. It enhances the coffee and caramel notes without overpowering them.
For Garnish (Optional but Recommended)
Chocolate Shavings or Cocoa Powder — A light dusting on top adds visual appeal and a hint of bitterness to balance the sweet. I use a microplane to shave a bar of semi-sweet chocolate, but cocoa powder works too.
Extra Vanilla Wafers — For crumbling on top for texture.
Equipment Needed
You don’t need fancy equipment for this. Here’s what I actually use.
9×13 Inch Baking Dish — Glass is best because you can see the layers, but ceramic or metal works fine. It needs to be deep enough to hold the layers without spilling over.
Mixer — A hand mixer or stand mixer is ideal for whipping the mascarpone and cream. If you don’t have one, you can do it by hand with a whisk, but it will take about 10-15 minutes of elbow grease. Trust me, get the mixer.
Spatula — A flexible silicone spatula is essential for folding the cream and spreading the layers evenly. A rubber scraper works too.
Microwave-Safe Bowl — If your caramel sauce is too thick to drizzle easily, you’ll need this to warm it up slightly. You don’t need to melt it, just loosen it.
Cooling Rack — Not strictly necessary, but good for cooling the coffee if you’re brewing it fresh.
Measuring Cups and Spoons — Standard stuff. Dollar store versions work fine.
Microplane or Grater — For chocolate shavings if you’re garnishing.
Optional but nice:
Offset Spatula — Makes spreading the mascarpone super smooth, but a regular butter knife works in a pinch.
How to Make It: Step-by-Step
Alright, let’s make this! I’m walking you through exactly how I do it, including the little tricks I’ve picked up over six months of making this.
Step 1: Prep Your Coffee and Caramel (5 minutes)
Brew your coffee and let it cool to room temperature. If you’re in a hurry, spread it on a baking sheet to cool it down faster, or add ice cubes to the hot coffee and stir until melted (just be aware this dilutes it slightly, so use a bit more coffee than usual). Meanwhile, check your caramel sauce. If it’s thick and gloopy, microwave it in 15-second intervals, stirring in between, until it’s pourable but not hot. Set aside.
Step 2: Whip the Mascarpone Cream (5-7 minutes)
This is the most important step for texture. In a large bowl, combine the cold mascarpone, cold heavy cream, powdered sugar, and vanilla extract. Using a hand or stand mixer, beat on medium-high speed until stiff peaks form. This means when you lift the beater, the cream stands up straight without drooping. Don’t overbeat it into butter, but don’t underbeat it either. It should look thick, glossy, and hold its shape. If you’re making this ahead, you can cover the bowl and refrigerate the whipped cream until you’re ready to assemble.
Step 3: Make the First Layer
Take your 9×13 dish. Dip each vanilla wafer quickly into the cooled coffee. I know this sounds like a lot of dipping, but it only takes a second. You want the cookie coated but not soggy. Lay the dipped cookies in a single, tight layer at the bottom of the dish. You might need to break a cookie or two to fill gaps, and that’s totally fine.
Step 4: Add the First Cream Layer
Spread about half of the whipped mascarpone mixture evenly over the cookie layer. Use your spatula to get it into the corners. Don’t worry about making it perfect; it will settle. The goal is even coverage.
Step 5: Drizzle the First Caramel Layer
Drizzle about half of the caramel sauce over the mascarpone. Use a zigzag pattern or just pour it in spots and swirl it with a knife. This creates those beautiful marbled streaks of toffee. Again, not perfect is good.
Step 6: Repeat the Layers
Repeat the process: coffee-dipped cookies, remaining mascarpone cream, remaining caramel sauce. End with a final layer of cookies. Some people like to end with a cookie layer, others with cream. I prefer ending with cookies because the top layer gets a bit chewier and provides a nice contrast to the soft cream. If you want a cleaner look, you can end with cream and garnish heavily.
Step 7: Chill (At Least 6 Hours)
This is the hardest part. You have to wait. Cover the dish tightly with plastic wrap or a lid. Refrigerate for at least 6 hours, but ideally overnight (12-24 hours). This time allows the cookies to absorb the coffee and soften into a cake-like texture. If you cut into it too soon, it’ll just be soft cookies and cream. Patience pays off.
Step 8: Garnish and Serve
Just before serving, dust the top with cocoa powder or chocolate shavings. Slice with a sharp knife. I dip my knife in hot water and wipe it dry between cuts for clean slices. Serve cold.
Total Time: About 15 minutes active, plus 6+ hours chilling.
Expert Tips & Tricks
Here’s everything I’ve learned from making this dozens of times. These tips will save you from my mistakes.
Don’t Soak the Cookies Too Long
I used to dip my cookies and let them sit in the coffee for a minute. Big mistake. They get soggy and fall apart. Dip them, place them, move on. They’ll absorb enough moisture from the cream and caramel while chilling.
Keep Everything Cold
The mascarpone and cream must be cold. If your kitchen is warm, put your mixing bowl in the fridge for 10 minutes before whipping. Warm cream won’t whip up stiff peaks, and your cake will be runny.
Use Good Caramel
Not all caramel sauces are created equal. Some are too thin and make the cake watery. Some are too thick and clump. Taste yours before you start. If it’s too thick, warm it slightly. If it’s too thin, reduce it on the stove for a few minutes to thicken it up.
Stabilize with Cornstarch (Optional)
If you’re worried about the cream deflating, add 1 teaspoon of cornstarch to the cream while whipping. It helps hold the structure, especially if you’re serving it in a warm room.
Make It Ahead, But Not Too Far Ahead
This cake is best eaten 1-2 days after making. After 3 days, the cookies can start to get too soft and lose their distinct texture. It’s still edible, but the mouthfeel changes.
Common Mistakes (and how to avoid them):
Mistake: Cake is too sweet
Fix: Use a dark roast coffee and a less sweet caramel sauce. You can also reduce the powdered sugar in the cream to 1 tablespoon.
Mistake: Layers are sliding apart
Fix: Your cream wasn’t whipped stiff enough. Make sure you hit stiff peaks. Also, ensure your dish is level.
Mistake: Coffee flavor is too strong
Fix: Dilute the coffee with a little milk or water, or use less coffee in the dipping process.
Variations & Substitutions
Once you’ve nailed the basic version, here’s how you can mix it up. I’ve tried all of these.
Chocolate Coffee Version
Add 2 tablespoons of cocoa powder to the whipped mascarpone. It turns it into a mocha dream. This pairs beautifully with chocolate shavings on top.
Butterscotch Swap
Replace the caramel sauce with butterscotch topping. It has a deeper, richer flavor that complements the coffee even more. This is my personal favorite variation.
Cookie Swap
You can use Nilla Wafers, Ladyfingers, or even shortbread cookies. Ladyfingers will make it more like a tiramisu, while shortbread will keep it crunchier longer. I’ve used tiramisu icebox cake techniques with ladyfingers, and it works surprisingly well here too.
Alcohol Kick
Add 1-2 tablespoons of Kahlúa or Bailey’s Irish Cream to the whipped cream. For adults only. This elevates the coffee flavor significantly.
Gluten-Free
Use gluten-free vanilla wafers. Most brands work fine, but check the packaging to ensure they’re sturdy enough for dipping. cinnamon roll apple cobbler is another gluten-free friendly dessert I love, but this cake is naturally easy to adapt.
Dairy-Free
Use coconut cream (chilled) instead of heavy cream and dairy-free mascarpone alternative. The flavor will be coconut-forward, which actually pairs well with toffee. Use dairy-free caramel sauce.
Serving & Storage
How to Serve:
I usually serve this straight from the fridge. It’s best cold. I slice it into 12 squares. If you’re having a dinner party, I recommend making two cakes—one for the party and one for you, because you will want to eat the whole thing.
Side Dishes:
This is rich, so it doesn’t need much. A simple green salad with a light vinaigrette cuts through the sweetness. Or just serve it with a cup of black coffee. No sides needed.
Storage Instructions:
Refrigerator: Store in an airtight container or tightly covered with plastic wrap for up to 3 days. It will keep, but the texture is best within the first 48 hours.
Freezing: I don’t recommend freezing this. The whipped cream can separate and become grainy upon thawing, and the cookies may become too mushy. It’s best enjoyed fresh from the fridge.
Reheating: Do not reheat. This is a cold dessert. Eat it cold.
Pro tip: If you’re transporting this, keep it in the baking dish and cover it well. Don’t slice it until you’re ready to serve. It holds its shape well if the cream is whipped stiff enough.
Nutrition Information
I’m not a nutritionist, but here’s the breakdown if you’re tracking. This is definitely a treat, so enjoy it in moderation.
Per Serving (based on 12 servings):
| Nutrient | Amount |
|---|---|
| Calories | 320 |
| Protein | 4g |
| Carbs | 42g |
| Fiber | 1g |
| Sugar | 30g |
| Fat | 16g |
| Saturated Fat | 10g |
| Sodium | 180mg |
What’s Good:
It’s easy to control portions because it’s sliced. The mascarpone provides some calcium and protein.
What to Know:
It’s high in sugar and saturated fat due to the caramel, cream, and cookies. It’s not a health food, but it’s a fun indulgence. If you want to lighten it up, use less caramel sauce and lighter cream cheese instead of mascarpone, though the texture will change.
My Take:
Look, this is dessert. It’s sweet, creamy, and comforting. It’s better than store-bought cake and costs less. When I make this, I enjoy a square and call it a day. It’s worth every calorie.
Final Thoughts
So that’s my go-to coffee toffee icebox cake! I’ve probably talked your ear off at this point, but when you make a recipe this often, you have a lot to say about it.
This has saved me from dessert disasters more times than I can count. It’s my answer to “what’s for dessert?” when I’m tired, don’t want to bake, and still want something that tastes really good. My kids are happy, my husband’s happy, and I’m happy because I’m not stressed about cooking.
Make it yours! Try different cookies, swap the caramel for butterscotch, or add a splash of liqueur. The best recipes are the ones you adapt to your family’s tastes.
If you make this, drop a comment and let me know what you think! I love hearing how recipes turn out in your kitchen. And if something doesn’t work, tell me that too—I’m here to help troubleshoot.
Happy cooking! And I hope your kitchen smells half as good as mine does right now.
Frequently Asked Questions
Can I use instant coffee instead of brewed coffee?
Yes! Dissolve 1-2 tablespoons of instant espresso powder in 1 cup of hot water and let it cool. This gives a stronger coffee flavor, which is great if you love coffee. Just make sure it’s cooled before dipping the cookies.
Why did my cake turn out watery?
Usually, this happens if the caramel sauce was too thin or if the cookies were soaked too long. Make sure your caramel is pourable but not runny. Also, dip the cookies quickly—just a second or two per side.
Can I make this ahead for a party?
Absolutely. This is best made 12-24 hours ahead. It needs time to set. You can assemble it up to 2 days before, but the texture might get too soft after that. Plan accordingly!
Can I use regular cream cheese instead of mascarpone?
You can, but the texture will be different. Mascarpone is richer and whips up fluffier. If you use cream cheese, make sure it’s softened and beat it well with the sugar first, then add the cream. It will be denser, but still tasty.
How do I cut clean slices?
Use a sharp knife. Dip it in hot water and wipe it dry between each cut. This prevents the cream from sticking and tearing the layers. Clean cuts make a huge difference in presentation.
Is this cake too sweet?
It is sweet, but the coffee and mascarpone balance it out. If you find it too sweet, use a less sweet caramel sauce or reduce the powdered sugar in the cream. You can also add a pinch of salt to the whipped cream to enhance the flavors.
Can I freeze leftovers?
I don’t recommend it. The whipped cream can separate and become grainy. It’s best enjoyed fresh from the fridge within 3 days.
Pin This Recipe!
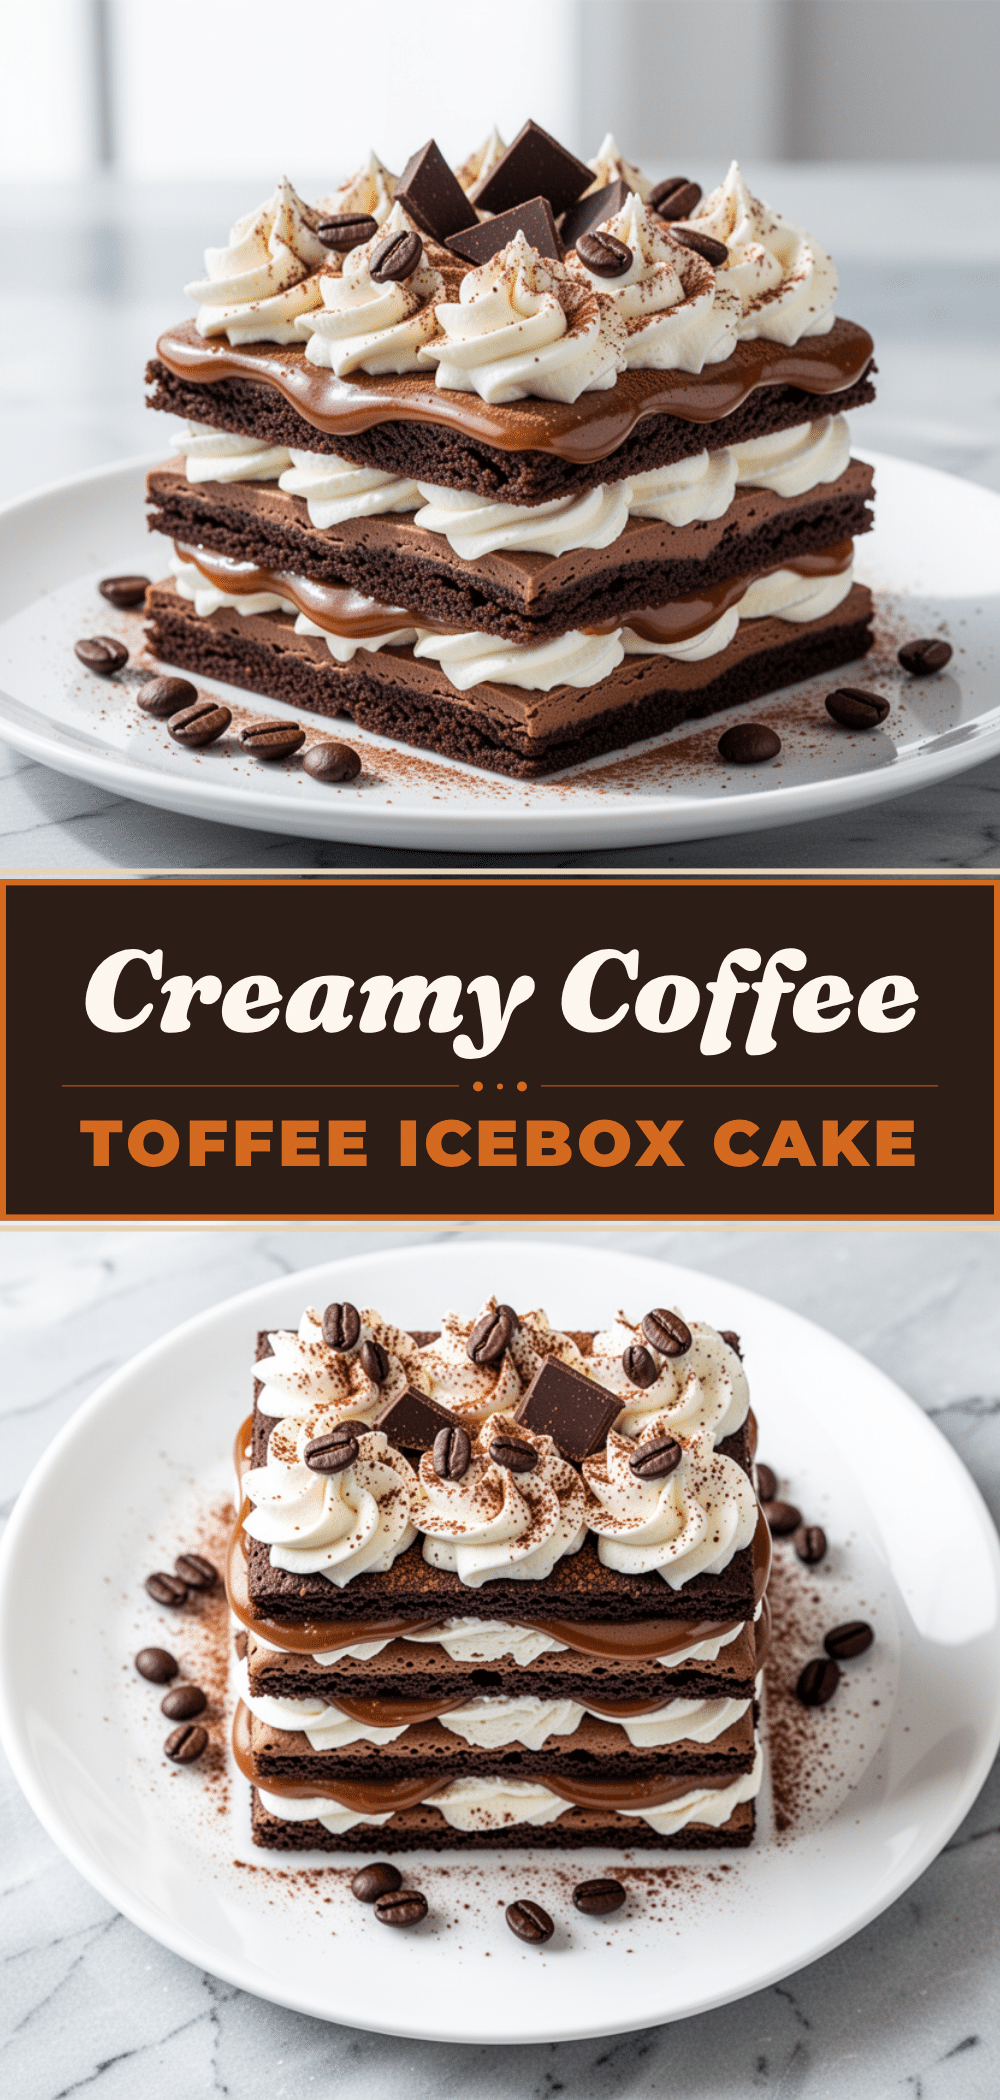
Coffee Toffee Icebox Cake: 6-Ingredient Dessert
- Total Time: 6 hours 15 minutes
- Yield: 12 servings 1x
Description
A rich, creamy no-bake dessert featuring layers of coffee-dipped vanilla wafers, caramel sauce, and whipped mascarpone. This easy, make-ahead treat requires minimal active effort and delivers high-impact flavor.
Ingredients
- 1 package (approx. 25-30 cookies) vanilla wafers
- 1 cup (240ml) strong brewed coffee, cooled
- 1 jar (14-18 oz) pourable caramel sauce
- 8 oz (225g) mascarpone cheese, cold
- 1 cup (240ml) heavy whipping cream, cold
- 2 tablespoons powdered sugar
- 1 teaspoon vanilla extract
- Chocolate shavings or cocoa powder for garnish (optional)
- Extra vanilla wafers for crumbling (optional)
Instructions
- Brew coffee and let it cool to room temperature. If caramel sauce is thick, microwave in 15-second intervals until pourable.
- In a large bowl, combine cold mascarpone, cold heavy cream, powdered sugar, and vanilla extract. Beat on medium-high speed until stiff peaks form.
- Dip each vanilla wafer quickly into the cooled coffee and lay them in a single, tight layer at the bottom of a 9×13 inch dish.
- Spread about half of the whipped mascarpone mixture evenly over the cookie layer.
- Drizzle about half of the caramel sauce over the mascarpone in a zigzag pattern.
- Repeat the layers: coffee-dipped cookies, remaining mascarpone cream, and remaining caramel sauce. End with a final layer of cookies.
- Cover the dish tightly with plastic wrap or a lid and refrigerate for at least 6 hours, ideally overnight (12-24 hours).
- Just before serving, dust the top with cocoa powder or chocolate shavings. Slice with a sharp knife dipped in hot water and wipe dry between cuts. Serve cold.
Notes
Ensure mascarpone and cream are very cold for best whipping results. Do not soak cookies too long or they will disintegrate. The cake is best eaten 1-2 days after making; after 3 days, cookies may become too soft. Do not freeze as whipped cream may separate.
- Prep Time: 15 minutes
- Cook Time: 0 minutes
- Category: Dessert
- Cuisine: American
Nutrition
- Serving Size: 1 slice
- Calories: 320
- Sugar: 30
- Sodium: 180
- Fat: 16
- Saturated Fat: 10
- Carbohydrates: 42
- Fiber: 1
- Protein: 4
Keywords: coffee toffee icebox cake, no bake dessert, easy dessert, make ahead dessert, mascarpone cream, caramel dessert, vanilla wafer cake



