I have a confession to make. For the first five years of my marriage, I was the person who bought the canned yams. You know the ones—those bright orange, syrup-soaked discs in a can that sit in the middle of the Thanksgiving spread like they’re trying to prove a point. My husband would politely eat three, nod, and then quietly go for seconds of the green bean casserole.
It wasn’t until last year, when I was actually stressed enough to try something new, that I decided to roast a whole acorn squash instead. I was worried it would be too much work for a holiday. I thought the seeds would be a nightmare to remove. I thought it would taste like cardboard.
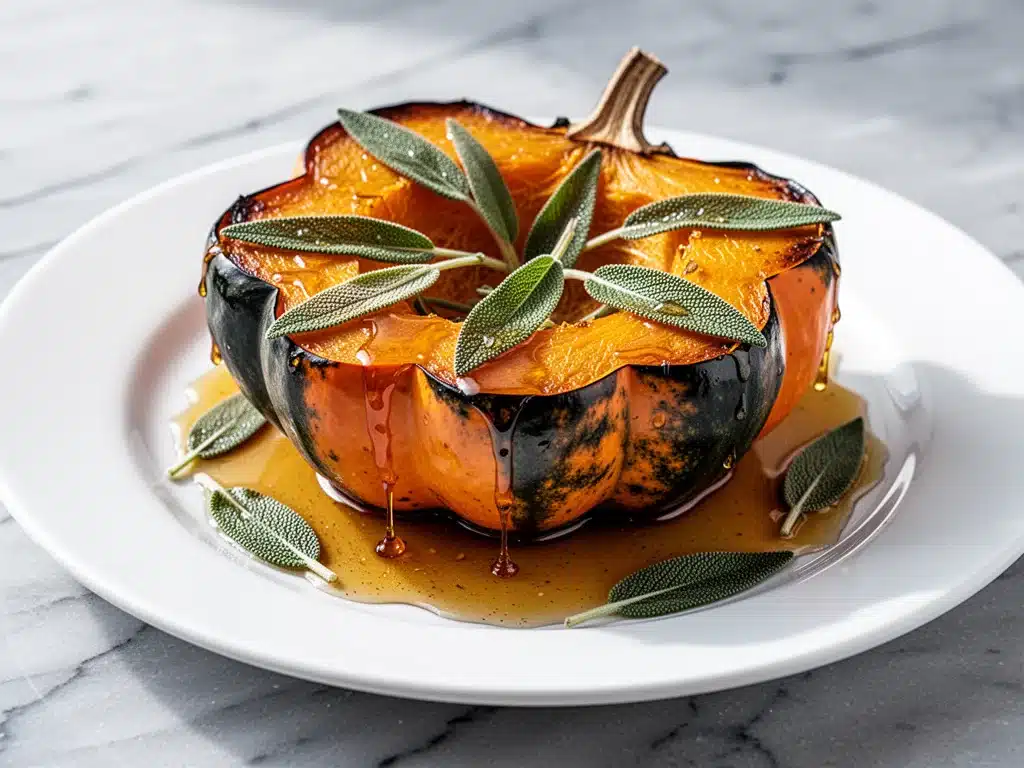
But then it happened. That moment when the kitchen smells like toasted nuts and warm maple syrup, and you pull the roasting pan out to see these golden, caramelized halves sitting there like little edible jewels. My husband took one bite, put his fork down, and said, “Okay, we are never buying the canned stuff again.”
That was the birth of our new holiday tradition. This Fall Maple Glazed Acorn Squash isn’t just a side dish; it’s the star of the show. It’s sweet, savory, tender, and honestly? It’s easier than you think. I’ve tested this recipe so many times now that I can make it in my sleep (though I still wake up to check the oven). It’s the perfect balance of earthy squash and rich, sticky maple glaze that makes everyone at the table ask for the recipe.
Whether you’re feeding a crowd of ten or just trying to impress your in-laws this year, this recipe is your secret weapon. It’s visually stunning, naturally gluten-free, and tastes like autumn in every single bite. Let’s get roasting.
Why You’ll Love This Recipe
There are about a dozen reasons I keep coming back to this maple glazed acorn squash, but if you’re skeptical about cooking with whole vegetables, here’s why it’s worth your time.
It’s Actually Easy — Seriously. The hardest part is cutting the squash in half. I’ve made this while babysitting a toddler on one hip and holding a glass of wine in the other. The rest is just tossing it in the oven and waiting. No complicated techniques, no fancy equipment.
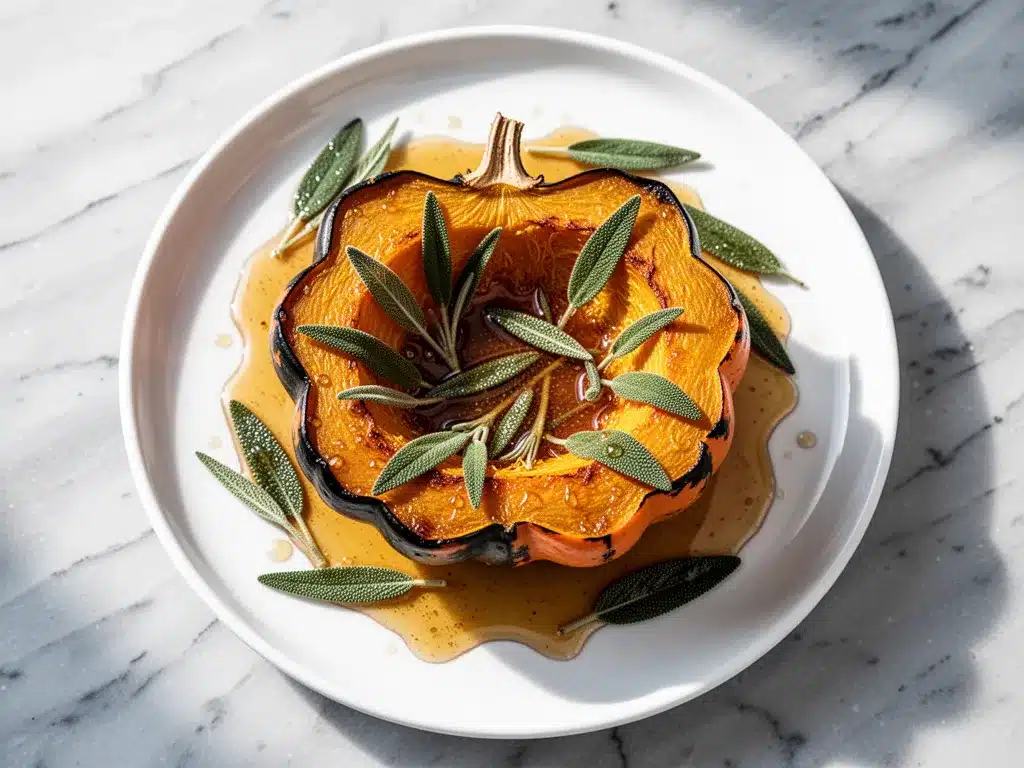
Stunning Presentation — I’m not a professional food stylist, but this dish photographs beautifully. The dark green skin contrasts perfectly with the golden-orange flesh and the shiny maple glaze. It looks like you spent hours in the kitchen, even though it’s mostly hands-off cooking. Perfect for those holiday photos.
Perfect Flavor Balance — Acorn squash has a naturally nutty, slightly sweet flavor that pairs incredibly well with maple. But the secret isn’t just the syrup—it’s the balance of salt and spice. A little black pepper and salt cut through the sweetness so it doesn’t taste like dessert. It’s savory enough to stand next to turkey or roast beef.
Meal Prep Friendly — Here’s the best part: this dish reheats beautifully. I often roast the squash the day before Thanksgiving. I just reheat it in the oven for 15 minutes before serving, and it tastes just as good as fresh. This is a lifesaver when your oven is packed with turkeys and pies.
Naturally Gluten-Free and Healthy — This is a whole food side dish packed with fiber, vitamin C, and potassium. It’s not “diet food” in the sad sense—it’s rich, comforting, and satisfying. My kids who usually pick out their vegetables actually ask for seconds of this.
This is my go-to when I need a side dish that feels fancy but doesn’t require a degree in culinary arts. It’s reliable, delicious, and makes everyone happy.
Ingredients You’ll Need
Here’s the best part: you probably have most of this already. This isn’t a recipe that requires a trip to three different specialty stores. It’s simple, wholesome ingredients that come together to create something magical.
Acorn Squash (2 medium, about 2-3 lbs each) — Look for squash that feels heavy for its size with a hard, unblemished shell. The dark green skin is traditional, but I’ve also used golden acorn squash, which is slightly sweeter. Avoid squash that feels light or has soft spots.
Maple Syrup (1/3 cup) — This is non-negotiable. I use 100% pure maple syrup, not the pancake syrup stuff in the bottle with the bear on it. The real stuff has a depth of flavor that sugar just can’t mimic. It’s worth the extra few dollars.
Unsalted Butter (3 tablespoons) — I use unsalted so I can control the saltiness. Melted butter adds richness and helps the glaze stick to the squash. If you’re dairy-free, you can swap this for olive oil, but the butter really makes the glaze glossy.
Extra Virgin Olive Oil (1 tablespoon) — Just a splash to help the squash roast evenly and add a subtle fruity note. It complements the maple without overpowering it.
Garlic (2 cloves, minced) — Yes, garlic in a sweet dish? It sounds weird, but it works. It adds a savory backbone that keeps the maple from being too one-note. Don’t skip it.
Dijon Mustard (1 teaspoon) — This is my secret weapon. It adds a tiny bit of tang and heat that cuts through the sweetness. You won’t taste the mustard directly, but the flavor is deeper and more complex.
Salt (1/2 teaspoon) — Kosher salt is best here because it’s easy to pinch and distribute evenly. Sea salt works too.
Black Pepper (1/4 teaspoon, freshly cracked) — Freshly cracked pepper adds a nice bite. Pre-ground pepper just doesn’t have the same punch.
Optional Add-ins:
Pecans (1/4 cup, chopped) — Toasted pecans add a wonderful crunch and nutty flavor. I sprinkle them on right after glazing.
Thyme (1 teaspoon, fresh) — Fresh thyme leaves add an earthy, herbal note that pairs beautifully with squash.
Brown Sugar (1 tablespoon) — If you like it extra caramelized, mix this with the maple syrup. It helps create a sticky, candy-like coating.
Personal Tip: I always keep a bag of pecans in my pantry specifically for this recipe. If you don’t have them, no big deal, but they really take it to the next level.
Equipment Needed
You don’t need fancy equipment for this. Here’s what I actually use.
Large Chef’s Knife — This is the most important tool. Acorn squash can be tough to cut. I use my 8-inch Wüsthof chef’s knife. It’s sharp and heavy enough to handle the job. If your knife is dull, you’ll struggle. A dull knife is dangerous. Learn to sharpen yours.
Sturdy Cutting Board — Use a large, heavy-duty board. I have a thick plastic one from Costco that doesn’t slip. If your board slides around while you’re hacking at a hard squash, that’s how you get hurt.
Microwave-Safe Plate — We’re going to microwave the squash to soften it before cutting. This is the trick that makes the cutting step safe and easy.
Roasting Pan or Sheet Pan — I use a rimmed baking sheet. Make sure it’s big enough to hold the squash halves in a single layer with a little space between them. Crowding them will make them steam instead of roast.
Small Saucepan or Microwave-Safe Bowl — For melting the butter and mixing the glaze. I prefer the microwave for speed, but a small saucepan on the stove works fine too.
Basting Brush — Silicone works great. I use it to brush the glaze onto the squash. You can also use a spoon if you don’t have a brush.
Measuring Cups and Spoons — Standard stuff. Dollar store versions work fine for this.
Optional but nice:
Kitchen Towel — To hold the hot squash while you scoop out seeds.
Parchment Paper — Lines the pan for easy cleanup. The maple syrup will caramelize and stick, so this is a lifesaver.
How to Make It: Step-by-Step
Alright, let’s make this! I’m walking you through exactly how I do it, including the little tricks I’ve picked up over the years.
Step 1: Prep the Squash (10 minutes)
Wash the acorn squash thoroughly under cold water. Dry it off. Here’s the pro tip: pierce the squash all over with a fork, then microwave it on high for 2-3 minutes. This softens the skin just enough to make cutting safe. It’s a game-changer. I learned this after nearly losing a finger trying to cut a raw acorn squash.
Let it cool for a minute, then use the sharp knife to cut it in half lengthwise. Scoop out the seeds and stringy pulp with a spoon. Discard the seeds (or save them to roast later if you’re feeling fancy). You should have two neat halves.
Step 2: Make the Glaze (2 minutes)
In a small bowl, combine the melted butter, olive oil, maple syrup, minced garlic, Dijon mustard, salt, and black pepper. Whisk it together until it’s smooth and combined. It should look like a glossy, golden liquid. Taste it—it should be sweet, savory, and slightly spicy. Adjust salt if needed.
Step 3: Season the Squash
Place the squash halves cut-side up on your prepared baking sheet. Brush the flesh generously with about half of the glaze. Make sure you get it into all the nooks and crannies. Save the rest for later.
Step 4: Roast (30-35 minutes)
Roast in a preheated 400°F (200°C) oven for 25-30 minutes. The squash is done when the flesh is tender enough to pierce easily with a fork and the edges start to brown slightly. Don’t rush this step. If you pull it out too early, it’ll be hard.
Step 5: Glaze and Finish (5 minutes)
Remove the pan from the oven. Brush the remaining glaze over the squash. If you’re adding pecans or thyme, sprinkle them on now. Return to the oven for 5-10 more minutes. This step caramelizes the glaze, creating that sticky, shiny coating that makes everyone’s mouth water.
You’ll know it’s ready when the glaze is bubbling and has a deep golden color. The squash should look tender and inviting.
Step 6: Serve
Serve immediately while hot. The glaze will set slightly as it cools, so don’t wait too long to eat it. Garnish with extra pecans or a sprig of thyme if you want to look fancy.
Total Time: About 45 minutes (10 minutes prep, 35 minutes cooking)
Troubleshooting During Cooking:
- Squash is too hard: If the fork doesn’t go in easily after 30 minutes, roast for another 5-10 minutes.
- Glaze is burning: If the glaze is getting too dark before the squash is tender, cover the pan loosely with foil for the last 10 minutes.
- Squash is watery: Make sure you scooped out all the seeds and strings. Those can release moisture.
Expert Tips & Tricks
Here’s everything I’ve learned from making this dozens of times. These tips will save you from my mistakes.
Don’t Skip the Microwave Step
I know it seems like an extra step, but microwaving the whole squash for 2-3 minutes softens the tough skin. It makes cutting so much safer and easier. I’ve tried cutting it raw both ways, and the microwave method is infinitely better. Your knife (and your fingers) will thank you.
Use Real Maple Syrup
I cannot stress this enough. The pancake syrup substitute tastes like artificial sugar and chemicals. It doesn’t have the complex, smoky sweetness that real maple syrup brings. It’s the star of this recipe, so treat it like one. It’s worth the investment.
Don’t Overcrowd the Pan
If you’re making a large batch, use two pans. Crowding the squash will cause it to steam instead of roast. You want dry heat to caramelize the edges and concentrate the flavor. If they’re touching, they’ll get soggy.
Save the Seeds
Don’t throw those seeds away! Rinse them, pat them dry, toss them with a little salt and oil, and roast them at 350°F for 10-15 minutes. They make a delicious snack or topping for salads. Zero waste cooking is my jam.
Make Ahead Strategy
You can roast the squash up to 2 days ahead. Let it cool completely, then store it in an airtight container in the fridge. When you’re ready to serve, reheat it in a 350°F oven for 15-20 minutes, then add the fresh glaze and broil for 2 minutes to crisp it up. It tastes almost as good as fresh.
Variations & Substitutions
Once you’ve nailed the basic version, here’s how you can mix it up. I’ve tried all of these.
Spicy Maple Version
Add a pinch of cayenne pepper or red pepper flakes to the glaze. It adds a nice kick that balances the sweetness. Great if you like a little heat.
Honey Glazed
Swap the maple syrup for honey. It’s slightly less complex but still delicious. I use honey when I’m out of maple syrup, but I always go back to maple.
Bacon Crumble
Top the finished squash with crispy, crumbled bacon. The salty, smoky bacon pairs perfectly with the sweet maple. My husband loves this version.
Orange Zest
Add the zest of one orange to the glaze. It adds a bright, citrusy note that cuts through the richness. Great for spring or early fall.
Gluten-Free
This recipe is naturally gluten-free, so no substitutions needed. Just make sure your maple syrup and mustard are certified gluten-free if you have celiac disease.
Dairy-Free
Swap the butter for olive oil or coconut oil. The flavor will be slightly different, but it still works well.
Serving & Storage
How to Serve:
I usually serve this straight from the roasting pan at the dinner table—it looks rustic and stays warm. But here are other ways I’ve enjoyed it:
Side Dishes:
– Roasted Brussels sprouts with balsamic glaze
– Garlic mashed potatoes
– Cranberry sauce (obviously)
– Green bean casserole
Toppings Bar:
When I have guests, I put out: extra chopped pecans, a drizzle of warm maple syrup, fresh thyme sprigs, and cracked black pepper. Everyone customizes their bowl.
Storage Instructions:
Refrigerator:
Store in an airtight container for up to 4 days. The glaze will harden in the fridge—totally normal.
Reheating:
Best method: Reheat in a 350°F oven for 15-20 minutes. This restores the texture.
Microwave method: Heat in 30-second intervals, stirring between. It gets softer, but it’s still good.
Avoid: Don’t reheat in the microwave for too long, or it’ll get mushy.
Freezing:
Honestly, this doesn’t freeze well. The squash texture changes when thawed. It becomes watery and soft. Make it fresh or store in the fridge for up to 4 days.
Nutrition Information
I’m not a nutritionist, but here’s the breakdown if you’re tracking.
Per Serving (based on 4 servings, 1/2 squash each):
– Calories: 180
– Protein: 2g
– Carbs: 28g
– Fiber: 4g
– Sugar: 18g
– Fat: 8g
– Saturated Fat: 3g
– Cholesterol: 10mg
– Sodium: 220mg
– Calcium: 40mg
What’s Good:
– High in fiber and vitamins A and C
– Naturally gluten-free
– Good source of potassium
– No refined sugar (just natural maple syrup)
What to Know:
– Higher in sugar from the maple syrup
– Contains dairy (unless swapped)
– Moderate calories, but very filling due to fiber
My Take:
Look, this is a sweet side dish. It’s not a diet recipe, but it’s made with whole foods. It’s way better than processed sides, and I know exactly what’s in it. When I want to make it lighter, I reduce the maple syrup slightly and add more spices. But usually? I just enjoy it as a treat.
Final Thoughts
So that’s my go-to Fall Maple Glazed Acorn Squash! I’ve probably talked your ear off at this point, but when you make a recipe this often, you have a lot to say about it.
This has saved holiday dinners more times than I can count. It’s my answer to “what’s for side dish” when I’m tired, don’t want to make something complicated, and still want something that tastes really good. My kids are happy, my husband’s happy, and I’m happy because I’m not stressed about cooking.
Make it yours! Try different add-ins, swap in your favorite nuts, adjust the spice level. The best recipes are the ones you adapt to your family’s tastes.
If you make this, drop a comment and let me know what you think! I love hearing how recipes turn out in your kitchen. And if something doesn’t work, tell me that too—I’m here to help troubleshoot.
Happy cooking! And I hope your kitchen smells half as good as mine does right now.
Frequently Asked Questions
Q: Can I use butternut squash instead of acorn squash?
A: You can, but the texture and cooking time will be different. Butternut squash is denser and sweeter. If you use it, peel and cube it, then roast at 400°F for 20-25 minutes. It won’t look as pretty as the halves, but it’ll still taste good.
Q: Why did my glaze turn out runny?
A: Usually means you didn’t roast it long enough in the second stage. The glaze needs to caramelize. Make sure you brush on the second coat and roast for 5-10 more minutes until it’s sticky and glossy.
Q: Can I make this ahead for a dinner party?
A: Absolutely. Roast the squash up to 2 days ahead. Store it in the fridge. When you’re ready to serve, reheat it in the oven, add the fresh glaze, and broil for 2 minutes. It saves you so much stress on the day of.
Q: Why did my squash taste bland?
A: You probably under-salted it. Squash needs salt to bring out its natural sweetness. Make sure you’re salting both the squash and the glaze. Also, taste your glaze before brushing it on—it should be seasoned.
Q: Can I use brown sugar instead of maple syrup?
A: You can, but you’ll lose that distinct maple flavor. If you use brown sugar, mix it with a little water to make a syrup. But I really recommend sticking with real maple syrup for the best flavor.
Q: How do I know when the squash is done?
A: Pierce it with a fork. If the fork goes in easily and the flesh is tender, it’s done. The edges should also be slightly browned. If it’s still hard, roast for another 5-10 minutes.
Q: Can I double this recipe?
A: Yes! Just make sure you have enough room on your baking sheet. Crowding the squash will make it steam. Use two pans if needed. The cooking time stays the same.
Pin This Recipe!
Fall Maple Glazed Acorn Squash: Easy Holiday Side
- Total Time: 45 minutes
- Yield: 4 servings 1x
Description
A stunning and easy holiday side dish featuring roasted acorn squash with a sweet, savory, and sticky maple glaze. Naturally gluten-free and perfect for Thanksgiving or dinner parties.
Ingredients
- 2 medium acorn squash (about 2–3 lbs each)
- 1/3 cup pure maple syrup
- 3 tablespoons unsalted butter, melted
- 1 tablespoon extra virgin olive oil
- 2 cloves garlic, minced
- 1 teaspoon Dijon mustard
- 1/2 teaspoon kosher salt
- 1/4 teaspoon freshly cracked black pepper
- Optional: 1/4 cup chopped toasted pecans
- Optional: 1 teaspoon fresh thyme leaves
- Optional: 1 tablespoon brown sugar
Instructions
- Preheat oven to 400°F (200°C). Line a rimmed baking sheet with parchment paper.
- Wash and dry the acorn squash. Pierce the skin all over with a fork and microwave on high for 2-3 minutes to soften the skin for easier cutting.
- Let the squash cool slightly, then cut in half lengthwise. Scoop out seeds and pulp with a spoon.
- In a small bowl or microwave-safe container, whisk together melted butter, olive oil, maple syrup, minced garlic, Dijon mustard, salt, and black pepper until smooth.
- Place squash halves cut-side up on the prepared baking sheet. Brush generously with about half of the glaze.
- Roast for 25-30 minutes, or until the flesh is tender when pierced with a fork.
- Remove from oven and brush with the remaining glaze. If using, sprinkle with pecans or thyme.
- Return to oven for 5-10 minutes to caramelize the glaze until bubbling and golden.
- Serve immediately while hot.
Notes
Microwaving the whole squash before cutting makes it much safer and easier to slice. Use real maple syrup, not pancake syrup, for the best flavor. If the glaze burns, cover loosely with foil. This dish can be made up to 2 days ahead and reheated in the oven.
- Prep Time: 10 minutes
- Cook Time: 35 minutes
- Category: Side Dish
- Cuisine: American
Nutrition
- Serving Size: 1/2 squash half
- Calories: 180
- Sugar: 18
- Sodium: 220
- Fat: 8
- Saturated Fat: 3
- Carbohydrates: 28
- Fiber: 4
- Protein: 2
Keywords: acorn squash, maple glazed squash, holiday side dish, Thanksgiving recipe, gluten-free side, roasted vegetables, fall recipes, easy side dish



